6
ENG
ENGLISH
ASSEMBLING AND PREPARING
Moving and Lifting the Monitor
Whenmovingorliftingthemonitor,followthese
instructionstopreventthemonitorfrombeing
scratchedordamagedandtoensuresafetrans-
portationregardlessofitsshapeorsize.
Asfaraspossible,avoidtouchingthemoni-
torscreen.Thismayresultindamagetothe
screenorsomeofthepixelsusedtocreate
images.
Itisadvisabletoplacethemonitorinthe
originalboxorpackingmaterialbeforeat-
temptingtomoveit.
Beforemovingorliftingthemonitor,discon-
nectthepowercordandallcables.
Holdthetopandbottomofthemonitorframe
firmly.Donotholdthepanelitself.
Whenholdingthemonitor,thescreenshould
faceawayfromyoutopreventitbeing
scratched.
Whenmovingthemonitor,avoidanystrong
shockorvibrationstotheproduct.
Whenmovingthemonitor,keepitupright,
neverturnthemonitoronitssideortiltit
sideways.
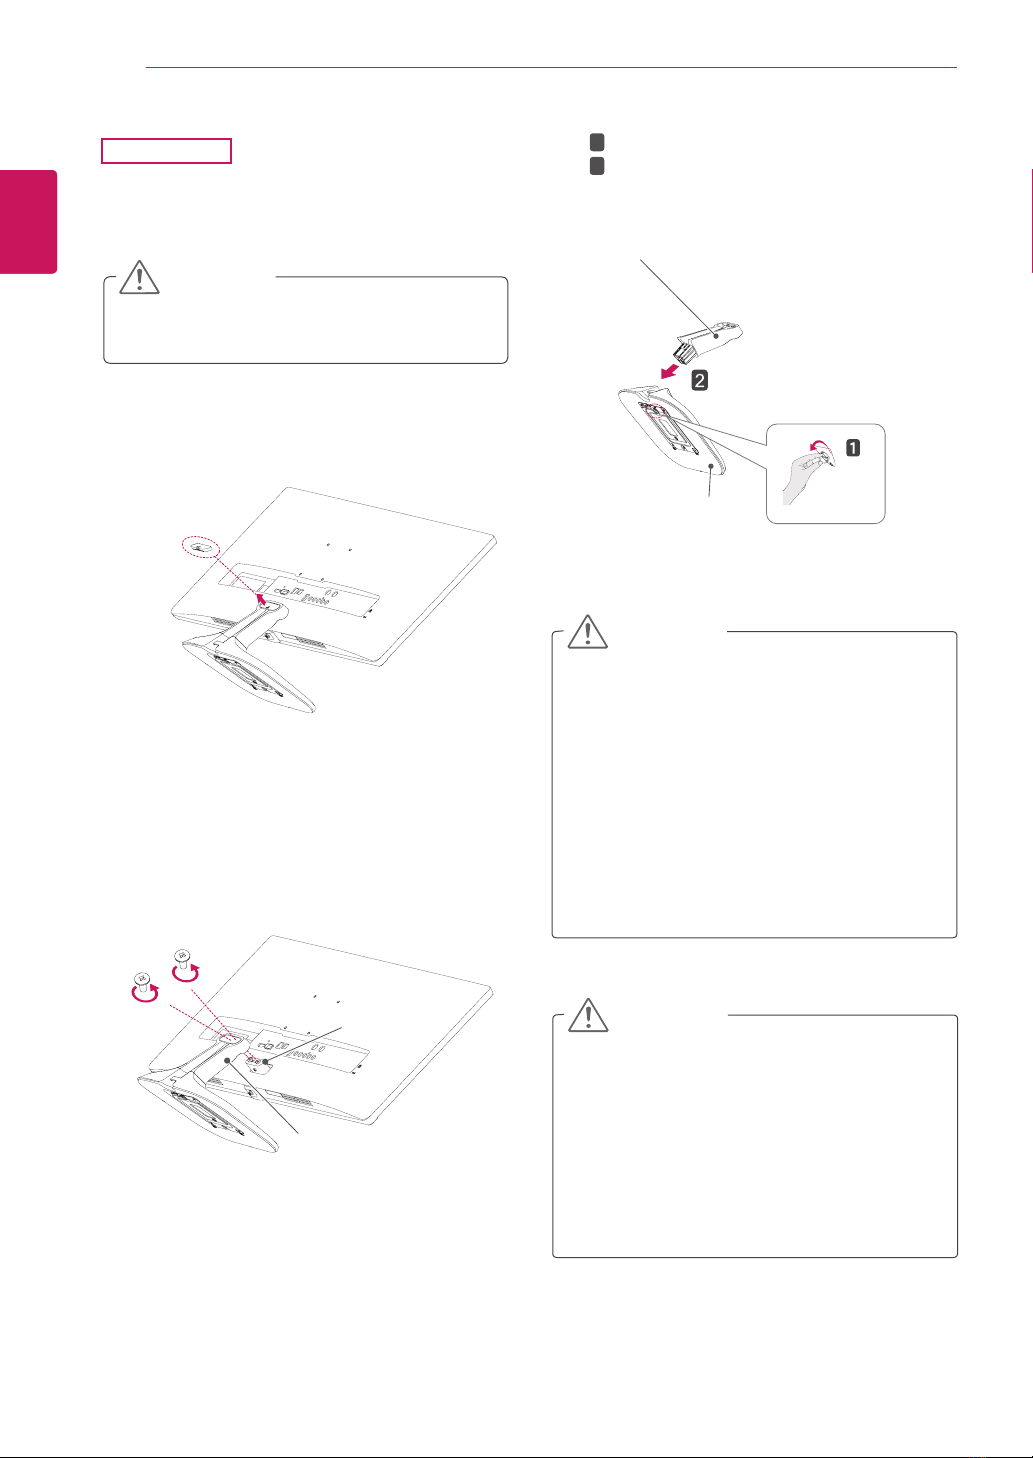
CAUTION
Ifyouusethemonitorpanelwithoutthe
standbase,itsjoystickbuttonmaycause
themonitortobecomeunstableandfall,
resultingindamagetothemonitororhuman
injury.Inaddition,thismaycausethejoystick
buttontomalfunction.