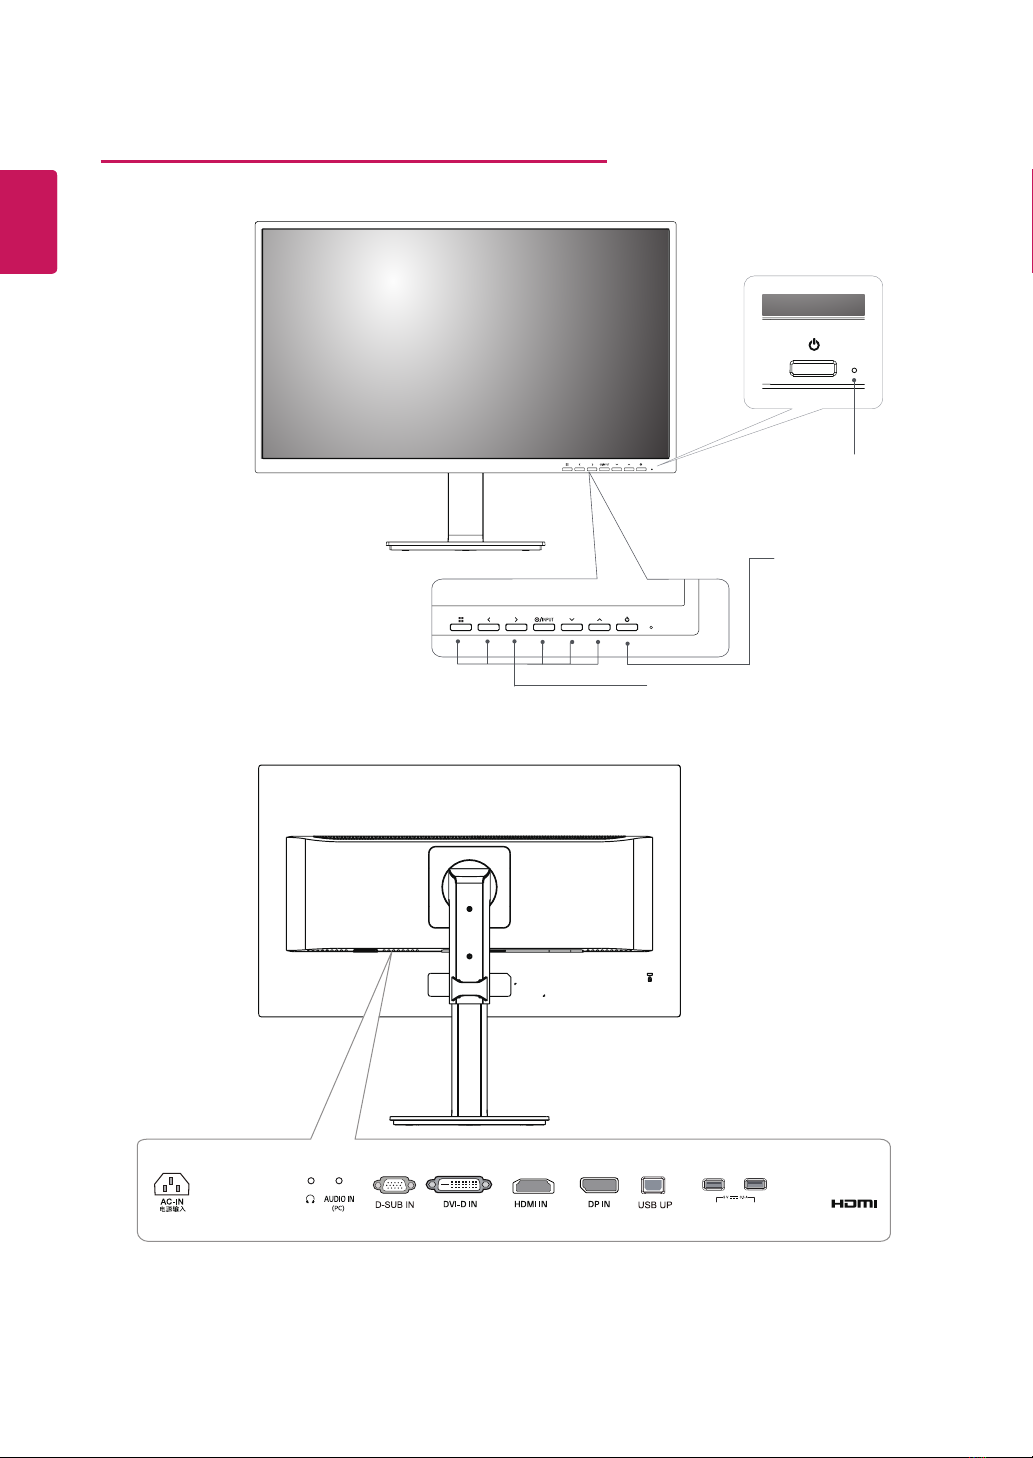
9
ENG
ENGLISH
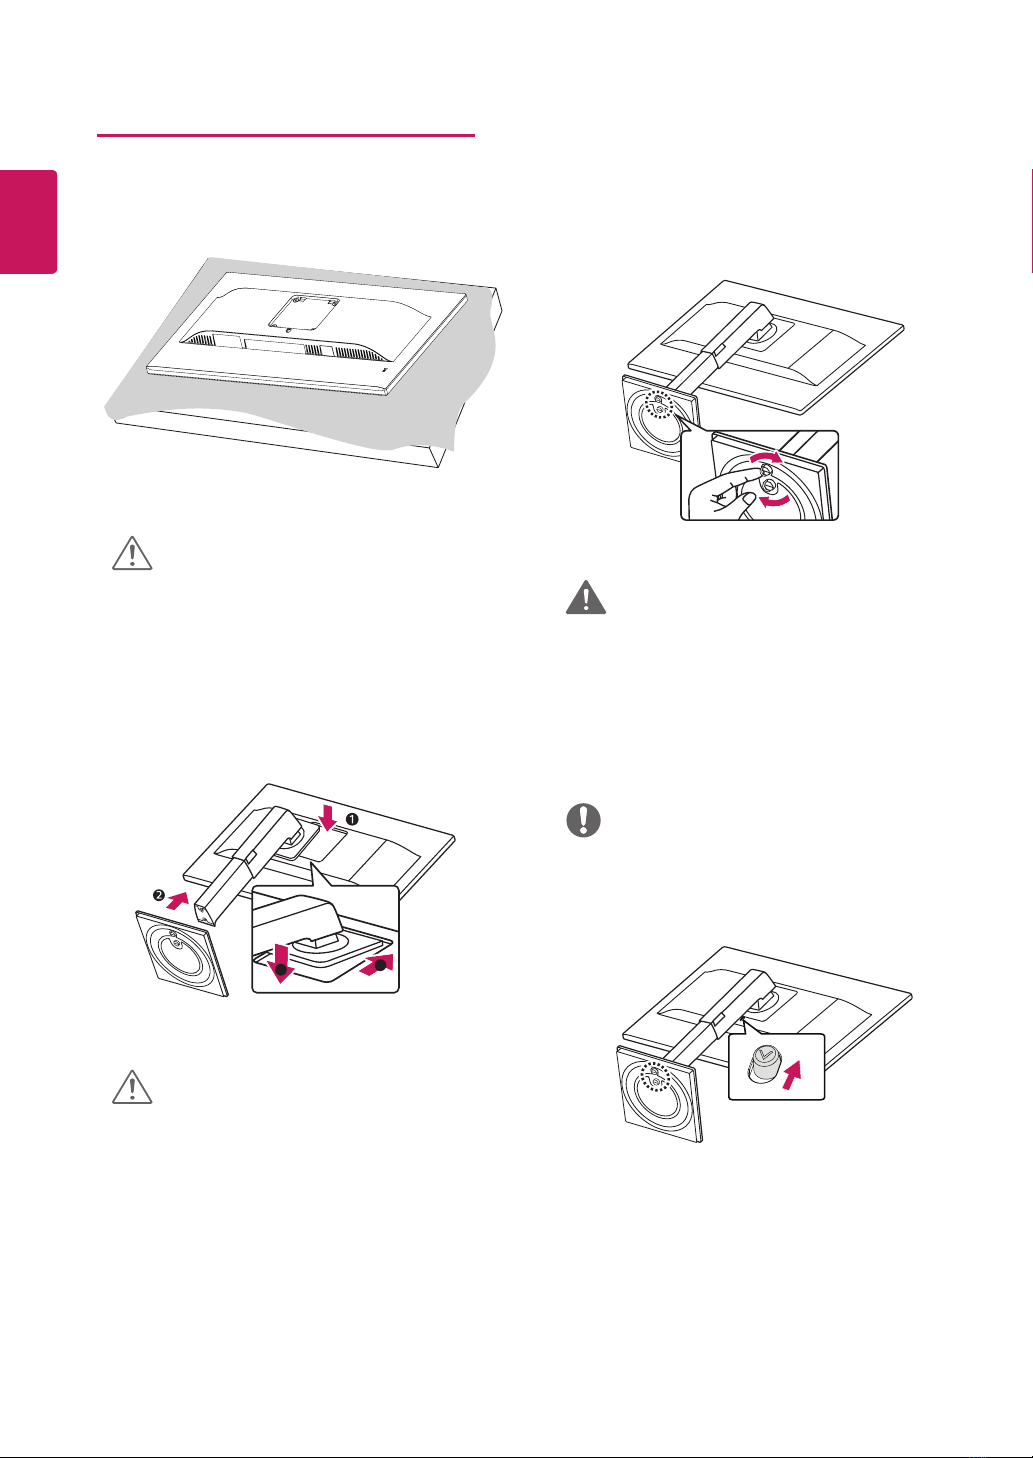
yIllustrations in this document represent typical
procedures, so they may look different from the
actual product.
yDo not carry the monitor upside down by just
holding the stand base. This may cause the
monitor to fall off the stand and could result in
personal injury.
yWhen lifting or moving the monitor, do not
touch the monitor screen. The force applied to
the monitor screen may cause damage to it.
yDo not apply foreign substances (oils,
lubricants, etc.) to the screw parts when
assembling the product. (Doing so may
damage the product.)
yApplying excessive force when tightening
screws may cause damage to the monitor.
Damage caused in this way will not be covered
by the product warranty.
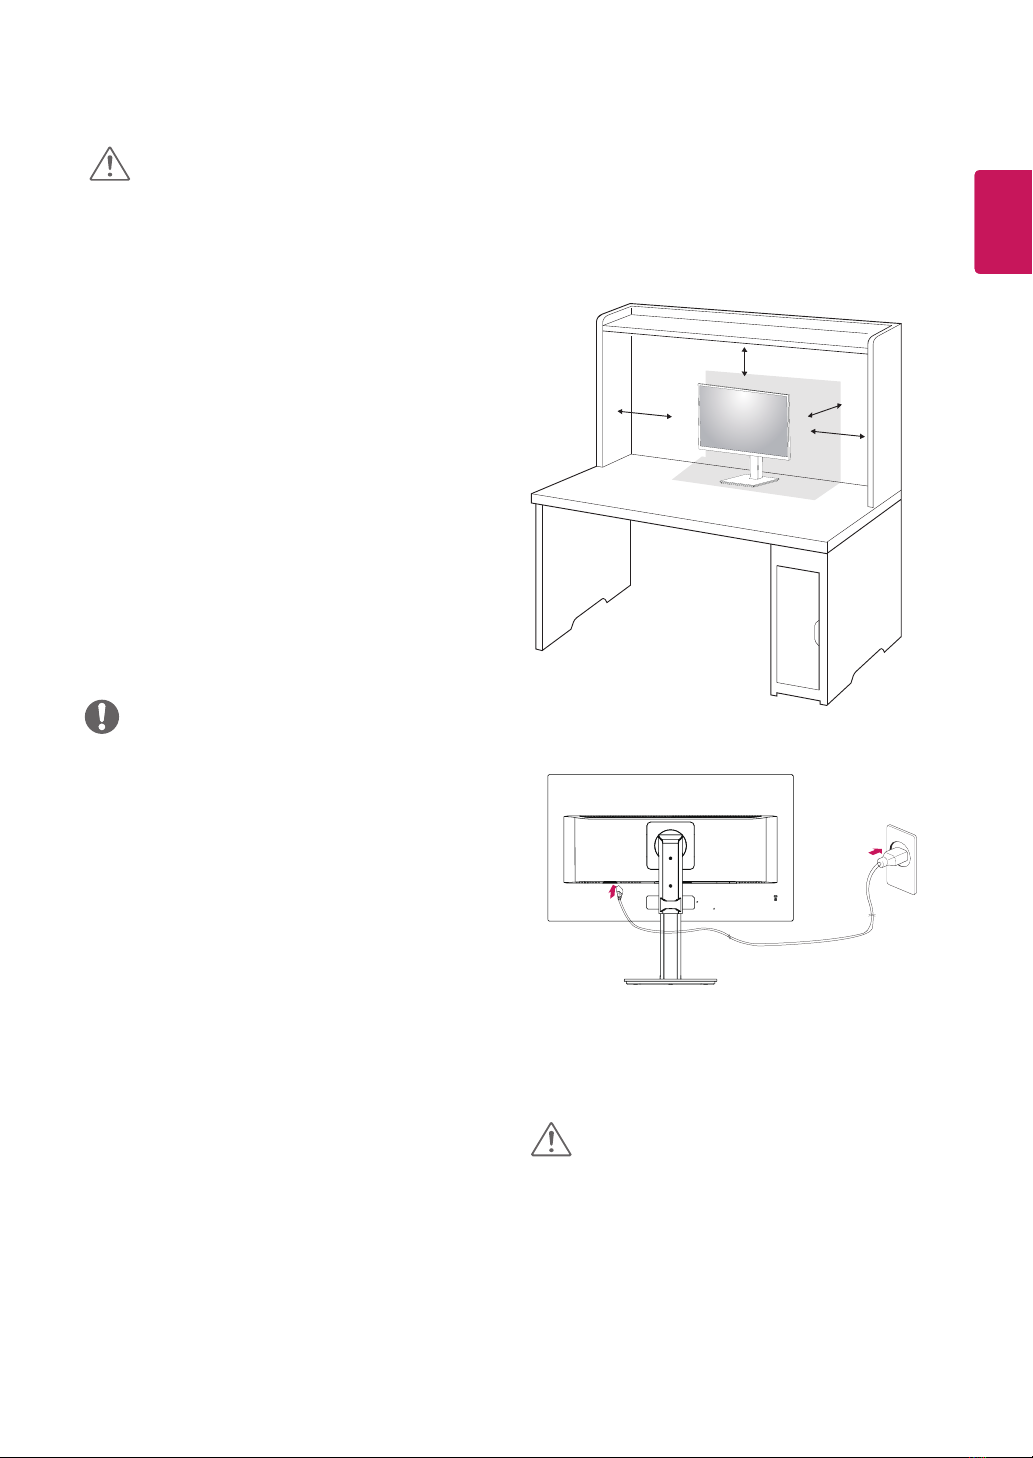
Mounting on a table
1Lift and tilt the Monitor set into its upright
position on a table.
Leave a 100 mm (minimum) space from the
wall for proper ventilation.
100 mm
100 mm
100 mm
100 mm
CAUTION
CAUTION
NOTE
yYou can disassemble the stand in the re-
verse order of the assembly.
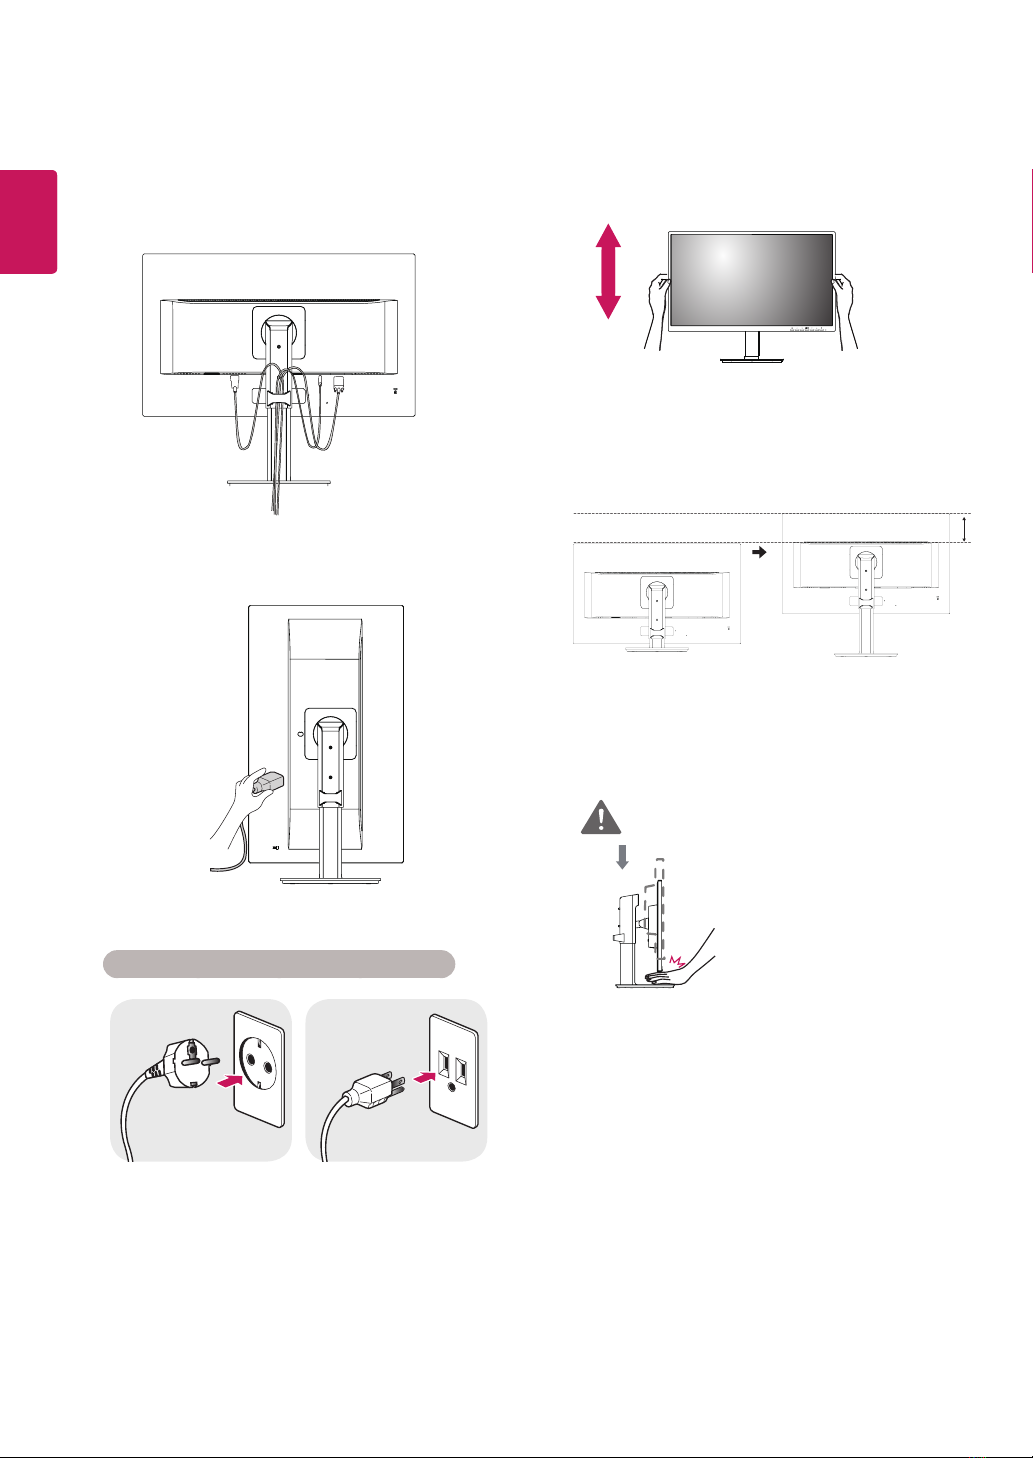
yUnplug the power cord prior to moving or
installing the monitor. There is risk of electric
shock.
2Connect the Power cord to the monitor, then
plug the power cord into the wall outlet.
3Press the Power button on the front of the
monitor to turn on the monitor.