2
910 11
1
87 12
56
3 4
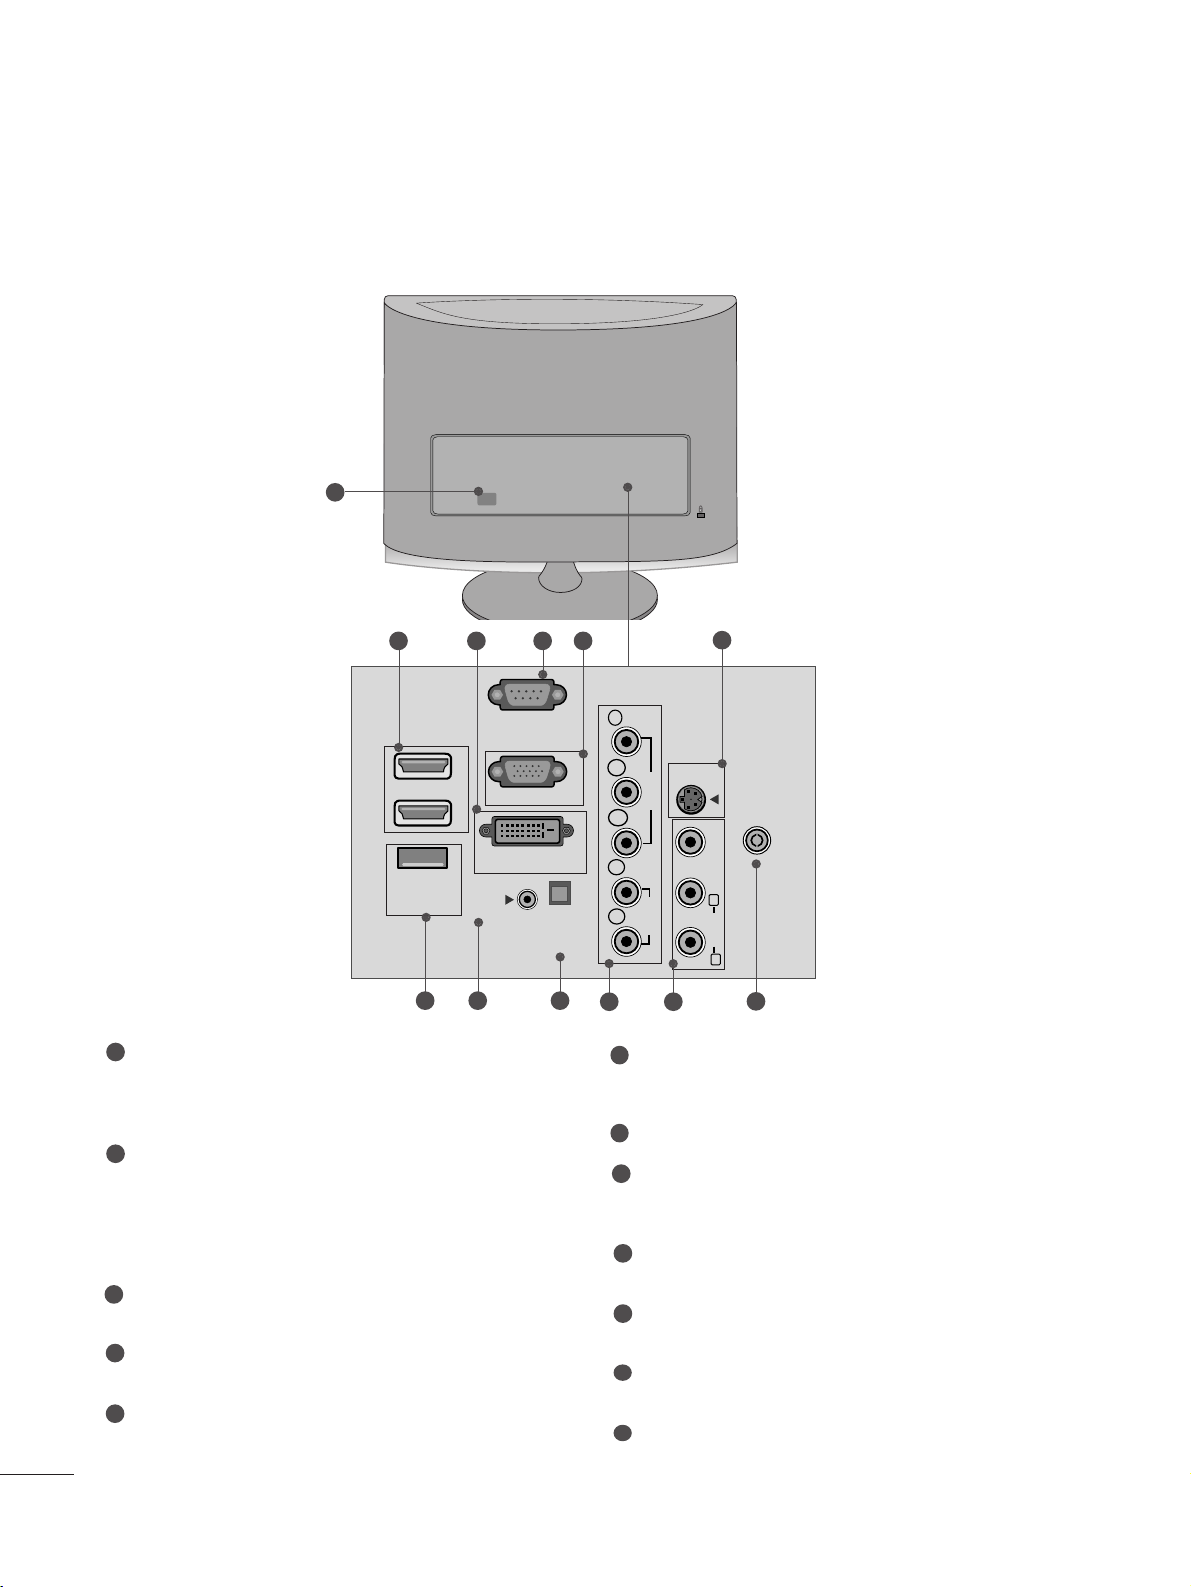
Power Cord Socket
This set operates on AC power. The vo tage is indicated
on the Specifications page. Never attempt to operate
the set on DC power.
HDMI Input
High definition inputs. These two inputs accept TV
Video, not PC Video. They a so accept TV Video from a
DVI connection when using an adapter. The HDMI
inputs support video and audio. When using an adapter
for DVI, they on y accept video.
DVI-D Input
Digita PC input.
RS-232C IN (CONTROL & SERVICE) PORT
Seria port used for externa contro or service.
RGB INPUT (PC)
Ana og PC input. A so known as VGA.
S-Video Input
Standard definition (480i), but better qua ity than
standard A/V input.
SERVICE ONLY PORT
RGB/DVI Audio Input
This is the audio input for the RGB and DVI-D video
inputs.
Optica Digita Audio Out
Use this to export audio to an externa amp ifer.
Component Input
High definition ana og input.
Audio/Video Input
Standard definition input.
Antenna Input
Connect over-the-air or cab e signa s to this jack.
1
2
3
4
5
7
6
8
9
10
11
12