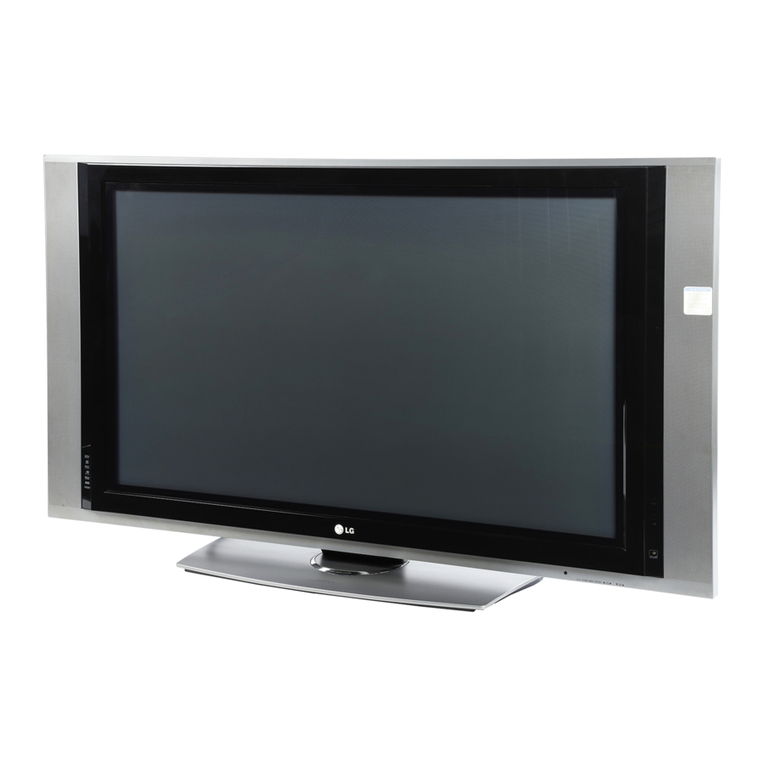
LG 42PX3DBV User manual

MATV
42PX3DBV-UC/42PX3DLV-UC
and completely before
....
iiiiiiiiiiiiiiiiiiiiiiiiiiiiiiiiiiiii_,
iiiiiiiiiiiiiiiiiiiiiiiiiiiiiiiiiiiiiiiii_,,_
iiiiiiiiiiiiiiiiiiiiiiiiiiiiiiiiiiiiiiiiiiiiiiiii_......
of the TV in the
and relate this
;rJice.

Warning/Caution
Q
arnIn
WARNING/CAUTION:
TO REDUCE THE RiSK OF ELECTRIC SHOCK DO NOT REMOVE COVER (OR BACK)_ NO USER
SERVICEABLE PARTS iNSIDE. REFER TO QUALIFIED SERVICE PERSONNEL.
The lightning flash with arrowhead symbol, within an equilateral triangle, is intended to alert the user to
the presence of uninsulated "dan_rous voltage' within the pr_uct's enclosure that may be of suffi-
cient magnitude to constitute a risk of electhc shock to persons.
The exclamation point within an equilateral triangle is intended to alert the user to the presence of
im_rtant operating and rr_aintenance (servicing) instructions in the literature accompanying the appD
ante,
WARN ING/CA UTIO N:
TO PREVENT FIRE OR SHOCK HAZARDS, DO NOT EXPOSE THiS PRODUCT TO RAIN OR MOISTURE.
FCC NOTICE
AClass B digital device
This equipment has been tested and found to comply with the limits for a C_ass B digital device, pursuant to Part
15 of the FCC Rules, These limits are designed to provide reasonable protection against harmful interference in
a residential installation, This equipment generates, uses and can radiate radio frequency energy and, if net
insta]Jed and used in accordance with the instructions, may cause harmful interference to radio communications.
However, there is no guarantee that interference will not occur in a particular installation, ff this equipment does
cause harmfu_ interference to radio or television reception, _ich can be determined by turning the equipment off
and on, the user is encourag_ to try to correct the interference by one or more of the foflowing measures:
Reorient or relocate the receiving antenna.
Increase the separation between the equiprr_nt _d receiver.
oConnect the equipment into an outfet o,n a circuit different from that to which the receiver is connected,
- Consult the dealer or an experienced radio/TV technician for help,
•Any changes or modifications not expressly approved by the party responsible for compli-
an_ could void the user's authority to operate the equipment:.
Do not attempt to _ify this product in any way without wdtten authorization from LG Electronics, Unauthorized
ific_ion could void the user's authority to operate this producL
COMPLIANCE:
The responsible party for this p_oduct's compliance is:
LG E_ctronics U,S,A, tnc
1000 Sy[v_ Avenue, Eng{ewood Cliffs, NJ 07632
1-800-24-3_
http://wwwJgusa corn
WARNING/CAUTION
TO REDUCE THE RISK OF FIRE AND ELECTRIC SHOCK, DO NOT EXPOSE THIS PRODUCT TO
RAIN OR MOISTURE
2 Plasma TV

SafetyInstructions
ructions
IMPORTA_ SAFETY INSTRUCTIONS
ImpoC'_nt safety instructions shall be provided with each apparatu& This information shail be given in a separate booklet or
sheet, or be _ocated before any operating instructions in an instruc_on for installation for use and supplied with the appa_-
tus, This information sha[_ be given in a language acceptable to the country where the apparatus is intended to be used_ The
important safety instructions shah be entitled lmport_t Safety Instructions". The following safety instruc_ons shah be inc[ud°
ed where applicable, and, when used, shalI be verbatim as foilows. Additional safety information may be included by adding
statements after the end of the following safety instruction list. At the _nufacturer's option, a picture or drawing that il[us
trates the intent of a specific safety instruction may be placed immediately adiacent to that safety instrt_ction :
1. Read these instructions.
2. Keep these instructions.
3. Heed all warnings.
4oFollow all instructions.
5. Do not use this apparatus near water.
&C_ean only w_h dW cleth.
7_Do not block any ventilation openings. Install in accordance w_h the manufacturer's instructions.
8. Do not install near any heat sources such as radiators, heat registers, stoves, or other ap_ratus (includlng ampli-
fiers)that produ_ heat.
9. Do not defeat the safety purpose of the polarized or groundtng-ty_ plug. A polarized plug has two blades w_h
one wider than the other. A grounding type plug has two blades and a third grounding prong, The wide blade or the
third prong are provided for your safety. _fthe provided plug d_s not fit into your outlet, consuH an electrician for
repl_ement of the obsolete outlet.
i0. Protect the power cord from being walked on or pinched particularly at plugs, convenience receptacles, and the
point where they exit from the apporatus.
il. Only use at'_hments/accessortes spec_ted by the manufacturer.
12. Use only with the cart, stand, tripod, b_ket, or table s_cif_ed by the manufacturer, or sold with the apparatus.
When a cart is used, use caution when moving the cart/apparatus combination to avoid injury from tip-over.
_RTA_t_r_ CA_ WARNtlXG
J
Owner's Manual 3

Safety fnstrucdons
I ni nl s
1;3,
t4°
Unplug this apparatus during lightning _orms or when unused for long periods of time.
Refer all servicing to qualHted service personnel. Servicing is required when the apparatus has been damaged
in any way, such as power-supply cord or plug is damaged, liquid has been spilled or objects have fallen into
the apparatus, the apparatus has exposed to rain or moisture, does not operate normally, or has been droppad.
15. CAUTION concerning the Power Cord :
17.
Most appliances recommend they be pieced upon a dedicated circuit; that
is, a single outlet circuit which powers only that appliance and has no
additional outlets or branch circuits. Check the spacHIcatfon page of
this owner's manual to be certain.
Do not overload wall outlets. Overloaded wall outlets, loose or damaged
wall outlets, extension cords, frayed power cords, or damaged or
cracked wire insolation are dangerous. Any of these conditions could
result in electric shock or fire= Periedically examine the cord of your
appliance, and if its appearance indicates damage or deterioration_
unplug it, discontinue use of the appliance, and have the cord repleced
w_h an exact replacement part by an authorized servicer.
Protect the power cord from physical or mechanical abuse, such as being
twisted, kinked, pinched, closed in a door, or walked upon. Pay
particular attention to plugs, wall outlets, and the point where the
cord exits the appliance.
Outdoor Use Marking :
WARNING -To Reduce The Risk Of Fire Or Electric Shock, Do Not Expose This Appliance To Rain Or Moisture.
Wet Location :
Apparatus shall not be exposed to dripping or splashing and no objects _led wHh liquids, such as vases, shall
be placed on the appa_us.
4 Plasma TV

Warning/Caution ................................ 2
Safe_ Instructions .............................. 3_4
IntroductionControls ......................... 7
Connection Options ...................... 8
Remote Control Key Functions ........... 9--10
Installation
_nstallation _nstruction .............. 11~12
External Equipment Connections .......... 13~17
Antenna Connection ..................... 13
VCR Setup /Cable TV Setup .............. 14
Extema_ A/V Source Setup ................ 15
DVD Setup ............................ 15
HDSTB Setup /Digi_ Audio Output ......... 16
PC Setup ....................... 17
Operation
Screen Setup for PC mode .................. 18
XD ................................... 18
Turning the TV On ...................... 19
On-screen Menus Language Selection ......... 19
Setup Menu Options
EZ Sc_ (Channe_ Search) ..................
Channet Edit ...........................
DTV Signal Strength .................... 21
Channel Label Setup .................... 21
Main Picture Source Selection ......... 21
Video Menu Options
EZ Picture ............................ 22
Manual Picture Contro_ (Off Option) ......... 22
Color Temperature Control .............. 22
Video Preset ........................ 22
Audio Menu Options
Audio Language ........................ 23
EZ SoundRite /EZ Sound ................. 23
Manua[ Sound Contro} (Off OptJon) .......... 24
Stereo/SAP Broadcasts Setup ............. 24
Front Surround ...................... 24
TV Speakers On!Off Setup ............... 25
BBE ............................... 25
Time Menu Options
Auto Clock Setup ....................... 26
Manual C}ock Setup ...................... 26
On/Off "Timer Setup ....................... 26
Sleep Timer /Auto Off .................. 27
Option Menu Features
Aspect Ratio ........................... 28
Caption /Caption Mode .................. 29
Caption Option ........................ 30
Cinema Mode Setup .................... 30
Demo .......................... 30
]SM Method .......................... 31
Low pawer ............................ 31
Lock Menu Options
Parental Lock Setup ..................... 33
External Control Device S_up ................ 34~38
IR Codes ................................ 39~40
Programming the Remote ...................... 41
Programming Codes ....................... 42~43
Troubleshooting Checklist ...................... 44
f_intenance ................................. 45
Product Specifications ......................... 46
Warranty ................................. 47~48
Setup and Operation Checklist
Setup and Operation CheckJist
(See pages I2~17 for availabJe connection and operatJona_ setup options,)
1 Unpack TV and all accessories 5, Turn video _urce equipment on,
2. Connect all external video and audio equipment.
see pages 15 *_17. 6. Select viewing source for TV.
See page 21,
3 Instal] batteries in remote controJ
See page 9~10,
4. Turn TV on,
See page 19,
7. Fine-tune source image and sound to your personal prefer-
ence or as required by source
See pages 22 _ 25
8. Additional features set up
See Contents above.
After reading this rr_nua_, keep it handy for future reference.
Owner's Manual 5
IntroductiOn
In! ion
What is a Plasma Display Panel (PDP)?
A plasma display pane_is the _atestdisplay technology and the best way to achieve flat panel displays with excellent image quality
and large screen sizes that are easily viewabie, Re PDP c_ be thought of as a descend_t of the neon lamp and it can be also
be viewed as a series of fluorescent _amps.
How does it work?
POP is an array of c_tls, known as pixe_s, which are comprised of 3sub pi×els, cerres_nding to the colors ted, green, and blue.
Gas in a plasma state is used to react with phosphors in each sub-pixe_ to produce colored light(red, green, or blue). These phos-
phors are the same types used in Cathode Ray Tube (CRT} devices such as televisions and common computer rr_nitors.
You get the rich, dynamic cetors that you expect. Each sub_pi×e{ is individually controlled by advanced e_ectronics to produce over
16 million different colors. All dthis means that you get perfect images that are easily viewable in a display that is less than 5
inches thick.
160 ° - Wide angle range of vision
"four flat panel plasma screen offers _ exceptionally broad viewing angle =oover 160 degrees. This means that the display is
clear and visible to viewers anywhere in the room who can see the screen.
Wide Screen
The screen of the Plasma Dispiay is so wide that your viewingexperience is as if you are in a theater,
Multimedia
Connect your plasn-_ display to a PC and you can use it for conferencing, games, and tnternet browsing, The Picture-imPicture
feature allows you to view your PC and video images simultaneously,
Versatile
The light weight and thin size _kes it easy to in_t your pJasma display in a vadety of locationswhere conventional TVs wiI] not
fit.
The PDP Manufacturing Pr_ess: afew minute colored dots may be present on the PDP screen
The PDP (Plasma Display Panel)_ which is the display device ef this product is compo_d of 0,9 to 22 million cet[s, A few cell
defects will normally occur in the PDP manufacturing process. _veral tiny, minute colored dots visible on the screen should be
acceptable. This also occurs in other PDP manufacturers' products_ The tiny dots appearing does not mean that this PDP is deles=
five, Thus a few celt defects are not sufficient cause for the PDP to be exchanged or returned, Our production technology mini-
mizee these cell defects dudng the manufacture and operation of this produ_,
6 Play'ha TV

Introduction
= This is a simplified representation of front pane_
Image shown may be somewhat different from your TV,
Remote Control Sensor
CHANNEL (m, D ) Buttons
VOLUME (r ,e ) Buttons
ENTER Button
MENU Button
TVtVIDEO Button
POWER Button
Power Standby indicator
illuminates red in s_dby mode, [_luminates
green w_hen the TV is turned on,
Owner's Manual 7

IntroductiOn
Remote Control
Port
Connect your wired
remote control here,
DVI InputtAudio InputiRGB DVDIDTv' Input (Component
Input 1-2)
Connect the monitor output con = Connect a component
nector from a PC to the appro- video/audio device to these
pdate input port jacks. I
S-Video input
Connect S-Vi_ out from an
S-VIDEO device to the S-
V_DEO input.
ii;;;ii_ _iii!iiii_iiiiii!i/iiiiiiiif_iiiiiiiiiii
_ lii/iiii!mliiiiiiiiiiii!!/ilii!!iiiiiiii!!i/ii_llliii!
;o ,::
Digital Audio (DVI: Digital Visual
InterfaceiComponentt) Input/
Digital Audio Output
Conn_ digi_l audio from various types
of equiprr_nt, Note: in standby mode,
these ports will not work.
RS_232C INPUT
(CONTROL!SERVICE) PORT
Connect to the RS-232C port
on a PC,
Audio/Video Input 1
Connect audio/video out-
put from an external
device to these iacks
I
Antenna Inputs
Connect cable or _tenna signals to the
TV_ either directly or through your cable
box.
Power Cord _kel
This TV operates on _ AC power. The voltage is indi-
cated on the Specifications page, Never attempt to o_r-
ate the TV on DC power,
,,J
8 Plasma TV

Installation
When using the remote controI, aim it at the ren_te contro_ sensor on the TV
COMP!RGB!DVI
Selects: Component 1-2, RGB-DTV (or
RGS=PC), DVI=DTV (or DVFPC) input
sources.
Selects the remote o_rating mode: TV,
DVD, VCR, AUDEO, CABLE or STB. Select
a mode ether than TV, for the remote to
operate an extema_ devi_.
Brings up the main menu to the screen,
C{ears atl on-screen displays and returns to
TV viewing from any menu,
_lects MTS sound: Mono, Stereo, and
SAP in AnaJog mode, Change the audio
Janguage in DTV mode.
Switches the sound on or off.
EZ
Selects a factory preset picture mode
depending on the viewing environment,
External input modes rotate in regular
sequence: (CA)DTV, TV, Video 1-2,
Component 1_2, RGB-DTV(or RGB-PC),
DVFDTV(or DVFPC) input sources
(Video1-2 Component 1-2 input sources
are _ink_ aatoma_caliy only if these are
connected )
RAllO
Changes the aspect ratio,
Lets you semect the amount of time before
you r TV tums i_etf off automatically,
SURF
Scrolls the Favorite channel&
FLASHBK
Tunes to the recent ch_nels.
FREEZE
Freezes the currently-viewed picture.
Main picture is frozen.
installing Battedes
•Open the battery compartment cover on the back side _d in.nit the batteries
rrhatching correct polarity (+ with +, -with -).
•Instalt two 1,5V AA batteries. Don't mix old or used batteries with new ones. Close
cover.
Owner's Manual 9

Ins_llation
Turns your TV or any other programmed
equipment on or off, _pending on mode,
When you watch the TV, informa_on dis _
plays on top of the screen, Not available in
Component 1-2 and RGB mode.
_UMBST_
AHows you to navigate the on-screen menus
and adiust the system settings to your pref _
erence,
Select a closed caption:
Off, CC1~4, Te×tl ~4.
VOLUME UP/_W_
Increases/decreases the sound level,
EZ
Selects the sound appropriate for the pro-
grams character,
Adjusts screen position, size, and phase in
PC mode.
- Control some video cassette recorders
or DVD players, ('RECORD" button is not
available for DVD p_ayers }
CHANNEL UPfDOWN
Selects available channeJs found with EZ
scan.
PAGE UP/PAGE DOWN
Moves from one fuil set of screen inforo
marion to the next one_
XD
Switches the XD function on or off.
LIGHT
_E_uminates the rerr#te control
buttons of selected mode,
'tO Plasma TV

Installation
II
IOn
Ensure that the following accessories are included with your plasn_ display, If an ascesson/is missing, please contact the dealer
where you purchased the product,
Owner's Manuar Bakeries Power Cord
Remote Cor_rol 2°Wail brackets 2-eye-bolts D-sub 15 pin Cable(RGB)
-Secure the TV assemMy by joining it to a wall by using the TV?CCall bracke_.
Here shown may be somewhat different from your TV.
°ff the set wiF! be mounted on a desk top, insert the 2 eye-
boi_ and tighten them securely in the upper holes as
shown,
_nstali the wail brackets on the wall with 2 boils*, (not sup-
plied with the product), as shown
Match the height: of the eye-belts and/the wall brackets,
Check to be sure the eye-belts and the brackets are tight-
ene,d securely
- _ure the TV assembly to the wall with strong strings or
wire c.ables_ (not suppiied with the product)_ as shown
Owner's Manual 11

/ns_llation
• The TV can be installed in various ways such as on a wait, or on a desktop etc,
• _e TV is designed to be mounted hod_ntally,
GROUNDING
Ensure that you connect the earth ground wire to prevent possible
e_ectric shock ff grounding methods are not possible_ have a quatified
electrician instatl a separate circuit breaker, Do not try to ground the
unit by connecting it to telephone wires, lightening rods, or gas pipes,
For proper ventilation, a]Jow a clearance
of 4_'on each side and the top, 2,36" on
the bottom, and 2" from the wall
Detailed inst_[ation instructions are
inctuded in the optional Desktop Stand
hstal[atJon and Setup Guide available
from your denier.
To Install on a Desktop
Pedestal mount minimum a_lowab[e clearances
for adequate ventilation.
12 Plasma TV

Installation
Analog and Digital TV signals provided; on one antenna
Antenna or Cable _rvice without a Cable Box Connections
-For optimum picture quality, adjust antenna dire_on ff needed.
fMulti°family Dwellings!Apartments
(Connect to wa[I antenna socket)
Wal_Antenna
C_r Wire
VHF Antenna
UHF Antenp_ Turn clockwise to tighten.
Copper Wke
Be careful not to bend the C@e_ wire when
sonnec_ng the antenna
q.q . in a poor signa_ area to improve picture quality_ purchase
and install a signal amplifier.
. if the antenna needs to _ splff for two TV's insta_ a '2-
Way Signal Splitter _'in the connections.
• if the antenna is not installed properly, contact your dear-
er for assistance.
Analog and DTV signals provided on two separate antennas
Walt Antenna Co#r Wife
Socket RF Coaxial Wire (75 ohm)
Wall; A_enna
Socket
Anaiog Ar_eeea
Tam dockwi_ to tighten
RF Coaxia_ Wire (75 ohm) 1
Copper Wi_e J
NOTE: if you are not sure of the type of signal(s) you are receiving, let _ Scan complete air the channel signaFtype searches,
The TV will let you know when the analcg, cable, and digitat channe_ scans are complete
Owner's Manual 13

Ins_llation
NOTE: All cables shown are not included with the T¢
To avoid picture noise (interference)_ _eave an adequate distance between the VCR and TV
U_ the ]SM Method (on the Option menu) feature to avoid having a fixed image remain on the screen for a tong period of time.
Typically a frozen still picture from a VCR. [f the 4:3 picture format is used; the fixed images on the sides of the screen may
remain visib[e on the screen.
Connection Option 1
Set VCR output switch to 3 or 4 and then tune
TV to the same c_anne[ number.
Connection Option 2
1. Connect the audio and video cables from the
VCR's output iacks to the TV input jacks, as
shown in the figure.
When connecting the TV to a VCR, match the
jack corers (Video = yellow, Audio Left = white,
and Audio Right = red).
If you connect the S-VIDEO output from a VCR
to the S-V[DEO input, the picture quality is
improved; compa#ed to connecting the Video
}nput.
2. insert a video tape into the VCR and press
PLAY on the VCR. (Refer to the VCR owner's
manual,)
3 Select the input source by using the TVTVIDEO
button on the remote control (ff connected to
A!V iNPUT 1, set_ Video 1 input source)
Do not connect to both Video and
S-Video at the same t_me,
[] []
VCR
After subscribing to a _b]e TV _rvice from a local provi_r and installing a converter, you can watch cable TV programming.
The TV cannot display TV programming unless a TV tuner _vice or ceb[e TV converter box is connected to the TV.
For farther information regarding cable TV service, contact your local cable TV service provider(s).
Connection Option 1
1, Sele_ 3 or 4 w_th channel switch on the cabte
biox_
2_ Tune the TV channel to the same selected
output channel on cable box
& Select channels at the cable box or with the
cable box remote control
Connection Option 2
1, Connect the audio and video cables from the
Cable Box's output iacks to the TV input jacks,
as shown in the figure.
When connecting the TV to a Cable Box,
match the jack corers (Video =,yellow, Audio
Left = white, and Audio Right = red).
2. _[ect the input source by using the
TViVIDEO button on the remote control (ff
connected to A/V INPUT 1, select Video 1
input source)
3. Select your desired channel with the remote
control for cable box,
Cable Box
[]
14 Plasma TV

Installation
How to connect
Connect the audio and video cabtes from the external equip-
ment"s output jacks to the "F,/input jacks, as shown in the
figure.
When connecting the TV to external equipment, match the
jack colors (Video = yellow, Audio Left = white, and Audio
Right = red)_
How to uSe
1. Select the input source by using the TV!VIDEO button on
the remote control. (If connected to A/V iNPUT 1, setect
Vid_ 1 input source).
2. Operate the corresponding external equipment. Refer to
extema_ equipment operating guide.
How to connect
1. Connect the DVD video outputs (Y, PB P_) to the COMPONENT ('7",
P_, P_t) INPUT iacks on the _# and connect the DVD audio outputs
to the AUDIO INPUT jacks on the TV, as shown in the figure,
2. tf your DVD on}y has an S_Video output jack, connect this to the S_
VIDEO input on the TV and connect the DVD audio outputs to the
AUDIO iNPUT jacks on the TV as shown in _e figure.
NOTE: ff your DVD player does not have component video output use
S-Video.
How to use
1. Turn on the DVD player, insed a DVD.
2. Use the TVlVlDEO or COMP/RGBiDV| button on the remote control
to select Component 1 or Component 2. (If connected to S-
VIDEO, select the Video 1or Video 2 external input source)
3. Refer to the DVD p_ayer s manual for operating instructions.
• Component Input ports
To get better picture quality, connect a DVD player to the compo
nent input pods as shown below.
Component po_
on _e TV
I Video output ports
on DVD player
DVD
NOTES
•DigitalAudio will not work for Com_nent 2 input source
• Digi_l Audio operation has priority ff Digi_ Audio and AUDIO L/R
are connected at the same time,
Owner's Manual 15

Ins_!lation
This TV can receive Digital Over4he-alr!Cable signals without an external digita_ set4op box. However, if you do receive Digital
signaEs from a digital set-top box or other digital external device, refer to the figure as shown below.
This _ supports HDCP (High-bandwidth Digita_ Contents Protection) protocol for DTV (480p,720p,1080i) mode.
or or
Dtgilal Set-top Box
How to connect
Use the TV's COMPONENT (Y, PB, P_) INPUT, RG£ or DV_ _ack for
video connections, depending on your _t-top box connector. Then,
make the corresponding audio connections.
How to use
1 Turn on the dig_al set4op box (Refer to the owner's manuat for the
digital set-top box,)
2_ Use TViVlDEO or 6OMP/RGB/DVt on the remote control to setect
Component i, Component 2, RGB-DTV, or DVI-DTV source
Signat Component 1/2 RGB-DTv'DVI_DTV
480i Yes No
480£ Yes Yes
720p Yes _ Yes
1080i Yes Yes
Send the TV's audio to external audio equipment (stereo system) via
the Digital Audio Output Optical port
How to connect
1. Connect one end of _ optical cable to the TV D,igita_ Audio Optical
Output port.
2. Connect the other end of the optical cable to the digital audio optical
input on the audio equipment.
See the external audio equipment instruction manual for operation.
Caution: Do not leok into the optical output port.
Looking at the _aser beam may damage
your vision.
16 Plasma TV

Installation
- This TV provides Plug and Ptay capability, meaning that the PC adjus_ automatically to the TVs setting& The TV sends config-
uration information (ED[D), to the PC using the Video E_ectronics Standard Asseda_ion (VESA) Display Data Channet (DDC)
protoco_
oThe TV perceives 640x480_ 60Hz as D_ 460p based on the PC graphic card card change the screen scanning rate for the
graphic card accordingly.
How to connect
1. To get the best picttlre quality; adjust the PC
graphics card to 1024x768, 60Hz.
2. Use the TV's RG8 fNPUT or DVl (Digital Visual
_ntefface) INPUT port for video connections,
depending on your PC connector.
, if the graphic card on the PC does not output
analog and digital RGB simultaneously, connect
onU'yone of e_ther RGB INPUT or DVl iNPUT to
display the PC on the TV,
• ff the graphic card on the PC does o_put analog
and digit_ RG B simuff_3neous_y_ set the TV to
either RGB or DW; (the other mode is set to Ptug
and Play automatically by the TV.)
3. Then, make the corresponding audio connections.
tf using a sound card, adjust the PC sound as
req uired.
How to u_
1 Turn on the PC and the TV,
2, Turn on the display by pressing the POWER button on the TV's remote control
3_ Select RGB-PC or DVI-PC input source in main input opton of SETUP menu_ (Refer to P,21)
4 Check the image on your TW There may be noise associ_ed with the resolution, ve_ca[ pattem_ contrast or bright_
hess in PC mode if noise is present, change the PC _de to another resolution, change the refresh rate to another
rate or adjust the brighthess and contrast on the menu until the picture is clear. If the refresh rate of the PC graphic
card can not be changed, change the PC graphic card or consult the manufacturer of the PC graphic card,
NOTES; *Depending on the graphics card, DOS mode may not work ff you use a DV[4 cable
• Avoid keeping a fixed image on the TV's screen for a long period of time The fixed image may become per-
manently imprinted on the screen Use the Orbiter screen saver when possible
• The synchronization input form for Honzontal and Ve_cal frequencies is separate,
Monitor Display Specifications (RGB-PC /DVI-PC Mode)
Horizon_| Vertical Horizonta| Vert|ca|
ResoluUon Frequency(KHz) Frequency(Hz) Resolution Frequency(KHz) Frequency(Hz)
840x350
720x400
640x480
31 468
37,861
31.469
37,927
31,469
37,861
37.500
43,269
7&09
85,08
70.08
85,03
59,94
72,80
75,00
85,00
800x600
1024x768
3&156
37,879
48.077
46,875
53,674
48,363
56.476
60,023
5&25
60,31
72.18
75,_
85._
60._
70._
75.02
Owner's Manual 17

Operation
Screen Setup for PC mode
Be sure to seJect the RGB-PCiRGB_DTV sou rce before operation
(For RGB-DTV input source_ Position and Reset are avai_able_)
In DVFPC and DVFDTV input source_ settings are not adjustable
You can manually adjust picture position and minimize imam shaking for the PC input source.
1 Press the ADJUST button and then use D Pl button to select PO$I'r][oN,
C_, or lq, l_ASE.
2. Press the ENTER button and then use # iz / r/e buttons to make appropri-
ate adjustments.
,The _ adjusf_ment ran_ is -16 -- +16.
,The (:.'LOCK adiusVnent range is -30 ~ +30.
3. Press the ENTER button.
- To initialize the adjusted values
1. Press the ADJUST button and then use D ,_z button to select the P_ option.
2. Press the ENTER button and then use r ,,'e button to select Yes.
3. Press the ENTER button,
-XD is LG Electronics unique picture improving technology to display a real HD source
through an advanced digita_ signal pr_essing a_gorithm.
1. Press the XD button.
2, To return to normaE viewing, press the _ button again.
18 Plasma TV

Operation
I Connect power cord correctly,
2. Press the 0/I button on the TV. At this moment, the TV is switched to s_andby mode. Press the
POWER button on the remote contro_ and then the TV wiEtswitch on.
1. If the TV was turned off with the #3/_ button on the TV
•Press the (_)/I button on the TV to turn the TV on.
2. if me TV was turned oft with the remote control and then the #3/I button on the TV
•Press the #3/t butt:on on the TV and then press the POWER button on the remote control to turn the
TV on.
NOTE
*tf you intend to be away on vacation, disconne_ the power plug f_m the wal_ _wer out_et.
* In this manuaI, the OSD (On Screen Display) may be d_erent from your TV's because _is just example to help
the TV opera{ion.
TV Setup
- The menus will be shown on the screen in the setected language. First select your language.
I Press the MENU button and then use #/I button to select the OPTION menu,
2. Press the e button and then use D /z button to select Language.
3 Press the e button and then use # lB button to select your desired _anguage
From this point on, the on-screen _nus wil_ be shown in the selected language.
4, Press EXIT button to return to TV viewing or press MENU button to return to the
previous rr'enu,
Owner's Manual 19

Operatio_'_
Automatically finds all channels available through antenna or cable inputs, and stores them in memory on the channel _ist.
Run EZ Scan again after any ,antenna/Cable connection chants.
1, Press the MENU button and then use _ /# button to select the _ILrJP menu,
2, Press thee button andthen use# /# button to select _,
3, Press the e button and then use _ _# button to select antenna input
• Analog/DTV Air:
Watching the Over4he-air_ cable and digital overothe-air signats via antenna input port
• Analog/D_ Cable:
Watching the Over4he-air_ cable, and digital cable signals via antenna input port
Cable Service 8and Note: Sele_ Std=Stendard, HRC=HRC Band, or tRC=FRC Band,
(For further band infom_a_on_ contact your cable service provider,)
4, Press the ENTER button to begin the channe_ search
Allow EZ Scan to cemplete the ch_neJ search cycle for TV_ CATV, and DTViCADPv'.
Create two different _'pes of channel lists in memop/: "Custom lisf and "Surf"
(Favorite) channe_ _ist" from the default channel list created from the EZ Scan
channeJ search
A custom list can be created by toggiing each channel on or off with ENTER
button, Once a channel is hightighted_ you wiFIbe able to see whether the
channel is currently added or deleted by referring to the sinai} window at the
top-left comer of the screen, You can create your own Surf channel list with up
to 10 channels It appears at the bottom4eft corner of the screen. Use the
SURF button on the remote contro_ when a channe_ is highlighted_ to add or
delete the channel from the Surf channel _ist.
You can create your SURF channel _ist from the channe_ list memorized from
EZ Scan
CATV is available for 1-135 channel.
1. Press the MENU button and then use D /# button to select the S_."I'I_tPmenu.
2. Press the e button and then use D /# button to sel_ CI'_._t.
3. Press thee button. You witl now see a screen filled with channel numbers and
a preview picture.
4, Use _ /#/7 / e button to select a channel and then use the ENTER button to
add or delete it, Press SURF to add the channel to the Surf List,
5, Press EXIT button to return to TV viewing or press MENU button to return to the
previous menu,
20 Plasma TV
Other manuals for 42PX3DBV
3
This manual suits for next models
3
Table of contents
Other LG Plasma TV manuals
Popular Plasma TV manuals by other brands

Panasonic
Panasonic VIERA TC-60PU54 owner's manual

Palsonic
Palsonic PDP3280HD owner's manual

Panasonic
Panasonic TH-58PZ700U Manual de instrucciones

Akai
Akai PDP4206EA Product specifications

Panasonic
Panasonic TC-42PX14 - 42" Plasma Panel operating instructions

Panasonic
Panasonic TH-P42X30A operating instructions