- 9 - LGE Internal Use OnlyCopyright ©2011 LG Electronics Inc. All rights reserved.
Only or training and service purposes
* Caution
- Color Temperature : COOL, Medium, Warm.
- One o R Gain/G Gain/ B Gain should be kept on 0xC0, and
adjust other two lower than C0.
(when R/G/B Gain are all C0, it is the FULL Dynamic Range
o Module)
* Manual W/B process using adjusts Remote control.
(1) A ter enter Service Mode by pushing “ADJ” key,
(2) Enter White Balance by pushing “G” key at “. White
Balance”
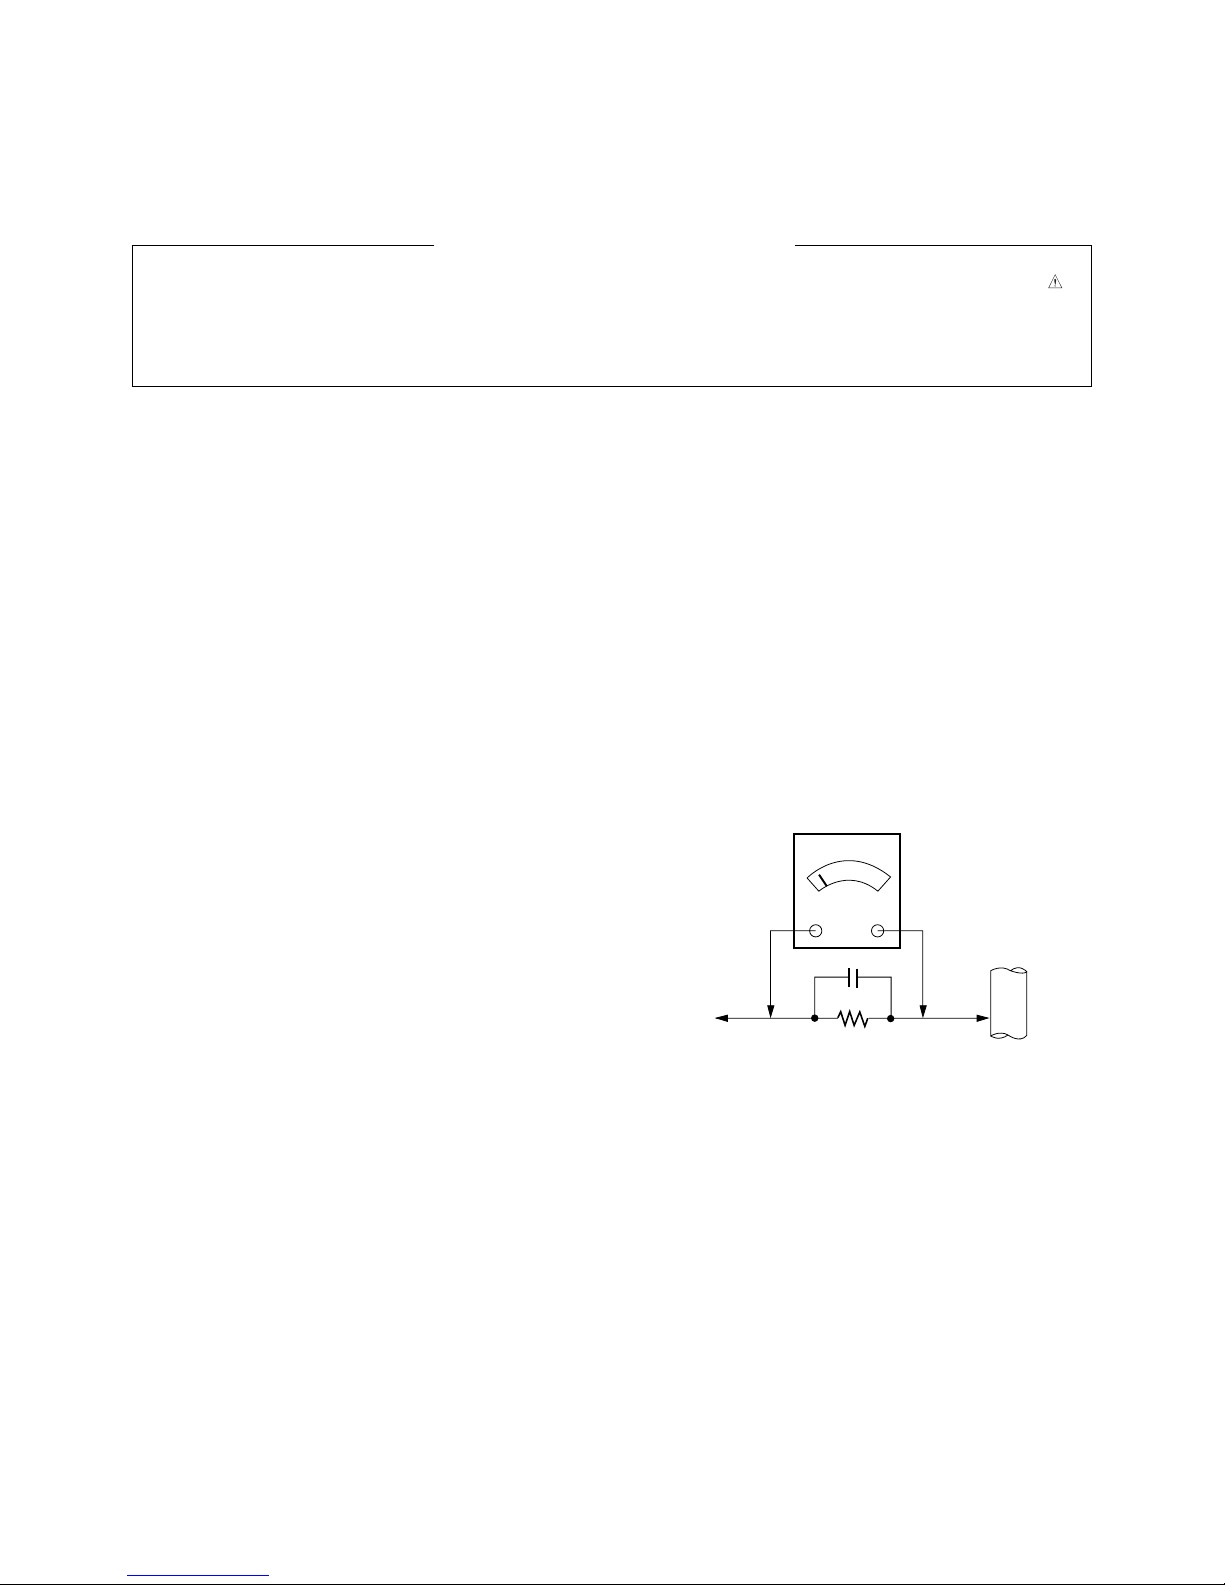
(3) Stick the sensor to the center o the screen and select
each items(Red/Green/Blue Gain) using D/E (CH +/-) key
on R/C.
(4) Adjust R/G/B Gain using F/G (VOL +/-) key on R/C.
(5) Adjust three modes all(Cool/Medium/Warm) : Fix the one
o R/G/B Gain and Change the others.
(6) When the adjustment is completed, Enter “COPY ALL”.
(7) Exit adjustment mode using EXIT key on R/C.
* A ter You inish all adjustments, Press °∞In-start°± button
and compare Tool option and Area option value with its
BOM, i it is correctly same then unplug the AC cable.
I it is not same, then correct it same with BOM and unplug
AC cable.
For correct it to the model’s module rom actory JIG model.
* Push The “N STOP KEY” a ter completing the unction
inspection. And Mechanical Power Switch must be set “ON”.
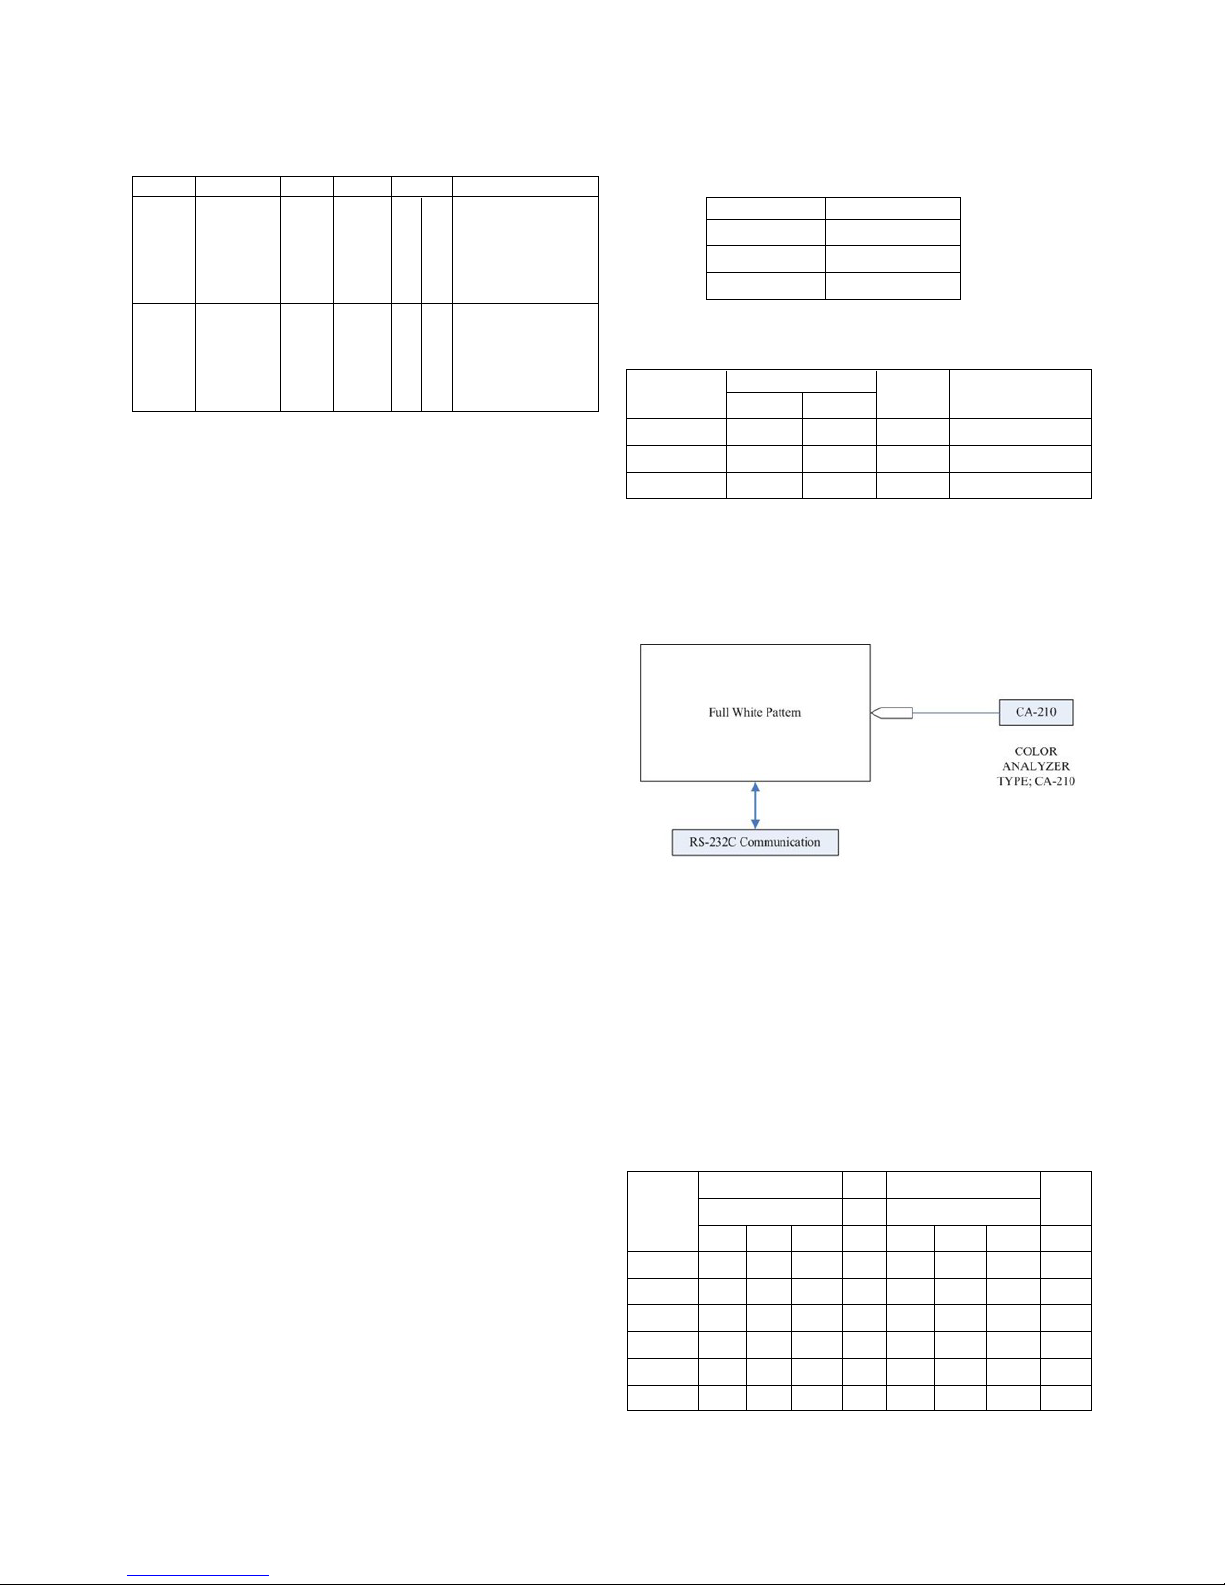
* To check the coordinates o White Balance, you have to
measure at the below conditions.
Picture mode : Vivid, Energy Saving : O , Below the
Advanced control, Dynamic Contrast : O , Dynamic Colour :
O
Colour Temp.
-> Picture Mode change : Vivid ? Vivid(User)
7-3. DPM op ration confirmation
(Only Apply for MNT Mod l)
* Check i Power LED Color and Power Consumption operate
as standard.
(1) Set Input to RGB and connect D-sub cable to set
(2) Measurement Condition: (100~240V@ 50/60Hz)
(3) Con irm DPM operation at the state o screen without
Signal
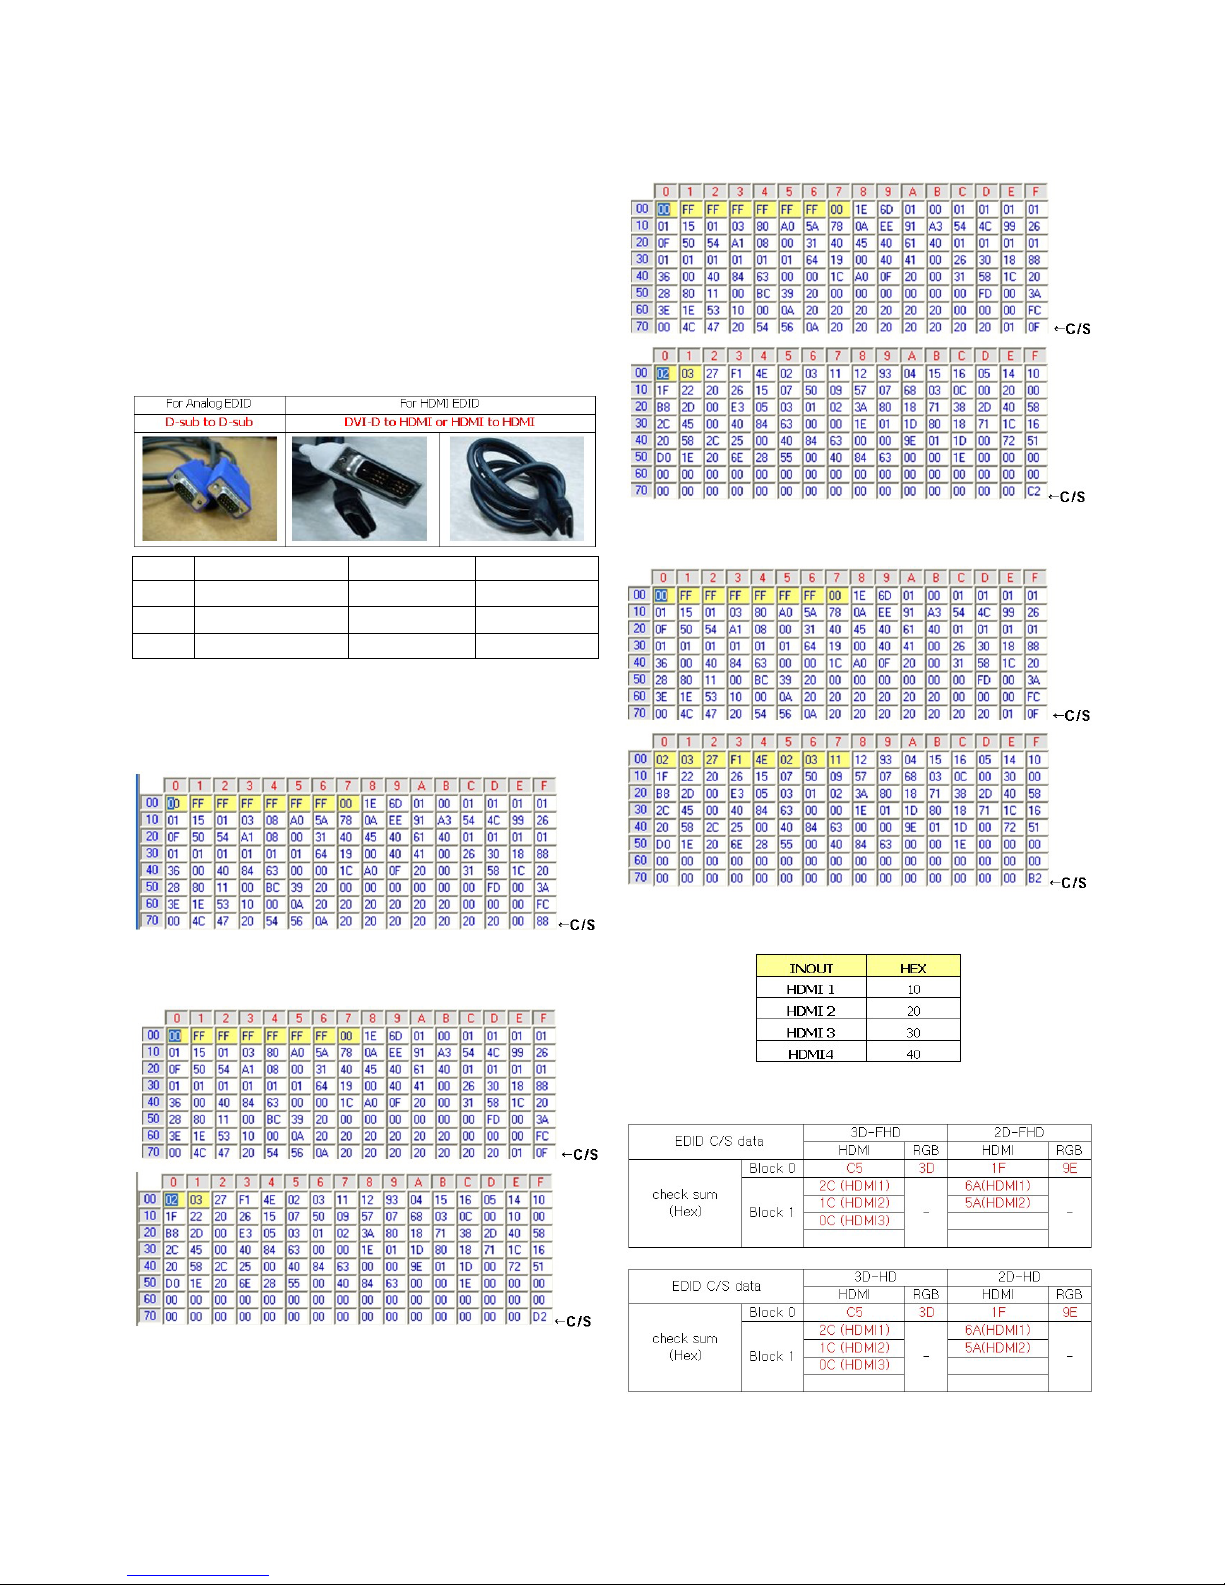
7-4. DDC EDID Writ (RGB 128Byt )
-> Not us d any mor , Us Auto D/L
(1) Connect D-sub Signal Cable to D-Sub Jack.
(2) Write EDID DATA to EEPROM (24C02) by using DDC2B
protocol.
(3) Check whether written EDID data is correct or not.
* For SVC main Ass’y, EDID have to be downloaded to
Insert Process in advance.
7-5 DDC EDID Writ (HDMI 256Byt )
-> Not us d any mor , Us Auto D/L
(1) Connect HDMI Signal Cable to HDMI Jack.
(2) Write EDID DATA to EEPROM(24C02) by using DDC2B
protocol.
(3) Check whether written EDID data is correct or not.
* For SVC main Ass’y, EDID have to be downloaded to
Insert Process in advance.
7-6. EDID DATA
(1) All Data : HEXA Value
(2) Changeable Data :
*: Serial No : Controlled / Data:01
**: Month : Controlled / Data:00
***:Year : Controlled
****:Check sum
7-7. EDID DATA Auto Download
(1) Press Adj. key on the Adj. R/C,
(2) Select EDID D/L menu.
(3) By pressing Enter key, EDID download will begin
(4) I Download is success ul, OK is display, but I Download is
ailure, NG is displayed.
(5) I Download is ailure, Re-try downloads.
*Caution: Never connect HDMI & D-sub Cable when EDID
downloaded.
O Edid data and Model option download (RS232)
NO Item CMD 1 CMD 2 Data 0
Enter download A A 0 0 When trans er the
download ‘Mode In’‘Mode In’
Mode Carry the
command.
EDID data download A E 00 10 Automatically
Model download
option (The use o
download a internal pattern)