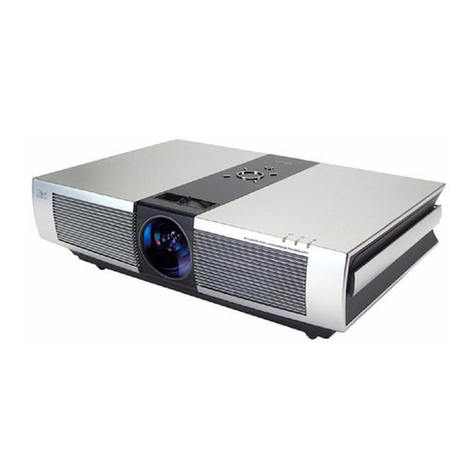
LG BX327 User manual

담 당 관리자
Model Description
MODEL BRAND
Printing Specification
1. Trim Size (Format) : 182mm x 257 mm
2. Printing Colors
•Cover : 1 COLOR (BLACK)
•Inside : 1 COLOR (BLACK)
3. Stock (Paper)
•Cover : Coated paper , S/W 150 g/㎡
•Inside : Uncoated paper , Wood-Free Paper(백상지) 80 g/㎡
4. Printing Method : OFF-SET
5. Bindery : Saddle stitch
6. Language : Eng/Tur/Ind
7. Number of pages : 96
Part No.
1.
2.
User’s Guide Specification
Changes
4.
REV.
NO. MM/DD/YY SIGNATURE CHANGE NO. CHANGE CONTENTS
1
2
3
4
6
5
SUFFIX
BX327-JD LG MFL63727105
(1104-REV02)
7
8
Special Instructions3.
Product Name
APDLLA
PARK JA
11.04.26
KANG KS
11.04.26
BX327-JD
* This part contain Eco-hazardous substances (Pb, Cd, Hg, Cr6+, PBB, PBDE, etc.) within LG
standard level, Details should be followed Eco-SCM management standard[LG(56)-A-2524].
Especially, Part should be followed and controlled the following specification.
(1)Eco-hazardous substances test report should be submitted when Part certification test
and First Mass Production.
(2) Especially, Don’t use or contain lead(Pb) and cadmium(Cd) in ink.
(1) Origin Notification
* LGERS : Printed in Mexico
* LGEAZ : Printed in Brazil
* LGESP : Printed in Brazil
* LGESY : Printed in China
* LGEND : Printed in China
* LGEIL : Printed in India
* LGEIN : Printed in Indonesia
* LGETH : Printed in Thailand
* LGEMA : Printed in Poland
* LGEWR : Printed in Poland
* LGEVN : Printed in Vietnam
* LGEEG : Printed in Egypt
* LGERA : Printed in Russia
* LGEAK : Printed in Kazakhstan
Nov./01/10 Park Jin Ah S0-05997 Changed Remote Control.
Apr./26/11 Park Jin Ah S1-30831 Added 16:9 function.

Pagination sheet
Pagination sheet P/NO.MFL63727105(1104-REV02)
Total pages :96 Pages
23 …. 31
Front
Cover
(EN)
(P/NO)
Back
Cover
23 …. 31
Front
Cover
(Tur)
Back
Cover
23 …. 31
Front
Cover
(Ind)
Back
Cover

OWNER’S MANUAL
DLP PROJECTOR
BX327
Please read this manual carefully before operating
your set and retain it for future reference.
www.lg.com
P/NO : MFL63727105 (1104-REV02)

DLP PROJECTOR
DLP PROJECTOR
Warning - Class B
(b) For a Class B Digital device or peripheral, the instructions furnished the user shall include
the following or similar statement, placed in a prominent location in the text of the manual:
NOTE: This equipment has been tested and found to comply with the limits for a Class B
digital device, pursuant to part 15 of the FCC Rules. These limits are designed to provide
reasonable protection against harmful interference in a residential installation. This equip-
ment generates, uses and can radiate radio frequency energy and, if not installed and used
in accordance with the instructions, may cause harmful interference to radio communica-
tions. However, there is no guarantee that interference will not occur in a particular installa-
tion. If this equipment does cause harmful interference to radio or television reception, which
can be determined by turning the equipment off and on, the user is encouraged to try to
correct the interference by one or more of the following measures:
- Reorient or relocate the receiving antenna.
- Increase the separation between the equipment and receiver.
- Connect the equipment into an outlet on a circuit different from that to which the receiver
is
connected.
- Consult the dealer or an experienced radio/TV technician for help.

ENGLISH
Contents
3
Contents
Disposal of your old appliance
1. When this crossed-out wheeled bin symbol is attached to a product it means the product is covered by
the European Directive 2002/96/EC.
2. All electrical and electronic products should be disposed of separately from the municipal waste stream
through designated collection facilities appointed by your government or your local authorities.
3. The correct disposal of your old appliance will help prevent potential negative consequences for the
environment and human health.
4. For more detailed information about disposal of your old appliance, please contact your city office,
waste disposal service or the shop where you purchased the product.
5. The fluorescent lamp used in this product contains a small amount of mercury. Do not dispose of this
product with general household waste. Disposal of this product must be carried out in accordance to
the regulations of your local authority.
To view the User’s guide on the CD-ROM
To view User’s guide on the CD-ROM, Adobe Acrobat Reader must be installed on your PC. The “ACRORD”>
“INSTALLS” folder on the CD-ROM contains the installation programs for them. If you want to install those
programs, Open the “My Computer” →Open the “Digital_LG” →Open the “ACRORD” →Open the
“INSTALLS” and doubleclick your language.
To view the User’s guide
The User’s guide files are included in the supplied CD-ROM.
Load the supplied CD-ROM into the CD-ROM drive of your PC.
After a while, the web page of the CD-ROM will open automatically. (for Window only)
If the web page does not appear automatically, open the User’s guide file directly.
Open the “My computer” →Open the “Digital_LG” →Open the “index.htm” file.
Safety Instructions .......................................................4
Names of parts
Main Body ..........................................................................................7
Control Panel.....................................................................................7
Connecting Part .............................................................................. 8
Remote Control .............................................................................. 8
Projector Status Indicators ........................................................... 9
Accessories......................................................................................10
Optional Extras ..............................................................................10
Installing and Composition
Installation Precautions..................................................................11
Turning on the Projector ..............................................................12
Turning off the Projector ..............................................................12
Focus and Position of the Screen Image................................13
Connection
Connecting to a Notebook PC...................................................14
Connecting to a Video Source ...................................................14
Connecting to a DVD Player .......................................................15
Connecting to a D-TV Set-Top Box ..........................................15
3D Video function.
Before watch 3D image................................................................16
To watch 3D image........................................................................ 17
How to watch 3D image...............................................................18
Function
Adjusting Picture Mode...............................................................20
To Change PJT Mode..................................................................20
Sleep time Function ......................................................................21
Selecting Language ......................................................................21
SET ID ..............................................................................................22
Network Setup ...............................................................................22
High Altitude Mode ......................................................................23
USB
Connecting the USB device.......................................................24
Eject USB ........................................................................................24
Precautions when using the USB device ...............................24
Information
Supported Monitor Display.........................................................25
Maintenance ...................................................................................25
Replacing the Lamp.....................................................................26
How to fix the lens cap to the projector.................................28
MEMO...............................................................................................29
Specifications .................................................................................30
Open Source Software Notice....................................................31

Safety Instructions
4
Safety Instructions
Please take note of the safety instructions to prevent any potential accident or misuse of the projector.
ꔈSafety Instructions are given in two forms as detailed below.
WARNING : The violation of this instruction may cause serious injuries and even death.
NOTES : The violation of this instruction may cause injuries or damage to the projector.
ꔈAfter reading this manual, keep it in the place that you can access easily.
Indoor Installation WARNING
Do not place the Projector in direct
sunlight or near heat sources such
as radiators, fires, stove etc.
This may cause a fire hazard!
Do not place flammable materi-
als in, on or near the projector.
This may cause a fire hazard!
Do not hang on the installed
projector.
It may cause the projector to fall,
causing injury or death.
Power WARNING
Indoor Installation NOTES
Earth wire should be connected.
Ensure that you connect the earth ground
wire to prevent possible electric shock (That
is a Projector with a three-prong grounded
AC plug must be connected to a three-
prong grounded AC outlet).
If grounding methods are not possible, have
a qualified electrician install a separate circuit
breaker.
Do not try to ground the unit by connecting
it to telephone wires, lightening rods, or gas
pipes.
The power cord should be inserted
fully into the power outlet to avoid
a fire hazard!
This may cause a fire hazard or damage
the unit.
Do not place heavy objects on
the power cord.
This may cause a fire or an electric
shock hazard!
Do not place the projector close
to sources of steam or oil such
as a humidifier.
This may create a fire hazard or an
electric shock hazard!
Do not place the projector where
it might be exposed to dust.
This may cause a fire hazard or
damage to the unit!
Do not block the vents of the pro-
jector or restrict air-flow in any way.
This would cause the internal tempera-
ture to increase and could cause a fire
hazard or damage to the unit!
Ensure good ventilation around the
projector. The distance between
the projector and the wall should
be more than 30 cm.
An excessive increase in its internal
temperature may cause a fire hazard or
damage to the unit!
Do not use the projector in a
damp place such as a bathroom
where it is likely to get wet.
This may cause a fire or an electric
shock hazard!
Do not place the projector direct-
ly on a carpet, rug or place where
ventilation is restricted.
This would cause its internal tempera-
ture to increase and might create a
fire hazard or damage the unit.
When installing the projector on
a table, be careful not to place it
near the edge.
The projector could fall causing injury
and damage to the projector.
Only use a suitable stand.
Only use the projector on a level
and stable surface.
It may fall and cause injury and/or
damage to the unit.
Disconnect from the power sup-
ply and remove all connections
before moving, or cleaning.

ENGLISH
Safety Instructions
5
Using WARNING
If water is spilt into the projector unplug it from the power supply
immediately and consult your Service Agent.
This may cause an electric shock hazard or damage to the unit!
Dispose of used batteries
carefully and safely.
In the case of a battery being
swallowed by a child please consult
a doctor immediately.
CAUTION concerning the Power Cord
It is recommend that most appliances be placed on a dedicated circuit; that is, a single outlet circuit
which powers only that appliance and has no additional outlets or branch circuits.Check the specification
page of this owner's manual to be certain.
Do not overload wall outlets. Overloaded wall outlets, loose or damaged wall outlets, extension cords,
frayed power cords, or damaged or cracked wire insulation are dangerous.Any of these conditions could
result in electric shock or fire. Periodically examine the cord of your appliance, and if its appearance
indicates damage or deterioration, unplug it, discontinue use of the appliance, and have the cord
replaced with an exact replacement part by authorized service personnel.
Protect the power cord from physical or mechanical abuse, such as being twisted, kinked, pinched,
closed in a door, or walked upon. Pay particular attention to plugs, wall outlets, and the point where the
cord exits the appliance.
Do not remove any covers. High
risk of Electric Shock!
Don’t look directly into the lens
when the projector is in use. Eye
damage may occur!
Do not touch metal parts during
or soon after operation since the
vents will remain very hot!
Power WARNING
Power NOTES
Do not plug-in too many items
into one power outlet.
It may result in overheating of the out-
let and create a fire hazard!
Never touch the power plug with
a wet hand.
This may cause an electric shock
hazard!
Prevent dust from collecting on
the power plug pins or outlet.
This may cause a fire hazard!
Hold the plug firmly when
unplugging. If you pull the cord,
it may be damaged.
This may cause a fire hazard!
Do not use if the power cord or
the plug is damaged or any part
of the power outlet is loose.
This may cause a fire or an electric
shock hazard or damage to the unit!
Ensure the power cord does not
come into contact with sharp or
hot objects.
This may cause a fire or an electric
shock hazard or damage to the unit!
Place the projector where people
will not trip or tread on the power
cord.
This may cause a fire or an electric
shock hazard or damage to the unit!
Do not turn the projector On/Off by plugging-in or unplugging the
power plug to the wall outlet.
(Allow the unit to cool before removing power.)
It may cause mechanical failure or could cause an electric shock.
Do not place anything containing
liquid on top of the projector
such as flowerpot, cup, cosmet-
ics or candle.
This may cause a fire hazard or
damage to the unit!
In case of impact shock or damage
to the projector switch it off and
unplug it from the power outlet and
contact an authorized service center.
This may cause a fire or an electric shock
hazard or damage to the unit!
Do not allow any objects to fall
into the projector.
This may cause an electric shock haz-
ard or damage to the unit!

Safety Instructions
6
Using NOTES
Do not place heavy objects on
top of projector.
This may cause mechanical failure or
personal injury!
Take care not to impact the lens
particularly when moving the
projector.
Do not touch the lens of the pro-
jector. It is delicate and easily
damaged.
Others NOTES
Cleaning NOTES
Contact the Service
Center once a year to
clean the internal
parts of the projector.
Accumulated dust can
cause mechanical failure.
When cleaning the plastic parts such as projector case, unplug the power and
wipe it with a soft cloth. Do not use cleanser, spray water or wipe with a wet
cloth. Especially, never use cleanser (glass cleaner), automobile or industrial
shiner, abrasive or wax, benzene, alcohol etc., which can damage the product.
Use an air spray or soft cloth that is moist with a neutral detergent and water
for removing dust or stains on the projection lens.
It can cause fire, electric shock or product damage (deformation, corrosion and damage).
Cleaning WARNING
Do not use water while cleaning
the projector.
This may cause damage to the pro-
jector or an electric shock hazard.
In the unlikely event of smoke or
a strange smell from the projec-
tor, switch it off, unplug it from
the wall outlet and contact your
dealer or service center.
This may cause a fire or an electric
shock hazard or damage to the unit!
Use an air spray or soft cloth that
is moist with a neutral detergent
and water for removing dust or
stains on the projection lens.
Others WARNING
Do not attempt to service the projector yourself. Contact your dealer or service center.
This may cause damage to the projector and could give an electric Shock as well as invalidating the warranty!
Using WARNING
If the projector is in a room that experiences a gas leak, do not touch
the projector.
It can cause a fire or a burn by a spark.
Always open the lens door or
remove the lens cap when the
projector lamp is on.
Do not use any sharp tools on
the projector as this will damage
the casing.
In the event that an image does
not appear on the screen please
switch it off and unplug it from the
power outlet and contact your
Service Agent.
This may cause a fire or an electric
shock hazard or damage to the unit!
Do not drop the projector or
allow impact shock.
This may cause mechanical failure or
personal injury!
Be sure to unplug if the projector is
not to be used for a long period.
Accumulated dust may cause a fire haz-
ard or damage to the unit!
Only use the specified type
of battery.
This could cause damage to the
remote control.
Do not mix new batteries with old
batteries.
This may cause the batteries to over-
heat and leak.

ENGLISH
Names of parts
7
AUTO Button
It automatically corrects the
position and the shaking of the
image at the RGB mode.
Front remote control sensor
Foot adjusting button
Names of parts
Main Body
* The projector is manufactured using high-precision technology. You may, however, see on the Projector screen tiny black
points and/or bright points (red, blue, or green). This can be a normal result of the manufacturing process and does not
always indicate a malfunction.
Control panel
Lamp cover POWER Button
Focus ring
Zoom ring
Control Panel
MENU Button
Displays or closes menus.
∧/∨/</>Button
Adjusts functions of menus.
INPUT Button
Switches to RGB1, RGB2, Component1,
Component2, HDMI, Video mode.
OK Button
Checks present mode and saves the
change of functions.
POWER Button
Turns ON/OFF the projector.

Names of parts
8
USB
AC IN
Kensington Security
System Connector
VIDEO
HDMI/DVI
RGB OUT
RGB 2 IN
RGB 1 IN
IR (Remote control sensor)
*
Do not block the IR port for normal
operation of remote control.
RS-232C
LAN
AUDIO IN
3D
Button
SLEEP Button
L/R
Button
TIMER Button
Zoom Button
Connecting Part
*When using HDMI/USB connector, if the size of the jack connecting
to the connector is too big, they may not be connected. Please use
standard size jack.
Headphone port
Remote Control
INPUT Button
KEYSTONE Button
MENU Button
AUTO Button
BACK Button
OK, ∧/∨/</>Button
STILL Button
(Functions as the STILL button in
any mode other than DivX.)
BLANK Button
USB Button
Q.MENU Button
PAGE ∧/∨Button
MARK Button
VOLUME ∧/∨Button
RATIO Button
MUTE Button
POWER Button

ENGLISH
Names of parts
9
Operation Indicator
/ Temperature
Indicator
Lamp Indicator
Red
Green(flashing)
Green
Orange(flashing)
Off
Orange
Red(flashing)
Red
Red(flashing)
Green (flashing)
Orange(flashing)
Standby.
Lamp is starting up.
Unit is in operation (Lamp is turned on)
The lamp is cooling (10 seconds).
The projector has been turned off due to excessive heat
(1 minute and 30 seconds).
Power off.
Standby-This mode cools the projector naturally for 4
minutes after it is turned off.
This is the warning message of excessive heat when the
projector is on. Turn the projector off and check the ventilator.
Power has turned off due to problem with the internal
cooling fan. Contact your service center.
Projector lamp is reaching the end of its life and needs
to be replaced with a new lamp.
An error has occurred in the projector lamp. Turn the projector
on again after sufficient amount of time. If this indicator
flashes red again, contact your local service center.
The lamp cover is open.
This indicates Color Wheel Motor or Color Wheel Index problem.
Please contact your local service center.
Projector Status Indicators
* Lamp indicator, operation indicator and temperature indicator at the top of the projector show the user the operating status
of the projector.
Lamp indicators
Operation Indicator
/ Temperature
Indicator

Names of parts
10
Remote Control AAA Battery Owner’s manual
Lens cap and Strap
Computer CablePower Cord
Projection Screen
Lamp
Component Cable HDMI Cable
RS-232CCable
RCA to D-Sub Adapter
Video Cable
Ceiling mount for projector
LAN
Cable
Accessories
CD Owner’s manual
Optional Extras
* Contact your dealer to purchase these items.
* Optional parts can be changed without notice to improve the quality of the product, and new optional parts can be added.
eZ-Net Manager CD
3D Glasses
(DLP-LINK or
DLP-Ready Type)
* Please use M4xL10 MACHINE
SCREW to tighten up the set if
other product than recommended
ceiling mount is used

ENGLISH
Installing and Composition
11
Provide proper ventilation for this projector.
• The projector is equipped with ventilation holes(intake) on
the bottom and ventilation holes(exhaust) on the front. Do
not block or place anything near these holes. Internal heat
build-up may occur, causing picture degradation or dam-
age to the projector.
ꔈ
Do not place the projector on a carpet, rug or other simi-
lar surface. It may prevent a adequate ventilation of the
projector bottom. This product should be mounted to a
wall or ceiling only.
• Never push projector or spill any kind of liquid into the
projector.
• Leave an adequate distance (30 cm or more) around the
projector.
Installing and Composition
Installation Precautions
Place this projector in adequate temperature and humidity conditions.
• Install this projector only in a location where adequate temperature and humidity is available.
Don’t place the projector where it can be covered with dust.
• This may cause overheating of the projector.
This projector is manufactured using high-precision technology. You may, however, see tiny black points and/or bright
points (red, blue or green) that continuously appear on the projector Screen. This is a normal result of the manufacturing
process and does not indicate a malfunction.
To display DTV programs, it is necessary to purchase a DTV receiver (Set-top Box) and connect it to the projector.
The remote control may not work when a lamp equipped with electronic ballast or a three-wavelength lamp is installed.
Replace those lamps with international standard products to use the remote control normally.
Do not obstruct the slots and openings of the projector. This may cause overheating and create a fire hazard.

Installing and Composition
12
Turning on the Projector
1. Connect power cord correctly.
2. Remove the lens cap. If it is left on, it could become deformed due to the heat produced by the projection lamp.
3. Press the POWER button on the remote control or top cover.
(Green operation indicator flashes if lamp is in start-up cycle.)
ꔈAn image will appear after the operation indicator light turns (Green).
ꔈSelect the source mode with the INPUT button.
Turning off the Projector
* Do not disconnect the power cord during the suction/discharge fan in operation. If the power cord is disconnected during the
suction/ discharge fan in operation, it may takes longer to activate the lamp after turning on the power and the lifespan of the
lamp may be shortened.
ꔈIf the operation indicator LED is orange and blinking, the power button on the top cover or on the remote control will not operate.
ꔈThis projector features the Quick Power On/Off function that allows a user to turn it on and off quickly.
1. Press the POWER button on the top cover or remote control.
2. Press the POWER button on the top cover or remote control again to turn off the power.
3. If the operation indicator LED is orange and blinking, do not disconnect(30 sec.) the supply until the operation
indicator LED is lit constantly (orange).
* What is the Quick Power On/Off function?
The projector enters into Standby mode without waiting it is cooled.
When standby mode is maintained for about 4 minutes after turning off the projector, it operates immediately without cooling when
the set is turned on.
Please Press
Power Key again.
iPower off?

ENGLISH
Installing and Composition
13
When an image appears on the screen, check if it is in focus and fits well to the screen.
ꔈTo adjust the focus of the image, rotate the focus ring which is the outer ring on the lens.
ꔈTo adjust the size of the image, rotate the zoom ring which is the inner ring on the lens.
Focus and Position of the Screen Image
To raise or lower the image on the screen, extend or retract the foot at the bottom of the projector
by pushing foot adjusting button as below.
1. While pressing the foot adjusting button, raise or lower the projector to place the screen image in the proper position.
2. Release the button to lock the foot in its new position.
3. Turn the foot at the back left or right to make a fine tune of the length of the projector.
4. After raising the front foot, do not press down on the projector.
Focus ring
Zoom ring
Foot adjusting button

Connection
14
Connection
Connecting to a Notebook PC
* You can connect the projector to a computer with VGA, SVGA, XGA, SXGA, UXGA output.
< How to connect >
1. Connect the RGB 1 IN of the projector and the computer
output port with a computer cable.
2. Connect the AUDIO IN RGB 1 of the projector and the
computer audio output port with an audio cable.
* You may have to change the resolution that your PC exports to
one supported by the projector.. This projector may not support
output from laptops when the laptop screen is on.
Connecting to a Video Source
< How to connect >
1. Connect the VIDEO IN of the projector to the output
jack of the video source with a video cable.
2. Connect the AUDIO IN VIDEO of the projector to the
output jack of the audio source with an audio cable.
* You can connect a VCR, a camcorder or any other compatible video image source to the projector.
Audio Cable
Computer Cable
LAN
<VCR>
Audio Cable
Video Cable
* You can also connect to the RGB 2 IN port.
* Please activate HDMI sound by changing Windows setting on desktop PC
to play sound using PC-HDMI through projector speaker.

ENGLISH
Connection
15
Connecting to a DVD Player
< How to connect a Component source >
1. After connecting the Component cable of DVD Player
to the RGB to Component cable, connect it to the
RGB 1 IN terminal of the projector.
* When connecting the component cable, match the jack
colors with the component cable.(Y=green, PB=blue, PR
=red)
2. Connect the AUDIO IN RGB 1 of the projector to the
output jacks of the audio source with an audio cable.
< How to connect a HDMI source >
1. Connect the HDMI of the projector and the HDMI
output port of the DVD Player with an HDMI cable.
2. Set the DVD Player's resolution to one of the following:
480p(576p)/720p/1080i/1080p mode.
LAN
AUDIO
IN
* Depending on the equipment, the component output jacks (Y, PB, PR) of the DVD Player may be labeled as Y, Pb, Pr/Y, B-Y, R-Y/Y, Cb, Cr.
<DVD Player>
Component cable
Component cable
Connecting to a D-TV Set-Top Box
< How to connect a HDMI source >
1. Connect the HDMI of the projector and the HDMI output
port of the DTV set-top box with an HDMI cable.
2. Set the DTV receiver's resolution to one of the following:
480p(576p)/720p/1080i/1080p mode.
LAN
AUDIO
IN
* To receive Digital TV (D-TV) programs, it is necessary to purchase a D-TV receiver (Set-Top Box) and connect it to
the projector.
* Please refer to the owner's manual of the D-TV Set-Top Box for the connection between the projector and D-TV
Set-Top Box.
< How to connect a Component source >
1. Connect the D-TV Set-Top Box Component cable with
RGB to Component cable and than connect it to
RGB 1 IN of the projector.
* When connecting the component cable, match the jack
colors with the component cable.(Y=green, PB=blue, PR
=red)
2. Connect the AUDIO IN RGB 1 of the projector to the
output jacks of the audio source with an audio cable.
LAN
AUDIO
IN
<D-TV Set-Top Box>
<D-TV Set-Top Box>
RGB to Component
Cable
RGB to Component
Cable
LAN
AUDIO
IN
<DVD Player>
HDMI Cable
HDMI Cable
Audio Cable
Audio Cable
* You can also connect to the RGB 2 IN port.
Component cable

Connection
16
3D Video function.
* 3D image is a technology that utilizes parallax of both eyes to make an image to be perceived solid.
Before watch 3D image
►Do not watch 3D image at a close distance for a long time. It might impair visual acuity.
►It might cause dizziness if one watch projector screen or play video game while wearing 3D glasses for a
long time.
►Please refrain from watching it if you are one of the following: a pregnant, an elderly, one who has a weak
heart, one who often get nausea, or one who is drunk.
►3D image can be misunderstood as a reality and cause astonishment or excitement.
►Do not put objects that are easily broken or can cause harm when watching 3D image.
►3D image can be misunderstood as a reality and cause damage to the objects or human.
►Please prevent children under 5 from watching 3D image. It might hinder development of visual acuity.
►Warning of photosensitive seizure.
Some people might experience seizure when watching a specific image in the video game, a blinking image
or an image with specific pattern. If you or your family have history of epilepsy or seizure, please consult with
doctor before watch 3D image. If you feel the following symptoms while watching 3D image, please stop
watching right away and take a rest.
- Fuzz feeling, sight change, instability in eye or face, unconscious motion, convulsions, loss of consciousness,
confusion, loss of a sense of direction, or nausea. If one or more of these persist, please consult with doctor.
Following precautionary measure might reduce the risk of seizure due to watching 3D image.
- Take 5 to 15 minute rest after an hour of watching.
- Watch it after eyesight correction if each eye has different vision.
- Watch it on the line of eye and at the front side.
- If you feel headache, fatigue, or nausea, please stop watching and take a rest.
- Do not watch for a long time when sleepy, tired or sick.
While watching 3D image
Warning
While watching 3D image
Caution
►Please put extra care when children are watching
Check these when watching 3D image
►Please watch the image within effective angle and distance.
►It might not be seen in 3D if it is out of effective angle or distance. It will not be seen when lay down.
►There might be more image overlap during initial operation after turning on the power. It needs time for
optimization.
►If you stare other spot and gaze back to 3D image, you might need some time to watch it in 3D.
►If you watch it under fluorescent light (50Hz ~ 60Hz), trichromatic light, or near a window, there can be
blinking of the image. In this case, use curtains to block the sunlight and darken the lighting.
►Use DLP-LINK(DLP Ready) Type 3D glasses.
►If there are obstacles between the projector and 3D glasses, 3D image might not be fully appreciated.
►Please install the projector as far as possible from other devices.

ENGLISH
Connection
17
1. While watching 3D image from the projector, press a button on the glasses.
2. When it is pressed, it will blink and synchronize with 3D image.
(Blinking is operating method of DLP-LINK Type 3D glasses and it varies by its variety.)
3. If it blinks or has other trouble while watching, turn off the light in the room. Please contact seller
for questions regarding 3D glasses.
How to use DLP-LINK(DLP-Ready) Type 3D glasses
To watch 3D image
* Effective watching angle: 9° up and down and left and right.
Suggested watching distance: 5m ~ 10m
5 m ~ 10 m
▪Some menu might not work while watching 3D image
▪Choose correct and supported 3D image format to fully enjoy 3D image.
* 3D watching condition is based on a darkroom
1. Play contents produced in 3D image. Please refer the following for 3D image input support format.
Signal Resolution Vertical Frequency(Hz) Playable 3D video format
HDMI
720p 1280x720
60 HDMI(V1.4 with HDMI 3D) Frame Packing, Side by Side,
Top & Bottom, Frame Sequential
50 HDMI(V1.4 with HDMI 3D) Frame Packing, Side by Side,
Top & Bottom
1080i 1920x1080 50/60 Side by Side, Top & Bottom
1080p 1920x1080
24 HDMI(V1.4 with HDMI 3D) Frame Packing, Side by Side,
Top & Bottom
60 Side by Side, Top & Bottom, Frame Sequential
30/50 Side by Side, Top & Bottom.
HDMI-PC
RGB-PC XGA 1024x768 60 Side by Side, Top & Bottom, Frame Sequential
ꔈTo play 3D image input in frame packing format, media contents and player should support HDMI
(1.4 version 3D) frame packing format.
ꔈImage input in HDMI (1.4 version 3D) frame packing format is automatically converted into 3D image.

Connection
18
SCREEN SIZE OF 2D VIDEO
16:9
THE REST
SCREEN SIZE OF 3D VIDEO
16:9
4:3
2. RGB-PC should press auto correction button on remote controller before watch 3D image. (Please refer “PC
connection”on page 17 for HDMI-PC sound output)
3. When watching 3D image with HDMI-PC or RGB-PC, non 3D part (wall paper, explorer, etc) will be shown in dual phase
(overlap phenomenon). So it needs to play the image in “full screen” mode of the video player.
3D part
Non 3-D part
ABCDFG
ABCDFG
ABCDFG
ABCDFG
Full screen
3D part
4. Press 3D image button
5. Press <, > button to select same shape on the projector screen and wear the 3D glasses.
To turn on 3D Mode, select this icon.
ꔁMove ꔉOK ꕉExit
Top & Bottom Side by Side Frame Sequential
6. While watching 3D image from the projector, press a button on the glasses.
7. You can convert left/right image by pressing L/R selection button. Select the image that is seen better.
ꔈPressing 3D image button while watching 3D image will convert to image to normal.
8. If the screen size is 16:9 in 2D video, 3D video is projected as 16:9, and for the rest of the screen sizes other than 16:9
in 2D video, it is projected as 4:3 in 3D video.
• In 3D video, the screen size cannot be adjusted.
Other manuals for BX327
2
Table of contents
Languages:
Other LG Projector manuals