LG LFCS25663 series User manual

Model Name/Nombre de Modelo/Nom du Modèle **=color number/número de color/numéro de couleur
LFCS25663*
GM63BGS
P/No. MFL6730660367
ENGLISH ESPAÑOL
www.lg.com
OWNER’S MANUAL
BOTTOM FREEZER
REFRIGERATOR
Please read this manual carefully before operating
your set and retain it for future reference.
MANUAL DE USUARIO
REFRIGERADOR
CON CONGELADOR INFERIOR
Lea detenidamente este manual antes
de empezar a utilizar el refrigerador y guárdelo
como referencia para el futuro.
FRANÇAIS
MANUEL D’UTILISATEUR
RÉFRIGÉRATEUR
A CONGÉLATEUR INFÉRIEUR
Veuillez lire ce manuel en entier avant de mettre
en marche l’unité et conservez-le à portée de la
main pour le consulter à tout moment.

1
WARRANTY
LG ELECTRONICS U.S.A., INC.
LG REFRIGERATOR LIMITED WARRANTY - U.S.A.
Should your LG Refrigerator (“Product”) fail due to a defect in materials or workmanship under normal home use, during
the warranty period set forth below, LG will at its option repair or replace the product. This limited warranty is valid only to
the original retail purchaser of the product and applies only when purchased and used within the United States including
U.S. Territories. Proof of original retail purchase is required to obtain warranty service under this limited warranty.
WARRANTY PERIOD
Refrigerator Sealed System
(Condenser, Dryer, Connecting Tube, Refrigerant and
Evaporator) Linear Compressor
One (1) year from the date
of original retail purchase. One (1) year from the date
of original retail purchase. Seven (7) years from
the date of original retail
purchase.
Ten (10) years from the date of
original retail purchase.
Parts and Labor
(internal/functional parts
only)
Parts and Labor Parts only
(Consumer will be charged
for labor)
Part only
(Consumer will be charged for
labor)
Noises associated with normal operation and failure to follow instructions found in the use and care and installation guides or
operating the unit in an unsuitable environment will not be covered under this warranty.
Replacement products and parts are warranted for the remaining portion of the original warranty period or ninety (90) days,
whichever is greater.
Replacement products and parts may be new or remanufactured.
THIS WARRANTY IS IN LIEU OF ANY OTHER WARRANTY, EXPRESS OR IMPLIED, INCLUDING WITHOUT LIMITATION,
ANY WARRANTY OF MERCHANTABILITY OR FITNESS FOR A PARTICULAR PURPOSE. TO THE EXTENT ANY IMPLIED
WARRANTY IS REQUIRED BY LAW, IT IS LIMITED IN DURATION TO THE EXPRESS WARRANTY PERIOD ABOVE. NEITHER
THE MANUFACTURER NOR ITS U.S. DISTRIBUTOR SHALL BE LIABLE FOR ANY INCIDENTAL, CONSEQUENTIAL, INDIRECT,
SPECIAL, OR PUNITIVE DAMAGES OF ANY NATURE, INCLUDING WITHOUT LIMITATION, LOST REVENUES OR PROFITS,
OR ANY OTHER DAMAGE WHETHER BASED IN CONTRACT, TORT, OR OTHERWISE. Some states do not allow the exclusion
or limitation of incidental or consequential damages or limitations on how long an implied warranty lasts, so the above exclusion
or limitation may not apply to you. This warranty gives you specific legal rights and you may also have other rights that vary from
state to state.
THIS LIMITED WARRANTY DOES NOT COVER:
1. Service trips to deliver, pick up, install, or repair the
product; instruct the customer on operation of the
product; repair or replace fuses or correct wiring or
plumbing, or correction of unauthorized repairs/
installation.
2. Failure of product to perform during power failures and
interruptions or inadequate electrical service.
3. Damage caused by leaky or broken water pipes, frozen
water pipes, restricted drain lines, inadequate or
interrupted water supply or inadequate supply of air.
4. Damage resulting from operating the product in a
corrosive atmosphere or contrary to the instructions
outlined in the product owner’s manual.
5. Damage to the product caused by accidents, pests and
vermin, lightning, wind, fire, floods, or acts of God.
6. Damage resulting from misuse, abuse, improper
installation, repair, or maintenance. Improper repair
includes use of parts not approved or specified by LG.
7. Damage or failure caused by unauthorized modification
or alteration, or if it is used for other than the intended
purpose, or any water leakage where the unit was not
properly installed.
8. Damage or failure caused by incorrect electrical current,
voltage, or plumbing codes, commercial or industrial
use, or use of accessories, components, or consumable
cleaning products that are not approved by LG.
9. Damage caused by transportation and handling,
including scratches, dents, chips, and/or other damage
to the finish of your product, unless such damage
results from defects in materials or workmanship and
is reported within one (1) week of delivery (Call: 1-800-
243-0000).
10.Damage or missing items to any display, open box,
discounted, or refurbished product.
11. Products with original serial numbers that have been
removed, altered, or can not be readily determined.
Model and Serial numbers, along with original retail
sales receipt, are required for warranty validation.
12.Increases in utility costs and additional utility
expenses.
13.Replacement of light bulbs, filters, or any consumable
parts.
14.Repairs when your product is used in other than normal
and usual household use (e.g. commercial use, offices,
and recreational facilities) or contrary to the instructions
outlined in the product owner’s manual.
15.Costs associated with removal of your product from your
home for repairs.
16.The removal and reinstallation of the product if it is
installed in an inaccessible location or is not installed
in accordance with published installation instructions,
including LG’s owner’s and installation manuals.
17. Shelves, door bins, drawers, handles, accessories, and
other parts besides those that were originally included
with this particular model.
The cost of repair or replacement under these excluded circumstances shall be borne by the consumer.
For complete warranty details and customer assistance,
please call or visit our website:
Call 1-800-243-0000 (24 hours a day, 365 days a year) and
select the appropriate option from the menu, or visit our website
at www.lg.com
Or by mail: LG Customer Information Center:
P. O. Box 240007, 201 James Record Road Huntsville, Alabama
35813
ATTN: CIC
Write your warranty information below:
Product Registration Information:
Model:
Serial Number:
Date of Purchase:

2
GARANTÍA
LG ELECTRONICS U.S.A., INC.
FRIGORÍFICO LG GARANTÍA LIMITADA - U.S.A.
En caso de que su Frigorífico LG (“Producto”) falle por defectos de material o mano de obra bajo circunstancias de uso
doméstico normal durante el período de garantía descrito a continuación, LG, a su criterio, reparará o reemplazará el
producto. Esta garantía limitada es sólo válida para el comprador original del producto y se aplicará sólo cuando la compra
y el uso se haya realizado dentro de los Estados Unidos, incluyendo los territorios de EE.UU. Para solicitar un servicio
cubierto por esta garantía limitada, será necesario presentar el comprobante de compra original.
PERÍODO DE GARANTÍA
Frigorífico (Condensador, Filtro desecante, Tubo conector,
Refrigerante y Evaporador) Compresor lineal
Un (1) año a partir de la
fecha original de compra.
Un (1) año a partir de la
fecha original de compra.
Siete (7) años a partir de la
fecha original de compra.
Diez (10) años a partir de la fecha
original de compra.
Piezas y mano de obra
(sólo piezas internas/
funcionales)
Piezas y mano de obra Sólo piezas (Se le
cobrará mano de obra al
consumidor)
Sólo piezas (Se le cobrará mano
de obra al consumidor)
Ruidos asociados con operaciones y fallas normales encontradas en las instrucciones de uso y cuidado y las guías de instalación u
operación de la unidad en un ambiente inapropiado no seran cubiertas bajo esta garantía.
Los productos y piezas reemplazados están garantizados por la parte que reste del período original de la garantía o por noventa
(90) días, el período que sea más largo de los dos.
Los productos y piezas reemplazados pueden ser nuevos o reacondicionados.
ESTA GARANTÍA SUSTITUYE A CUALQUIER OTRA GARANTÍA, EXPRESA O IMPLÍCITA, INCLUYENDO, SIN LIMITACIONES,
CUALQUIER GARANTÍA DE COMERCIABILIDAD O ADECUACIÓN A UN FIN PARTICULAR. HASTA EL EXTREMO PERMITIDO
POR LA LEY PARA UNA GARANTÍA IMPLÍCITA, LA DURACIÓN SE LIMITA AL PERIODO DE GARANTÍA EXPRESA INDICADO
ANTERIORMENTE. NI EL FABRICANTE NI EL DISTRIBUIDOR DE EE.UU. SERÁN RESPONSABLES DE CUALQUIER DAÑO
EXTRAORDINARIO POR MOTIVOS AJENOS,INDIRECTOS, ESPECIALES, O DAÑOS PUNITIVOS DE CUALQUIER NATURALEZA,
INCLUYENDO SIN LIMITACIONES, PÉRDIDAS DE BENEFICIOS, O CUALQUIER OTRO DAÑO YA SEA MENCIONADO EN EL
CONTRATO, ACUERDO, O CUALQUIER OTRO SUPUESTO. Algunos estados no permiten la exclusión o limitación de daños
extraordinarios o ajenos o limitaciones sobre la duración de una garantía implícita, por lo tanto la exclusión o limitación citada
arriba puede que no se le aplique a usted. Esta garantía le otorga derechos legales específicos y podría tener otros derechos que
variarán dependiendo del estado.
ESTA GARANTÍA LIMITADA NO CUBRE:
1. Desplazamientos del servicio para entregar, recoger, instalar
o reparar el producto, instruir al cliente en el funcionamiento
del producto, reparar o reemplazar fusibles o corregir
cableados o fontanería o para realizar correcciones de
reparaciones o instalaciones no autorizadas.
2. Averías de funcionamiento del producto durante cortes
eléctricos e interrupciones del servicio eléctrico.
3. Daños causados por tuberías de agua con fugas o rotas,
tuberías de agua congeladas, conductos de drenaje
bloqueados, suministros de agua inapropiados o
interrumpidos o suministros de aire inadecuados.
4. Daños provocados por un uso del producto en una atmósfera
corrosiva o contraria a las instrucciones enmarcadas en el
manual del propietario del producto.
5. Daños al producto provocados por accidentes, plagas y
parásitos, rayos, viento, fuego, inundaciones o actos de la
Naturaleza.
6. Daños provocados por un uso indebido, abuso, instalación,
reparación o mantenimiento inadecuados. Una reparación
inadecuada que incluya piezas no aprobadas o especificadas
por LG.
7. Daños o fallos provocados por una modificación o alteración
no autorizada, o por un uso más allá de su propósito
o cualquier fuga de agua causada por una incorrecta
instalación de la unidad.
8. Daños o fallos provocados por una incorrecta corriente
eléctrica, voltaje, normativas de fontanería, uso comercial o
industrial, o uso de accesorios, componentes, o productos
de limpieza desechables que no estén aprobados por
LG.
9. Daños provocados por transporte y manipulación,
incluyendo arañazos, limaduras, astillados y/o cualquier
otro daño al acabado de su producto, a menos que tales
daños sean producto de defectos en los materiales o en la
fabricación y sea informado en el plazo de una (1) semana
desde su entrega (Llame al: 1-800- 243-0000).
10. Daños u objetos desaparecidos de cualquier producto de
presentación, con la caja abierta o productos rebajados o
reacondicionados.
11. Productos cuyo número de serie original haya sido retirado,
alterado o no sea legible con claridad. Para la validación de
la garantía serán necesarios el recibo de compra original, el
número de serie y el número del modelo.
12. Incrementos de los costes de utilidad y gastos de utilidad
adicionales.
13. Sustitución de bombillas, filtros o cualquier otra pieza
desechable.
14. Reparaciones cuando su producto haya sido usado de forma
diferente al uso doméstico normal ( p.ej. uso comercial, en
oficinas y lugares de ocio) o contrario a las instrucciones
enmarcadas en el manual del propietario del producto.
15. Costes asociados a la retirada del producto de su hogar
para reparaciones.
16. La retirada y reinstalación del producto si se encuentra
instalado en un lugarinaccesible o no está instalado de
acuerdo con lo publicado en el manual de instalación del
producto, incluyendo los manuales LG del propietario y de
instalación.
17. Las estanterías, cestas de las puertas, cajones, manillas, y
otras piezas a parte de aquellas que venían incluidas con
este modelo en particular.
El costo de la reparación o sustitución bajo estas circunstancias excluidas será asumido por el cliente.
Para obtener una información más detallada de la garantía y
asistencia al cliente, Por favor llame o visite nuestra página web:
Llame al 1-800-243-0000 (24 horas al día, 365 días al año) y
seleccione la opción apropiada del menú o visite nuestra página
web en: www.lg.com
O por correo: Centro de información al cliente LG:
P. O. Box 240007, 201 James Record Road Huntsville, Alabama
35813
ATTN: CIC
Escriba la información de su garantía debajo:
Información de registro del producto:
Modelo:
Número de serie:
Fecha de la compra:

3
WARRANTY
LG ELECTRONICS CANADA, INC.
LG REFRIGERATOR LIMITED WARRANTY - Canada
WARRANTY: Should your LG Refrigerator (“Product”) fail due to a defect in material or workmanship under normal home use during
the warranty period set forth below, LG Canada will at its option repair or replace the Product upon receipt of proof of original retail
purchase.
This warranty is valid only to the original retail purchaser of the product and applies only to a Product distributed in Canada by LG
Canada or an authorized Canadian distributor thereof. The warranty only applies to Products located and used within Canada.
WARRANTY PERIOD: (Note: If the original date of purchase can not be verified,
the warranty will begin sixty (60) days from the date of manufacture)
Refrigerator/Freezer
Sealed System
(Condenser, Dryer, Connecting Tube, Refrigerant and
Evaporator)
Linear Compressor
One (1) year from the date of
original retail purchase.
One (1) year from the date
of original retail purchase.
Seven (7) years from the date
of original retail purchase.
Ten (10) years from the date of
original retail purchase.
Parts and Labor
(internal/functional parts
only)
Parts and Labor Parts only
(Consumer will be charged
for labor)
Part only
(Consumer will be charged for
labor)
Noises associated with normal operation and failure to follow instructions found in the use and care and installation guides or
operating the unit in an unsuitable environment will not be covered under this warranty.
Replacement products and parts are warranted for the remaining portion of the original warranty period or ninety (90) days,
whichever is greater.
Replacement products and parts may be new or remanufactured.
LG Authorized Service Center warranties their repair work for thirty (30) days.
LG CANADA’S SOLE LIABILITY IS LIMITED TO THE WARRANTY SET OUT ABOVE. EXCEPT AS EXPRESSLY PROVIDED
ABOVE, LG CANADA MAKES NO AND HEREBY DISCLAIMS ALL OTHER WARRANTIES AND CONDITIONS RESPECTING THE
PRODUCT, WHETHER EXPRESS OR IMPLIED, INCLUDING, BUT NOT LIMITED TO, ANY IMPLIED WARRANTY OR CONDITION
OF MERCHANTABILITY OR FITNESS FOR A PARTICULAR PURPOSE, AND NO REPRESENTATIONS SHALL BE BINDING ON
LG CANADA. LG CANADA DOES NOT AUTHORIZE ANY PERSON TO CREATE OR ASSUME FOR IT ANY OTHER WARRANTY
OBLIGATION OR LIABILITY IN CONNECTION WITH THE PRODUCT. TO THE EXTENT THAT ANY WARRANTY OR CONDITION
IS IMPLIED BY LAW, IT IS LIMITED TO THE EXPRESS WARRANTY PERIOD ABOVE. LG CANADA, THE MANUFACTURER OR
DISTRIBUTOR SHALL NOT BE LIABLE FOR ANY INCIDENTAL, CONSEQUENTIAL, SPECIAL, DIRECT OR INDIRECT DAMAGES,
LOSS OF GOODWILL, LOST PROFITS, PUNITIVE OR EXEMPLARY DAMAGES OR ANY OTHER DAMAGE, WHETHER ARISING
DIRECTLY OR INDIRECTLY FROM ANY CONTRACTUAL BREACH, FUNDAMENTAL OR OTHERWISE, OR FROM ANY ACTS OR
OMISSIONS, TORT, OR OTHERWISE. This warranty gives you specific legal rights. You may have other rights which may vary
from province to province depending on applicable provincial laws. Any term of this warranty that negates or varies any implied
condition or warranty under provincial law is severable where it conflicts with provincial law without affecting the remainder of
this warranty’s terms.
THIS LIMITED WARRANTY DOES NOT COVER:
1. Service trips to deliver, pick up, install, or repair the product;
instruct the customer on operation of the product; repair or
replace fuses or correct wiring or plumbing, or correction of
unauthorized repairs/installation.
2. Failure of product to perform during power failures and
interruptions or inadequate electrical service.
3. Damage caused by leaky or broken water pipes, frozen water
pipes, restricted drain lines, inadequate or interrupted water
supply or inadequate supply of air.
4. Damage resulting from operating the product in a corrosive
atmosphere or contrary to the instructions outlined in the
product owner’s manual.
5. Damage to the product caused by accidents, pests and vermin,
lightning, wind, fire, floods, or acts of God.
6. Damage resulting from misuse, abuse, improper installation,
repair, or maintenance. Improper repair includes use of parts not
approved or specified by LG.
7. Damage or failure caused by unauthorized modification or
alteration, or if it is used for other than the intended purpose, or
any water leakage where the unit was not properly installed.
8. Damage or failure caused by incorrect electrical current, voltage,
or plumbing codes, commercial or industrial use, or use of
accessories, components, or consumable cleaning products that
are not approved by LG.
9. Damage caused by transportation and handling, including
scratches, dents, chips, and/or other damage to the finish
of your product, unless such damage results from defects in
materials or workmanship and is reported within one (1) week of
delivery.
10. Damage or missing items to any display, open box, discounted,
or refurbished product.
11. Products with original serial numbers that have been removed,
altered, or can not be readily determined. Model and Serial
numbers, along with original retail sales receipt, are required for
warranty validation.
12. Increases in utility costs and additional utility expenses.
13. Replacement of light bulbs, filters, or any consumable parts.
14. Repairs when your product is used in other than normal
and usual household use (e.g. commercial use, offices, and
recreational facilities) or contrary to the instructions outlined in
the product owner’s manual.
15. Costs associated with removal of your product from your home
for repairs.
16. The removal and reinstallation of the product if it is installed in
an inaccessible location or is not installed in accordance with
published installation instructions, including LG’s owner’s and
installation manuals.
17. Shelves, door bins, drawers, handles, accessories, and other
parts besides those that were originally included with this
particular model.
The cost of repair or replacement under these excluded circumstances shall be borne by the consumer.
For complete warranty details and
customer assistance, please call or visit
our website: Call 1-888-542-2623 (24 hours
a day, 365 days a year) and select the
appropriate option from the menu, or visit our
website at www.lg.com
Write your warranty information below:
Product Registration Information:
Model:
Serial Number:
Date of Purchase:

4
GARANTIE
LG ELECTRONICS CANADA, INC.
GARANTIE LIMITÉE DES RÉFRIGÉRATEURS LG - Canada
GARANTIE : Si, au cours de la période de garantie indiquée ci-dessous, votre réfrigérateur LG (“Produit”) tombe en panne suite à un
défaut de fabrication ou de main d’oeuvre dans le cadre d’une utilisation normale, LG Canada s’engage à réparer ou à remplacer le
Produit à sa discrétion, sur présentation d’une preuve d’achat d’origine. Cette garantie ne s’applique qu’à l’acheteur initial du Produit et
uniquement si celui-ci a été acheté au Canada auprès de LG Canada ou d’un distributeur agréé au Canada. La garantie ne s’applique
que si le Produit est situé et utilisé au Canada.
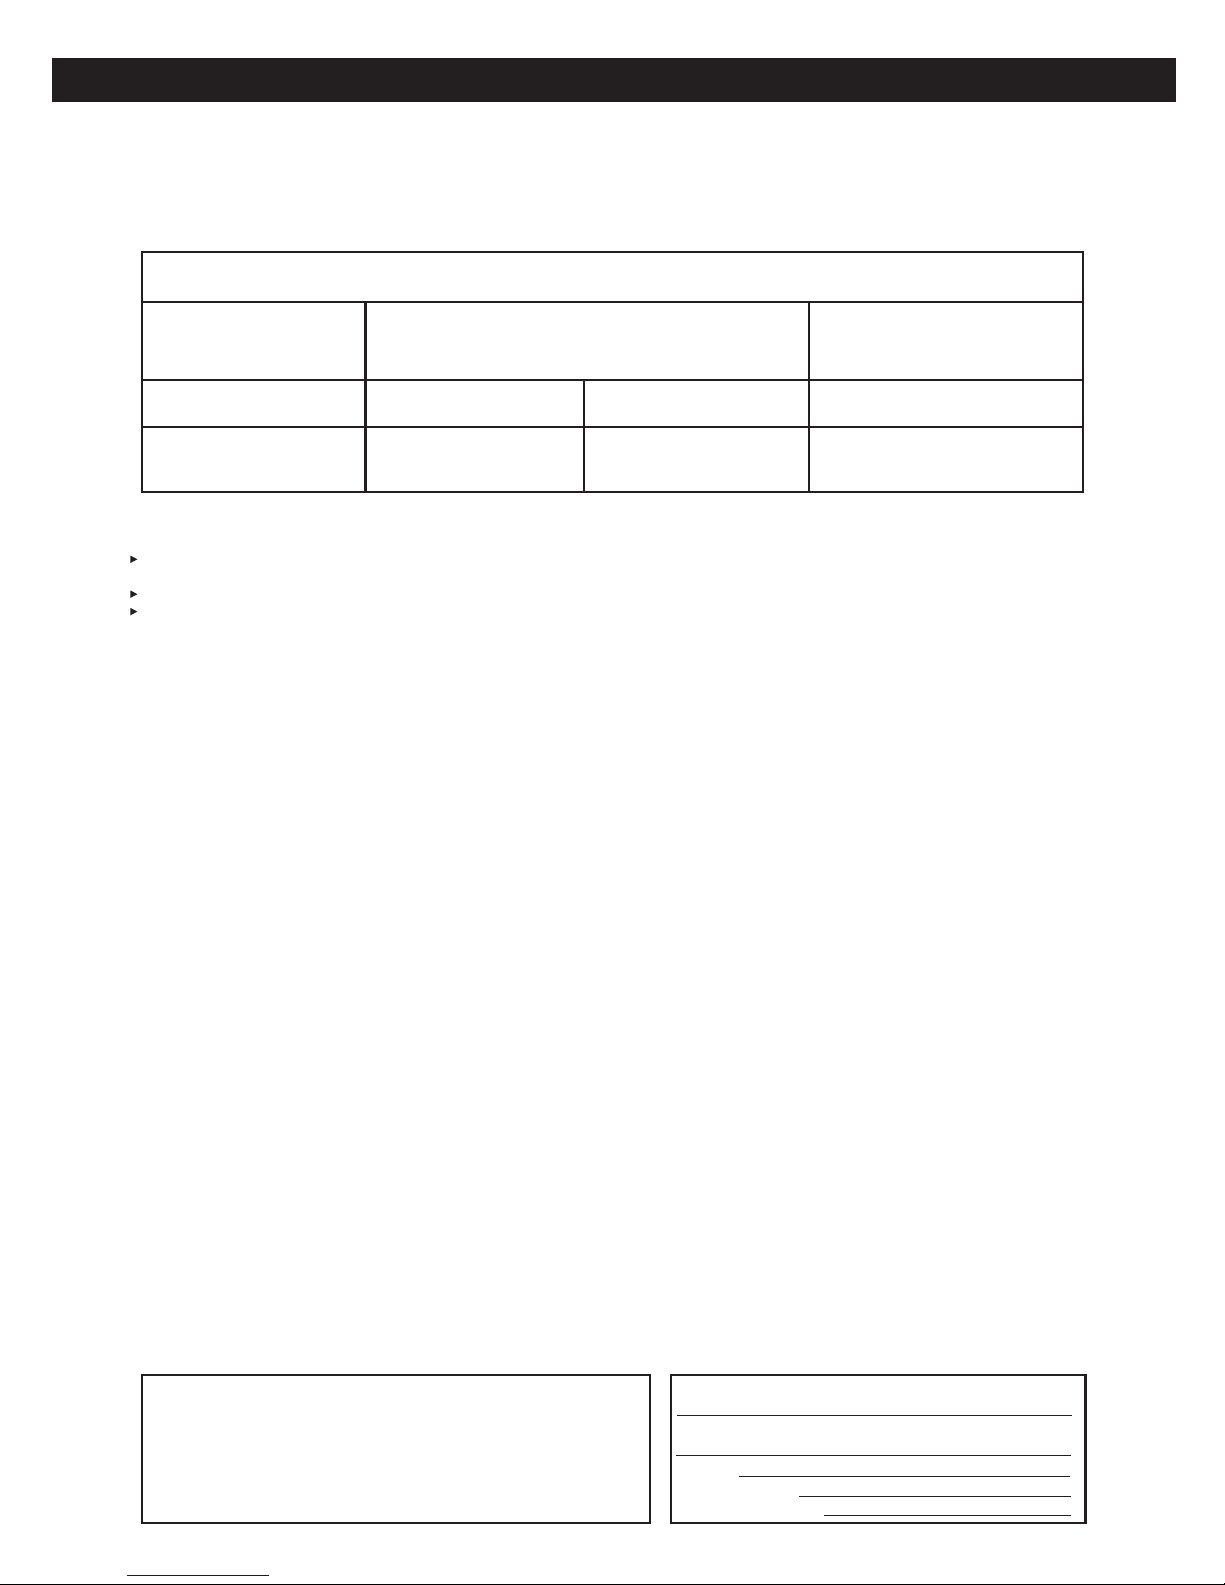
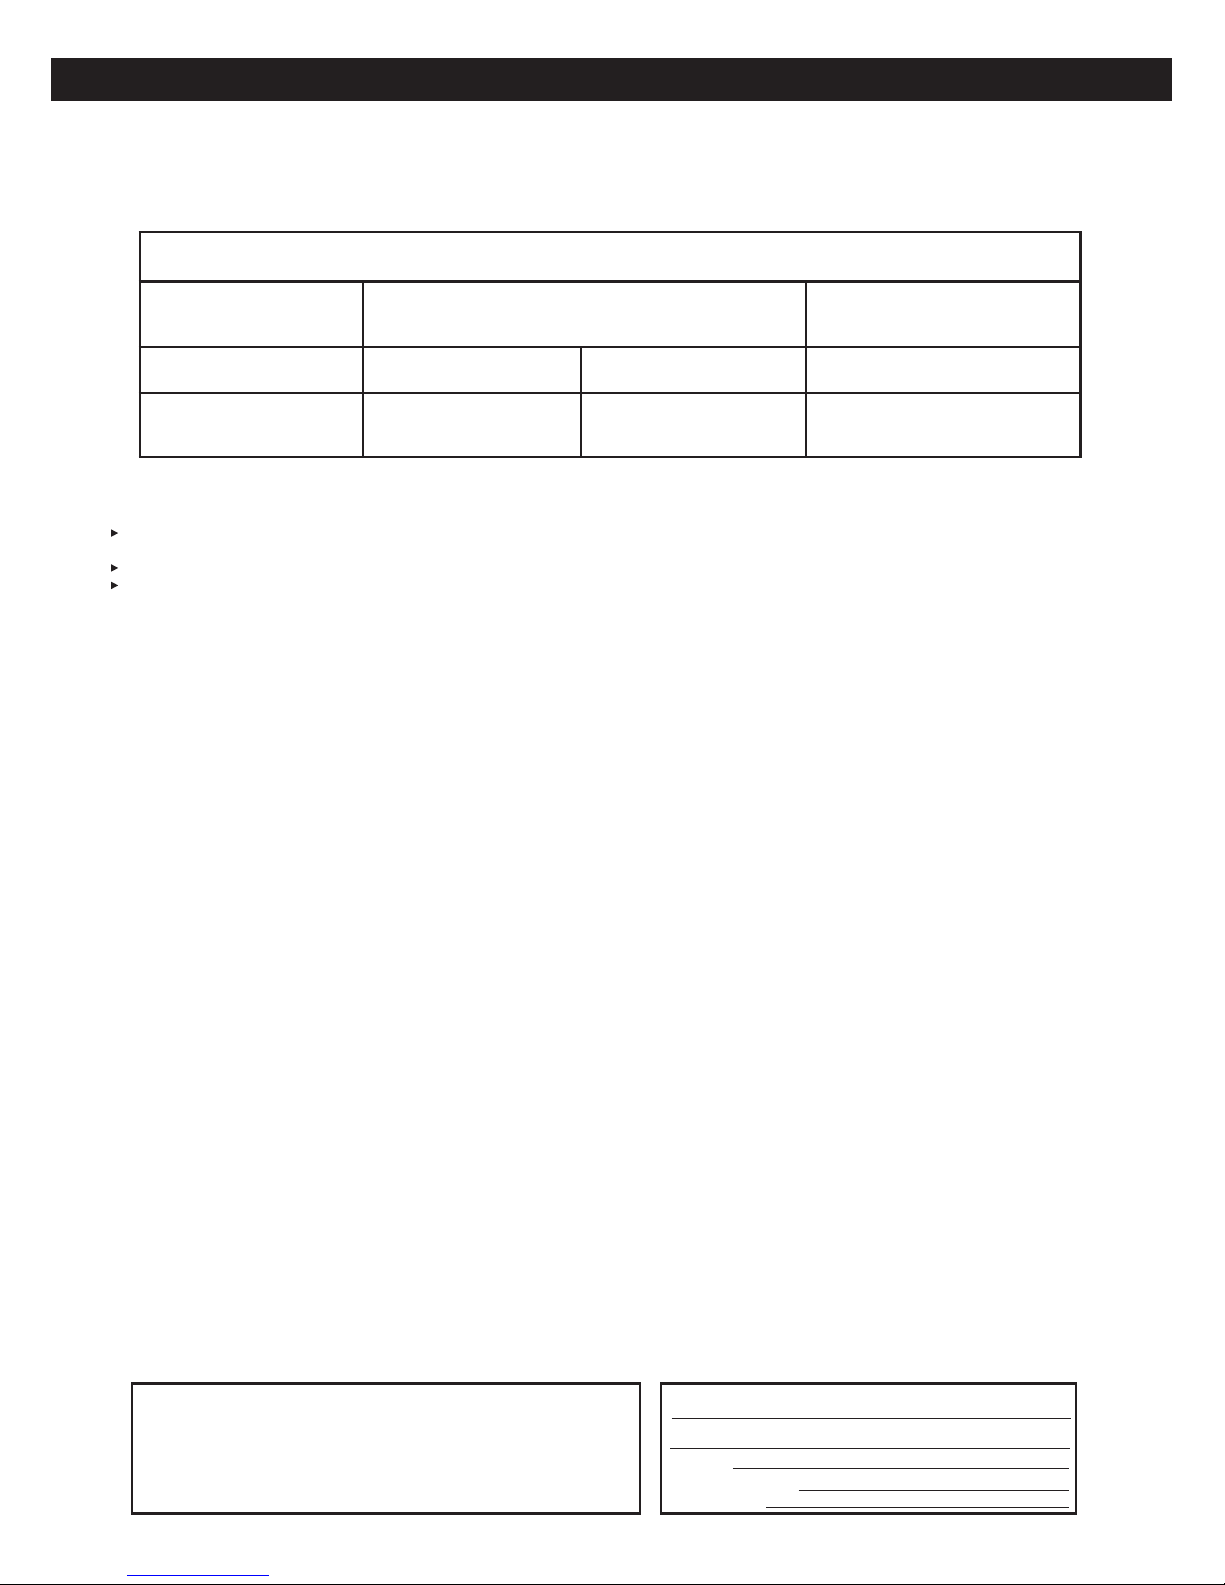
PÉRIODE DE GARANTIE : (Remarque : dans le cas où la date d’achat initial ne peut pas être vérifiée,
la garantie commence soixante (60) jours après la date de fabrication).
Réfrigérateur/Congélateur Système scellé
(condensateur, sèche-linge, tuyau de raccordement,
réfrigérant et évaporateur) Compresseur linéaire
Un (1) an à compter de la date
d’achat initial
Un (1) an à compter de la date
d’achat initial
Sept (7) ans à compter de la
date d’achat initial.
Dix (10) ans à compter de la date
d’achat initial.
Pièces et main-d’oeuvre
(pièces internes/
fonctionnelles uniquement)
Pièces et main-d’oeuvre Pièces uniquement
(la main-d’oeuvre sera
facturée au client)
Pièces uniquement
(la main-d’oeuvre sera facturée au
client)
Le bruit lié au fonctionnement normal, ne respecter pas les instructions dans le Guide d'utilisation et d’entretien et la pan ne
fonctionnelle de cet appareil pour une utilisation dans un environnement inadapté, ne être pas couvertes par cette garantie.
Les pièces et Produits de rechange sont garantis pour la durée restante de la garantie initiale ou quatre-vingt-dix (90) jours, la durée
la plus longue prévalant.
Les pièces et Produits de rechange peuvent être neufs ou réusinés.
Le centre de réparation agréé LG garantit ses travaux de réparation trente (30) jours.
CETTE GARANTIE LIMITÉE NE COUVRE PAS:
1. Les déplacements des techniciens pour livrer, reprendre, ou installer le
Produit, expliquer au client l’utilisation du Produit ; réparer ou remplacer
les fusibles, corriger les branchements d’électricité ou de plomberie, ou
corriger les réparations et installations non autorisées.
2. Le non-fonctionnement du Produit en cas de pannes ou coupures
d’électricité, ou encore d’installation électrique inadaptée.
3. Les dégâts causés par une fuite, une rupture ou un gel des tuyaux d’arrivée
d’eau, un encombrement du circuit d’évacuation, une alimentation en eau
interrompue ou inadéquate, ou une arrivée d’air inadaptée.
4. Les dégâts résultant de l’utilisation du Produit dans une atmosphère
corrosive ou contraire aux instructions détaillées dans le manuel
d’utilisation du Produit.
5. Les dégâts causés au Produit par des accidents, des insectes nuisibles,
des orages, des tempêtes, des incendies, des inondations ou des
catastrophes naturelles.
6. Les dégâts résultant d’une utilisation inappropriée, d’un usage abusif,
ou d’une installation, réparation ou maintenance inadaptée du Produit.
La réparation inadaptée inclut l’utilisation de pièces non approuvées ou
spécifiées par LG Canada.
7. Les dégâts ou les pannes provoquées par une modification ou altération
non autorisée, par une utilisation autre que pour l’objet prévu, ou par une
fuite d’eau due à une mauvaise installation de l’appareil.
8. Les dégâts ou les pannes provoqués par un courant électrique, une
tension ou des codes de plomberie incorrects, une utilisation commerciale
ou industrielle, ou l’utilisation d’accessoires, de composants ou de
Produits de nettoyage consommables qui ne sont pas approuvés par LG
Canada.
9. Les dégâts provoqués par le transport et la manipulation, notamment les
éraflures, bosses, entailles et/ou tout autre dommage causé à la finition
du Produit, sauf si ces dommages sont dus à un défaut de fabrication
ou de main-d’oeuvre et sont signalés dans un délai d’une (1) semaine
suivant la livraison.
10. Les dégâts ou pièces manquantes en cas de Produit d’exposition, déjà
ouvert, faisant l’objet d’une remise ou réusiné.
11. Les Produits dont le numéro de série d’origine a été enlevé, modifié ou est
illisible. Les numéros de modèle et de série, ainsi que la facture d’origine
du Produit sont nécessaires pour valider la garantie.
12. L’augmentation du coût des services publics et des frais supplémentaires
liés à ces derniers.
13. Le remplacement des ampoules, filtres ou de tout autre élément
consommable.
14. Les réparations lorsque votre Produit est utilisé dans des conditions autres
qu’une utilisation domestique normale et habituelle (y compris, mais
sans se limiter à, une utilisation dans des commerces, des bureaux et
des structures d’accueil) ou contraires aux instructions décrites dans le
manuel d’utilisation du Produit.
15. Les coûts associés à l’enlèvement du Produit de votre domicile à des fins
de réparation.
16. L’enlèvement et la réinstallation du Produit s’il est installé dans un endroit
inaccessible ou s’il n’est pas installé conformément aux instructions
d’installation publiées, notamment dans les manuels d’installation et
d’utilisation.
17. Les clayettes, bacs, tiroirs, poignées, et accessoires du Produit. Sont
également exclues les pièces autres que celles fournies d’origine avec
le Produit.
Tous les coûts associés aux circonstances exclues ci-dessus seront assumés par le consommateur.
Pour obtenir tous les détails sur la garantie et accéder au service à
la clientèle, téléphonez-nous visitez notre site Web:
Composez le 1-888-542-2623 (24 h sur 24, 365 jours par année)
et
Sélectionnez l’option de menu appropriée, ou visitez notre site Web
au: http://www.lg.com
Écrivez vos renseignements de garantie ci-dessous:
Renseignements sur l’enregistrement du produit:
Modèle:
Numéro de série:
Date d’achat:
LA RESPONSABILITÉ DE LG CANADA SE LIMITE EXCLUSIVEMENT À LA GARANTIE EXPOSÉE CI-DESSUS. À L’EXCEPTION DE CE QUI EST
EXPRESSÉMENT STIPULÉ CI-DESSUS, LG CANADA DÉCLINE TOUTE AUTRE GARANTIE ET CONDITION CONCERNANT LE PRODUIT,
EXPLICITE OU IMPLICITE, Y COMPRIS, MAIS SANS S’Y LIMITER, TOUTE GARANTIE OU CONDITION IMPLICITE DE VALEUR
COMMERCIALE OU DE COMPATIBILITÉ POUR UN BUT OU USAGE PARTICULIER. EN OUTRE, AUCUNE DÉCLARATION NE PEUT ENGAGER
LG CANADA. LG CANADA N’AUTORISE AUCUNE PERSONNE À CRÉER OU ENDOSSER À SA PLACE AUCUNE AUTRE OBLIGATION DE
GARANTIE OU DE RESPONSABILITÉ LIÉE AU PRODUIT. SAUF GARANTIE OU CONDITION RENDUE IMPLICITE PAR LA LOI, LA PÉRIODE
DE GARANTIE EST LIMITÉE À LA PÉRIODE INDIQUÉE CI-DESSUS. LG CANADA, LE FABRICANT OU LE DISTRIBUTEUR NE SAURONT ÊTRE
TENUS RESPONSABLES EN CAS DE DOMMAGE ACCESSOIRE, IMMATÉRIEL, PARTICULIER, DIRECT OU INDIRECT, DE PERTE
INCORPORELLE, DE PERTE DE PROFIT, DE DOMMAGE PUNITIF OU EXEMPLAIRE, OU TOUT AUTRE DOMMAGE, RÉSULTANT
DIRECTEMENT OU INDIRECTEMENT D’UNE VIOLATION CONTRACTUELLE, FONDAMENTALE OU AUTRE, OU DE TOUT AUTRE ACTE OU
OMISSION, DÉLICTUEL OU AUTRE.
Cette garantie vous donne des droits juridiques spécifiques. Vous pouvez avoir d’autres droits, selon la législation provinciale qui s’applique pour
la province concernée. Tout terme de cette garantie qui nierait ou modifierait une condition ou une garantie implicite selon la législation
provinciale est séparable lorsqu’il contredit la législation provinciale sans affecter le reste des termes de cette garantie.

5
Warranty 1-4
English Version 5
Spanish Version 33
French Version 62
Important Safety Instructions 6-7
Requirements for Ground Connection 7
Parts and Features 8
Refrigerator Installation 9-15
Unpacking 9
Installation 9
How to remove and install Handle 10
How to remove and Install the
Refrigerator Doors
11-12
How to remove and Install Pull-Out Drawer 13-14
Closing and Aligning the doors 15
Using your Refrigerator 16-21
Ensuring Proper Air Circulation 16
Multi Flow 16
Ice Plus 16
Door Alarm 16
Adjusting the Controls 16
Food Storage Guide 17
Storing Frozen Food 17-18
Refrigerator Section 18-21
Refrigerator Shelves 18-19
Pantry 19
Crisper Humidity Control 19
Crisper cover with interior lattice 20
Door Racks 20
Dairy Compartment 20
Egg Compartment 20
Freezer Section 20
Ice Bin 20
DuraBase 21
Durabase Divider 21
Glide Out Drawer 21
Tilting Door
Door in Door
Door in Door Compartment
Door in Door Case
Door in Door Bins
Door in Door Lower Bins
21
Refrigerator Care and Cleaning 23-24
Refrigerator Cleaning 23
Outside 23
Inside Walls 23
Door Lining & Gaskets 23
Plastic Parts (Covers and Panel) 23
Back Cover 23
Replacing Refrigerator Lights 23
Replacing The Fresh Air Filter 23
42snoitpurretnIrewoP
When Going on Vacation 24
When Moving 24
About the Automatic Ice Maker 25
Connecting the Water Line 26-28
Troubleshooting Guide 29-31
32
Smart Diagnosis
TABLE OF CONTENTS
TM
22
22
22
23
22

If the use of this unit is no longer needed, please
contact local authorities to dispose of this product in a
safe way due contains Pentane-cycle or pentane like gas
for insulation. Insulation gases require a special elimina-
tion process. This product contains flammable insula-
tion.
6
This manual contains several important safety notices. Always read and obey all of the following safety messages.
This is the safety alert symbol. This symbol is a warning to potential dangers that could cause death, injury
or damage to you, others or the product. All safety messages will follow after this warning symbol and the
word “DANGER”, “CAUTION” or “WARNING”. These words mean:
You may be killed or suffer fatal damage if you do not follow instructions.
You may be killed or seriously injured if you do not follow instructions.
Indicates a potentially hazardous situation which, if not avoided, may result in minor injury
or damage to the product.
All safety messages inform you of potential danger, advise you on how to reduce the risk of injury and tell you what
can occur if the instructions are not followed.
To reduce the risk of fire, electrical shock or personal injury, the following precaution measures should be
followed:
KEEP THESE INSTRUCTIONS
IMPORTANT SAFETY INSTRUCTIONS
SAFETY MESSAGES
WARNING
DANGER
WARNING
CAUTION
•Immediately repair or replace all faulty or damaged
service cables. Do not use cords that have cracks or
abrasion damage on the length of the cord or on the
plug.
•When moving your refrigerator, take care not to roll
over the electrical cord.
•DO NOT store or use gasoline or other combustible
liquids or vapors in proximity with this or any other
electrical appliance.
•DO NOT permit children to climb, stand or swing from
the doors or shelves of the refrigerator. This can cause
serious injury to them and damage to the product.
•Keep your fingers away from areas in which they can
become caught, such as the doors, hinges and cabinets.
Be careful closing the doors when children are near.
•Unplug the refrigerator before cleaning or repairing.
NOTE: We strongly recommend that any repair services
be performed by a qualified professional.
•Do not keep bottles in the freezer compartment, they
could explode after freezing and cause damage.
•This product contains chemicals known to the State of
California to cause cancer and birth defects or other
reproductive harm. Wash hands after handling.
•For your safety, this product should be properly
grounded. Have a qualified professional check the
electrical circuit and outlet to ensure a proper ground
connection.
•
•
Read all instructions before utilizing the product. Utilize
this product only as explicitly expressed in this guide.
•Once the refrigerator is operating, avoid touching cold
surfaces of the freezer with damp or wet hands; the skin
could become adhered to these surfaces.
•In refrigerators with an automatic ice dispenser, avoid
contact with moving parts of the ejector mechanism or
with the heating mechanism that discharges the cubes.
DO NOT place your fingers or hands in the ice dispenser
mechanism while the refrigerator is connected.
•DO NOT refreeze foods which have already thawed. The
Department of Agriculture of the United States, in your
Bulletin of Home and Gardens No. 69 establishes that:
“...You can refreeze food that has thawed if they contain
ice crystals or are cold and below 40 °F (4 °C)”.
“...Ground beef, perishable food or seafood that is discol
-
ored or has an unpleasant odor should not be frozen or
consumed. Consumption of melted ice cream should
also be avoided. If the odor or color of food is question
-
able, discard it. The food may be dangerous to
consume”.
“Partial thawing or refreezing reduces the quality of the
food, especially fruit, vegetables and prepared meals.
The quality of red meat is less affected than other foods.
Use refrozen products as soon as possible in order to
maintain their quality”.
•DO NOT store explosive substances such as aerosol
cans with a flammable propellant in this appliance.
•If the use of this unit is no longer needed, please
contact local authorities to dispose of this product in a
safe way due contains
Pentane-cycle or pentane like gas for insulation. Insula-
tion gases require a special elimination process. This
product contains flammable insulation.
WARNING: This product contains chemicals known to the State of California to cause cancer and birth defects or
other reproductive harm.

7
This appliance is not intended for use by children, persons with physical or mental disabilities, persons with reduced
sensory or mental capacity, or persons with lack of experience or know-how, unless they have supervision or instruction
in relation to the use of the appliance by the person responsible for their safety. Children should be supervised to
assure that they do not play with the appliance.
Children becoming trapped or suffocated is not
a problem of the past. Discarded and abandoned
refrigerators are a hazard, even if they remain there
“for just a few days”. If you would like to dispose of
your old refrigerator, please follow the instructions
below to prevent any accidents.
BEFORE DISPOSING YOUR REFRIGERATOR
OR FREEZER WHEN NO LONGER IN USE:
• Remove the doors.
• Leave the shelves in place so that children
cannot easily become stuck in them.
Your old refrigerator may have a cooling system that
uses CFC’s (chlorofluorocarbons). CFC affects the
stratospheric layer of the ozone.
If you decide to throw out your old refrigerator, ensure
that CFC contaminants are properly disposed of by a
qualified professional. If you intentionally remove the
CFC refrigerant, you could be subject to fines or prison
in accordance with environmental legislation in effect.
IMPORTANT: Attentively read the following.
TO CONNECT ELECTRICITY
WARNING
ELECTRICAL SHOCK HAZARD
FOR YOUR PERSONAL SAFETY, this appliance must
be properly grounded. Have a qualified electrician
check your wall outlet to ensure that the plug is
grounded properly.
3 prong
grounding type
wall receptacle
3 prong
grounding Ensure proper
plug ground exists
before use
RECOMMENDED GROUNDING METHOD
Your refrigerator must always be plugged to its own
outlet which is adequately grounded. The energy current
should only be 115 V, 60 Hz, A.C. and fused at 15 or 20
A. This provides the best performance and prevents an
overload which could cause a fire from the overheating
of the cables.
Do not use an extension cable. It is your responsibility
and obligation to replace two-prong outlets with that of
an adequately grounded three-prong outlet.
Do not, under any circumstance, cut or extract the third
prong from the plug.
NOTE: Before installation, cleaning or replacing light
bulbs, you must disconnect the appliance from the
power source. When finished, plug the appliance back in
and adjust the thermostat to the desired position.
USE OF EXTENSION CABLES
We do not recommend the use of extension cables.
However, if you still choose to utilize an extension cable,
it is absolutely necessary that it is listed in the UL (in
the United States) or CSA (in Canada), that it supports
three-pronged plugs and that the electrical current
support a minimum of 15 A and 120 V.
The use of an extension cable will increase the amount
of space needed behind the refrigerator.
WARNING
REPLACING ELECTRICAL CABLE
If the power cord is damaged, it must be replaced by
our service center or qualified LG technician to avoid
any risk.
CAUTION
DANGER: CHILDREN MAY BECOME TRAPPED
CFC DISPOSAL
REQUIREMENTS FOR GROUND CONNECTION
It is recommended that a separate circuit be used for
this appliance, as well as a receptacle that cannot be
disconnected with a switch.
WARNING: Do not use extension cords or adapters
ungrounded. Do not extend or modify the power power.
WARNING: NEVER disconnect the refrigerator by
pulling the power cord, always grip the plug firmly and
disconnect it directly from the outlet.

8
PARTS AND FEATURES
Read this section to familiarize yourself with the parts and features of your new refrigerator.
NOTE: This guide covers different models. Your refrigerator could have some or all of the features and parts listed
below. The location of some of the parts may not correspond to that of your model.
Refrigerator Temperature Control
Refrigerator Light
Shelves
Optibin Crisper
Keeps fruits and vegetable fresh and crisp
Pantry *
Ice Maker *
Ice Bin*
Durabase
Durabase divider
Pull Out Drawer
Freezer Light
Cheese & Butter Bin
It makes spreading butter and slicing cheese easier.
Door-In-Door Case
* On some models
A
B
C
H
F
G
E
D
I
J
K
L
A
B
C
D
E
F
G
HI
J
M
Air Filter
The Air Filter helps remove odors from
the refrigerator.
N
Condiment Bin
O
K
O
M
LN

9
REFRIGERATOR INSTALLATION
WARNING
EXCESSIVE WEIGHT HAZARD
Use the assistance of two or more persons to move or
install the refrigerator. Not following these instructions
may cause injury to the back and other parts of the
body.
UNPACKING
Before installing your refrigerator, remove any tape
or temporary stickers. Do not remove any stickers
that feature warnings, the model serial number or the
technical label of the product located on the back of the
refrigerator.
To remove adhesive tape residue, rub it well with your
fingers and a little liquid detergent. Clean with warm
water and let dry.
Do not use sharp instruments, rubbing alcohol,flammable
liquids or abrasive cleaning products to remove the
adhesive tape or glue. These products can damage the
surface of your refrigerator. For more information, see
the section on “Important Safety Instructions”.
The shelves come already installed in their factory
position. Remove the shelves and replace them
according to your spacing needs.
Moving Your Refrigerator:
Your refrigerator is extremely heavy. Make sure you
protect the floor when moving your refrigerator for
cleaning or servicing. Always pull your refrigerator
straight out when moving it. Do not shift from side
to side or “walk” the refrigerator when attempting to
move it as this can cause damage to the floor.
WARNING
EXPLOSION HAZARD
Keep all flammable materials and vapors (such as
gasoline) away from the refrigerator. Not following
these instructions may cause death, explosion or fire
INSTALLATION
1. Avoid placing the unit near heat sources, direct
sunlight, or humidity.
2.To avoid vibration, the unit should be leveled. If needed,
adjust the leveling screws to compensate for an
unleveled floor. The front should be slightly taller than
the rear to ensure that the doors close properly. The
leveling screws can easily be turned by slightly tilting
the front of the refrigerator, turning the leveling screws
clockwise ( ) to raise it and counter-clockwise
( ) to lower it.
3.Install the refrigerator in an area between 55 °F
(13 °C) and 110 °F (43 °C). If the surrounding temperature
is lower or higher than previously mentioned, it can
adversely affect the unit.
CAUTION: Avoid placing the unit near heat
sources, direct sunlight or humidity.
ONCE INSTALLED
1. Carefully clean your refrigerator and remove and dust
ONCE INSTALLED
NOTE
Carefully clean your refrigerator and remove and dust
accumulated during shipping.
2.Install accessories such as the ice bin, door racks,
shelves, etc., in their proper places. These are already
packed to prevent any possible damage during
shipping.
3.Leave your refrigerator on for 2 to 3 hours before
storing food inside. Verify that there is a flow of cold air
in the freezer compartment to ensure proper cooling.
Your refrigerator is now ready for use.
WARNING:
• Take care when working with the hinges, base cover
and stops, etc. You may injure yourself.
• DO not place your hands or any tools in the air vents,
the base cover or in the bottom of the refrigerator. This
may cause injury or electrical shock.
This appliance is intended to be used in household and
similar applications such as:
• Staff kitchen areas in shops, offices and other working
environments;
• Farm houses and by clients in hotels, motels and other
residential type environments;
• Bed and breakfast type environments;
• Catering and similar non-retail applications.
• The refrigerator should be level and on a firm ground.
Keep a Proper Distance from Adjacent
Objects
Please keep the refrigerator at an
adequate distance from other objects.
Insufficient spacing can reduce the
refrigerator’s freezing efficiency and
increase electricity consumption.
(5.08 cm) 2”

10
TOOLS YOU MAY NEED
10 mm
1/4in 1/4 in
3/8in 3/32 in
Hex Socket Wrench Phillips Screwdriver Flat Head Screwdriver Allen Wrench
NOTE: It is always recommended that the doors be removed when it is necessary to move the refrigerator through a
narrow opening. If it is necessary to remove the handles follow the directions below.
NOTE: Handle appearance may vary from illustrations on this page.
DOOR HANDLE REMOVING
Mounting
Fasteners
Allen Wrench
Set Screw
2. Removing Freezer Drawer Handle
DOOR HANDLE INSTALLATION
Mounting
Fasteners
2. Reinstalling Freezer Drawer Handle
REFRIGERATOR INSTALLATION
1. Removing Refrigerator Handle
Loosen the set screws with the 3/32 ” Allen wrench
and remove the handle.
NOTE: If the handle mounting fasteners need to be
tightened or removed, use a 1/4 ” Allen wrench.
1. Reinstalling Refrigerator Handle
Place the handle on the door by aligning handle
footprints to fit mounting fasteners and tighten
the set screws with a 3/32“ Allen wrench.
NOTE: If the handle mounting fasteners need to
be tightened or removed, use a 1/4 ” Allen wrench.
Loosen the set screws located on the lower side of
the handle with the 3/32” Allen wrench and remove
the handle.
NOTE: If the handle mounting fasteners need to be
tightened or removed, use a 1/4 ” Allen wrench.
Place the handle on the door by aligning handle
footprints to fit mounting fasteners and tighten
the set screws on the bottom of the handle with
a 3/32” Allen wrench.
NOTE: If the handle mounting fasteners need to
be tightened or removed, use a 1/4 ” Allen wrench.

11
HOW TO REMOVE AND INSTALL REFRIGERATOR DOOR
1. Removing Refrigerator Doors
NOTE: Handle, top hinge and hinge cover appearance may vary from illustrations on this page.
WARNING
• Disconnect electrical supply to the refrigerator before installing. Failure to do so could result in death or serious
injury.
• Do not put hands or feet or metal sticks into the air vents, base grille, or bottom of the refrigerator. You may be
injured or receive an electrical shock.
• Be careful when you work with the hinge, base grille, and stopper. You may be injured.
Left Door
• Open the door. Remove the top hinge cover screw (1 ).
• Use a flat blade screwdriver to lift the tabs on the front underside of the cover(2). Lift up the cover.
• Disconnect all wire harness (3).
• Remove the grounding screw(4).
• Rotate hinge lever (5) counterclockwise. Lift the top hinge (6) free of the hinge lever latch (7).
• Place the door on a non-scratching surface with the inside up.
Right Door
• Open the door. Remove the top hinge cover screw (8).
• Use a flat blade screwdriver to lift the tabs on the front underside of the cover (9). Lift up the cover.
• Rotate hinge lever (10) clockwise. Lift the top hinge (11) free of the hinge lever latch (12).
• Place the door on a non-scratching surface with the inside up.
CAUTION: When lifting the hinge free of the latch, be careful that the door does not fall forward.
•Lift the door from the middle hinge pin and remove the door.
•Place the door, inside facing up, on a nonscratching surface.
(1)
(2)
(3)
(4)
(5) (6) (7)
(8) (9)
(10) (11)
(12)
REFRIGERATOR INSTALLATION

12
HOW TO REMOVE AND INSTALL
REFRIGERATOR DOOR (CONT.)
2. Refrigerator Door Reinstallation
Install the right-side door first.
Right Door
• Lower the door onto the middle hinge pin (1).
• Make sure the door is aligned with the cabinet.
• Fit the top hinge (2) over the hinge lever latch (3)
and into place. Rotate the lever (4) counterclockwise
to secure the hinge.
• Hook the tab on the door-switch side of the cover
(5) under the edge of the wire opening in the cabinet
top.
• Position the cover into place.
• Insert and tighten the cover screw (6).
1
(4)
(3)
(2)
(6) (5)
Left Door
• Lower the door onto the middle hinge pin (7).
• Make sure the door is aligned with the cabinet.
• Fit the top hinge (8) over the hinge lever latch (9)
and into place. Rotate the lever (10) clockwise to
secure the hinge.
• Install the grounding screw (11) and connect all the
wire harnesses (12).
• Hook the tab on the door-switch side of the cover
(13) under the edge of the wire opening in the cabi-
net top.
• Position the cover into place.
• Insert and tighten the cover screw (14).
7
(9)
(8)
(10)
(11)
(14)
(13)
(12)
REFRIGERATOR INSTALLATION

13
HOW TO REMOVE AND INSTALL THE PULL
OUT DRAWER
1. Removing Pull out Drawer
IMPORTANT: To avoid possible injury, product or
property damage, you will need two persons to
perform the following instructions.
• Pull the drawer open to full lower extension.
Remove the durabase by lifting it from rail system.
(Fig. 1)
Durabase
Fig. 1
• Remove the screws of the rail on both sides.
(Fig. 2)
screw
Fig. 2
CAUTION: When removing drawer door, do not
hold it by the handle. The door could fall down
and you may be injured. Grasp the door with both
hands as pictured below when removing.
CAUTION: When laying down the drawer, be
careful not to damage the floor or hurt your feet
with the sharp edges on hinge side.
• With both hands, hold both sides of the door
(Fig. 3) and pull it up to separate it from the rails.
(Fig. 4)
Fig. 3
Fig. 4 Rail tabes
Door
supports
• Push the rails back into drawer cavity. With both
hands, hold the center of the bar and push it in
so that both rails go back simultaneously. (Fig.5)
(Fig. 6)
Fig. 5
Fig. 6
REFRIGERATOR INSTALLATION

14
HOW TO REMOVE AND INSTALL THE PULL OUT
DRAWER (CONT.)
2. Installing Pull out Drawer
IMPORTANT: To avoid possible injury, product or
property damage, you will need two people to per-
form the following instructions.
• With both hands, hold the center of the bar and
pull it out to let both rails out to full extension
simultaneously. (Fig. 7)
Fig. 7
• Hook door supports into rail tabs. (Fig. 8)
Rail tabes
Door Supports
Fig. 8
• Lower door into final position and tighten the
screws. (Fig. 9)
Screws
Fig. 9
• With the rails pulled out to full extension, insert
the durabase in the rail assembly. (Fig. 10)
Durabase
Fig. 10
WARNING: To prevent accidental child and pet
entrapment or suffocation risk, DO NOT allow them
to play inside of drawer.
WARNING: DO NOT step or sit down on Freezer
Drawer.
REFRIGERATOR INSTALLATION

15
REFRIGERATOR INSTALLATION
CLOSING AND ALIGNING THE DOORS
Closing the Doors Door Alignment
Your refrigerator has two front leveling screws, one on
the right and one on the left. If your refrigerator seems
unstable or if you would like the doors to close more
easily, simply adjust the inclination of the refrigerator by
following the instructions below:
1. Plug the refrigerator into a 3 prong grounded outlet.
Move the refrigerator into its final position.
2.
Use a flat head screwdriver to adjust the leveling screws,
turning clockwise to raise the side of the refrigerator
and counter-clockwise to lower it. It may take several
turns to adjust it to the inclination you would like.
NOTE: Having someone push against the top of the
refrigerator takes some weight off the leveling screws.
This will make it easier to adjust the screws.
3.Open both doors again and check to make sure that
they close easily. If not, slightly tilt the refrigerator
further back by turning both leveling screws clockwise.
It may take several more turns. Make sure that you turn
both leveling screws the same amount.
4.Ensure that the refrigerator is even by using a level.
5.Replace the base grille.
NOTE: Your new refrigerator is uniquely designed with
two fresh food doors. Either door can be opened or
closed independently of one another. You may have
to exert slight pressure on doors to get them to close
completely.
When moving your refrigerator
1.
1.
Adjust leveling legs up.
2. Cover the floor with cardboard or hardboard to
avoid floor damage.
3. Always pull or push the refrigerator straight out
when moving it. Do not wiggle or “walk” the
refrigerator when trying to move it, as floor damage
could occur.
Note: Your refrigerator is extremely
heavy. When moving the refrigerator
for installing, cleaning or service be
sure to follow the next instructions.
The left refrigerator door has an adjustable nut, located
on the bottom hinge, to raise and lower, the door for
proper alignment.
If the space between your doors is uneven, follow the
instructions below to align the doors evenly:
Use the wrench (included with the Use & Care Guide) to
turn the nutin the door hinge to adjust the height. To the
right to raise or to the left to lower the heignt.
The right refrigerator door does not have an adjustable
nut.
If the space between your doors is uneven, follow the
instructions below to align the right door:
With one hand, lift up both the inner and outer door
sections of the right door to raise them at the
middle hinge. (Opening the door may make lifting
easier).
2. With the other hand, use pliers to insert the snap
ring on the middle hinge of tjhe inner door section
as shown. Do not insert the ring on the hinge of the
outer door section.
3. Insert additional snap rings until the rignt door is
aligned. (Two snap rings are provided with the unit).

16
ENSURING PROPER AIR CIRCULATION
In order to obtain stable temperature, the air must flow
between the freezer and refrigerator sections. As shown
in the illustration below, the cold air enters through
the bottom part and circulates upward. This air returns
below the freezer floor and the rest of the air enters the
refrigerator section through the top vent.
MULTI FLOW
• The cooling fan operates more powerful and effective
than when in normal operation. This is especially
noticeable when new food is placed in the refrigerator
compartment.
• If the lining is damaged, water or other substances
could enter through the cool air vent causing
decreased efficiency.
Do not block any of these vents with packages of food.
This can interrupt the flow of air and cause temperature
and moisture problems.
IMPORTANT: Because air circulates between both
sections, any odors formed in one section will transfer
to the other. You must thoroughly clean both sections to
eliminate odors. To prevent odor transfer and drying out
of food, make sure you wrap or cover foods tightly (See
the “Food Storage Guide” section for details).
ICE PLUS
Press the button ICE PLUS. The LED light will turn on.
This function will remain activated for 24 hours and
intensify the cooling speed of the freezer and increase
ice production.
DOOR ALARM
With this feature you will hear an alarm when the freezer
or refrigerator door is open for more than 1 minute.
These tones will repeat every 30 seconds. The alarm is
cancelled when the door is properly shut. To activate or
deactivate Door Alarm, press the button ALARM.
CAUTION WHEN CLOSING THE DOOR
CAUTION
To reduce the risk of door scratches, please make
sure that the refrigerator door mullion is always folded
ADJUSTING THE CONTROLS
Your refrigerator has two controls that allow you to
regulate the temperature the freezer and refrigerator
compartments.
Initially set the REFRIGERATOR CONTROL at 37°
degrees F and the FREEZER CONTROL at 0° degrees
F. Leave them at these setting for 24 hours (one day) to
stabilize. Then adjust the compartment temperature as
illustrated above.
• Refrigerator Control: 32 °F to 47 °F (0 °C to 8 °C)
To adjust the temperature in the refrigerator compartment
open both doors, then press the REFRIGERATOR button
to cycle through the range of available settings.
• Freezer Control: -6°F to 9 ° F ( - 21°C to -13°C)
To adjust the temperature in the freezer compartment
open both doors, then press the FREEZER button to
cycle through the range of available settings.
• Temperature Display
To change the temperature display from Fahrenheit to
Celsius:
1. Simultaneously press and hold the FREEZER and
REFRIGERATOR buttons for more than 5 seconds.
2. Do the same to convert back to Fahrenheit.
USING YOUR REFRIGERATOR
B
J

17
USING YOUR REFRIGERATOR
ADJUSTING CONTROL SETTINGS
Give the refrigerator time to cool down completely before
adding food. It is best to wait 24 hours before adding
food to the refrigerator. The mid-settings indicated in the
previous section should be correct for normal household
refrigerator usage. The controls are set correctly when
milk or juice is cold to your liking and ice cream is firm.
The refrigerator control functions as the thermostat for
the entire appliance. The higher the number setting, the
longer the compressor will run to keep the temperature
colder. The freezer control adjusts the cold air flow from
the freezer to the refrigerator. Setting the freezer control
to a lower temperature keeps more cold air in the freezer
compartment to make it colder.
If you need to adjust the temperature in the refrigerator
or freezer, begin by adjusting the refrigerator first. Wait
24 hours after the refrigerator adjustment to check the
freezer temperature. If it is too warm or too cold, then
adjust the freezer control as well.
Use the settings listed in the table below as a guide.
CONDITION/REASON: RECOMMENDED
ADJUSTMENT:
REFRIGERATOR section
is too warm
•Opening the door often
•Adding a large amount
of food
•Room temperature is
very warm
Adjust the
REFRIGERATOR setting
to the next highest
number and wait 24
hours, then check.
FREEZER section is too
warm/ ice is made too
slowly
•Opening the door often
•Adding a large amount
of food
•Room temperature is
very low (not cycling
often enough)
•Using ice frequently
•Air vents blocked by
objects
Adjust the FREEZER
setting to the next
highest number and wait
24 hours, then check.
Remove any objects
blocking air flow.
REFRIGERATOR section
is too cold
•Controls not set
correctly for your
conditions
Adjust the
REFRIGERATOR setting
to the next lowest
number and wait 24
hours, then check.
FREEZER section is too
cold
•Controls not set
correctly for your
conditions
Adjust the FREEZER
setting to the next lowest
number and wait 24
hours, then check.
FOOD STORAGE GUIDE
ITEMS HOW TO STORE
Storing Fresh Food Wrap or store food in the
refrigerator in airtight and
moisture-proof material unless
otherwise noted. This prevents
food odor and taste transfer
throughout the refrigerator. For
dated products, check date code
to ensure freshness.
Butter or
margarine
Store opened butter in a covered
dish or in a closed compartment.
When storing a larger quantity,
wrap in freezer packing and
freeze.
Cheese Store in original packaging until
you are ready to use it. Once
opened, tightly rewrap with
plastic wrap or aluminum foil.
Vegetables with
skins (carrots,
peppers)
Place in bags or plastic containers
inside the crisper.
Fruit Wash and let dry; store in plastic
bags in the refrigerator. Do not
wash or pit berries until you
are ready to eat them. Berries
should be selected and kept in
their original packaging (if there
is any) or in a paper bag closed
halfway and set on a shelf.
Leafy Vegetables Remove original packaging and
trim any dirty or discolored parts.
Wash in cold water and drain.
Place in a plastic bag or plastic
container and store in the crisper.
Fish Consume fish or seafood the
same day purchased.
Chef Fresh Store any meat in original airtight,
moisture-proof packaging
Rewrap if necessary.
Leftovers Cover leftovers with plastic
wrap or aluminum foil. Plastic
containers with airtight lids can
also be used.
STORING FROZEN FOOD
NOTE: For more information on how to prepare food to
be frozen such in a way to see the period they can be
stored consult a frozen food guide or cook book.
Packaging
A great freezing depends on how great you package the
food. When you seal the package make sure you remove
all excess air and do not allow humidity. A package that
is incorrectly sealed will result in the transmission of bad
odors, contaminants inside your refrigerator and will
cause your foods to dry.

18
Packaging Recommendations:
• Use sealed plastic containers.
• Use plastic containers with a smooth surface.
• Package with aluminum foil of high resistance.
• Wrap with paper layered with plastic.
• Use water proof plastic.
• Use recommended plastic bags to store frozen foods.
Follow these packaging or container instructions in order
to reach the best freezing
Do not use:
• Bread Wrapping.
• Plastic container not safe for storing.
• Containers without lids or seals.
• Waxed paper or waxed plastic.
• Thin wrapping paper or not water proof.
Freezing
IMPORTANT: Do not keep bottles in the freezer
compartment, they may explode after freezing and
cause damage.
For the maximum use of your freezer do not store excess
food. Do not introduce a large amount of unfrozen foods
that cannot be frozen within 24 hours (no more than
2 – 3 pounds or ,91 kg - 1,36 kg of food per square
inch of space in the freezer). Sufficient space must be
left in order for the air to circulate properly around the
packages. Leave enough space in order to close your
refrigerator with out difficulty.
Storage times can vary depending on the type and
quality of the food, the way its package, or packaging
container used, (in comparison to air and humidity), and
the temperature it being stored in. Ice crystals formed
inside your package are normal it indicates the air and
humidity inside your package have condensed.
NOTE: Let warm foods cool off at room temperature
for approximately 30 min, then wrap accordingly with
the methods mention above and freeze. By letting your
warm foods cool off before you introduce them to your
freezer it will save you energy.
WARNING
SUFFOCATING DANGER
Adequate ventilation is required when using dry ice.
Dry ice is Carbon Dioxide (CO2). When it evaporates it
produces oxygen, causing dizziness, slight headaches,
unconsciousness or death. Do not inhale these vapors
and properly ventilate the room while you use dry ice.
REFRIGERATOR SECTION
REFRIGERATOR SHELVES
The shelving of your refrigerator can be adjusted to
comply with your storage necessities; Depending on
the model you have in can include glass shelving or
wired shelving. The storing of your foods together and
adjusting the shelving to different heights will ease to
help you locate what you need. This also helps your
refrigerator to stay shut longer which will save you energy.
IMPORTANT: While your refrigerator glass shelving are
cold do not clean with hot or warm water. The glass
shelving may break if exposed to rapid temperature
changes or hard impacts. For your safety the glass
shelving are made out of tempered glass so when at
breaking they will fracture into tiny fragments.
NOTE: Be careful while moving or relocating the shelves
they are heavy. If moving the shelves is required keep in
mind to locate them in a safe environment to prevent
them from breaking.
Adjusting Shelves
Remove the shelves and adjust them to your convenience.
• Removing Shelves
Incline the front of the shelf in the direction indicated by
figure 1 and lift in the direction indicated by figure 2. Pull
the shelf towards you.
• Replacing Shelves
Incline the frontal part of the shelf (1) and guide the
shelf hooks towards the openings at the height desired.
Then lower the front of the shelf (2) so the hooks can be
inserted (3) in the shelf supports.
NOTE: Make sure that the shelf is installed in the
horizontal manner. Otherwise, it can cause the shelves to
fall, which will cause your stored food to spill.
3
1
2
1
2
USING YOUR REFRIGERATOR

19
Sliding Shelves (in some models)
You can slide some of the shelves in your refrigerator
towards inside or outside like explained below.
• To slide the shelf towards the outside: Pull towards you,
figure A.
• To slide the shelf towards the inside: Push until it stops,
figure B.
Figure A Figure B
In order to remove a shelf from a metal frame
• Pull the shelf until it stops.
• Incline the front of the shelf towards the top and pull
forward.
• Lift the shelf in the manner it moves across the
support openings.
To put back into place just reverse these steps.
Functional Shelves (Folding Shelves, in some models)
You can store tall articles like gallons or bottles just by
simply folding the shelf in half.
PANTRY (in some models)
For storage of meat or fresh food. Adjust the control to
desired temperature by moving from COLD to COLDER.
Pull forward to open. Lift slightly and pull it out to remove.
CRISPER HUMIDITY CONTROL (in some models)
You can control the amount of humidity in the moisture-
sealed crispers. Adjust the control to any setting between
HIGH and LOW.
• “High”: keeps moist air in the crisper for best storage
of vegetables.
• “Low”: lets moist air out of the crisper for best storage
of fruits.
To remove the crisper:
• Slide crisper straight out to the stop.
• Lift the front of the crisper, then pull it out to remove
• Replace the crisper by sliding it back in fully past the
drawer stop.
CAUTION: Be careful when you handle the glass
cover because it could loose.
To remove the glass:
• Lift up the glass after inserting a screwdriver under the
crisper cover.
• Pull glass cover up and out.
To remove the crisper cover support:
NOTE: Remove glass before removing the crisper cover
support.
• While holding the crisper cover support with both
hands (as shown in the image below). Pull forward and
slightly lift the front part.
I I
I
I
I I
I
USING YOUR REFRIGERATOR
Other manuals for LFCS25663 series
2
This manual suits for next models
2
Table of contents
Other LG Refrigerator manuals