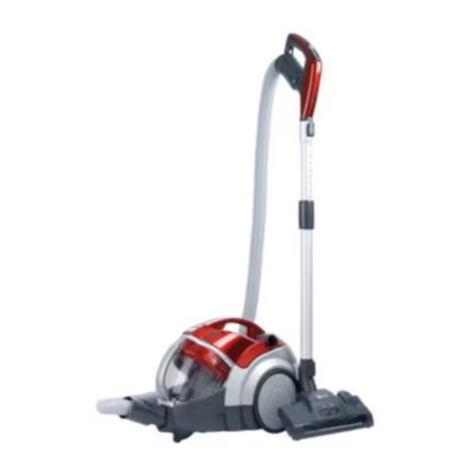
LG V-C426 Series Operating instructions

English
êyÒÒÍËÈ flÁ˚Í
E
P
V-C426**** *
*
V-C425*****
V-C424****


2
31
4
8
23
4
522
7
620
Air control lever
21
11
17
13
12
12
17
18
19
14
15
16
min
max
9
10
10
24
15
Clip

–4 –
Please read all the following information,
which contains important instructions for
the safety, the use and the maintenance
of the appliance.
This appliance complies with the following
EC Directives: -73/23/EEC, 93/68/EEC-
Low Voltage Directive-89/336EEC -EMC
Directive.
■ Never allow children to use the
appliance unsupervised.
■ Do not use the appliance If the
supply cord is damaged or faulty.
■ If the supply cord is damaged, it must
be replaced by an approved LG
Electronics Service Agent to avoid a
hazard.
■ Always switch the vacuum cleaner off
before :
•changing the dust bag
•changing or cleaning the filters.
■ If no dustbag is inserted, the cover
cannot be closed. Please do not use
force!
■ Do not vacuum flammable or explosive
substances (liquids or gases).
■ Do not vacuum hot ash, embers etc.
nor sharp objects.
■ Do not vacuum water or other liquids.
■ Please make sure when using the
carrying starp that it is securely fitted.
■ The use of radio trans mitting devices
close to the appliance may interfere
the function of the appliance, input
power may be vary.
■ When you vacuum with an attachment
appliance that has a rotating brush
roller:
•do not reach into the running brush roller.
Connecting the flexible hose
Insert the hose holder (1) into the
suction opening.
When the hose (2) is to be disconnected
from the appliance, press the release
button (3) and pull the hose holder out
of the suction opening.
Assembling the tubes
•Telescopic tube (4)
- Hold spring latch (5)
- Pull out the tube to required length.
- Release spring latch to lock.
•Metal tube (4)
- Connect tubes to each other.
•Elbow tube is for cleaning under the
sofa, table and bed easily. (23)
-Connect the elbow tube to the
flexible hose and, connect the
telescopic tube to the elbow tube.
(You can also connect the telescopic
tube to the flexible hose without the
elbow tube.)
- If you pull the spring latch(22), the
elbow tube is bended. (23)
- If you stretch the elbow tube, it is
returned to its position.
Using the cleaning head and
Accessory Nozzles
Fit the large cleaning head onto the end
of the tube.
•The 2 position head (6) is equipped
with a pedal (7) which allows you to
alter its position according to the type
of floor to be cleaned.
Hard floor position(tiles, parquet
floors...). slide on the lever to lower
the brush.
Carpet or rug position. slide on the
lever to lift brush up.
• This device (24) is used with the suction
hole for device protection mounted. For
the suction hole for device protection, its
front, side and upper side is enclosed
with a soft material in order to prevent
damage of the device.
Connect the suction hole for device
Information for your safety
How to Use
■
■
Do not expose vacuum cleaner to heat.
Do not vacuum fine dust.
•
Turbine brush nozzle
Slide the air control lever to the right
for long type carpet and to the left for
short type carpet.
Press the button on the rear side of
the nozzle to separate the air cover.
Use the dusting brush & crevice tool
to vacuum clean the brush and fan.
- Air adjustment(20)
- Cleaning turbine brush nozzle(21)

–5 –
protection to the extension pipe for
length adjustment.
Remove dusts accumulated where the
floor surface of the suction hole for
device protection is dirty.
• Crevice Tool (8)
For vacuuming in those normally
inaccess- ible places i.e. reaching
cobwebs, or down the side of a sofa!
• Upholstery Nozzle (9)
For vacuuming upholstery,
mattresses, etc. The thread collectors
help to pick up the threads and fluff.
• Dusting brush (10)
For vacuuming picture frames
furniture outlines, books and other
uneven objects.
How to plug in and use
Pull out the mains lead to the desired
length and plug into the socket.
Adjusting the power level
• Electronic power control (11)
Suction capacity increases steplessly up
to MAX.
String the cleaner
When you have switched off and
unplugged the appliance, press on the
button (19) to automatically rewind the
cord.(depending on model)
•Use storage clip as shown when
storing the cleaner (12)
Changing the dust bag
The dustbag needs changing when the
cleaner is set to maximum power and
the cleaner head is off the floor but the
“bag full”indicator window (13) is
completely coloured red.
Even if the dustbag does not appear to
be full at this stage, it should be
changed.
It could be that a great deal of very fine
dust has clogged up the pores of the
dust bag.
•Turn off the appliance and unplug it.
•Remove hose.
•Open the cover (14)
Your appliance is equipped with either a
paper dust bag or a fabric dust bag (15)
•Push the lever forwards in the
direction of the arrow (16), and pull off
the full paper filter bag towards the
rear. Remove the bag and throw it
away.
•Insert the new paper filter bag into the
unit with the arrow pointing downwards
(17)
If your appliance is fitted with a
dust bag, empty it and replace it.
Note: as the appliance is fitted with a
safety device which checks that the bag
is in place you cannot close the lid if the
bag is not fitted correctly.
Cleaning the motor filter
The motor filter is situated inside the
appliance between the dust bag and
the motor. Each time that you change
the air outlet filter we advise you to
remove the motor filter (18) and to
clean it by tapping to remove the dirt
and then replacing it in the vacuum
cleaner.
Check that the appliance is correctly
plugged in and that the electrical socket
is working.
•Stop the appliance and unplug it.
•Check that the tubes, flexible hose
and cleaning tool are not blocked.
•Check that the dust bag is not full.
Replace it if necessary.
•Check that the air outlet filter is not
blocked. Replace it if necessary.
What to do if your appliance
does not work
What to do when the suction
performance reduces?

–6 –
ÇÌËχÚÂθÌÓ ÔÓ˜ËÚ‡ÈÚ ‚ÒÂ
ËÌÒÚÛ͈ËË Ó Ï‡ı Ô‰ÓÒÚÓÓÊÌÓÒÚË,
ËÒÔÓθÁÓ‚‡Ì˲ Ë ÛıÓ‰Û Á‡ Ô ÎÂÒÓÒÓÏ.
è ÎÂÒÓÒ ÒÓÓÚ‚ÂÚÒÚ‚ÛÂÚ ÒÎÂ‰Û˛˘ËÏ
Òڇ̉‡Ú‡Ï
Öë:-73/23/ÖÖë, 93/68/ÖÖë-Low Voltage
Directive-89/336EEC-EMC Directive.
■ ç ‡Á¯‡ÈÚ ‰ÂÚflÏ ÔÓθÁÓ‚‡Ú¸Òfl
Ô ÎÂÒÓÒÓÏ ·ÂÁ ÔËÒÏÓÚ‡ ‚ÁÓÒÎ ı.
■ ç ÔÓθÁÛÈÚÂÒ¸ Ô ÎÂÒÓÒÓÏ ÔË
ÔÓ‚ÂʉÂÌÌÓÏ ¯ÌÛ ÔËÚ‡ÌËfl.
■ ÖÒÎË ¯ÌÛ ÔËÚ‡ÌËfl ÔÓ‚ÂʉÂÌ, ‚Ó
ËÁ·ÂʇÌË ÓÔ‡ÒÌ ı ÔÓÒΉÒÚ‚ËÈ Â„Ó
Á‡ÏÂÌÛ ‰ÓÎÊÂÌ ÔÓËÁ‚Ó‰ËÚ¸ ÚÓÎ ¸ÍÓ
ÒÔˆˇÎËÒÚ – ‡·ÓÚÌËÍ ÒÎÛÊ· Ò‚ËÒ‡
LG Eletronics.
■
ÇÒ„‰‡ ‚ Íβ˜‡ÈÚÂ Ô ÎÂÒÓÒ, ÔÂʉ ˜ÂÏ:
•á‡ÏÂÌflÚ¸ ϯÓÍ ‰Îfl Ô ÎË
•á‡ÏÂÌflÚ¸ ËÎË ˜ËÒÚËÚ¸ ÙËÎ¸Ú .
■ ÖÒÎË Ï¯ÓÍ ÓÚÒÛÚÒÚ‚ÛÂÚ, Í ¯Í‡
Ô ÎÂÒÓÒ‡ Ì Á‡ÍÓÂÚÒfl. çÂ
ÔËÏÂÌflÈÚ ÒËÎÛ!
■ á‡Ô¢‡ÂÚÒfl ‚Ò‡Ò ‚‡Ú¸ Ô ÎÂÒÓÒÓÏ
„Ó˛˜ËÂ Ë ‚Á ‚˜‡Ú  ‚¢ÂÒÚ‚‡
(ÊˉÍÓÒÚË ËÎË „‡Á ).
■ á‡Ô¢‡ÂÚÒfl ‚Ò‡Ò ‚‡Ú¸ Ô ÎÂÒÓÒÓÏ
„Ófl˜ËÈ ÔÂÔÂÎ, Û„ÓθÍË Ë Ú.Ô., ‡
Ú‡ÍÊ ÓÒÚ Â Ô‰ÏÂÚ .
■ á‡Ô¢‡ÂÚÒfl ‚Ò‡Ò ‚‡Ú¸ Ô ÎÂÒÓÒÓÏ
‚Ó‰Û Ë ‰Û„Ë ÊˉÍÓÒÚË.
■ é·flÁ‡ÚÂθÌÓ Û·Â‰ËÚÂÒ¸, ˜ÚÓ ÂÏÂ̸
‰Îfl ÔÂÂÌÓÒÍË Ì‡‰ÂÊÌÓ Á‡ÍÂÔÔÂÌ.
■ èË ËÒÔÓθÁÓ‚‡ÌËË Ì‡Ò‡‰ÍË Ò
‚‡˘‡˛˘ÂÈÒfl ˘ÂÚÍÓÈ:
ÔÓ‰Û˜Ì ı Ô‰ÏÂÚÓ‚ ‚ ‡·ÓÚ‡˛˘Û˛
˘ÂÚÍÛ.
èÓ‰ÒÓ‰ËÌÂÌË „Ë·ÍÓ„Ó ¯Î‡Ì„‡
ÇÒÚ‡‚¸Ú ̇ÍÓ̘ÌËÍ (1) ¯Î‡Ì„‡ ‚Ó
‚Ò‡Ò ‚‡˛˘Â ÓÚ‚ÂÒÚËÂ Ô ÎÂÒÓÒ‡.
óÚÓ· ÓÚÒÓ‰ËÌËÚ¸ ¯Î‡Ì„ (2), ̇ÊÏËÚÂ
ÍÌÓÔÍÛ (3) Ë ‚ ÚflÌËÚÂ Â„Ó Ì‡ÍÓ̘ÌËÍ
ËÁ ‚Ò‡Ò ‚‡˛˘Â„Ó ÓÚ‚ÂÒÚËfl.
ëéÖÑàçÖçàÖ íêìÅé
•íÂÎÂÒÍÓÔ˘ÂÒ͇fl Ú۷͇ (4)
- ç‡ÊÏËÚ ̇ ÔÛÊËÌÌÛ˛ Á‡˘ÂÎÍÛ (5)
- Ç ÚflÌËÚ ÚÛ·ÍÛ Ì‡ Ú·ÛÂÏÛ˛
‰ÎËÌÛ.
- éÚÔÛÒÚËÚ ÔÛÊËÌÌÛ˛ Á‡˘ÂÎÍÛ,
˜ÚÓ· Á‡ÙËÍÒËÓ‚‡Ú¸ ÚÛ·ÍÛ.
•åÂÚ‡Î΢ÂÒ͇fl ÚÛ·‡ (4)
- ëÓ‰ËÌËÚ ÚÛ·ÍË ÏÂÊ‰Û ÒÓ·ÓÈ.
•ò‡ÌË̇fl Ú۷͇ ÔÓÁ‚ÓÎËÚ ‚‡Ï
΄ÍÓ Û·‡Ú¸Òfl ÔÓ‰ ‰Ë‚‡ÌÓÏ, ÒÚÓÎÓÏ
ËÎË ÍÓ‚‡Ú¸˛ (23).
- èËÒÓ‰ËÌËÚ ¯‡ÌËÌÛ˛ ÚÛ·ÍÛ Í
„Ë·ÍÓÏÛ, ‡ Á‡ÚÂÏ ‚ÒÚ‡‚¸Ú ‚ ÌÂfi
‡Á‰‚ËÊÌÛ˛ ÚÛ·ÍÛ. (í‡ÍÊ ÏÓÊÌÓ
ÒÓ‰ËÌËÚ¸ ‡Á‰‚ËÊÌÛ˛ ÚÛ·Û Ò
„Ë·ÍËÏ ¯Î‡Ì„ÓÏ Ì‡ÔflÏÛ˛, ·ÂÁ
¯‡ÌËÌÓÈ ÚÛ·ÍË.)
- éÚÔÛÒÚËÚ ÔÛÊËÌÌÛ˛ Á‡˘ÂÎÍÛ (22)
˜ÚÓ· Á‡ÙËÍÒËÓ‚‡Ú¸ ÚÛ·ÍÛ ‚
ÌÛÊÌÓÏ ÔÓÎÓÊÂÌËË. (23)
- ê‡ÒÚflÌËÚ ¯‡ÌËÌÛ˛ ÚÛ·ÍÛ Ë Ó̇
‚ÂÌÂÚÒfl ‚ ÔÂÊÌÂÂ ÔÓÎÊÂÌËÂ.
àÒÔÓθÁÓ‚‡ÌË ˜ËÒÚfl˘ÂÈ Ì‡Ò‡‰ÍË
‰Îfl ÔÓ· Ë ‰ÓÔÓÎÌËÚÂθÌ˚ı ̇҇‰Í
èËÒÓ‰ËÌËÚ ·Óθ¯Û˛ ˜ËÒÚfl˘Û˛
„ÓÎÓ‚ÍÛ Í ÍÓÌˆÛ ÚÛ·ÍË Ô ÎÂÒÓÒ‡.
•Ñ‚ÛıÔÓÁˈËÓÌ̇fl ̇҇‰Í‡ (6)
Ò̇·ÊÂ̇ Ô‰‡Î¸˛ (7), ÍÓÚÓ‡fl
ÔÓÁ‚ÓÎflÂÚ ÏÂÌflÚ¸ ÔÓÎÓÊÂÌËÂ
̇҇‰ÍË ‚ Á‡‚ËÒËÏÓÒÚË ÓÚ ÚËÔ‡ ÔÓ·.
킉  ÔÓÎ (͇ÙÂθ, Ô‡ÍÂÚ...)
艂Ë̸Ú ˜‡„, ˜ÚÓ· ÓÔÛÒÚËÚ¸
˘ÂÚÍÛ.
äÓ‚ . 艂Ë̸Ú ˜‡„, ˜ÚÓ·
ÔÓ‰ÌflÚ¸ ˘ÂÚÍÛ.
•чÌÌÓ ËÁ‰ÂÎË ËÒÔÓθÁÛÂÚÒfl Ò
‚Ò‡Ò ‚‡˛˘ÂÈ Ì‡Ò‡‰ÍÓÈ ‰Îfl Á‡˘ËÚ
ËÁ‰ÂÎËfl. Ç ˆÂÎflı Á‡˘ËÚ Ô‰Ìflfl,
åÂ˚ Ô‰ÓÒÚÓÓÊÌÓÒÚË
àÒÔÓθÁÓ‚‡ÌË Ô˚ÎÂÒÓÒ‡
•ç ‰ÓÔÛÒ͇ÈÚ ÔÓÔ‡‰‡ÌËfl ÛÍ Ë
Не используйте пылесос для удаления
мелкой пыли.
Не подвергайте пылесос воздействию
высоких температур.
■
■
•
íÛ·ËÌ̇fl ̇҇‰Í‡
-
ê„ÛÎËÓ‚‡ÌË ‚ÓÁ‰Û¯ÌÓ„Ó
艂Ë̸Ú ˚˜‡„ „ÛÎËÓ‚‡ÌËfl
‚ÓÁ‰Û¯ÌÓ„Ó ÔÓÚÓ͇ ‚Ô‡‚Ó ‰Îfl ÍÓ‚Ó‚
Ò ‰ÎËÌÌ˚Ï ‚ÓÒÓÏ ‚ÎÂ‚Ó - ‰Îfl ÍÓ‚Ó‚
Ò ÍÓÓÚÍËÏ ‚ÓÒÓÏ.
ç‡ÊÏËÚ ÍÌÓÔÍÛ ÒÁ‡‰Ë ̇҇‰ÍË
‰Îfl ÚÓ„Ó ˜ÚÓ·˚ ÒÌflÚ¸ Í˚¯ÍÛ.
àÒÔÓθÁÛÈÚ ˘ÂÚÍÛ ‰Îfl Û‰‡ÎÂÌËfl
Ô˚ÎË Ë Ì‡Ò‡‰ÍÛ ‰Îfl ˜ËÒÚÍË ‚
ÚÛ‰ÌÓ‰ÓÒÚÛÔÌ˚ı ÏÂÒÚ‡ı ‰Îfl
Ó˜ËÒÚÍË ÚÛ·ËÌÌÓÈ Ì‡Ò‡‰ÍË Ë
‚ÂÌÚËÎflÚÓ‡.
ÔÓÚÓ͇ 20)
- óËÒÚ͇ ÚÛ·ËÌÌÓÈ Ì‡Ò‡‰ÍË 21)

–7 –
ÔÓ‚ÂʉÂÌËfl ËÁ‰ÂÎËfl. ëÓ‰ËÌËÚÂ
‚Ò‡Ò ‚‡‚‰˘Û˛ ̇҇‰ÍÛ ‰Îfl Á‡˘ËÚ
ËÁ‰ÂÎËfl Ò Û‰ÎËÌËÚÂθÌÓÈ ÚÛ·ÍÓÈ
‰Îfl „ÛÎËÓ‚ÍË ‰ÎËÌ .
쉇ÎËÚ ÒÍÓÔË‚¯Û˛Òfl Ô Î¸, ÍÓ„‰‡
‡·Ó˜‡fl ÔÓ‚ÂıÌÓÒÚ¸ ‚Ò‡Ò ‚‡˛˘ÂÈ
̇҇‰ÍË ‰Îfl Á‡˘ËÚ ËÁ‰ÂÎËfl
Á‡„flÁÌËÚÒfl.
•ôÂÚ͇ ‰Îfl ˘ÂÎÂÈ (8)
ÑÎfl Û·ÓÍË ‚ ÚÛ‰ÌÓ‰ÓÒÚÛÔÌ ı
ÏÂÒÚ‡ı, ̇ÔËÏÂ, Ô‡ÛÚËÌ ‚ ۄ·ı
ËÎË ÔÓ‰ ‰Ë‚‡ÌÓÏ.
•ôÂÚ͇ ‰Îfl Ï·ÂÎË (9)
ÑÎfl ˜ËÒÚÍË Ó·Ë‚ÍË, χڇÒÓ‚ Ë Ú.Ô.
ôÂÚÍË ‰Îfl ÌËÚÓÍ Û‰Ó·Ì ‰Îfl Û·ÓÍË
ÌËÚÓÍ Ë ‚ÓÒËÌÓÍ.
•ôÂÚ͇ ‰Îfl Ô˚ÎË (10)
ÑÎfl ˜ËÚÍË ‡Ï ͇ÚËÌ, ͇‚ Ï·ÂÎË,
ÍÌË„ Ë ‰Û„Ëı ÌÂÓ‚Ì ı Ô‰ÏÂÚÓ‚.
ÇÍβ˜ÂÌËÂ Ë ËÒÔÓθÁÓ‚‡ÌË Ô˚ÎÂÒÓÒ‡
Ç ÚflÌËÚ ˘ÌÛ ÔËÚ‡ÌËfl ̇ Ú·ÛÂÏÛ˛
‰ÎËÌÛ Ë ‚Íβ˜ËÚÂ Â„Ó ‚ ÓÁÂÚÍÛ.
ìÒÚ‡Ìӂ͇ ÏÓ˘ÌÓÒÚË
•ùÎÂÍÚÓÌÌÓ ÛÔ‡‚ÎÂÌË ÏÓ˘ÌÓÒÚ¸˛
(11) åÓ˘ÌÓÒÚ¸ ‚Ò‡Ò ‚‡ÌËfl Ô·‚ÌÓ
Û‚Â΢˂‡ÂÚÒfl ‰Ó MAX.
ï‡ÌÂÌË Ô˚ÎÂÒÓÒ‡
Ç Íβ˜Ë‚ Ô ÎÂÒÓÒ Ë ‚ ÌÛ‚ ‚ËÎÍÛ ËÁ
ÓÁÂÚÍË, ̇ÊÏËÚ ÍÌÓÔÍÛ (19) ‰Îfl
ÒÏÓÚÍË ¯ÌÛ‡ (Á‡‚ËÒËÚ ÓÚ ÏÓ‰ÂÎË).
•èË ı‡ÌÂÌËË Ô ÎÂÒÓÒ‡ ÔÓθÁÛÈÚÂÒ¸
Á‡ÊËÏÓÏ ‰Îfl ı‡ÌÂÌËfl ‚ ÒÓÓÚ‚ÂÚÒÚ‚ËËÒ
(12)
ëÏÂ̇ ϯ͇ ‰Îfl Ô˚ÎË
ëÏÂ̇ ϯ͇ Ú·ÛÂÚÒfl ‚ ÚÓÏ ÒÎÛ˜‡Â,
ÍÓ„‰‡ ÔË ‡·ÓÚÂ Ô ÎÂÒÓÒ‡ ̇
χÍÒËχθÌÓÈ ÏÓ˘ÌÓÒÚË Ë̉Ë͇ÚÓ
«Ï¯ÓÍ Á‡ÔÓÎÌÂÌ» ÔÓÎÌÓÒÚ¸˛ ͇ÒÌ È
(13), ‡ ˜ËÒÚfl˘‡fl ̇҇‰Í‡ ÔË ˝ÚÓÏ
‰‡Ê Ì ÔË͇҇ÂÚÒfl Í ÔÓÎÛ.
Ç ˝ÚÓÏ ÒÎÛ˜‡Â ϯÓÍ ÌÂÓ·ıÓ‰ËÏÓ
ÒÏÂÌËÚ¸, ‰‡Ê ÂÒÎË Ì‡ Ó˘ÛÔ¸ ÓÌ ÌÂ
͇ÊÂÚÒfl Á‡ÔÓÎÌÂÌÌ Ï.
ÇÓÁÏÓÊÌÓ, ÔÓ Ï¯͇ Á‡ÍÛÔÓË·
Ó˜Â̸ ÏÂÎ͇fl Ô Î¸.
•Ç Íβ˜ËÚÂ Ô ÎÂÒÓÒ Ë ‚ ̸Ú ‚ËÎÍÛ
ËÁ ÓÁÂÚÍË.
•éÚÒÓ‰ËÌËÚ ¯Î‡Ì„
•éÚÍÓÈÚÂ Í ¯ÍÛ (14)
LJ¯ Ô ÎÂÒÓÒ Ó·ÓÛ‰Ó‚‡Ì ÎË·Ó
·ÛχÊÌ Ï, ÎË·Ó Ú͇ÌÂ΂ Ï Ï¯ÍÓÏ
(15).
(‚ Á‡‚ËÒËÏÓÒÚË ÓÚ ÏÓ‰ÂÎË).
•燉‡‚ËÚ ˜‡„ ‚ ̇ԇ‚ÎÂÌËË
ÒÚÂÎÍË (16) Ë ÔÓÚflÌËڠϯÓÍ Ì‡Á‡‰.
Ç Ì¸Ú Ï¯ÓÍ Ë ‚ ·ÓÒ¸Ú „Ó.
•ÇÒÚ‡‚¸Ú ÌÓ‚ È Ï¯ÓÍ Ú‡Í, ˜ÚÓ·
ÒÚÂÎ͇ Û͇Á ‚‡Î‡ ‚ÌËÁ (17).
ÖÒÎË Ï¯ÓÍ ‰Îfl Ô ÎË Á‡ÔÓÎÌËÎ Ô ÎÂÒÓÒ,
‚ ̸ÚÂ Â„Ó Ë Á‡ÏÂÌËÚÂ.
èËϘ‡ÌËÂ: Ú‡Í Í‡Í Ô ÎÂÒÓÒ Ò̇·ÊÂÌ
ÛÒÚÓÈÒÚ‚ÓÏ, ÔÓ‚Âfl˛¯ËÏ Ì‡Î˘ËÂ
ϯ͇ ‰Îfl Ô ÎË, Ç‡Ï Ì ۉ‡ÒÚÒfl
Á‡Í Ú¸ Í ¯ÍÛ Ô ÎÂÒÓÒ‡, ÂÒÎË Ï¯ÓÍ
Á‡ÍÂÔÎÂÌ ÌÂÔ‡‚ËθÌÓ.
é˜ËÒÚ͇ ÙËθڇ ÏÓÚÓ‡.
îËÎ¸Ú ÏÓÚÓ‡ ‡ÒÔÓÎÓÊÂÌ ‚ÌÛÚË
Ô ÎÂÒÓÒ‡ ÏÂÊ‰Û Ï¯ÍÓÏ ‰Îfl Ô ÎË Ë
ÏÓÚÓÓÏ. ä‡Ê‰ È ‡Á ÔË Á‡ÏÂÌÂ
‚ÓÁ‰ÛÌÓ„Ó ÙËθڇ Ï ÂÍÓÏẨÛÂÏ
Ç‡Ï ÒÌËχڸ ÙËÎ¸Ú ÏÓÚÓ‡ (18),
‚ ÚflıË‚‡Ú¸ „Ó, ˜ÚÓ· Ó˜ËÒÚËÚ¸ ÓÚ
„flÁË, Ë ÛÒڇ̇‚ÎË‚‡Ú¸ ̇ ÏÂÒÚÓ.
èӂ¸Ú ԇ‚ËθÌÓÒÚ¸ ÔÓ‰Íβ˜ÂÌËfl
Ô ÎÂÒÓÒ‡ Í ÒÂÚË Ë ËÒÔ‡‚ÌÓÒÚ¸
ÓÁÂÚÍË.
•Ç Íβ˜ËÚÂ Ô ÎÂÒÓÒ Ë ‚ ̸Ú ‚ËÎÍÛ
ËÁ ÓÁÂÚÍË.
•èӂ¸ÚÂ, Ì Á‡·ËÚ ÎË ÏÛÒÓÓÏ
ÚÛ·ÍË, „Ë·ÍËÈ ¯Î‡Ì„ Ë ˜ËÒÚfl˘‡fl
̇҇‰Í‡.
•èӂ¸ÚÂ, Ì ÔÂÂÔÓÎÌËÎÒfl ÎË Ï¯ÓÍ
‰Îfl ÏÛÒÓ‡. èË ÌÂÓ·ıÓ‰ËÏÓÒÚË
ÒÏÂÌËڠϯÓÍ.
•èӂ¸ÚÂ, Ì Á‡·ËÚ ÎË ‚ÓÁ‰Û¯Ì È
ÙËθÚ. èË ÌÂÓ·ıÓ‰ËÏÓÒÚË ÒÏÂÌËÚÂ
„Ó.
óÚÓ ‰Â·ڸ, ÂÒÎË
Ô˚ÎÂÒÓÒ Ì ‡·ÓÚ‡ÂÚ
óÚÓ ‰Â·ڸ, ÂÒÎË ÒÌËÊÂ̇
‚Ò‡Ò˚‚‡˛˘‡fl ÏÓ˘ÌÓÒÚ¸?
·ÓÍÓ‚‡fl Ë ‚ÂıÌflfl ÒÚÓÓÌ
‚Ò‡‚ ‚‡˛˘ÂÈ Ì‡Ò‡‰ÍË Óډ·Ì
Ïfl„ÍËÏ Ï‡Ú¡ÎÓÏ ‚Ó ËÁ·ÂʇÌËÂ

AFN30196501
This manual suits for next models
2
Table of contents
Other LG Vacuum Cleaner manuals