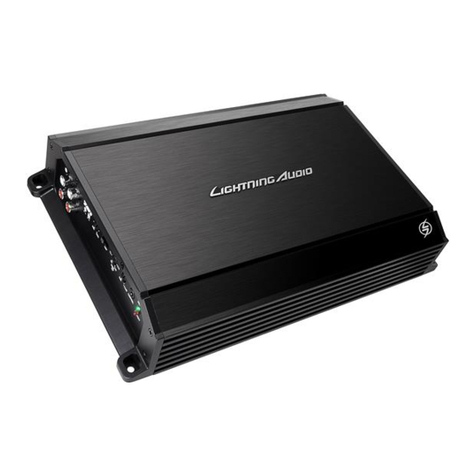
Lightning Audio Storm X1.1000.1D Guide

X1.1000.1D
X1.2000.1D
X1.400.2
X1.800.4
Installation & Operation
Installation et fonctionnement
Instalación y operación
Einbau und Betrieb
Installazione e funzionamento
Amplifier

Introduction
Table of Contents
2
Introduction . . . . . . . . . . . . . . . . . . . . . . . 2
Safety Instructions . . . . . . . . . . . . . . . . . . 3
Design Features . . . . . . . . . . . . . . . . . . 3-4
Installation. . . . . . . . . . . . . . . . . . . . . . . 4-9
Installation Considerations . . . . . . . . . . 4
Mounting Locations . . . . . . . . . . . . . . . 5
Battery and Charging . . . . . . . . . . . . . . 5
Wiring the System . . . . . . . . . . . . . . . . 6
Remote Level/BassEQ Control
(X1.1000.1D & X1.2000.1D Only) . . . . . 8
Using Passive Crossovers . . . . . . . . . . 9
NOTE: Review each section for more detailed information.
Operation. . . . . . . . . . . . . . . . . . . . . . 10-11
Adjusting Gain . . . . . . . . . . . . . . . . . . 10
Adjusting Crossover (X-Over) . . . . . . . 10
Subsonic . . . . . . . . . . . . . . . . . . . . . . 10
Phase. . . . . . . . . . . . . . . . . . . . . . . . . 10
Bass EQ. . . . . . . . . . . . . . . . . . . . . . . 10
Strapping Amplifiers
(X1.2000.1D Only). . . . . . . . . . . . . . . . 11
Troubleshooting . . . . . . . . . . . . . . . . . . . 12
Specifications. . . . . . . . . . . . . . . . . . . . . 12
Limited Warranty Information . . . . . . . . 13
International Instructions. . . . . . . . . . . . 14
Thank you for purchasing the Lightning Audio Storm Amplifier.
Our customers have come to expect that Lightning Audio pushes the edge in audio. Now we will
push the edge in the amplifier and woofer business with high value and high performance
models.
If, after reading your manual, you still have questions regarding this product, we recommend that
you see your Lightning Audio dealer. If you need further assistance, you can call us direct at 1-
888-881-8186. Be sure to have your serial number, model number and the dated proof of
purchase available when you call.
The serial number can be found on the outside of the box. Please record it in the space provided
below as your permanent record. This will serve as verification of your factory warranty and may
become useful in recovering your amplifier if it is ever stolen.
Serial Number: ________________________________________________________
Model Number: ________________________________________________________
INNOVATE OR DISINTIGRATE

Safety Instructions
Desi n Features
3
PRACTICE SAFE SOUND™
Continuous exposure to sound pressure levels over 100dB may cause
permanent hearing loss. High powered auto sound systems may produce sound
pressure levels well over 130dB. Use common sense and practice safe sound.
This symbol with “WARNING”is intended to alert the user to
the presence of important instructions. Failure to heed the
instructions will result in severe injury or death.
This symbol with “CAUTION”is intended to alert the user to
the presence of important instructions. Failure to heed the
instructions can result in injury or unit damage.
CAUTION: To prevent injury and damage to the unit, please read and follow the
instructions in this manual. We want you to have enjoyment from this
system, not a headache.
CAUTION If you feel unsure about installing this system yourself, have it
installed by a qualified Lightning Audio technician.
CAUTION Before installation, disconnect the battery negative (-) terminal to
prevent damage to the unit, fire and/or possible injury.
!
!
!
CI D
AB
HGL
E J K
X1.1000.1D
CI DAB
H
LO
MN
J K
MAS
SLV
X1.2000.1D
AB C
F
D
HG
E
X1.400.2
D
B BA
H
G
E EF
C C
X1.800.4

4
Desi n Features
Installation
A. RCA Input Jacks –Line Level from Radio Pre-outs: The industry standard RCA jack
provides an easy connection for signal level input. They are platinum to resist the signal
degradation caused by corrosion.
B. Gain Control: The input gain control is preset to match the output of most source units.
They can be adjusted to match output levels from a variety of source units.
C. Adjustable Crossover Frequency Control: 50-250Hz. Low Pass only on Models
X1.1000.1D & X1.2000.1D.
D. Speaker Connections: Follow correct polarity, and do not Ground any speaker wires. Do not
connect any speaker wires together.
E. Crossover Filter Switch: (Models X1.400.2 & X1.800.4 Only)
HPF for High Pass - Mid-Tweeter.
Flat for All Pass - Full Range.
LPF for Low Pass - Subs.
F. Pass Thru Outputs: The Pass-Thru provides a convenient source for daisy-chaining an
additional amplifier without running an extra set of RCA cables from the front of the vehicle
to the rear amplifier location.
G. Power Fuse: If this Fuse should blow, determine the cause or see your authorized dealer.
Never replace the fuse with one of greater value than the original
H. Power Connector terminals: Connects Power, Ground, and Remote
I. Phase: (Models X1.1000.1D & X1.2000.1D Only) Used to vary the inversion of the output,
0°-180°, from input source.
J. SubSonic: (Models X1.1000.1D & X1.2000.1D Only) A high pass filter designed to prevent
frequencies below the audio range from being applied to the subwoofer from the amplifier.
Improving subwoofer performance and power handling.
K. Bass EQ: (Model X1.1000.1D & X1.2000.1D Only) Variable 20-80Hz frequency control. Boost
controlled by remote.
L. Remote Level/Bass EQ Control: (Models X1.1000.1D & X1.2000.1D Only) Remote level
control attenuates Gain set on the amplifier by up to -20dB. Bass EQ control is 0 to +12dB
Boost of the frequency (20-80Hz) set on the amplifier.
M. Master / Slave Switch: (Model 2000.1D Only) Used to set the amplifier to master or slave
when strapping.
N. SLV IN (slave): (Model X1.2000.1D Only) When strapping, this is the slaved amplifer input
from the master amplifier.
O. MAS OUT (master): (Model X1.2000.1D Only) When strapping, this is the master amplifer
output to the slave amplifier.
INSTALLATION CONSIDERATIONS
The following is a list of tools needed for installation:
Volt/Ohm Meter
Wire strippers
Wire crimpers
Wire cutters
#2 Phillips screwdriver
Battery post wrench
Hand held drill w/assorted bits
1/8" diameter heatshrink tubing
Assorted connectors
Adequate Length—Power Wire
Adequate Length—Remote Turn-on Wire
Adequate Length—Grounding Wire

5
Installation
This section focuses on some of the vehicle considerations for installing your new Amplifier. Pre-
planning your system layout and best wiring routes will save installation time. When deciding on
the layout of your new system, be sure that each component will be easily accessible for making
adjustments.
CAUTION: If you feel unsure about installing this system yourself, have it
installed by a qualified technician.
CAUTION: Before installation, disconnect the battery negative (-) terminal to
prevent damage to the unit, fire and/or possible injury.
Before beginning any installation, follow these simple rules:
1. Be sure to carefully read and understand the instructions before attempting to install the
Unit.
2. For safety, disconnect the negative lead from the battery prior to beginning the installation.
3. For easier assembly, we suggest you run all wires prior to mounting your Unit in place.
4. Route all of the RCA cables close together and away from any high current wires.
5. Use high quality connectors for a reliable installation and to minimize signal or power loss.
6. Think before you drill! Be careful not to cut or drill into gas tanks, fuel lines, brake or
hydraulic lines, vacuum lines or electrical wiring when working on any vehicle.
7. Never run wires underneath the vehicle. Running the wires inside the vehicle provides the
best protection.
8. Avoid running wires over or through sharp edges. Use rubber or plastic grommets to protect
any wires routed through metal, especially the firewall.
9. ALWAYS protect the battery and electrical system from damage with proper fusing. Install
the appropriate fuse holder and fuse on the +12V power wire within 18”(45.7 cm) of the
battery terminal.
10. When grounding to the chassis of the vehicle, scrape all paint from the metal to ensure a
good, clean ground connection. Grounding connections should be as short as possible and
always be connected to metal that is welded to the main body, or chassis, of the vehicle.
MOUNTING LOCATIONS
The mounting position of your amplifier will have a great effect on the sound and performance
produced.
Engine Compartment
Never mount this unit in the engine compartment. Mounting the unit in the engine compartment
will void your warranty.
Passenger Compartment Mounting
Mounting the amplifier in the passenger compartment will work as long as you provide a
sufficient amount of air for the amplifier to cool itself. If you are going to mount the amplifier
under the seat of the vehicle, you must have at least 1" (2.54cm) of air gap around the amplifier's
heatsink.
Mounting the amplifier with less than 1" (2.54cm) of air gap around the amplifier's heatsink in the
passenger compartment will not provide proper cooling and will severely affect the performance
of the amplifier and is strongly not recommended.
BATTERY AND CHARGING
Amplifiers will put an increased load on the vehicle's battery and charging system. We
recommend checking your alternator and battery condition to ensure that the electrical system
has enough capacity to handle the increased load of your stereo system. Stock electrical
systems which are in good condition should be able to handle the extra load of any Lightning
Audio amplifier without problems, although battery and alternator life can be reduced slightly. To
maximize the performance of your amplifier, we suggest the use of a heavy duty battery and an
energy storage capacitor.
!
!

6
Installation
WIRING THE SYSTEM
CAUTION: If you do not feel comfortable with wiring your new unit, please see
your local Authorized Lightning Audio Dealer for installation.
CAUTION: Before installation, disconnect the battery negative (-) terminal to
prevent damage to the unit, fire and/or possible injury.
CAUTION: Avoid running power wires near the low level input cables, antenna,
power leads, sensitive equipment or harnesses. The power wires
carry substantial current and could induce noise into the audio
system.
1. Plan the wire routing. Keep RCA cables close together but isolated from the amplifier's
power cables and any high power auto accessories, especially electric motors. This is done
to prevent coupling the noise from radiated electrical fields into the audio signal. When
feeding the wires through the firewall or any metal barrier, protect them with plastic or rubber
grommets to prevent short circuits. Leave the wires long at this point to adjust for a precise
fit at a later time.
2. Prepare the power cable for attachment to the amplifier by stripping 1/2" of insulation from
the end of the wire. Insert the bared wire into the B+ terminal and tighten the set screw to
secure the cable in place.
NOTE: The B+ cable MUST be fused 18" or less from the vehicle's battery. Install the fuseholder
under the hood and prepare the cable ends as stated above. Connections should be water
tight.
3. Trim the power cable within 18" of the battery and strip1/2"of insulation from the end of the
wire.
4. Strip 1/2" from the battery end of the power cable and crimp a large ring terminal to the
cable. Use the ring terminal to connect to the battery positive terminal. DO NOT install the
fuse at this time.
5. Prepare the grounding cable for attachment to the amplifier by stripping 1/2" of insulation
from the end of the wire. Insert the bared wire into the GND terminal and tighten the set
screw to secure the cable in place. Prepare the chassis ground by scraping any paint from
the metal surface and thoroughly clean the area of all dirt and grease. Strip the other end of
the wire and attach a ring connector. Fasten the cable to the chassis using a non-anodized
screw and a star washer.
6. Prepare the REM turn-on wire for connection to the amplifier by stripping 1/2" of insulation
from the wire end. Insert the bared wire into the REM terminal and tighten the set screw to
secure the cable into place. Connect the other end of the REM wire to a switched 12 volt
positive source. The switched voltage is usually taken from the source unit's accessory lead.
If the source unit does not have this output available, the recommended solution is to wire a
mechanical switch in line with a 12 volt source to activate the amplifier.
7. Securely mount the amplifier to the vehicle or amp rack. Be careful not to mount the
amplifier on cardboard or plastic panels. Doing so may enable the screws to pull out from
the panel due to road vibration or sudden vehicle stops.
8. Connect the source signal to the amplifier by plugging the RCA cables/high level inputs into
the input jacks at the amplifier.
9. Connect the speakers. Strip the speaker wires 1/2" and insert into the speaker terminal and
tighten the set screw to secure into place. Be sure to maintain proper speaker polarity. DO
NOT chassis ground any of the speaker leads as unstable operation may result.
10. Perform a final check of the completed system wiring to ensure that all connections are
accurate. Check all power and ground connections for frayed wires and loose connections
which could cause problems.
NOTE: Follow the diagrams for proper signal polarity.
CAUTION: The X1.400.2 and X1.800.4 amplifiers are not recommended for
impedance loads below 2Ωstereo and/or 4Ωbridged (mono).
!
!
!
!

7
Installation
X1.1000.1D
X1.2000.1D
X1.400.2
X1.800.4
MONO AMPLIFIERS X1.1000.1D & X1.2000.1D
These amplifiers have two (2) speaker outputs for convenience and are paralleled internally.
CAUTION: The X1.1000.1D and X1.2000.1D amplifiers are not recommended for
impedance loads below 1Ω.
!

8
Installation
REMOTE LEVEL/BASS EQ CONTROL
(Models X1.1000.1D & X1.2000.1D Only)
Mounting and installation
1. Find a location, either under the dash or near
the center console, that gives easy access to
the remote.
2. Using the screws supplied, install the mounting
clip with the tabs towards the back.
3. Route the cable for the remote and connect to
both the remote and amplifer.
4. Slip the remote onto the mounting clip until it
snaps into place.
Mounting
Clip
From Source Unit
From Source Unit
From Source Unit
From Source Unit From Source Unit
From Source Unit
X1.400.2
2-Channel
X1.800.4
4-Channel
2-Channel –Bridged
4-Channel –
Set as 3-Channel Bridged
X1.1000.1D
X1.2000.1D

USING PASSIVE CROSSOVERS
A passive crossover is a circuit that
uses capacitors and/or coils and is
placed on speaker leads between the
amplifier and speaker. The crossover
delegates a specific range of
frequencies to the speaker for
optimum driver performance. A
crossover network can perform one of
three functions: High-Pass
(capacitors), Low-Pass (inductors or
coils) and Bandpass (combination of
capacitor and coil).
The most commonly used passive
crossover networks are 6dB/octave
systems. These are easy to construct
and require one component per filter.
Placing this filter in series with the
circuit will reduce power to the
speaker by 6dB/octave above or
below the crossover point depending
on whether it is a high-pass or low-
pass filter. More complex systems
such as 12dB/octave or 18dB/octave
can cause impedance problems if not
professionally designed.
Passive crossovers are directly
dependent upon the speaker's
impedance and component value for
accuracy. When passive crossover
components are used in multiple
speaker systems, the crossover's
effect on the overall impedance should
be taken into consideration along with
the speaker's impedance when
determining amplifier loads.
CAUTION: The Lightning Audio amplifiers are not recommended for impedance
loads below 2Ωstereo and 4Ωbridged (mono) loads.
9
Installation
80 4.1mH 1000mF 8.2mH 500mF 16mH 250mF
100 3.1mH 800mF 6.2mH 400mF 12mH 200mF
130 2.4mH 600mF 4.7mH 300mF 10mH 150mF
200 1.6mH 400mF 3.3mH 200mF 6.8mH 100mF
260 1.2mH 300mF 2.4mH 150mF 4.7mH 75mF
400 .8mH 200mF 1.6mH 100mF 3.3mH 50mF
600 .5mH 136mF 1.0mH 68mF 2.0mH 33mF
800 .41mH 100mF .82mH 50mF 1.6mH 26mF
1000 .31mH 78mF .62mH 39mF 1.2mH 20mF
1200 .25mH 66mF .51mH 33mF 1.0mH 16mF
1800 .16mH 44mF .33mH 22mF .68mH 10mF
4000 .08mH 20mF .16mH 10mF .33mH 5mF
6000 51mH 14mF .10mH 6.8mF .20mH 3.3mF
9000 34mH 9.5mF 68mH 4.7mF .15mH 2.2mF
12000 25mH 6.6mF 51mH 3.3mF 100mH 1.6mF
Freq.
Hertz
Speaker Impedance
2 OHMS 8 OHMS
4 OHMS
L L L
C C C
6dB/Octave Low-Pass 6dB/Octave High-Pass
LC
L = Low-Pass (Inductor)
C = High-Pass (Capacitor)
For more information, see your Authorized Lightning
Audio Dealer.
!

10
Operation
ADJUSTING GAIN
To adjust the gain setting, turn the amplifier gains all the way down. Turn the source unit volume
up until distortion is audible and then turn it down a bit until the distortion is inaudible. This will
be about two thirds all the way up on most source units. Next, turn the amplifier gain setting
until once again distortion is audible and then back it down until the distortion is inaudible.
NOTE: For a more in depth setting procedure, contact Lightning Audio Technical Support.
ADJUSTING CROSSOVER (X-OVER)
Models X1.400.2 & X1.800.4
Placing the switch in the HPF position sets the amplifier to the High Pass mode, enabling
frequencies above the cut-off point to pass, adjustable between 50-250Hz.
Placing the switch in the FLAT position sets the amplifier to the All Pass mode, preventing any
crossover adjustment, allowing all frequencies to pass..
Placing the switch in the LPF position sets the amplifier to the Low Pass mode, enabling
frequencies below the cut-off point to pass, adjustable between 50-250Hz.
Turn the crossover adjustment knob all the way down. With the system playing, turn the
crossover adjustment knob up slowly until the desired crossover point is achieved.
Models X1.1000.1D & X1.2000.1D
Turn the crossover adjustment knob all the way down. With the system playing at normal
listening level, turn the crossover adjustment knob up slowly until the desired crossover point is
achieved.
SUBSONIC (Models X1.1000.1D & X1.2000.1D Only)
A high pass filter designed to prevent frequencies below the audio range from being applied to
the subwoofer from the amplifier.
Set this to your personal preference while listening to the system.
PHASE (Models X1.1000.1D & X1.2000.1D Only)
This varies the inversion of the output signal from 0°to 180°from the input signal. Set this to
your personal preference while listening to the system.
BASS EQ (Models X1.1000.1D & X1.2000.1D Only)
Used with the Remote Level/Bass EQ Control, the control will boost the frequency of what is set
here.
Example: If the Bass EQ Freq on the amplifier is set to 50Hz, the Remote will boost that frequency.
Gain Bass EQ Crossover
Phase
Subsonic
Gain Crossover
X1.1000.1D
X1.2000.1D
is Simular
X1.400.2
X1.800.4
is Simular

11
Operation
STRAPPING AMPLIFIERS (X1.2000.1D Only)
The X1.2000.1D amplifiers have the ability to connect two together and have their outputs
combined, or strapped, to power a single speaker load.
CAUTION: Two X1.2000.1D amplifiers that are strapped together are not
recommended for impedance loads below 2Ω.
1. Select which amplifier of the two will be the master. and set the Master/Slave switch in the
"out" position.
NOTE: Only adjustments made to the master amplifier will effect the output to the connected
speaker.
2. Connect RCA cables from the source signal to the input connection on the master amplifier.
3. Set the Master / Slave switch on the slave amplifier to the "in" position.
4. Connect a RCA cable from the MAS OUT connector on the master amplifier to the SLV IN
connector on the slave amplifier.
5. Connect one of the negative (-) speaker outputs from the master amplifier to one of the
negative (-) speaker outputs on the slave amplifier using a 10 gauge wire (minimum).
6. Connect one of the positive (+) speaker outputs from the master amplifier to the positive (+)
terminal of the speaker being use.
7. Connect one of the positive (+) speaker outputs from the slave amplifier to the negative (-)
terminal of the speaker being use.
!

12
Specifications
Specifications subject to change without notice
Troubleshootin
Symptom Diagnosis Remedy
Amplifier does not
turn on.
Amplifier Noise
(Turn-On Pop)
Engine Noise
B+ or REM not between 10.5 and
15.5 volts or no voltage present
Amplifier is not properly grounded.
Voltage spike from source unit is
entering amplifier’s input
Noise is radiating into signal cables
Check the alternator, battery, fuse,
and wiring and repair as necessary
Check wiring and repair as necessary
Connect a relay turn-on module to
REM terminal if pops are eliminated
with no input signal to amplifier
Re-route signal cables away from
sources of high current
MODEL- Storm X1.1000.1D X1.2000.1D X1.400.2 X1.800.4
Continuous Power Rating (RMS) - Measured at 14.4 Battery Volts
4ΩLoad Per Channel 400 Watts x 1 700 Watts x 1 100 Watts x 2 100 Watts x 4
2ΩLoad Per Channel 700 Watts x 1 1200 Watts x 1 200 Watts x 2 200 Watts x 4
4ΩLoad Bridged (Mono) 400 Watts x 1 400 Watts x 2
X1.1000.1D & X1.2000.1D Only
1ΩLoad Bridged 1000 Watts x 1 2000 Watts x 1
Dimensions: -
add 1.5" (xcm) to length for mounting feet
Height 2.2" (5.6cm) 2.2" (5.6cm) 2.2" (5.6cm) 2.2" (5.6cm)
Width 10.4" (26.42cm) 10.4" (26.42cm) 10.4" (26.42cm) 10.4" (26.42cm)
Length 14" (35.56cm) 22.0" (56.00cm) 15.2" (30.61cm) 18.6" (47.24cm)
Signal-to-Noise Ratio >90dB A-weighted
Input Sensitivity 150mV - 4V
Crossover (X1.1000.1D & X1.2000.1D only) 24dB/octave Low Pass only
Crossover (X1.400.2 & X1.800.4 only) 24dB/octave HPF/Flat/LPF Switch
Crossover Frequency variable from 50Hz to 250Hz
Channel Separation 50dB
Bass Equalization (X1.1000.1D & X1.2000.1D only) Variable from 0dB to +12dB @ 20-80Hz

13
Ship to: Electronics
Lightning Audio
Warranty Repair Department
2055 E. 5th Street
Tempe, AZ 85281
RA#: _________________________
Ship to: Speakers
Lightning Audio
Speaker Returns
2356 Turner Ave. NW
Grand Rapids, MI 49544
RA#: ____________________
Lightning Audio offers a limited warranty on products on the following terms:
•Length of Warranty
Speakers
One year parts and labor warranty. Requires proof of purchase.
Amplifiers
Bolt: One year parts and labor warranty. Requires proof of purchase.
Strike and Storm: One year parts and labor warranty. Requires proof of purchase.
Or, Two years parts and labor warranty if installed by a Authorized Dealer. Requires proof of purchase.
CT-1and PC2
One year parts and labor warranty. Requires proof of purchase.
•What is Covered
This warranty applies only to Lightning Audio products sold to consumers by Authorized Lightning Audio
Dealers in the United States of America or its possessions. Product purchased by consumers from an
Authorized Lightning Audio Dealer in another country are covered only by that country’s Distributor and
not by Lightning Audio.
•Who is Covered
This warranty covers only the original purchaser of Lightning Audio product purchased from an Autho-
rized Lightning Audio Dealer in the United States. In order to receive service, the purchaser must provide
Lightning Audio with a copy of the receipt stating the customer name, dealer name, product purchased
and date of purchase.
•Products found to be defective during the warranty period will be repaired or replaced (with a product
deemed to be equivalent) at Lightning Audio’s discretion.
•What is Not Covered
1. Damage caused by accident, abuse, improper operations, water, theft
2. Any cost or expense related to the removal or reinstallation of product
3. Service performed by anyone other than Lightning Audio or an Authorized Lightning Audio Service Center
4. Any product which has had the serial number defaced, altered, or removed
5. Subsequent damage to other components
6. Any product purchased outside the U.S.
7. Any product not purchased from an Authorized Lightning Audio Dealer
•Limit on Implied Warranties
Any implied warranties including warranties of fitness for use and merchantability are limited in duration to
the period of the express warranty set forth above. Some states do not allow limitations on the length of
an implied warranty, so this limitation may not apply. No person is authorized to assume for Lightning
Audio any other liability in connection with the sale of the product.
•How to Obtain Service
Please call 1-888-881-8186 for Lightning Audio Customer Service. You must obtain an RA# (Return
Authorization number) to return any product to Lightning Audio. You are responsible for shipment of
product to Lightning Audio. Always include Proof of Purchase.
Mark RA# on outside of shipping carton.
•EU Warranty
This product meets the current EU warranty requirements, see your Authorized dealer for details.
Limited Warranty Information

´
14
Français
Introduction
Table des matieres
Introduction . . . . . . . . . . . . . . . . . . . . . . 14
Consignes de sécurité. . . . . . . . . . . . . . 15
Particularités techniques . . . . . . . . . 15-16
Installation. . . . . . . . . . . . . . . . . . . . . 16-21
Considérations concernant l’installation16
Emplacements de montage . . . . . . . . 17
Batterie et chargement . . . . . . . . . . . . 17
Câblage du système. . . . . . . . . . . . . . 18
TÉLÉcommande de niveau/égalisateur
de basses (modèles X1.1000.1D et
X1.2000.1D seulement). . . . . . . . . . . . 20
Utilisation de Filtres Passifs . . . . . . . . 21
REMARQUE : consultez chaque section pour de plus amples informations
Fonctionnement . . . . . . . . . . . . . . . . 22-23
Réglage du gain . . . . . . . . . . . . . . . . . 22
Réglage du filtre passif (Filtre). . . . . . . 22
Subsonique . . . . . . . . . . . . . . . . . . . . 22
Phase. . . . . . . . . . . . . . . . . . . . . . . . . 22
Égalisateur de basses. . . . . . . . . . . . . 22
Jumelage des amplis
(X1.2000.1D seulement) . . . . . . . . . . . 23
Dépannage . . . . . . . . . . . . . . . . . . . . . . . 24
Caractéristiques . . . . . . . . . . . . . . . . . . . 24
Garantie limitée . . . . . . . . . . . . . . . . . . . 25
Nous vous remercions d'avoir achetécet ampli Lightning Audio Bolt.
Notre clientèle s’attend àce que Lightning Audio pousse toujours plus loin les limites du son.
C’est ce àquoi nous nous consacrons àprésent dans les domaines des amplis et des haut-
parleurs graves grâce àdes modèles hautement performants de valeur supérieure.
Si vous avez encore des questions àpropos de ce produit, même après avoir lu ce manuel,
contactez votre concessionnaire Lightning Audio agréé. Si vous avez besoin d'aide, appelez-
nous au 1-888-881-8186. Veuillez avoir les numéros de modèle et de série, ainsi que la date
d'achat de l'appareil àportée de main lorsque vous appelez.
Le numéro de série est indiquésur l’extérieur de l’emballage. Veuillez l’inscrire ci-dessous dans
l'espace réservéàcet effet. Il permettra de vérifier votre garantie et de retrouver votre appareil
en cas de vol.
Numéro de série : _____________________________________
Numéro de modèle : ___________________________________
L’innovation ou la mort !

´´
´
15
Consi nes de securite
Particularites Techniques
PRATIQUEZ UNE ÉCOUTE SANS RISQUESMD
Une exposition continue àdes niveaux de pression acoustique supérieurs à100 dB peut
causer une perte d'acuitéauditive permanente. Les systèmes audio de forte puissance
pour auto peuvent produire des niveaux de pression acoustique bien au-delàde 130 dB.
Faites preuve de bon sens et pratiquez une écoute sans risque
Le symbole accompagnant le mot «AVERTISSEMENT »signale à
l'utilisateur la présence d’instructions importantes. Le non-respect de
ces instructions causera des blessures graves ou la mort.
Le symbole accompagnant l’expression «MISE EN GARDE »signale
àl'utilisateur la présence d’instructions importantes. Le non-respect
de ces instructions peut causer des blessures ou endommager
l’appareil.
MISE EN GARDE : pour éviter des blessures et ne pas endommager l'appareil,
veuillez lire et suivre les instructions du manuel. Notre but est
que ce système vous donne du plaisir et non des maux de
tête.
MISE EN GARDE : si vous vous sentez incapable d’installer l’appareil vous-
même, confiez la tâche àun technicien qualifié.
MISE EN GARDE : avant d'entamer l'installation, déconnectez la broche négative
(-) de la batterie pour éviter tout risque de blessures,
d’incendie ou de dommages àl'appareil.
!
!
!
CI D
AB
HGL
E J K
X1.1000.1D
CI DAB
H
LO
MN
J K
MAS
SLV
X1.2000.1D
AB C
F
D
HG
E
X1.400.2
D
B BA
H
G
E EF
C C
X1.800.4

´
16
Français
Particularites Techniques
Installation
A. Prises d’entrée RCA –Entrées de ligne de pré-sorties radio : les prises RCA de norme industrielle
permettent une connexion facile pour les entrées de signaux. Elles sont plaquées de platine pour
résister àla détérioration de signal due àl'effet de la corrosion.
B. Commande de gain : la commande de gain d'entrée est préréglée de manière àcorrespondre àla
sortie de la plupart des unités source. Elle peut être réglée en fonction d'une variétéd'unités
source.
C. Contrôle de fréquence de coupure réglable : 50-250 Hz. Modèles X1.1000.1D et X1.2000.1D en
mode passe-bas LP seulement.
D. Connexions de haut-parleurs : respectez les polarités et ne mettez àla masse aucun fil de
haut-parleur. Évitez de connecter les fils de haut-parleur ensemble.
E. Commutateur de filtre passif :(modèles X1.400.2 et X1.800.4 seulement)
Haut pour passe-haut - haut-parleur d'aigus, fréquence médiane.
Plat pour passe-tout - pleine gamme.
Bas pour passe-bas - subwoofer.
F. Sorties d’extension ampli : l’extension ampli permet de connecter en guirlande un ampli supplémentaire
en évitant d’acheminer des câbles RCA additionnels de l’avant du véhicule vers l’emplacement arrière oùse
trouve le second ampli.
G. Fusible de ligne : si le fusible est grillé, essayez d’en déterminer la cause ou bien consultez votre
distributeur agréé. Ne remplacez jamais un fusible par un autre de valeur supérieure.
H. Prises de connecteurs d’alimentation : connexion d’alimentation, de mise àla masse et de commande à
distance
I. Phase : (modèles X1.1000.1D et X1.2000.1D seulement) Permet de varier l'inversion de sortie, de
0°à180°, relativement àla source d'entrée.
J. Subsonique : Filtre passe-haut conçu pour empêcher la transmission, de l’ampli au subwoofer,
des fréquences inférieures àla plage sonore. Par conséquent, cela améliore le rendement et la
puissance du subwoofer.
K. Égalisateur de basses : (modèles X1.1000.1D et X1.2000.1D seulement) contrôle variable des
fréquences de 20 à80 Hz. Contrôle d'amplification par télécommande.
L. Télécommande de niveau/égalisateur de basses : (modèles X1.1000.1D et X1.2000.1D
seulement) Télécommande de niveau atténuant le gain de l'ampli de -20 dB max. Commande
d'égalisateur de basses pouvant amplifier de 0 à+12 dB la fréquence (20 à80 Hz) de l'ampli.
M. Interrupteur Master/Slave : (Modèle 2000.1D uniquement) Permet de régler l'ampli sur maître ou
esclave en cas de jumelage.
N. SLV IN (esclave) : (Modèle X1.2000.1D uniquement) En cas de jumelage, ceci est l'entrée de
l'amplificateur esclave àpartir de l'amplificateur maître.
O. MAS OUT (maître) : (Modèle X1.2000.1D uniquement) En cas de jumelage, ceci est la sortie de
l'amplificateur maître vers l'amplificateur esclave.
CONSIDÉRATIONS CONCERNANT L’INSTALLATION
Voici la liste d’outils requis pour l’installation :
Voltmètre-ohmmètre
Pince àdénuder
Pince àsertir
Coupe-fils
Tournevis àembout cruciforme no 2
Cléde borne de batterie
Perceuse àmain avec mèches assorties
Tube thermorétrécissable de 1/8" de
diamètre
Connecteurs assortis
Longueur adéquate —Fil d'alimentation
Longueur adéquate —Fil d’allumage à
distance
Longueur adéquate —Fil de masse

17
Installation
Cette section traite de points concernant le véhicule dont il faut tenir compte pour l’installation
de votre nouvel ampli. Vous sauverez du temps en planifiant àl’avance la disposition du système
et du câblage. Assurez-vous, entre autres, que chaque composant du système est facilement
accessible pour les réglages.
MISE EN GARDE : si vous vous sentez incapable d’installer l’appareil vous-
même, confiez la tâche àun technicien qualifié.
MISE EN GARDE : avant d'entamer l'installation, déconnectez la broche négative
(-) de la batterie pour éviter tout risque de blessures,
d’incendie ou de dommages àl'appareil.
Avant de commencer l’installation, suivez ces règles toutes simples :
1. Prenez soin de bien lire et comprendre les instructions avant d’installer l’appareil.
2. Par mesure de sécurité, veuillez débrancher le fil négatif de la batterie avant de commencer
l’installation.
3. Pour faciliter le montage, nous vous suggérons de dérouler tous les fils avant d’installer l’appareil.
4. Acheminez tous les câbles RCA de façon groupée, àl’écart des fils àcourant élevé.
5. Utilisez des connecteurs de haute qualitépour assurer une installation fiable et minimiser la perte
de signal ou de puissance.
6. Réfléchissez avant de percer quoique ce soit ! Faites attention de ne pas couper ou percer le
réservoir d’essence, les conduites de carburant, de frein, hydrauliques ou de dépression, ou le
câblage électrique lorsque vous travaillez sur un véhicule.
7. Ne faites jamais passer les fils sous le véhicule. Il vaut mieux les installer àl’intérieur du véhicule
pour assurer une meilleure protection.
8. Évitez de faire passer les fils par dessus ou àtravers des bords tranchants. Tout fil acheminéà
travers du métal, un pare-feu en particulier, doit être protégéavec des bagues en caoutchouc ou
plastique.
9. Protégez TOUJOURS la batterie et le circuit électrique des dommages potentiels àl’aide de
fusibles. Installez un porte-fusible et un fusible appropriés sur le câble d’alimentation de +12 V à
moins de 45,7 cm (18”) de la borne de batterie.
10. Préparez la masse du châssis en grattant toute trace de peinture de la surface métallique afin
d’assurer une bonne mise àla masse. Les connexions de masse doivent être aussi courtes que
possible et toujours connectées àdu métal soudéàla carrosserie ou au châssis du véhicule.
EMPLACEMENTS DE MONTAGE
L’emplacement de l’ampli influe grandement sur la qualitédu son obtenu.
Compartiment moteur
Ne jamais monter cet appareil dans le compartiment moteur. Cela entraînerait l’annulation de la
garantie.
Montage dans l’habitacle
Le montage de l’ampli dans l’habitacle passager est acceptable àcondition qu’il reçoive suffisamment
d’air pour se refroidir. Si vous comptez installer l’ampli sous le siège du véhicule, prévoyez un
écartement d’au moins 2,54 cm (1 po) autour du dissipateur thermique de l’ampli.
Un écartement inférieur àcela n’assure pas un refroidissement satisfaisant, nuit àla performance de
l’ampli et est, pas conséquent, fortement déconseillé.
BATTERIE ET CHARGE
Les amplificateurs exercent une charge accrue sur la batterie et le système de charge du véhicule.
Nous vous conseillons de vérifier l’état de l’alternateur et de la batterie pour vous assurer que le
système électrique puisse supporter la charge accrue de votre système stéréo. Les systèmes
électriques ordinaires en bon état sont normalement capables de fournir sans problème la charge
supplémentaire requise par les amplis Lightning Audio. Toutefois, la durée de vie de la batterie et de
l’alternateur peut s’en trouver affectée légèrement. Pour maximiser la performance de votre ampli, nous
vous suggérons d’utiliser une batterie àusage intensif et un condensateur de stockage d’énergie.
!
!

18
Français
Installation
CBLAGE DU SYSTÈME
MISE EN GARDE : si vous ne vous sentez pas àl’aise pour effectuer vous-
même le câblage de votre nouvel appareil, veuillez confier
l’installation àvotre concessionnaire Lightning Audio agréé.
MISE EN GARDE : avant d'entamer l'installation, déconnectez la broche négative
(-) de la batterie pour éviter tout risque de blessures,
d’incendie ou de dommages àl'appareil.
MISE EN GARDE : évitez de faire passer les fils d’alimentation près des câbles
d’entrée de signaux faibles, de l’antenne, des câbles
d'alimentation, des équipements ou faisceaux sensibles. Les
fils d’alimentation transportent un courant élevéet peuvent
produire du bruit dans le système audio.
1. Planifiez l’acheminement des fils. Gardez les câbles RCA ensemble mais en les isolant des câbles
d’alimentation de l’ampli et des autres accessoires automobiles de forte puissance, particulièrement les
moteurs électriques, pour éviter que le signal audio ne subisse d'interférence de bruit provenant de
champs de rayonnement électriques. Si vous faites passer les fils par un pare-feu ou autre barrière
métallique, protégez-les àl’aide de bagues en caoutchouc ou en plastique pour éviter les courts-circuits.
Conservez toute la longueur des fils pour l’instant. Vous l’ajusterez plus tard.
2. Préparez le câble d'alimentation qui devra être reliéàl'ampli en dénudant 1/2 po de son extrémité.
Insérez la partie dénudée dans la borne B+, puis fixez le fil en vissant la vis sans tête.
REMARQUE : Le câble B+ DOIT comporter un fusible à18 pouces ou moins de la batterie du véhicule.
Installez le porte-fusible sous le capot et préparez les extrémités de câble tel qu’indiquéci-
dessus. Les connexions doivent être étanches.
3. Coupez le câble d'alimentation àmoins de 18 pouces de la batterie et dénudez 1/2 po de son
extrémité.
4. Dénudez 1/2 po de l’extrémitéde batterie du câble d’alimentation et sertissez une grosse cosse àanneau
sur le câble. Connectez la cosse àla borne positive de la batterie. N’installez pas le fusible pour l'instant.
5. Préparez le fil de terre qui devra être reliéàl'ampli en dénudant 1/2 po de son extrémité. Insérez la
partie dénudée dans la borne GND, puis fixez le fil en vissant la vis sans tête. Préparez la masse du
châssis en grattant toute trace de peinture de la surface métallique et en nettoyant soigneusement pour
éliminer tout dépôt de saletéet de graisse. Dénudez l’autre extrémitédu fil et fixez un connecteur en
anneau. Fixez le câble au châssis àl’aide d’une vis non anodisée et une rondelle en étoile.
6. Préparez le fil d’activation REM qui devra être reliéàl’ampli en dénudant 1/2 po de son extrémité. Insérez
la partie dénudée dans la borne REM, puis fixez le fil en vissant la vis sans tête. Connectez l’autre
extrémitédu fil REM àune source positive commutée de 12 volts. La tension commutée provient
généralement de l’antenne ou du câble d’accessoires de la source audio. Si la source audio ne comporte
pas de telles sorties, nous recommandons de raccorder un interrupteur mécanique en ligne avec une
source de 12 volts pour activer l’ampli.
7. Montez solidement l’ampli sur le véhicule ou le rack d’ampli. Prenez soin de ne pas le fixer sur des
panneaux en carton ou en plastique. Les vis pourraient en effet se décoller des panneaux sous l’effet des
vibrations de la route ou des arrêts soudains du véhicule.
8. Connectez le signal àl’ampli en branchant les câbles RCA/entrées de signaux élevés dans les prises
d’entrée de l’ampli.
9. Connectez les haut-parleurs : dénudez les fils des haut-parleurs de 1/2" et insérez la partie dénudée dans
la borne du haut-parleur, puis serrez la vis sans tête pour fixer le tout. Veillez àrespecter la polaritédes
haut-parleurs. NE mettez
10. Effectuez une vérification finale du câblage pour vous assurer que toutes les connexions sont bien
mises. Vérifiez toutes les connexions d’alimentation et de mise àla masse en vue de fils effilochés
et de connexions desserrées pouvant causer des problèmes.
REMARQUE :vérifiez les polarités de signal àl’aide des schémas.
MISE EN GARDE : les amplis X1.400.2 et X1.800.4 ne sont pas recommandés
pour des charges d'impédance inférieures à2Ωstéréo ou
4Ωpontées (mono).
!
!
!
!

19
Installation
AMPLIFICATEURS MONO X1.1000.1D et X1.2000.1D
Ces amplis ont deux (2) sorties de haut-parleur pour plus de commoditéet sont en parallèle àl'intérieur.
MISE EN GARDE : les amplificateurs X1.1000.1D et X1.2000.1D ne sont pas
recommandés pour des charges d'impédance inférieures à1Ω.
!
X1.1000.1D
X1.2000.1D
X1.400.2
X1.800.4

20
Français
From Source Unit
From Source Unit
From Source Unit
From Source Unit From Source Unit
From Source Unit
X1.400.2
2 canaux
X1.800.4
4 canaux
2 canaux - pontés
4 canaux –
Réglage en 3 canaux pontés
X1.1000.1D
X1.2000.1D
Source audio
Source audio Source audio
Source audio
Source audio Source audio
Amplificateur
Amplificateur Amplificateur
Amplificateur
Installation
TÉLÉCOMMANDE DE
NIVEAU/ÉGALISATEUR DE BASSES
(modèles X1.1000.1D et X1.2000.1D
seulement)
Montage et installation
1. Trouvez un bon emplacement, sous le tableau de
bord ou près de la console centrale, offrant un
accès facile àl’appareil de télécommande.
2. Servez-vous des vis fournies pour installer
l’attache de fixation, les languettes étant dirigées
vers l’arrière.
3. Acheminez le câble de la télécommande et
branchez-le àla télécommande et au subwoofer
amplifié.
4. Glissez la télécommande sur l’attache de fixation
jusqu’à ce qu’elle se mette en place d’un déclic.
Attache de
fixation
This manual suits for next models
3
Table of contents
Languages:
Other Lightning Audio Amplifier manuals

Lightning Audio
Lightning Audio Strike S4.300 User manual

Lightning Audio
Lightning Audio B3.200.2 Owner's manual

Lightning Audio
Lightning Audio LA-600M User manual

Lightning Audio
Lightning Audio LA-21 00 User manual

Lightning Audio
Lightning Audio LA-8004 User manual

Lightning Audio
Lightning Audio L-2125 User manual

Lightning Audio
Lightning Audio LA1.150.2 Owner's manual

Lightning Audio
Lightning Audio LA-1000MDMINI User manual

Lightning Audio
Lightning Audio B4.250.2 User manual

Lightning Audio
Lightning Audio BOLT User manual