LightwaveRF JSJSLW934 User manual

lightwaveRF
Professional Series
Electric Radiator Switch
Model No. JSJSLW934
Instruction Manual
www.megamanuk.com/lightwaverf


Get Started
What do I need?
How do I get started?
The following installation guide will explain how
to fit the LightwaveRF Electric Radiator Switch
to a radiator. The setup guide will explain how to
link it to other LightwaveRF heating devices. For
guidance on how to use the Electric Switch with
the LightwaveRF App & Web App, visit
www.lightwaverf.com or scan the QR code below
.
Help Video & further guidance
You can scan this QR code with your
smartphone. It will take you to a video and
further instructions that will help guide you
through setup and installation.
To install the Electric Switch, you must under-
stand how to safely turn o the electricity
supply. You will also need suitable electrical
screwdrivers.

IMPORTANT: Please retain these instructions for guidance on how to link
other LightwaveRF Heating devices to the Electric Radiator Switch. For
App setup and additional guidance please visit
www.megamanuk.com/lightwaverf
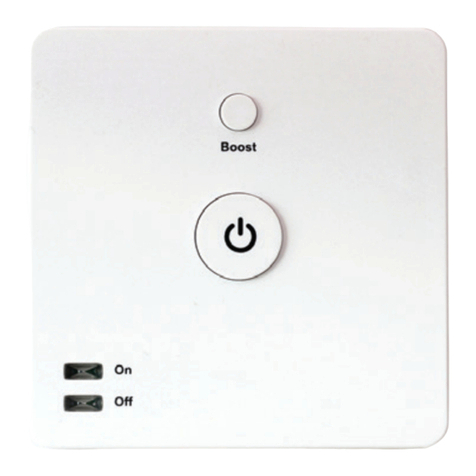
‘O’ LED. When
illuminated
radiator is o.
Boost button.
Temporarily
increases
temperature.
‘On’ LED. When
illuminated
radiator is on.
Overview
Installation
Standby button.
Turns radiator
on/o
Linking button.
Press to enter
linking mode

Installation
Removing the backplate
In order to wire the Electric Radiator
Switch and to mount it to the wall, you
must first remove the backplate. This
can be done by loosening the two
screws situated at the base of the unit
using a suitable screwdriver. Once the
screws are loosened enough so that
they protrude from their screw holes,
gently lift the backplate away from the
main unit and slide it down. Once the
hooks are free from their mountings,
the backplate should slide free.
Mounting the Electric Radiator Switch
The backplate includes two screw holes. These allow the plate to be mount-
ed to a wall using suitable screws. Once mounted, the main unit can be
slotted back into place and the screws tightened. As the Switch has to be
wired to the radiator, ensure that the is long enough to reach from the unit
to the radiator (see www.lightwaverf.com for advice).
Screws
Mounting
hole
Hook

Quick Start Guide
Wiring the Electric Raidator Switch
Installation
NOTE: it is important to install this product in accordance with the following
instructions. Failure to do so may void your warranty.
LightwaveRF is fully legal to install in your own home. However, if in doubt,
always consult a qualified electrician.
Now refer to www.lightwaverf.com to find up to date wiring instructions for
your specific boiler type.
Hook
Cable clamp
mount (clamp
removed)
Backplate
screw hole
Cable hole
(cover not
removed)
Wiring
connection
points
Tightening
Screws

Understanding the Indicator LEDs
Basic Operation
Device Setup
This section will show you how to setup the basic functions of the Electric
Radiator Switch to allow you to use it manually or with a Heating Remote /
Magnetic Trigger. If you link the Switch to Room or Home Thermostat, or with the
Lightwave Link, then the Switch will take its instructions from these devices. This
means that the Switch will automatically abide by the temperatures and
schedules that you set from them.
The following section will show you how to link the Electric Radiator Switch to a
Thermostat, and other LightwaveRF Heating devices, to integrate it into your
heating system. It is always recommended to use the Electric Radiator Switch
with the Lightwave Link if anything more than a basic setup is desired.
Steady Green ‘On’: Radiator is on
Steady Red ‘O’: Radiator is o
Alternating On/O (longer on LED): Linking mode
Alternating O/On (Longer o LED): Unlinking mode

The Standby button
Device Setup
Standby button
Pressing the Standby button toggles between
standard ‘Running’ mode and ‘Standby’. Holding
the Standby button (3 secs) activates ‘Away’ mode.
When the Electric Switch is operating alone
(without a linked Thermostat or the LightwaveRF
App controlling it) Running mode will set it to a
default temperature of 22 degrees. Standby will
set the Switch to a default setback temperature of
18 degrees and Away mode 15 degrees.
If the Electric Radiator Switch is linked to a Thermostat or to the App, Running
mode will set it to the temperatures and schedules stipulated by these devices
(see Thermostat and App instructions to learn how to do this). The Standby set
back temperature and Away mode temperature is also stipulated by what is set
on the Thermostat.
NOTE: If it is linked to a Home Thermostat or to the App, pressing Standby
on the Electric Switch will turn o Running mode only until the next ‘heating
period’ in the schedule (see App or Thermostat instructions). Away mode,
by contrast, will remain constantly active until it is cancelled by pressing the
Standby button again on the Switch or Thermostat.

Pressing the Boost button on the Switch raises the target temperature a
few degrees above the current temperature for the duration of one hour. If
the target temperature is already several degrees higher than the actual
temperature, then pressing boost will simply match this temperature.
Device Setup
The Boost button
A LightwaveRF Heating Handset can be linked to
one or more Electric Radiator Switches to directly
control them (see Handset instructions). It can
also be linked to a Room Thermostat which will, in
turn, control Switches.
Once linked, the Standby button on the Handset will
toggle between Running and Standby Modes in the
same way as the Standby button on the Switch. The
Boost button operates the Switch Boost button.
The plus and minus arrows on the handset will
raise or lower the target temperature a few
degrees above or below the current temperature.
Using the Heating Handset

How LightwaveRF heating devices work together
To use the Switch, with other LightwaveRF Heating Devices, you will need to
‘link’ it. The devices that you link depends on the setup that you want to achieve.
You can create a basic setup (e.g. Switch plus a Heating Remote) by linking
the devices directly (see later section). The most comprehensive solution is to
link all heating devices to the LightwaveRF Smartphone or Web App using the
Lightwave Link. This allows you to create an expandable zoned system that
can take care of your entire home. Temperatures can be set for each room or
‘heating zone’, and heating can be planned week by week and room by
room.
The illustration on the following page shows how dierent heating devices
can be linked together in a whole house setup. Following this are some the
most typical scenarios in which you would use the Electric Switch. For
further information and guidance please visit www.lightwaverf.com.
Lightwave Link Web App Heating ‘Planner’
Heating System Setup

Lightwave link
(runs the show)
Lightwave App
(control any room from anywhere)
Boiler Switch
(turns boiler on/o)
Bedroom 1 Bedroom 2
Lounge
Home Thermostat
(monitors house temp.)
Room Thermostat
(controls several TRVs)
Heating Remote
(sets house temp.)
Window Trigger
(open window turns o TRV)
Electric Switch
(controls radiator)
Example ‘Heating Zones’ (rooms or areas of the house)
Heating System Setup

1. Recommended: Using Switches with the Lightwave Link
2. Controlling Switches via a Thermostat and Lightwave Link
Heating System Setup
The most comprehensive and recommend-
ed way to use Electric Switches is by linking
them to the App using the Lightwave Link.
This will allow you complete control of the
temperature in each room from your
smartphone or tablet. The Switches are
arranged into ‘heating zones’ (e.g. rooms)
and can be independently scheduled using
the Heating Planner.
You can also use the App to control Switch-
es via a Room or Home Thermostat. This is
useful, as it provides a wall mounted display
and control. In addition, it provides a more
accurate temperature reference point for
the Switches in the room to work to
(because it is away from the hot radiator). A
Thermostat can also control more than one
Switch together in the same room
(heating
zone).

If there are several Switches in a large room
or area of the house, they can be linked to
and controlled by a single LightwaveRF
Room (or Home Thermostat).
There are several advantages to this:
1. The temperature of the room can be
measured to a higher degree of accuracy
as the sensor is distanced from the radiator.
2. The temperature and status of the Switches can be set together from one place.
3. If the Switches are not being controlled from the LightwaveRF App, the
Home Thermostat can be used instead to set daily heating schedules and
save favourite plans for that room or ‘heating zone’ of the house.
4. If linked to the same thermostat, the valves can work together as one
‘heating zone’ which can appear on the LightwaveRF App or Web App.
NOTE: If linked to the LightwaveRF App or Web App, Electric Switches in
the same room or area of the house can also be linked to each other to form
a heating zone without the need for a thermostat.
Heating System Setup
3. Controlling TRVs with a Room/Home Thermostat

5. Using an Electric Switch with a Magnetic Trigger
The LightwaveRF Magnetic Trigger is
designed to send an alert to a linked
LightwaveRF device or to the Lightwa-
veRF App when a door or window has
been opened. If such an alert is sent to a
linked Electric Radiator Switch, the
valve will automatically be turned o. If
the window is opened, it will turn on
again.
4. Using the Electric Radiator Switch with a Heating Remote
The LightwaveRF Heating Remote can
directly control a single Electric Switch,
or two ‘daisy chained’ together (see
linking multiple devices). It can be used
to turn the Switch on and o, to raise
the temperature up and down and to
boost the temperature.
Heating System Setup

Linking the TRV to other LightwaveRF heating devices
If you intend to use a LightwaveRF Heating Remote,
Home / Room Thermostat or Magnetic Trigger to control
the Switch directly then you will need to ‘link’ them. The
Switch can be linked to other LightwaveRF heating
devices using the following method.
1. Press and release the ‘Linking’ button on the Electric
Switch (the on and o LEDs will flash alternately).
2. Press the Linking button on the heating device you
wish to link. The ‘on’ LED should flash to indicate a
successful link.
To unlink a heating device from the Switch, press and release
the Linking button and then press the Standby button. This
activates ‘unlinking’ mode. Press the Linking button on the
heating device you wish to unlink. The ‘o’ LED should flash
to indicate that the devices have been unlinked.
To completely clear the memory of the Switch, press and
release the Linking button. Then hold the Linking button
until the LEDs flash rapidly. Finally, press and release the
Linking button once more. The O LED should then
flash.
Heating System Setup

Linking multiple Electric Switches in one ‘heating zone’ (room)
If you have a large room or area with more than one radiator, you may want
to link the Electric Switches to become part of the same ‘heating zone’ on the
App and work together.
You can do this by, firstly, linking one Switch to Lightwave Link and App, and
then linking it to the next Switch to form a ‘daisy-chain’. Alternatively, you can
link a Room / Home Thermostat to the App, then to a Switch, and finally link
the Switches together. The Thermostat will take commands from the App and
relay them to the linked Switches in its ‘heating zone’.
In some cases, you may also want to link a Heating Remote or Magnetic
Trigger to more than one Electric Radiator Switch in the same room or
‘heating zone’. This will cause all radiators to be controlled by the same
device. This can be achieved in the same way: link one Electric Switch to the
Remote or Trigger, and then link that Switch to the next. A single Heating
Remote or Magnetic Trigger can also be linked to multiple Switches by linking
it to a Thermostat that, in turn, controls the Electric Switches in that room.
IMPORTANT: LightwaveRF Electric Switches can link to a limited number of
heating devices. If this limit is exceeded and an extra device linked, the link to
the former device will be overwritten. More devices can be added by linking
them to the Lightwave Link and App. It is always recommended to use the
Lightwave Link if anything more than a basic setup is desired.
Heating System Setup

Linking to the LightwaveRF Apps
If you intend to use the LightwaveRF App
or Web App to control the Electric Switch,
you will need the ‘Lightwave Link’. This
allows LightwaveRF heating devices to be
linked to and controlled by a smartphone,
tablet or PC. The Switch can be linked to
the App using the following method.
1. Follow the in-App setup instructions to
setup the Lightwave Link and App. Access
the ‘Heating’ Page and follow the instruc-
tions regarding how to add a device.
2. Press and release the ‘Link’ button on
the Switch (the on and o LEDs will flash
alternately).
3. Send the linking command from the
App (the in-App instructions will explain
how to do this). The ‘on’ LED should flash
to indicate a successful link.
Heating System Setup

Using the Home Thermostat with the LightwaveRF Apps
IMPORTANT: For full instructions on how
to use the Home Thermostat with the
LightwaveRF App and Web App, follow the
in-App help or visit www.lightwaverf.com.
The main use of the Home Thermostat, if
linked to the LightwaveRF App and Web
App, is as an accurate temperature
reference. You can still the schedule
heating and select modes using the
Thermostat, however, it may be more
convenient to do this from the App or
Web App on your smartphone/tablet. The
Thermostat now acts as a convenient
manual control to complement the App.
Importantly, the Thermostat and App
work together: when you change the
mode or schedule on the Thermostat or
the App, it will automatically appear on
the other device.
Heating System Setup

1. (Easy): Cut heat loss from windows
Required: Electric Radiator Switch, Magnetic Triggers
When people are too hot, especially children, instead of turning o the
radiator, they often open a window. This can waste a great deal of energy as
the radiator is still working, but never reaches its set temperature as the heat
is lost to the atmosphere. Installing a LightwaveRF Window Trigger means
that, if a window is opened, the LightwaveRF Electric Radiator Switch or TRV
on the radiator is automatically turned o, therefore saving energy. Once the
window is closed again, the radiator is automatically turned back on.
Heating Scenarios

2. (Easy): Remote control of a single radiator
Required: Electric Radiator Switch, Heating Remote
It is really comfortable and convenient to be able to have direct control over
the room temperature without having to get up and alter the thermostat.
This can be achieved quickly and easily using LightwaveRF TRVs, or, if you
have electric radiators, the Electric Radiator Switch and a Heating Remote.
Installed in seconds, they can turn o the radiator in the room and allow you
to be comfortable without having to aect the rest of the house heating.
Heating Scenarios
Table of contents
Other LightwaveRF Switch manuals

LightwaveRF
LightwaveRF Glow LW420 User manual

LightwaveRF
LightwaveRF LW934 User manual
LightwaveRF
LightwaveRF JSJS LW826 User manual

LightwaveRF
LightwaveRF LW440 User manual

LightwaveRF
LightwaveRF Comfy LW920 Professional Series User manual

LightwaveRF
LightwaveRF Connect LW430 User manual
LightwaveRF
LightwaveRF LW400 User manual