manuals.online logo
Brands
  1. Home
  2. •
  3. Brands
  4. •
  5. Lily Tech
  6. •
  7. Thermostat
  8. •
  9. Lily Tech ZL-6231A User manual

Lily Tech ZL-6231A User manual

Suzhou Lily Tech. Co., Ltd.
Page 1, Total 4 Pages
ZL-6231A Temperature Controller
Instruction Manual Version 1.2
Introduction
ZL-6231A ther ostat is for cooling or heating control, with IP65 front panel, buzzer beeping and warning function.
There is a ultifunction ti er which is for incubator air exhaustion, or egg tray turning, or other application.
Main Specification
Power supply: 185~245Vac, 50/60Hz
Sensor: NTC, wire length is 2 eters
Output: 10A, 250Vac resistance
Setting range: -40~120℃
Display range: -40~130℃
Working: -10~45℃, 5~90%RH without dew
Di ension: W78 x H34.5 x D71 ( )
Installation drilling: W71 x H29 ( )
Case aterials: PC + ABS fire proof
Protection level: IP65 (Front side only)
eypad and Display
Icon Function On Off Blinking
R1 output R1 Temp. Output energized R1 Temp. Output de-energized Within protecting delay
Work mode Cooling mode Not in cooling mode Setting set-point
Work mode Heating mode Not in heating mode Setting set-point
aintenance ---- No failure Has failure
Warning ---- No warning Has warning
R2 output R2 energized R2 de-energized
Egg turn times reached After reached, stop egg turn
Display
Remark
E01 Sensor failure (short or open)
Hi Roo te p. is higher than the high li it
Lo Roo te p. is lower than the low li it
EE Me ory error
Err Password error
i
iA
A
E
Ex
xt
te
er
rn
na
al
l
w
wa
ar
rn
ni
in
ng
g
U
Un
nL
L
Para eters Will restore to factory default settings
Power up Display
The odel (ZL-6231A) and software version (Version 1.1) will display successively: “6231”, “A 1.2”.
Operation
Set Set-Point (Factory Default Setting = 37.8℃)
Keep〖S〗depressed for 3 seconds to enter into the status. The current set-point value displays.
Press〖▲〗or〖▼〗 to set the value (keeping depressed can fast set).
Press〖S〗to exit, and save the settings.
The status will exit, and the setting will not be saved, if no key operation within 30 seconds.
Set System Parameters
Keep〖P〗depressed for 3 seconds, digits show “---0”.
Press〖▼〗to select the digit of the password, press〖▲〗to set the value of the digit.
Press〖S〗 to confir :
If the password is correct, enter into the para eter setting status, else display “Err”, and exit.
Set in para eter setting status:
Suzhou Lily Tech. Co., Ltd.
Page 2, Total 4 Pages
Press〖▲〗or〖▼〗to select the para eter code (see para eter code table below).
Press〖S〗 to display the value of the code.
Press〖▲〗or〖▼〗to set the value.
Press〖S〗to return to para eter code selection.
Keep〖P〗depressed for 3 seconds to exit, and save the settings.
The status will exit, and the settings will not be saved, if no key operation for 30 seconds.
Parameter Code Table
Code
Function Range Remark
Factory
Default
U10
inimum time for Temp. Output to keep de-energized 0 ~ 100 min Only for cooling 0
U20
Sensor calibration -9.9 ~ +9.9℃ 0.0
U22
Hysteresis for temperature control 0.1 ~ +10.0℃ 0.1
U40
Timer period 1, time unit 0 ~ 2 0: sec; 1: min; 2: hour 0
U41
Timer period 1, time 1 ~ 9999 R2 on 30
U42
Timer period 2, time unit 0 ~ 2 0: sec; 1: min; 2: hour 1
U43
Timer period 2, time 1 ~ 9999 R2 off 60
U44
R2 working mode 1 ~ 2 1: Timer output
2: Timer output + limit_protection 2
U45
Timer repeat times 0 ~ 9999 If 0: Timer never stops
Else: R2 never on, when U46 reaches U45
0
U46
Timer counter
(the value
saved to permanent memory once every hour,
keeps even without power supply)
0 ~ 9999 One period = timer period 1 + timer period 2
Clear to 0 before every hatching 0
U52
Over temp. warning delay 0 ~ 180 min 0
U53
1
st
over temp. warning delay after power supplied 0 ~ 180 hour 0: disable 0
U54
Temp. up limit (relative value) 0.0 ~ 120.0℃ Absolute point = (Set-point + U54) 0.2
U55
Temp. low limit (relative value) 0.0 ~ 120.0℃ Absolute point = (Set-point – U55) 37.8
U60
External input warning mode 0 ~ 4
0: disable 3: NC, locked
1: NO, locked 4: NC, unlocked
2: NO, unlocked
0
U61
Delay for external input warning 0 ~ 120 min 0
U62
Buzzing warning 0 ~ 1 0: no waring / 1: enable warning 0
U90
Control mode CO/HE CO: cool / HE: heat HE
U99
Password 0000 ~ 9999 When 0000, equals no password 0000
Note:
Limit Protection:
Troom: Temperature of the room. SP: Temperature set point.
When U44 = 2:
If Troom ≥ SP + U54 in heating mode (U90 = HE),
or
if Troom ≤ SP - U55 in cooling mode (U90 = CO),
Then R2 will be energized.
Suzhou Lily Tech. Co., Ltd.
Page 3, Total 4 Pages
Control
 Cooling Control (U90 = C0)
 Temperature control
If Troom ≥ Set-point + U22, and Te p. Output has been de-energized for U10, then Te p. Output energized;
If Troom ≤ Set-point, then Te p. Output de-energized.
 Heating Control (U90 = HE)
 Temperature control
If Troom ≤ Set-point - U22, then Te p. Output energized;
If Troom ≥ Set-point, then Te p. Output de-energized.
 Temp. Output Load Delay Protection (only for cooling control)
After power supplied, Te p. Output could be energized after U10;
After Te p. Output de-energized, it could be energized again after U10.
 Buzzer Function
Every key press, there will be a short beep. Every confir ation key press, there will be a long beep. Every error operation, there will
be three short beeps.
When there is failure, or external warning input: If U62 = 0, no buzzing warning. If U62 = 1, there will be continuous buzzing of
warning.
The waring will stop, if press〖P〗, or warning condition disappears.
 Over Temperature Warning
When Troom ≥ SP + U54, or Troom ≤ SP – U55, display warning, and buzzing
 External Warning Input
NO: nor al open. If open, no warning; if closed, warning.
NC: nor al close. If closed, no warning; if open, warning.
Locked: Warning keeps after the external warning disappeared. Press〖P〗 to stop warning.
Unlocked: Warning stops after the external warning disappeared.
Note: When there is external warning, the output(s) will be de-energized.
 Sensor Fail
R1 stop energized.
 Sensor Calibration
The sensor can be calibrated by U20.
 Restore to Factory Default Settings
Keep〖P〗and〖▲〗depressed si ultaneously for 5 sec, there will be a beep, and “UnL” displays.
Press〖▼〗twice, there will be a beep, all settings will be restored to factory default settings.
Installation
1st: Insert into drilling hole 2nd: Cla p
Suzhou Lily Tech. Co., Ltd.
Page 4, Total 4 Pages
Attention
 Wiring work should be anipulated by certified technicians.
 Wrong connection could da age the controller, and the loads. Power supply to ter inal 7 and 8 to check the controller. If there is a
ulti eter, check the outputs, as well as input, by the help of settings.
 Sensor and input signal wires should not be laid together with power supply wire, and even in sa e pipe.
 Sensor wire is better as short as possible. Not wind the redundant length wire to electrical noise equip ent.
 The loads should be within the specification of the controller output driving ability. If using ac/dc odule as load, or tungsten la p,
or otor, following the below require ents to avoid surging current da aging or shorten the life ti e of the controller outputs:
For ac/dc odule as load, the rated current should be no ore 1/10th of output specification under pure resistance.
For tungsten la p as load, the rated current should be no ore 1/15th of output specification under pure resistance.
For otor, the rate current should be no ore 1/5th of output specification under pure resistance.
For exa ple: if drive a 1500W tungsten la p with 7A (pure resistance spec.) relay, the relay contactor will be burnt immediately.
 Don’t touch inside co ponents;
 Avoid installing controller in the following environ ent:
More wet than 90%RH, or easily dew; Vibrating, or will be shocked; Possible sprayed; Under erosive air; Under explosive air.
Electrical Wiring

Other Lily Tech Thermostat manuals

Lily Tech ZL-320A User manual

Lily Tech

Lily Tech ZL-320A User manual

Lily Tech ZL-660A-R User manual

Lily Tech

Lily Tech ZL-660A-R User manual

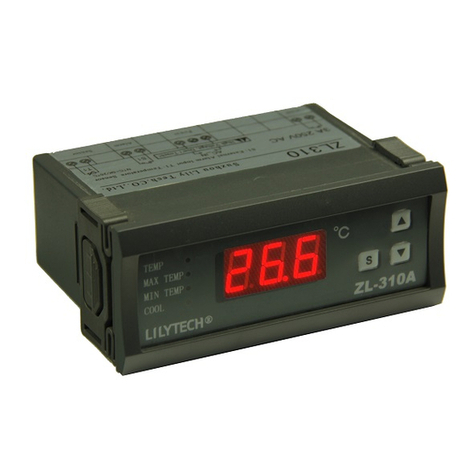
Lily Tech ZL-310A User manual

Lily Tech

Lily Tech ZL-310A User manual

Lily Tech ZL-6250A User manual

Lily Tech

Lily Tech ZL-6250A User manual

Lily Tech ZL-6 A-R Series User manual

Lily Tech

Lily Tech ZL-6 A-R Series User manual

Lily Tech ZL-330A User manual

Lily Tech

Lily Tech ZL-330A User manual

Lily Tech ZL-220A User manual

Lily Tech

Lily Tech ZL-220A User manual

Popular Thermostat manuals by other brands

Siemens RDE10.1DHW user manual

Siemens

Siemens RDE10.1DHW user manual

Mars 70813 Installation and operating instructions

Mars

Mars 70813 Installation and operating instructions

Wattstemp 860 manual

Wattstemp

Wattstemp 860 manual

Control M6003 Instruction manua

Control

Control M6003 Instruction manua

Ouellet OTH557 Installation and user guide

Ouellet

Ouellet OTH557 Installation and user guide

Honeywell FocusPRO Wi-Fi TH6000 Series installation guide

Honeywell

Honeywell FocusPRO Wi-Fi TH6000 Series installation guide

Gewiss Chorus Programming manual

Gewiss

Gewiss Chorus Programming manual

Theben RAM 722 operating instructions

Theben

Theben RAM 722 operating instructions

Innogy WRT manual

Innogy

Innogy WRT manual

HaiLin Controls HL-ESNC-025 manual

HaiLin Controls

HaiLin Controls HL-ESNC-025 manual

Theben KNX Ramses 712 user manual

Theben

Theben KNX Ramses 712 user manual

Danfoss RT 103 installation guide

Danfoss

Danfoss RT 103 installation guide

Tekmar 519 user manual

Tekmar

Tekmar 519 user manual

Pro T705 Operation manual

Pro

Pro T705 Operation manual

Elko T2300 user guide

Elko

Elko T2300 user guide

Kermi WRT Instructions for installation and use

Kermi

Kermi WRT Instructions for installation and use

Honeywell Y6H920RW4026 user guide

Honeywell

Honeywell Y6H920RW4026 user guide

Henco LOGIC manual

Henco

Henco LOGIC manual

manuals.online logo
manuals.online logoBrands
  • About & Mission
  • Contact us
  • Privacy Policy
  • Terms and Conditions

Copyright 2025 Manuals.Online. All Rights Reserved.