On/Off Switch
Variable DImmer On/Off Indicator*
02 - Pixel | legal notice & warranty
warranty
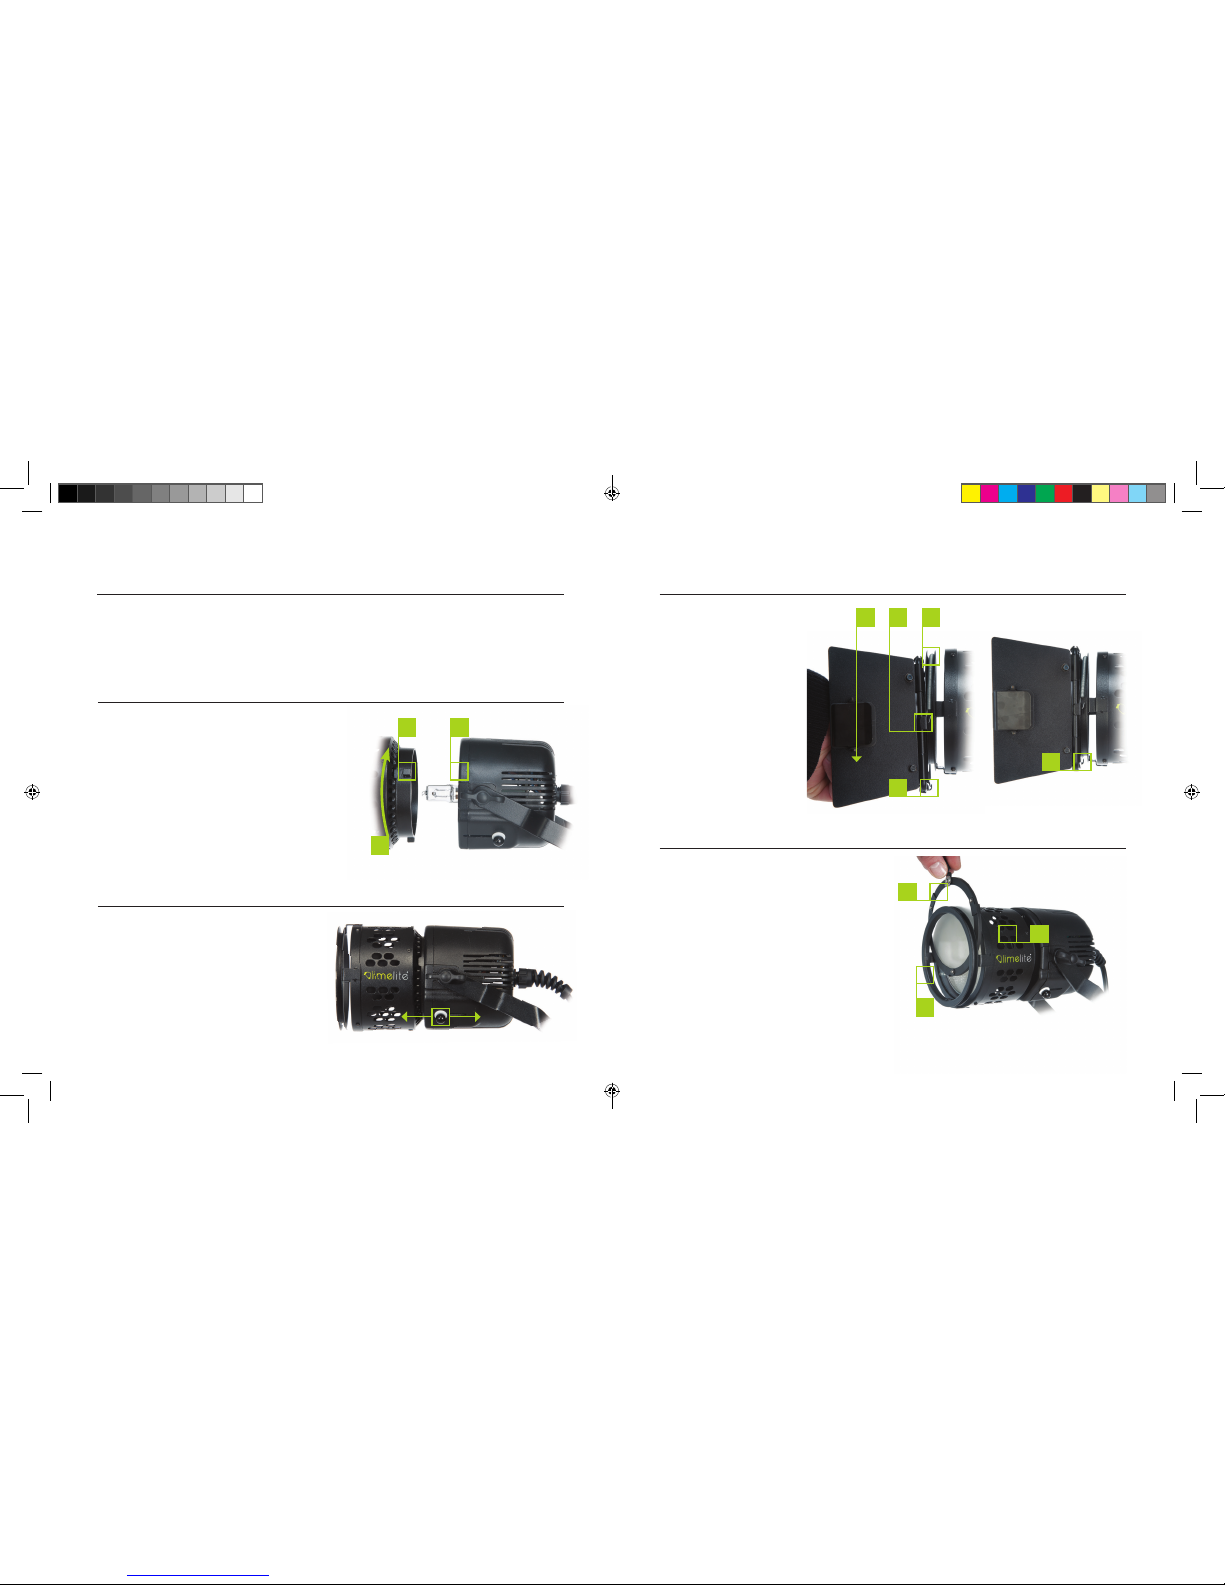
Zoom Slider
Positional Thumb Lock
Accessory Mount
Reector
legal notice
always... never...
• Avoid placing cables where they can be tripped
over. Protect from heavy, sharp or hot objects,
which may cause damage & replace damaged
cables immediately.
• All servicing must be carried out by a Bowens
authorised service centre.
• Always remove the power cord by gripping the
plug. NEVER pull the cord.
• Ensure that any extension cord used has a
suitable current rating to prevent overheating
and never use coiled extension cords.
• Use in an environment where moisture or
ammable vapour is likely to come into contact
with the unit.
• Restrict air vents while in use.
• Use a unit with damaged housing, mouldings or
lamps. If a unit is dropped or damaged in
anyway, always have it checked before using.
• Operate the unit without a safe grounded AC
supply.
safety notes
Reector Lug Sockets
All Bowens products are covered by a two-year
warranty against any faulty design, materials and
workmanship.
If a product does not work on arrival, or up to a
maximum period of four weeks from the date of
dispatch of the product, it should be returned to the
dealer/retail outlet from where it was purchased for
exchange (subject to stock availability). If the faulty unit
was part of a kit, the dealer/retailer may choose to only
replace the unit and not the entire kit.
Alternatively the dealer may offer to repair the unit as
soon as possible at no charge.
If neither an exchange nor repair is possible for the
faulty unit, then a full refund may be made.
If a warranty fault occurs after the initial four week
period (and within the maximum two year warranty
period), then the unit should be returned to the dealer,
who will arrange to repair the unit as soon as possible,
at no charge.
This warranty does not apply to consumable items such
as ash tubes, modelling lamps, fuses or consumable
type batteries.
Should a unit be returned at any time within the two year
warranty period, and it is judged to have experienced
any of the following;
Failure to follow working instructions correctly,
accidental or wilful damage, misuse, alteration or repair
by a non-authorised Bowens service/repair centre,
then the warranty will be deemed invalid and any
repairs required will be payable by the owner.
The dealer, in advance of undertaking any work that
may be required, should notify the cost of any repairs
to the owner.
No warranty repairs can be undertaken to any units
without proof of purchase.
All warranty repairs or returns must be conducted with
the dealer from where the product was purchased.
Other terms and conditions may be applicable in
specic countries, if stated at the time of purchase.
Limelite®, Bowens® and ‘the power behind the picture’® are
registered trademarks of Bowens International Ltd.
Due to our policy of continual product improvement, Bowens
International Ltd reserves the right to change equipment
specications at any time and without notice.
The information contained in this user guide should not
be relied on solely before making a purchase, seek further
information from your retailer.
© 2013 Bowens International Ltd.
All Bowens products are certied by
the CE mark. The CE certied mark
is a declaration of conformity to the
required EMC directives 2004/108/EC
‘Electromagnetic Compatibility’ and
2006/95/EC ‘Low Voltage Directive’.
the pixel
03 - Pixel | safety notes and pixel overview
On/Off indicator also used to highlight when unit is in overheat; when unit has gone into overheat mode the On/Off indicator will turn red.
BWL0690-2-Pixel-User-Guide.indd 4-5 22/08/2013 08:26