manuals.online logo
Brands
  1. Home
  2. •
  3. Brands
  4. •
  5. Limora
  6. •
  7. Crimping Tools
  8. •
  9. Limora 532167 User manual

Limora 532167 User manual

534809 LC29032019
Spare Parts for Classic British Cars
Limora central warehouse
Industriepark Nord 21
D - 53567 Buchholz
Tel: 49(0)26 83 - 97 99 0
E-Mail: [email protected]
Internet: Limora.com
Stores:
• Aachen • Berlin • Bielefeld
• Düsseldorf • Hamburg
• Köln • Stuttgart
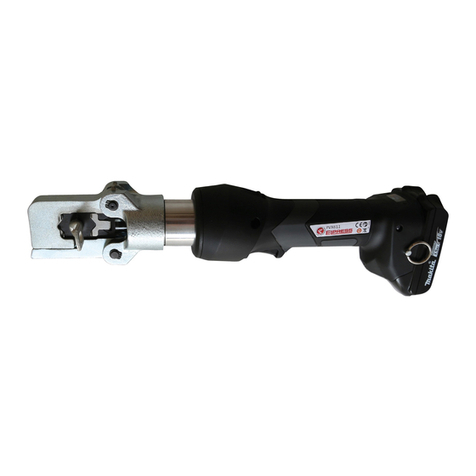
Hydraulic Crimper
part no. 532167
Section 1
Safety Instructions
1.1 Specied Applications
As portable crimping tools, 532167 hydraulic crimper apply
to sealing connection of the rubber hoses and their asso-
ciated hose joints and accessories corresponding to the
design module. Any other applications will be regarded as
non specied applications.
Our company will not claim any responsibility for any dama-
ge incurred by non specied applications, whether hydraulic
crimper are used by other manufacturers or our company.
Specied applications include compliance with use instruc-
tions, inspection and maintenance requirement and other
use safety instructions.
As portable crimping tools, 532167 hydraulic crimper shall
not be used for xed occasions. Any auxiliary force applicati-
on tools shall be used , or permanent damage to the equip-
ment will occur.
532167 hydraulic crimper are used only for specied appli-
cations.
1.2 General Safety Regulation
CAUTION ! Please observe all the safety instructions and
descriptions.
• Anybreachofsafetyinstructionsanddescriptionsre-
sulting from negligence maybe leads to a re, personal
injury or other serious results.
• Keepallthesafetyinstructionsanddescriptionsproperly
in order to read them at any time.
• Theterm„portabletool“usedinthesafetyinstructions
refers to the tools which are held only by hands and shall
be not xed or placed on ground.
1) Work Area
a. Keep the work area clean and tidy. A messy and dark work
area always leads to an accident.
b. Avoid use of the hydraulic crimper in flammable, explosi-
ve and dusty environment. A spark caused by collision of
black metal maybe leads to a re or explosion.
c. Keep the hydraulic crimper away from children or other
personnel. Lack of concentration maybe leads to an acci-
dent.
2) Personal Safety
a. Be cautious during operation of hydraulic crimper. Keep
safety consciousness in mind. During operation , fatigue
or drug administration, drinking or drug injection will lead
to serious personal injury.
b. Please wear personal protective equipment, especially
protective goggles always. According to the use environ-
ment and conditions, wear personal protective equip-
ment, such as dust mask, anti-slip work shoes, helmet,
earprotector, etc., in order to reduce injury risk.
c. Before use of hydraulic crimper, remove the adjusting tool
or spanner, check that the key does not hamper the use,
or personal injury maybe occurs.
d. Avoid excessive extension of the rubber hose , keep it in
an appropriate position, and balance it in order to control
the hydraulic crimper better in case of an fortuitous event.
e. Wear appropriate clothes, not loose clothes or jewelry.
Avoid hair, clothes or gloves close to the mouth of tongs
or handle resulting in personal injury.
f. Keep the dust collector or absorber, if any, on , and use it
properly to avoid any accident caused by dust.
3) Use and maintenance of hydraulic crimper
a. Avoid operation of hydraulic crimper at overload. Before
use, retract the piston completely, and counterclockwise
rotate the handwheel of the pressure relief valve so that
the crimping clip of hydraulic crimper can go back to the
xed clip seat.
b. Counterclockwise rotate the xed clip seat of the hydrau-
lic crimper so that it leaves the cylinder bottom, remove
the movable pin connected to the key chain, and replace
the crimping module group matching with the hose.
c. Select the copper or aluminium joint matching with the
hose, insert the hose completely, and check the assembly
in place.
d. Install the above hose joint in the clip seat (i.e. mouth of
tongs), fold the movable clip seat to the xed clip seat
so that the pin holes of two clip seats can coincide, and
completely insert the movable pin connected to the key
chain.
e. Clockwise rotate the xed clip seat of the hydraulic crim-
per so that it presses close to the cylinder bottom.
f. Re-check if the piston completely returns, counterclockwi-
se rotate the handwheel of the pressure relief valve until
the piston completely returns, and clockwise rotate the
handwheel of the pressure relief valve so that the pressu-
re relief valve is completely closed (rmly tightened).
g. Slightly press the handle so that the crimping clip is slow-
ly close to the hose joint, and adjust the position of the
hose joint in the mouth of tongs simultaneously. When it
reaches the designed position, the crimping work begins.
h. During crimping, observe the joint change at any time to
ensure crimping quality and aesthetic appearance.
i. At the end of crimping, counterclockwise rotate the hand-
wheel of the pressure relief valve slowly, so the piston will
rapidly return under the action of its spring force. Remove
the movable pin connected to the key chain, open the
mouth of tongs, and take out the crimped hose joint.
j. Perform crimping of the next joint or clean and store the
tools in a tool kit.
NO. Hose specication
given conditions
Hose size inner
diameter
Hose size Outer
diameter
Hose tting outer dia-
meter Remark
6SRB ∅ 5/16“, Dn8 ∅ 8±0.4 ∅ 14.5~16.5 Aluminium joint ∅ 19.5
Steel joint ∅ 17.5 Dn8 Thin-wall hose
8SRB, 6
∅ 5/16“, Dn8 ∅ 8±0.4 ∅ 18.5~20.5 Aluminium joint ∅ 23.5
Steel joint ∅ 21 .5 Dn8 Thick-wall hose
∅ 13/32“, 3/8“, Dn10 ∅ 10~11 .5 ∅ 16.5~20.5 Aluminium joint ∅ 23.5
Steel joint ∅ 21 .5 Dn1 0Thin-wall hose
8 ∅ 13/32“, Dn10 ∅ 10~10.5 ∅ 22~23.5 Aluminium joint ∅ 26.5
Steel joint ∅ 24.6 Dn1 0Thick-wall hose
10SRB ∅ 1/2“, Dn13 ∅ 12.4~13.5 ∅ 19.5~22 Aluminium joint ∅ 25 Dn13 Thin-wall hose
10 ∅ 1/2“, Dn13 ∅ 12.4~13.5 ∅ 23~25.5 Aluminium joint ∅ 27.7
Steel joint ∅ 25.5 Dn1 3Thick-wall hose
12SRB ∅ 5/8“, Dn16 ∅ 14.8~16 ∅ 22.5~25 Aluminium joint ∅ 27.8 Dn16 Thin-wall hose
12 ∅ 15/8“, Dn16 ∅ 15~16.5 ∅ 28~29.5 Aluminium joint ∅ 32.5 Dn16 Thick-wall hose
CAUTION ! Please keep the tools out of reach of children.
The us of the hydraulic tools by untrained person maybe
leads to the damage to the tools or personal injury.
CAUTION ! Do not increase the arm strength by expanding
the handle, or the tools will be permanently damaged.
CAUTION ! If the hose and joint are not in their places, the
clip seat is not close to the cylinder bottom, or a module
group does not match the hose joint, etc., it is impossible
to start the piston handle, or the tools will be permanently
damaged. In addition, keep no hand at any clipping point
during use of the tools.
Note: Use the correct model dimension, or leak or crimping fault may occur!
Table: Module Groupe Hose, and Joint
4) Equipment Maintenance
The equipment can be maintained by professional techni-
cians using only the original parts in order to ensure the
equipment safety.
1.3 Important Instructions
Keep no hand or limb at the work area of hydraulic crimper.If
serious damage to the equipment leads to a large leakage or
cylinder burst, damage to piston and mouth of tongs, please
stop work immediately. Unauthorized maintenance may lead
to serious personal injury.
Replace the damaged parts only with original parts from our
company.
37-10291 hydraulic crimper can be used only by the trained
technicians for hose crimping.
The joint must match with the hose.
A defective joint must be cut before a new part is used for
re-crimping.
On completion of crimping , each joint must undergo pressu-
re test in order to meet the process requirement.
Section 3
Maintenance and Service
Check if hydraulic crimper function normally. Any damaged
tool is never used and shall be sent to the authorized repair
shop or our company.
Check that the parts at the mouth of hydraulic crimper can
freely move. Periodically check that all the pipes , axes, and
screws are not damaged. Any damaged part must be re-
placed with original part by the authorized technician.
Section 2
Technical Index
Piston force: 80 kn
Maximum travel of piston: 14 mm
Hose dimension: Nominal diameter,
Dn, 5/16“~5/8“
(Reference outer diameter:
∅ 17~ ∅ 30 at 5MPa)
Standard module group: 7
Operation mode: Manual
Ambient temperature: -10~60 ˚C
Arm strength: ≤75 Kg
Crimping time: about 10 s
Noise level: ≤10 db (Not detected)
Appearance dimension (L x W x H): 780 x412 x43 mm
Weight: 4.73 Kg
Aer that, the hydraulic crimper shall be thoroughly cleaned.
All the moving parts are greased only with premium hydrau-
lic oil or ball bearing oil.
Other maintenance : Adjustment and maintenance must be
performed by the our company authorized technicians.
If the seal is damaged, the quality assurance will not be
cancelled.
The hydraulic crimper, which have undergone 20.000 crim-
ping operations or have been used for two years, whichever
is earlier, must be maintained by the authorized repair shop
or our company.
The hydraulic crimper are sent only aer hydraulic oil must
be thoroughly drained from them.
Associated hydraulic oil : H830 (acid number: 0.81 mg
KOH/g) 57ml
Section 4
Supplies
Hydraulic crimper: 1 set
Die set: 7
Suitcase: 1
Appearance and Parts of 37-10291 Hydraulic Crimper.
Tope yoke Die set piston Cover plate Handle
Yoke Fixed chuck Oil pump housing valve Body

Popular Crimping Tools manuals by other brands

Gates GC20 Operating and safety manual

Gates

Gates GC20 Operating and safety manual

HRS CM-105 instruction manual

HRS

HRS CM-105 instruction manual

Textron Klauke EK 120IDCL quick start guide

Textron

Textron Klauke EK 120IDCL quick start guide

Textron Klauke EK 425CL manual

Textron

Textron Klauke EK 425CL manual

Milwaukee M18 Operator's manual

Milwaukee

Milwaukee M18 Operator's manual

Tyco Electronics 90035-3 instruction sheet

Tyco Electronics

Tyco Electronics 90035-3 instruction sheet

Tyco Electronics CERTI-CRIMP 90418-1 instruction sheet

Tyco Electronics

Tyco Electronics CERTI-CRIMP 90418-1 instruction sheet

TE Connectivity ERGOCRIMP 539 723-2 instruction sheet

TE Connectivity

TE Connectivity ERGOCRIMP 539 723-2 instruction sheet

molex 105300 Series quick start guide

molex

molex 105300 Series quick start guide

Staubli M-PZ-T2600 operating instructions

Staubli

Staubli M-PZ-T2600 operating instructions

Southwire M300P quick start guide

Southwire

Southwire M300P quick start guide

TE Connectivity HDP-400 Customer's manual

TE Connectivity

TE Connectivity HDP-400 Customer's manual

RYCO MINI CRIMPER Series Operation manual

RYCO

RYCO MINI CRIMPER Series Operation manual

molex 35745 Series Specification sheet

molex

molex 35745 Series Specification sheet

Aalberts industries Apollo PEX 69PTKH00143 instruction sheet

Aalberts industries

Aalberts industries Apollo PEX 69PTKH00143 instruction sheet

ODU 080.000.037.000.000 instruction manual

ODU

ODU 080.000.037.000.000 instruction manual

TE Connectivity 2392900-1 manual

TE Connectivity

TE Connectivity 2392900-1 manual

molex 207129 Series Specification sheet

molex

molex 207129 Series Specification sheet

manuals.online logo
manuals.online logoBrands
  • About & Mission
  • Contact us
  • Privacy Policy
  • Terms and Conditions

Copyright 2025 Manuals.Online. All Rights Reserved.