IS 747 ECN 4614 Page 6 of 14
OPERATING INSTRUCTIONS
Only qualified or trained personnel should use this appliance.
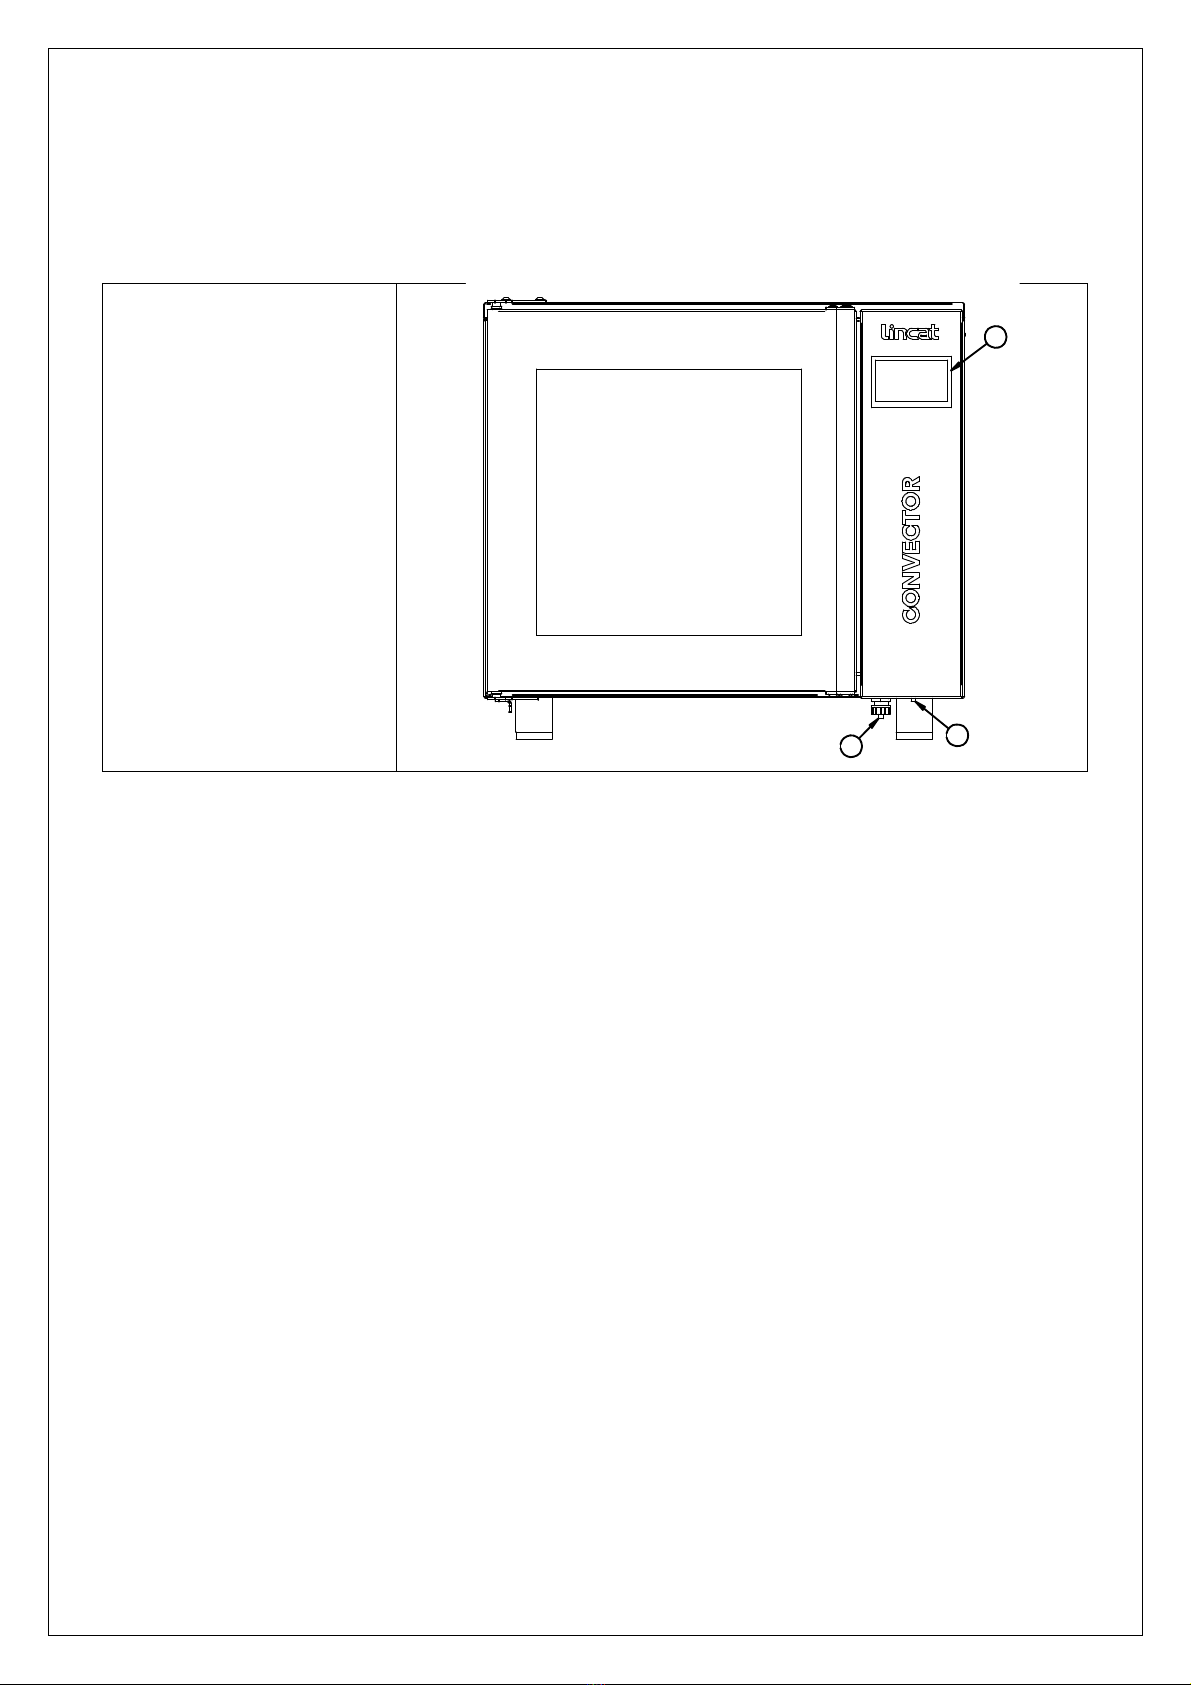
MODEL: CO343M
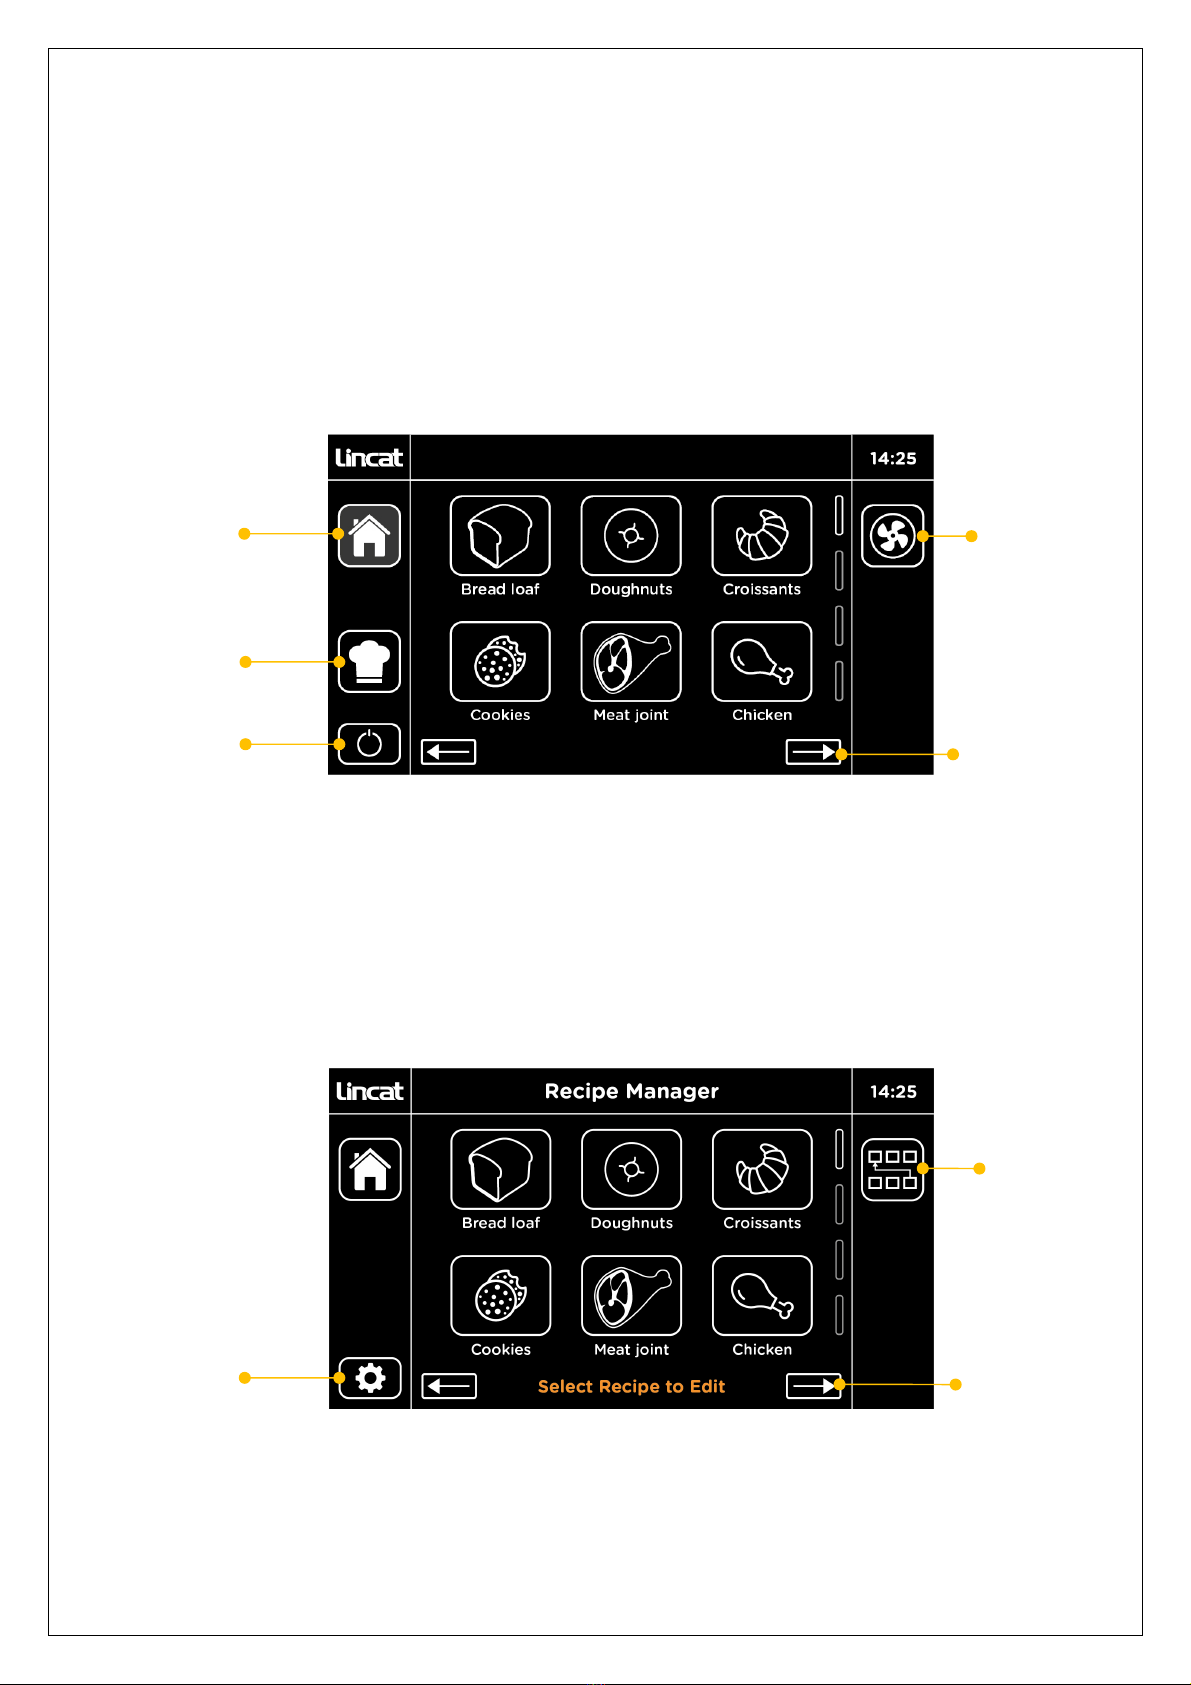
A- On/Off
B- Power supply indicator
C- Oven heating indicator
D- Temperature control knob
E- Fan Speed
F- 120 minute timer
G- Reset
Fig 3
Connect the appliance to the electricity supply. The green neon (B) illuminates
indicating power to the appliance. Select the On/Off switch (A), the switch will
illuminate and the fan will start rotating.
Select the desired fan speed, slow or fast (E).
Set the thermostat (D) to the desired temperature, the amber neon (C) will indicate
that the unit is heating.
When at the set temperature the amber light will turn off and will alternate on or off
to maintain the set temperature.
Load products onto the shelves and if required set the timer (F).
When the set time expires the buzzer/lights will sound/flash.
Carefully open the door and remove the cooked products. Opening the door will
cancel the buzzer and flashing lights.
Note: When the door is opened, if the fan is set to fast speed, the fan will switch
from fast to slow speed and return to fast speed when the door is closed.
A
E
F
C
D
B
G