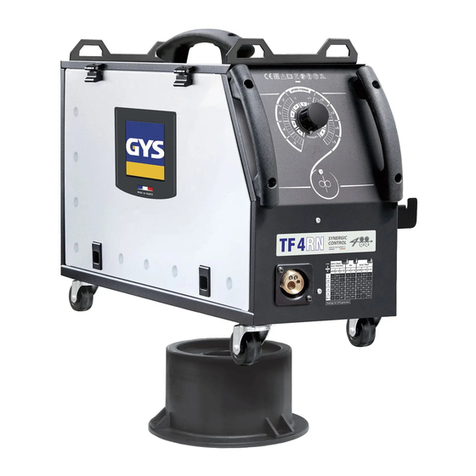
Lincoln Electric LF 52Ds User manual

IM3134
12/2022
REV02
LF 52Ds
OPERATOR’S MANUAL
ENGLISH
Lincoln Electric Bester Sp. z o.o.
ul. Jana III Sobieskiego 19A, 58-260 Bielawa, Poland
www.lincolnelectric.eu

English I English
12/05
THANK YOU! For choosing the QUALITY of the Lincoln Electric products.
Please check packaging and equipment for damage. Claims for material damaged in shipment must be notified
immediately to the dealer.
For ease of use, please enter your product identification data in the table below. Model Name, Code & Serial Number
can be found on the machine rating plate.
Model Name:
………………...…………………………….…………………………………………………………………………………………..
Code & Serial number:
………………….……………………………………………….. …………………………………………………….……………..
Date & Where Purchased:
…………………………………………………………………... ……………………….…………………………………………..
ENGLISH INDEX
Technical Specifications...................................................................................................................................................... 1
Electromagnetic Compatibility (EMC).................................................................................................................................. 2
Safety.................................................................................................................................................................................. 3
Introduction ......................................................................................................................................................................... 5
Installation and Operator Instructions.................................................................................................................................. 5
WEEE ............................................................................................................................................................................... 33
Spare Parts ....................................................................................................................................................................... 33
REACh .............................................................................................................................................................................. 33
Authorized Service Shops Location .................................................................................................................................. 33
Electrical Schematic.......................................................................................................................................................... 33
Accessories....................................................................................................................................................................... 34
Connection Diagram ......................................................................................................................................................... 35
Dimension Diagram........................................................................................................................................................... 36

English 1 English
Technical Specifications
NAME INDEX
LF 52Ds K14186-2
INPUT
Input Voltage U1Input Amperes I1EMC Class
40Vdc 4Adc A
RATED OUTPUT
Duty Cycle 40°C (based on a 10 min. period) Output Current
100% 420A
60% 500A
OUTPUT RANGE
Welding Current Range Peak Open Circuit Voltage
5 ÷ 500A 113Vdc peak
DIMENSION
Weight Height Width Length
15,2 kg 406 mm 249 mm 642 mm
WIRE FEED SPEED RANGE / WIRE DIAMETER
WFS Range Drive Rolls Drive roll diameter
1.5 ÷ 22 m/min 4 Ø37
Solid Wires Aluminum Wires Cored Wires
0.8 ÷ 1.6 mm 1.0 ÷ 1.6 mm 0.9 ÷ 1.6 mm
SAFETY
Protection Rating Maximum Gas Pressure
IP23 0,5 MPa (5 bar)
OTHERS
Operating Temperature Storage Temperature
from -10°C to +40°C from -25°C to 55°C

English 2 English
Electromagnetic Compatibility (EMC)
01/11
This machine has been designed in accordance with all relevant directives and standards. However, it may still generate
electromagnetic disturbances that can affect other systems like telecommunications (telephone, radio, and television) or
other safety systems. These disturbances can cause safety problems in the affected systems. Read and understand this
section to eliminate or reduce the amount of electromagnetic disturbance generated by this machine.
This machine has been designed to operate in an industrial area. To operate in a domestic area it is necessary
to observe particular precautions to eliminate possible electromagnetic disturbances. The operator must install
and operate this equipment as described in this manual. If any electromagnetic disturbances are detected the
operator must put in place corrective actions to eliminate these disturbances, if necessary with assistance from
Lincoln Electric.
Before installing the machine, the operator must check the work area for any devices that may malfunction because of
electromagnetic disturbances. Consider the following.
Input and output cables, control cables, and telephone cables that are in or adjacent to the work area and the machine.
Radio and/or television transmitters and receivers. Computers or computer controlled equipment.
Safety and control equipment for industrial processes. Equipment for calibration and measurement.
Personal medical devices like pacemakers and hearing aids.
Check the electromagnetic immunity for equipment operating in or near the work area. The operator must be sure that
all equipment in the area is compatible. This may require additional protection measures.
The dimensions of the work area to consider will depend on the construction of the area and other activities that are
taking place.
Consider the following guidelines to reduce electromagnetic emissions from the machine.
Connect the machine to the input supply according to this manual. If disturbances occur if may be necessary to take
additional precautions such as filtering the input supply.
The output cables should be as short as possible and positioned together as close as possible to each other. If possible
connect the work piece to ground in order to reduce the electromagnetic emissions. The operator must check that
connecting the work piece to ground does not cause problems or unsafe operating conditions for personnel and
equipment.
Shielding of cables in the work area can reduce electromagnetic emissions. This may be necessary for special
applications.
WARNING
EMC classification of this product is class A in accordance with electromagnetic compatibility standard EN 60974-10 which
means that the product is designed to be used in an industrial environment only.
WARNING
The Class A equipment is not intended for use in residential locations where the electrical power is provided by the public
low-voltage supply system. There may be potential difficulties in ensuring electromagnetic compatibility in those locations,
due to conducted as well as radiated disturbances.

English 3 English
Safety
01/11
WARNING
This equipment have to be used by qualified personnel. Be sure that all installation, operation, maintenance and repair
procedures are performed only by qualified person. Read and understand this manual before operating this equipment.
Failure to follow the instructions in this manual could cause serious personal injury, loss of life, or equipment damage. Read
and understand the following explanations of the warning symbols. Lincoln Electric is not responsible for damages caused
by improper installation, improper care or abnormal operation.
WARNING: This symbol indicates that instructions must be followed to avoid serious personal injury, loss
of life, or equipment damage. Protect yourself and others from possible serious injury or death.
READ AND UNDERSTAND INSTRUCTIONS: Read and understand this manual before operating this
equipment. Arc welding can be hazardous. Failure to follow the instructions in this manual could cause
serious personal injury, loss of life, or equipment damage.
ELECTRIC SHOCK CAN KILL: Welding equipment generates high voltages. Do not touch the electrode,
work clamp, or connected work pieces when this equipment is turned on. Insulate yourself from the
electrode, work clamp, and connected work pieces.
ELECTRICALLY POWERED EQUIPMENT: Turn off the input power using the disconnect switch at the
fuse box before working on this equipment. Ground this equipment in accordance with local electrical
regulations.
ELECTRICALLY POWERED EQUIPMENT: Regularly inspect the input, electrode, and work clamp
cables. If any insulation damage exists replace the cable immediately. Do not place the electrode holder
directly on the welding table or any other surface in contact with the work clamp to avoid the risk of
accidental arc ignition.
ELECTROMAGNETIC FIELD MAY BE DANGEROUS: Electric current flowing through any conductor
creates electromagnetic field (EMF). EMF fields may interfere with some pacemakers, and welders having
a pacemaker shall consult their physician before operating this equipment.
CE COMPLIANCE: This equipment complies with the European Community Directives.
ARTIFICIAL OPTICAL RADIATION: According with the requirements in 2006/25/EC Directive and
EN 12198 Standard, the equipment is a category 2. It makes mandatory the adoption of Personal
Protective Equipment (PPE) having filter with a protection degree up to a maximum of 15, as required by
EN169 Standard.
FUMES AND GASES CAN BE DANGEROUS: Welding may produce fumes and gases hazardous to
health. Avoid breathing these fumes and gases. To avoid these dangers the operator must use enough
ventilation or exhaust to keep fumes and gases away from the breathing zone.
ARC RAYS CAN BURN: Use a shield with the proper filter and cover plates to protect your eyes from
sparks and the rays of the arc when welding or observing. To protect the skin, use suitable clothing made
of durable, fireproof material. Protect other nearby personnel with suitable, non-flammable screening and
warn them not to watch the arc nor expose themselves to the arc.

English 4 English
WELDING SPARKS CAN CAUSE FIRE OR EXPLOSION: Remove fire hazards from the welding area
and have a fire extinguisher easily accessible. Welding sparks and hot materials from the welding process
can easily go through small cracks and openings to adjacent areas. Do not weld on any tanks, drums,
containers, or material until the proper steps have been taken to insure that no flammable or toxic vapors
will be present. Never use this equipment when flammable gases, vapors or flammable liquids are
present.
WELDED MATERIALS CAN BURN: Welding generates a large amount of heat. Hot surfaces and
materials in work area can cause serious burns. Use gloves and pliers when touching or moving
materials in the work area.
CYLINDER MAY EXPLODE IF DAMAGED: Use only certificate, compressed gas cylinders containing
the correct shielding gas for the process used and properly operating regulators designed for the gas and
pressure used. Always keep cylinders in an upright position securely chained to a fixed support. Do not
move or transport gas cylinders with the protection cap removed. Do not allow the electrode, electrode
holder, work clamp or any other electrically live part to touch a gas cylinder. Gas cylinders must be
located away from areas where they may be subjected to physical damage or the welding process
including sparks and heat sources.
MOVING PARTS ARE DANGEROUS: There are moving mechanical parts in this machine, which can
cause serious injury. Keep your hands, body and clothing away from those parts during machine starting,
operating and servicing.
SAFETY MARK: This equipment is suitable for supplying power for welding operations carried out in an
environment with increased risk of electric shock.
The manufacturer reserves the right to make changes and/or improvements in design without upgrade at the same time the
operator’s manual.

English 5 English
Introduction
LF 52Ds is digital wire feeder which have been designed
to work with Lincoln Electric power source:
POWERTEC®i400S.
The CAN protocol is used for communication between the
power source and the wire feeder. All signals from the
power source are displayed on the User Interface located
in the wire feeder machine.
Power source – wire feeder set allow the welding:
GMAW (MIG/MAG)
FCAW
SMAW (MMA) with using a special EURO to MMA
Adapter
Gouging (CAG) with using a special EURO to MMA
Adapter.
The complete package contains:
Wire feeder device
USB with operator’s manual
Set of 1.0 / 1.2 rolls for flux cored wires.
Recommended equipment, which can be bought by user,
was mentioned in the "Accessories" chapter.
Installation and Operator Instructions
Read this entire section before installation or operating the
machine.
Exploitation conditions
This machine can operate in harsh environments.
However, it is important to use the following simple
preventive measures that will ensure its long life and
reliable operation:
Do not place or operate this machine on a surface with
an incline higher than 15° from horizontal.
Do not use this machine for pipe thawing.
This machine must be located where there is free
circulation of clean air without restrictions for air
movement. Do not cover the machine with paper, cloth
or rags when switched on.
Dirt and dust that can be drawn into the machine
should be kept to a minimum.
This machine has a protection rating of IP23. Keep it
dry when possible and do not place it on wet ground
or in puddles.
Locate the machine away from radio controlled
machinery. Normal operation may adversely affect
the operation of nearby radio controlled machinery,
which may result in injury or equipment damage.
Read the section on electromagnetic compatibility in
this manual.
Do not operate in areas with an ambient temperature
greater than 40°C.
Duty cycle and Overheating
The duty cycle of a welding machine is the percentage of
time in a 10 minute cycle at which the welder can operate
the machine at rated welding current.
Example: 60% duty cycle:
Welding for 6 minutes. Break for 4 minutes.
Excessive extension of the duty cycle will cause the
thermal protection circuit to activate.
Minutes or decrease
Duty Cycle
Input Supply Connection
Check the input voltage, phase, and frequency of the
power source that will be connected to this wire feeder.
The acceptable level of input voltage is indicated in the
section „Technical Specifications” and on the rating plate
of the power source. Verify the connection of grounding
wires from the power source to the input source.

English 6 English
Controls and Operational Features
1
2
Figure 1
1. EURO socket: For connecting a welding gun
(for GMAW, FCAW process).
2. User Interface U22: See "User Interface U22" section.
3
4
5
Figure 2
3. Gas quick coupling socket: For connecting a
gas pipe.
WARNING
The machine allows the use all suitable shielding gases
with a maximum pressure of 5 bar.
4. Control Socket: 5 pins socket for connecting
the power source. The CAN protocol is used
for communication between the power
source and wire feeder.
5. Current Socket: For connecting a welding
cable.
6. Gas Flow Regulator Plug: Gas Flow Regulator can
be purchased separately. See "Accessories" section.
7. Switch: wire feed / gas purge: This switch allows wire
feeding (wire test) and gas flow (gas test) without
switching on the output voltage.
8. Wire Spool Holder: For wire spool with maximum
16kg weight. Holder allows mounting plastic, steel
and fiber spools on the 51mm spindle.
WARNING
Be sure that wire spool case has to be completely closed
during welding.
9. Spool with wire: Not supplied as standard.
10. Wire drive: 4-rolls wire drive.
WARNING
The side panel and wire spool case have to be completely
closed during welding.
WARNING
Do not use handle to move the machine during operation.
See "Accessories" section.
6 7 8
9
10
Figure 3

English 7 English
User Interface U22
The LF 52DS wire feeder uses the U22 interface based
on two separate LED displays for operation.
11 14
24 17
12 13 15
16
18
192021
2223
25
26
Figure 4
11. Left Display: Shows wire feed speed or welding
current. During welding shows the actual welding
current value.
12. Status LED: A two color light that indicates system
errors. Normal operation is steady green light. Error
conditions are indicated, per Table 1.
Note: The status light will flash green for up to one minute
when the machine is turned on for the first time. When the
power source is powered it can take as long as up to 60
seconds for the machine to be ready to weld. This is a
normal situation as the machine goes through the
initialization.
Table 1. LED Light Conditions
LED Light
Condition
Meaning
Only machines which using
protocol for communication
Steady Green Power source is operational, and is
communicating normally with all
healthy peripheral equipment.
Blinking Green Occurs during power up or a system
reset, and indicates the power source
is mapping (identifying) each
component connect to the system.
This behavior occurs for first after
power is turned on, or if the system
configuration is changed during
operation.
Alternating Green
and Red
If the status lights are flashing any
combination of red and green color, it
means that errors are present in the
power source.
Each digit of the code corresponds to
the number of red flashes of the
indicator lamp.
Individual code digits are flashed in
red with a long pause between digits.
If more than one code is present, the
codes will be separated by green light.
Read the error code before the
machine is turned off.
To clear the errors try to turn off the
machine and wait for a few seconds,
then turn on again. If the error
remains, a it maintenance is required.
Please contact the nearest authorized
technical service center or Lincoln
Electric and report the error code.
Steady Red Indicate no communication between
the power source and device which
has been connected to this power
source.
13. Thermal Overload Indicator: It indicates that the
machine is overloaded or that the cooling is not
sufficient.
14. Right Display: Depending on the source welding and
the welding program shows the welding voltage in
volts or Trim value. During welding shows the actual
welding voltage value.

English 8 English
15. LED Indicator: Informs that the value on the right
display is in volts unit and during welding, it blinks and
the display shows the measured voltage.
16. LED Indicator: Informs that the value on the right
display is Trim. Trim is adjustable from 0.50 to 1.50.
1.00 is the nominal setting.
17. Right Control: Adjusts values on the right display.
18. LED Indicator: Quick Access Menu.
19. Right Button: Enables selecting, changing and setting
welding parameters. Quick Access Menu.
20. LED Indicator: Indicates that the Settings and
Configuration Menu is activated.
21. Left Button: Enables:
Checking the active program number. To check
the program number, press the left button once.
Changing the Welding Process.
22. Welding Programs Indicators (changeable): In the
user memory can be stored four user programs. Shine
LED indicates that the program is active.
23. Welding Programs Indicators (unchangeable): LED
indicates the program for non-synergic process is
active. See the Table 2.
24. Left Control: Adjusts values on the left display.
25. LED Indicator: Informs that the value on the left
display is in ampere units, blinks during welding and
the display shows current measured.
26. LED Indicator: Informs that the wire feed speed is on
the left display.

English 9 English
Changing the Welding Process or Program
Table 2 . Unchangeable Welding Programs
Symbol Process Program Number
Powertec®Speedtec®Flextec®
GMAW (non-synergic) 2 5 10
FCAW-GS 7 7 81
SMAW 1 1 1
GTAW - 3 3
Note: The list of available programs depends on the power source. If the power source does not support one of four
unchangeable programs, the LED indicating this program does not light up.
It is possible to quick recall one of the eight welding
programs. Four programs are fixed and cannot be
changed - Table 2. Four programs can be changed and
assigned to one of four user memory. By default, user
memories store the first available welding program.
To change the welding process:
Press the Left Button [21]. "Pr" is shown on the Left
Display [11] and the actual program number on the
Right Display [14].
Again, press the Left Button [21] the welding programs
indicator (22 or 23) will pass to the next program in the
sequence shown in Figure 5.
Figure 5
Press the Left Button [21] until the LED Indicator (22
or 23) will indicate desired welding program.
Note: After the device has been restarted remembers the
last selected welding program with its parameters.

English 10 English
User Memory
In user memory only four welding programs can
be stored.
To assign the weld program to user memory:
Use the Left Button [21] to select the user memory
number (1, 2, 3 or 4) - LED Indicator [22] will light up
selected memory.
Press and hold the Left Button [21] it until LED
Indicator [22] will blink.
Use the Right Control [17] to select the welding
program.
To save the selected program, press and hold the Left
Button [21] until LED Indicator will stop blinking.
Note: The list of available programs depends on the
power source.
Quick Access Menu
The user has access to the arc parameters as well as
start and end process parameters according to Table 3
and 4.
Figure 6
To enter the menu:
Press the right Button [19] until the LED Indicator [18]
illuminates the required parameter.
Set the parameter value by the Right Control [17]. The
set value is automatically saved.
The parameter value is shown on the Right Display
[14].
Press the Right Button [19] to go to the next
parameter.
Press the left button [21] to exit.
Note: Access to the menu is not available under welding,
or if there is a fault (status LED [12] is not solid green).
Note: Availability of the parameters in the Quick Access
Menu depend on the selected welding program / welding
process.

English 11 English
Table 3 Wave Controls
Parameter Definition
Pinch
–
controls the arc characteristics during short-arc
welding. Increasing Pinch value results in a crisper arc
(more spatter) while decreasing provides a softer arc
(less spatter).
Regulation range: from -10.0 to +10.0.
Default value: 0.
Frequenc
y
- influences the width of the arc and the
amount of heat input to the weld.
Default value: 0.
Note: Adjust range depend on the power source.
Background Current
-
percentage value of nominal
welding current. Adjusts the overall heat input into the
weld. Changing the background current changes the
shape of the back bead.
Note: Adjust range depend on the power source.
UltimArc™ – for pulse welding programs adjusts the
focus or shape of the arc. In consequence of increasing
UltimArc™ value the arc is tight, stiff for high speed sheet
metal welding.
Adjust range: from -10 to +10.
Default value: 0.
ARC FORCE - the output current is temporarily
increased prevents the electrode from sticking and
facilitates the welding process.
Lower values will provided less short circuit current and a
softer arc. Higher settings will provided a higher short
circuit current, more forceful arc and possibly of more
spatter.
Default value: 0.
Regulation range: from -10.0 to +10.0
HOT START - percentage regulation of increasing
nominal current value during arc start with electrode. It
cause temporarily increased of output current and made
easy arc start with electrode.
Default value: +5.
Regulation range: from 0 to +10.0.
This parameter is for SMAW only.
Pulse Period - - influences the width of the arc and the
amount of heat input to the weld. If the value of
parameters is lower:
Improves penetration and the microstructure of the
weld.
The arc is narrower, more stable.
Reduces the amount of heat input to the weld.
Reduces distortions.
Increases welding speed.
Note: Adjust range depend on the power source.

English 12 English
Table 4 Process start and end parameters
Parameter Definition
Torch trigger mode (2-step / 4-step)
-
change the
function of the torch trigger.
2 Step trigger operation turns welding on and off
as direct response to the trigger. Welding
process starts when the torch trigger is press.
4-Step mode allows to continue welding, when
the torch trigger is released. To stop welding, the
torch trigger should be pressed again.4-step
model facilitates to make long welds.
Default settings: 2-step
Run
-
in WFS
–
sets the wire feed speed from the
time the torch trigger is pressed until an arc is
established.
Regulation range: from 1,49 m/min (59 in/min) to
3,81 m/min (150 in/min).
Default settings for non-synergic mode: OFF.
Default settings for synergic mode: AUTO mode.
Burnback Time
–
amount of time that the welding is
continued after the wire stops feeding. It prevents the
wire from sticking in the puddle and prepares the end
of the wire for the next arc ignition.
Regulation range: from OFF to 0,25 seconds.
Default settings for non-synergic mode: 0,07s.
Default settings for synergic mode: AUTO mode.

English 13 English
Setting and Configuration Menu
To access the menu, press the Left [21] and the Right [19]
Buttons simultaneously.
Parameter Selection Mode – the Parameter Name on the
Left Display [11] blinking.
Parameter Change Value Mode – the parameter value on
the Right Display [14] blinking.
WARNING
To exit the menu with changes saved, press the Left [21]
and the Right [19] Buttons simultaneously.
After one minute of inactivity the Menu without saving will
also exit.
Table 5 Interface Components and functions when the Settings and Configuration Menu is active.
11 14
24 17
19
2021
Figure 7
Functions of Interface Components
11. Parameter Name.
14. Parameter Value.
17. Changing Parameter Value.
19. Entering to parameter edition. Confirm
Parameter Value change.
20. Setting and Device Configuration Menu is
active.
21. Cancelation / Exit.
24. Parameter Selection.
BASE LEVEL
ADVANCED
LEVEL
Figure 8
User has access to two menu levels:
Basic Level – basic menu which is connected with
settings of Welding Parameters.
Advanced Level – advanced menu, configure device
menu.
Note: The availability parameters in the Setting and
Configuration Menu depend on the selected welding
program / welding process.
Note: After the device has been restarted remembers the
last selected welding program with its parameters.

English 14 English
Basic Menu (settings related to the welding’s parameters)
The Basic Menu includes the parameters described in Table 6.
Table 6 The default settings of Basic Menu
Parameter Definition
Preflow Time
–
time that shielding gas flows after the torch trigger
was pressed before prior to wire feeding.
Regulation range: from 0 seconds (OFF) to 25 seconds.
Default settings for non-synergic mode: 0,2s.
Default settings for synergic mode: AUTO mode.
Postflow Time
–
time that shielding gas flows after stop welding.
Regulation range: from 0 seconds (OFF) to 25 seconds.
Default settings for non-synergic mode: 0,5s.
Default settings for synergic mode: AUTO mode.
Spot Time
r
– adjusts the time welding will continue even if the
trigger is still pulled. This option has no effect in 4-Step Trigger
Mode.
Regulation range: from 0 second (OFF) to 120 seconds.
Default settings: OFF.
Note: Spot Timer has no effect in 4-Step Trigger Mode.
Crater Procedure controls the WFS (or value in ampere) and Volts
(or Trim) for a specified time at the end of the welding after the
trigger was released. During the crater time, the machine will ramp
up or down from the Weld Procedure to the Crater Procedure.
Adjust time range: from 0 seconds (OFF) to 10 seconds.
Default settings: OFF.
Crater parameters:
Crater time
Wire feed speed or welding current.
Voltage in volts or Trim value.
To set a crater for a selected process:
Press the Right Button [19].
"SEC" appears on the Left Display [11].
On the Right Display [14] the value in seconds flashes.
Set the crater time with the Right Control [17].
Confirm the setting of the crater time with the Right Button [19].
The Left Display [11] shows the value of the wire feed speed or
welding current, the Right Display [14] shows the voltage in volts
or the Trim value.
Set the value on the Left Display [11] by the left control [24].
Set the value on the Right Display [14] with the Right Control
[17].
Confirm the settings - press the Right Button [19].
Polarization – Used for configuration of the work and electrode
sense leads:
"Positive" (default) = Most GMAW welding procedures use
Electrode Positive welding.
"Negative" = Most GTAW and some inner shield procedures use
Electrode Negative welding.
Coole
r
– option is available when cooler is connected.
This function allows following cooler modes:
FILL – Filling.
AUTO – Automatic mode.
On – Cooler on in the continuous mode.
Off – Cooler off.
Refer cooler instruction manual for more details.
Note: Not apply to Flextec®350x i Flextec®500x.

English 15 English
Green Mode
–
is a power management feature that enables
welding equipment to switch to low power state and reduce power
consumption while is not using.
Note: Not apply to Flextec®350x i Flextec®500x.
Display Configuration Settings:
Standby
Shutdown
Standby – this option allows you to reduce energy consumption to
the level below 50W when the welding equipment is unused.
Default value: OFF.
To set the time for Standby option:
Press the Right Control [17] to enter in to Standby menu.
By the Right Control [17] set require time from 10-300min range
or Off this function.
Press the Right Control [17] to confirm.
When machine is under Standby mode any action on user
interface or trigger activates normal work of welding machine.
Shutdown – this option allows you to reduce energy consumption to
the level below 10W when the welding equipment is unused.
Default value: OFF.
To set the time when Shutdown option will be turn on:
Press the Right Control [17] to enter in to Shutdown menu
By the Right Control [17] set require time from 10-300min range
or Off this function.
Press the Right Control [17] to confirm.
Operating system inform you 15s before activate Shutdown
Mode by time counter.
Note: When machine is under Shutdown mode it is required to
switch the machine off and on to activate normal operation.
Note: Under Standby and Shutdown displays are disabled.
Advanced Menu – Device Configuration Menu.
Note: To access to advanced menu:
In Base Menu select the Advanced Menu (Adv).
Use the Right Button [19] to confirm the selection.

English 16 English
Advanced Menu (Device Configuration Menu)
The Advanced Menu includes the parameters described in Table 7.
Table 7 The default settings of Advanced Menu
Parameter Definition
The Menu Exit
–
enables exit from menu.
Note: This parameter cannot be edited.
To exit from menu:
In Advanced Menu select P000.
Confirm the selection, push the right button.
Wire Feed Speed (WFS) units – enables change WFS units:
CE (factory default) = m/min;
US = in/min.
Crater Delay
-
this option is used to skip the Crater sequence when
making short tack welds. If the trigger is released before the timer
expires, Crater will be bypassed and the weld will end. If the trigger
is released after the timer expires, the Crater sequence will function
normally (if enabled).
OFF (0) to 10.0 seconds (default = OFF)
Display Trim as Volts Option – determines how Trim is displayed:
"Yes" = all trim values are displayed as a voltage;
"No" = the trim is displayed in the format defined in the weld set.
Note: This option may not be available on all machines. The power
source must support this functionality, or this option will not appear
in the menu.
Arc Start
/
Loss Error Time - This option can be used to optionally
shut off output if an arc is not established, or is lost for a specified of
time. Error 269 will be displayed if the machine times out. If the
value is set to OFF, machine output will not be turned off if an arc is
not established or arc is lost. The trigger can be used to hot feed the
wire (default). If a value is set, the machine output will shut off if an
arc is not established within the specified amount of time after the
trigger is pulled or if the trigger remains pulled after an arc is lost. To
prevent nuisance errors, set Arc Start/Loss Error Time to an
appropriate value after considering all welding parameters (run-in
wire feed speed, weld wire feed speed, electrical stick out, etc).
OFF (0) to 10.0 seconds (default = Off)
Note: This parameter is disabled while welding in Stick, TIG or
Gouge.
Display Workpoint as Amps Option – determines how workpoint
is displayed:
"No" (factory default) = the workpoint is displayed in the format
defined in the weld set.
"Yes" = all workpoint values are displayed as an amperage.
Note: This option may not be available on all machines. The power
source must support this functionality, or this option will not appear
in the menu.
Feedback Persist
–
determines how feedback values are displayed
following a weld:
"No" (factory default) – last recorded feedback values will blink
for 5 seconds following a weld, then return to present display
mode.
"Yes" – last recorded feedback values will blink indefinitely
following a weld until a Control or Button is touched, or an arc is
struck.
Sense From Studs
-
Use this option for diagnostic purposes only.
When power is cycled, this option is automatically reset to False.
"No" = Voltage sensing is automatically determined by the
selected weld mode and other machine settings.
"Yes" = Voltage sensing is forced to "studs" of the power source.
Note: This option may not be available on all machines. The power
source must support this functionality, or this option will not appear
in the menu.

English 17 English
Brightness Control - enables the brightness level.
Adjust range: from 1 to +10, where 5 is default.
Restore Factory Settings – to restore Factory Settings:
Use the right button to confirm the selection.
Use the right control to select "YES".
Use the right button to confirm the selection.
Note: After the device has been restarted the P097 is "NO".
Show Test Modes– uses for calibration and tests. To use the Test
Modes:
On the right display is shown "LOAD".
Use the right button to confirm the selection.
On the right display is shown "DONE"
Note: After the device has been restarted the P099 is "LOAD".
V
iew Software Version Info – used for viewing the software
versions for user interface.
To read the software version:
In Advanced Menu select P103.
Confirm the selection, push the right button.
The displays will show the software version.
Note: P103 is a diagnostic parameter, to read only.

English 18 English
Welding GMAW, FCAW-GS and FCAW-SS Process in non-synergic mode
Table 8. GMAW and FCAW non-synergic Welding Programs
Process Gas Program Number
Powertec®Speedtec®Flextec®
GMAW
ArMIX 2
5 10CO23
Ar 4
FCAW-GS ArMIX 7 7 81
CO28
FCAW-SS - 6 6 80
Note: The list of available programs depends on the power source.
In non-synergic mode wire feed speed and welding
voltage are independent parameters and must be set by
the user.
Procedure of beginning welding of GMAW, FCAW-GS or
FCAW-SS process:
Connect a recommended Lincoln Electric power
source (see ʺAccessoriesʺchapter).
Place the welding set close to the work area, in the
place that minimize exposure to weld spatter and
guarantee avoid sharp bends of torch cable.
Determine the wire polarity for the wire to be used.
Check data sheet of wire to determine the wire
polarity.
Connect output the gun to GMAW, FCAW-GS or
FCAW-SS process to Euro Socket [1].
Connect the work lead to output sockets of the power
source and lock it.
Connect the work lead to the welding piece with the
work clamp.
Install the proper wire.
Install the proper drive roll.
Manually push the wire into the gun’s liner.
Make sure, if it is needed (GMAW, FCAW-GS
process), that the gas shield has been connected.
Turn the input power ON.
Insert the wire into the welding gun.
WARNING
Keep the gun cable as straight as possible when
loading electrode through cable.
WARNING
Never use defected gun.
Check gas flow with Gas Purge Switch [7] – GMAW
and FCAW-GS process.
Close the wire drive door.
Close the spool wire case.
Select the right welding program. Non-synergic
programs are described in the Table 8.
Note: The list of available programs depends on the
power source.
Set the welding parameters.
The welding machine is now ready to weld.
WARNING
The wire drive door and wire spool case have to be
completely closed during welding.
WARNING
Do not kink or pull cable around sharp corners.
By applying the principle of occupational health and
safety at welding, welding can be begun.
For non-synergic mode you can set:
Wire Feed Speed, WFS
The welding voltage
Burnback Time
Run-in WFS
Preflow Time
Postflow Time
Spot Time
2-Step/4-Step
Crater
Polarity
Wave Control:
Pinch
Pinch controls the arc characteristics during short-arc
welding. Increasing Pinch Control results in a crisper arc
(more spatter) while decreasing provides a softer arc (less
spatter).
Adjust range: from -10 to +10.
Default value: 0.
This manual suits for next models
1
Table of contents
Other Lincoln Electric Wire Feeder manuals

Lincoln Electric
Lincoln Electric DLF-72 User manual

Lincoln Electric
Lincoln Electric PWF-2 User manual

Lincoln Electric
Lincoln Electric Power Feed 10 User manual

Lincoln Electric
Lincoln Electric LWF-22 User manual

Lincoln Electric
Lincoln Electric 12442 User manual

Lincoln Electric
Lincoln Electric LF-72 User manual

Lincoln Electric
Lincoln Electric WF 56D User manual

Lincoln Electric
Lincoln Electric Power Feed 10 Robotic K1780-2 User manual

Lincoln Electric
Lincoln Electric Activ8X User manual

Lincoln Electric
Lincoln Electric DX7 User manual