8
Troubleshooting
ALWAYS TURN OFF THE SYSTEM
BEFORE PERFORMING ANY REPAIRS.
Problem Solution
Cleaner doesn’t move or moves too slow.
The loops in the hoses won’t come out.
The cleaner does not clean the entire pool.
The cleaner climbs the wall too much or climbs out.
The cleaner falls on its side and takes too long to recover.
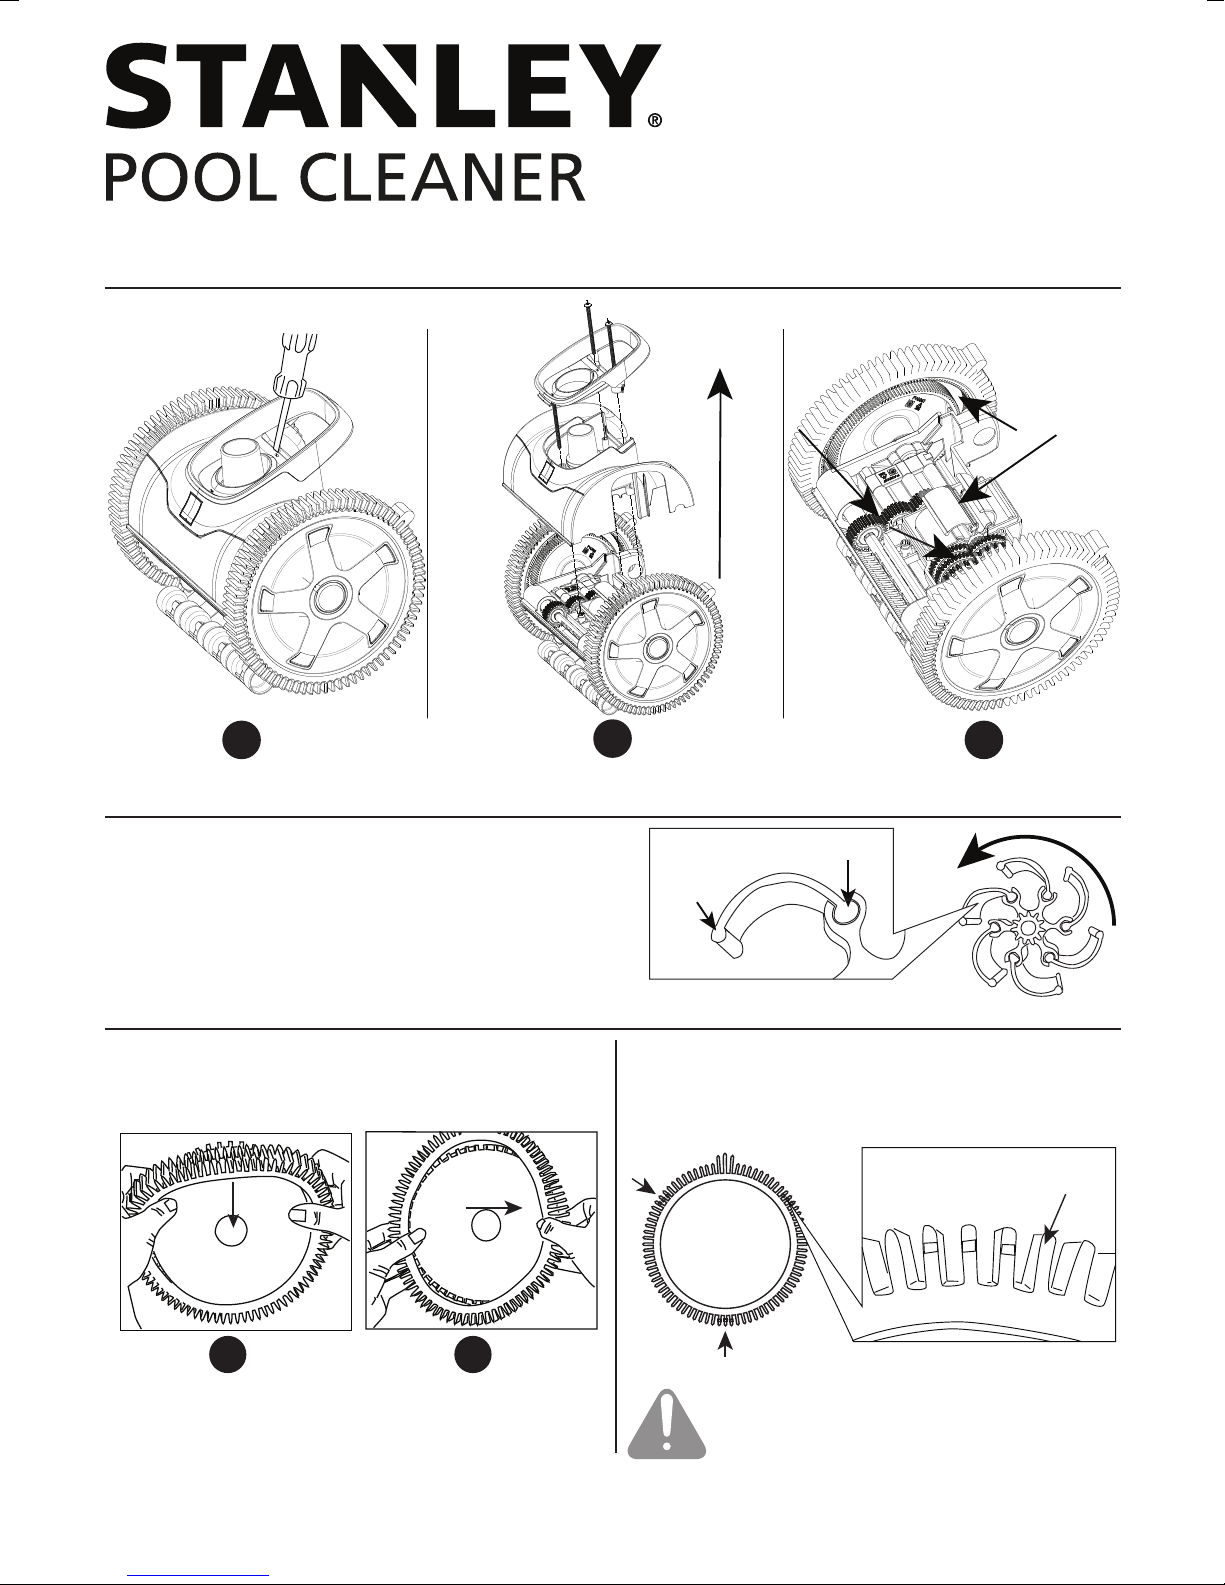
Turbine vanes /blades pop out of turbine.
suction inlet.
The cleaner won’t climb the wall.
The cleaner turns in circles, it wont go straight at all.
The right wheel will not turn when rotated by hand.
(looking from behind)
The right wheel skips teeth when rotated forward by hand.
(looking from behind)
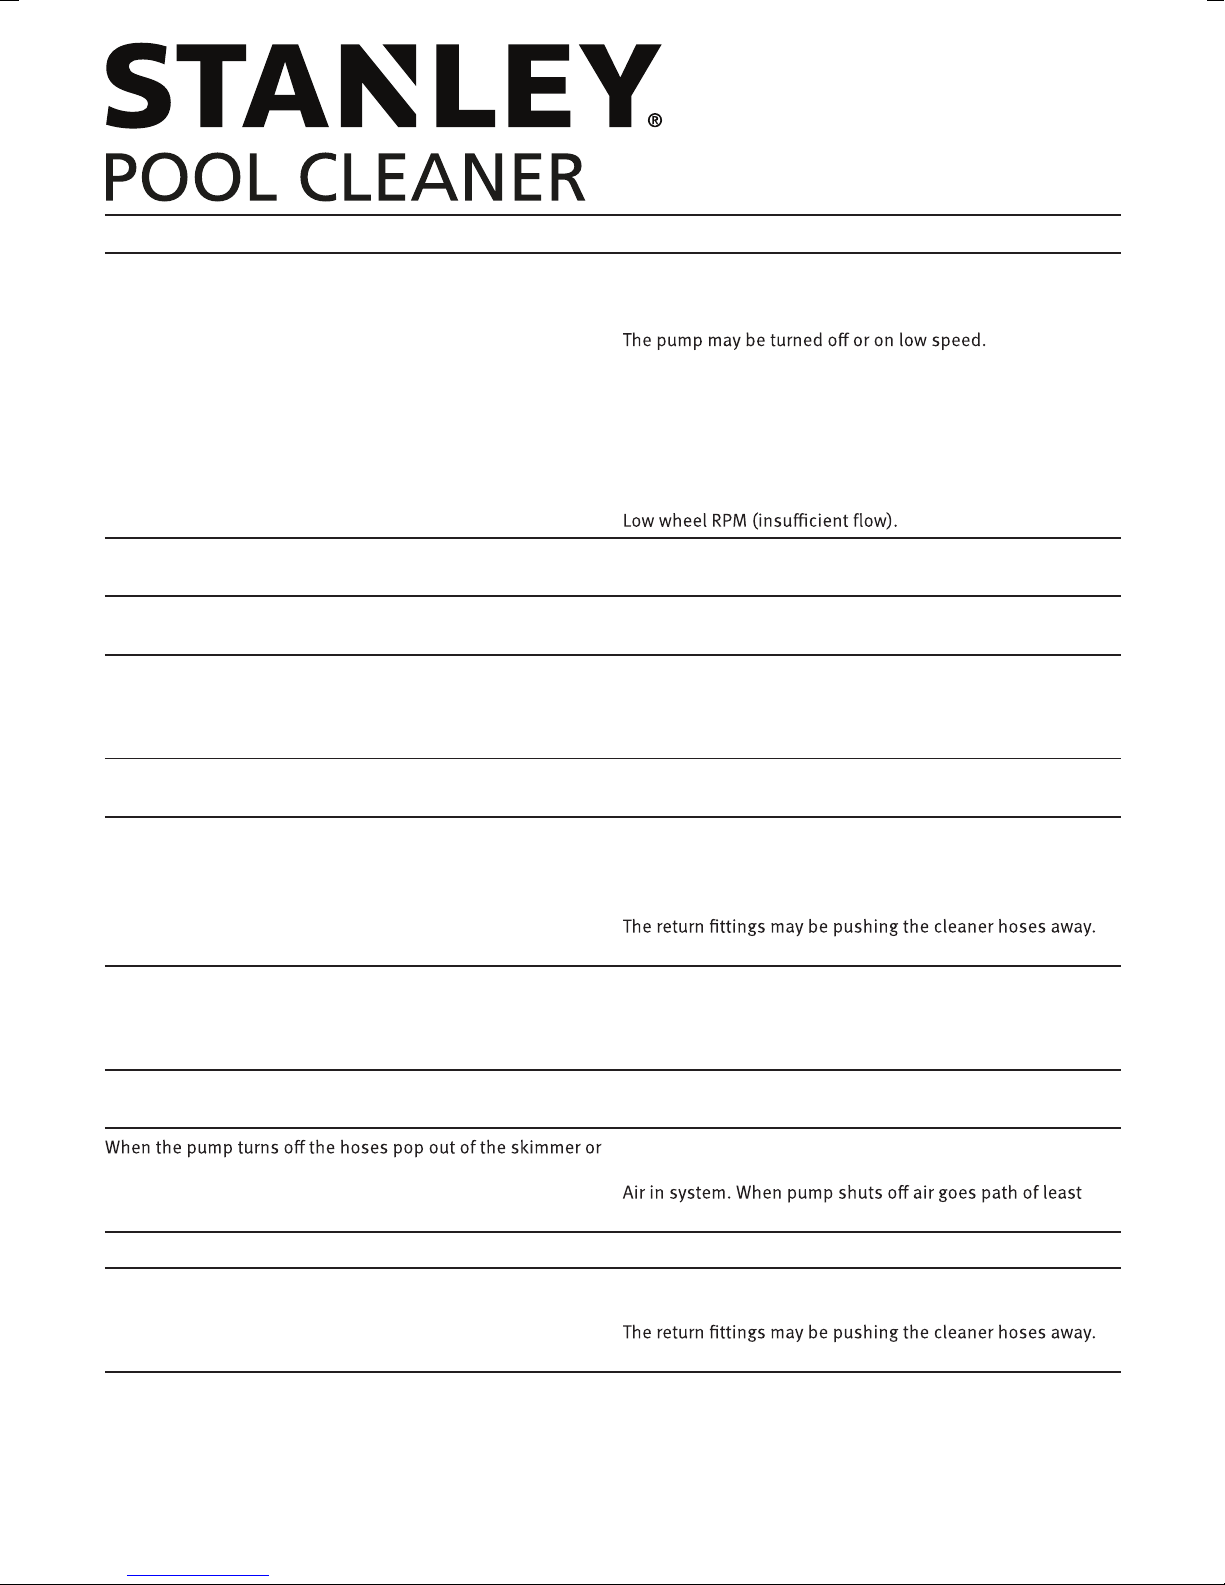
Wheels are wobbly.
Check wheel RPM.
Obstruction in the cleaner itself. If there was an obstruction
make sure vanes are replaced correctly.
The pump may not be primed. Check for leaks in the system
(symptoms--bubbles from the returns?) Possible other
problem or obstruction in the system. Pump impeller blocked?
Filter needs backwashing. Clean pump basket, skimmers.
Turbine vanes/blades in wrong direction and/or wrong side.
Problem or obstruction in the system.
Obstruction in the cleaner itself.
The hoses have been stored in a coiled position. Lay them
straight in the sunlight.
Clean swivel on cleaner head by running it under a tap.
Leaf canister, it may be in the wrong place or not floating.
The hose is too short.
The float(s) may be in the wrong position.
Should be 50-60 centimetres from cleaner head.
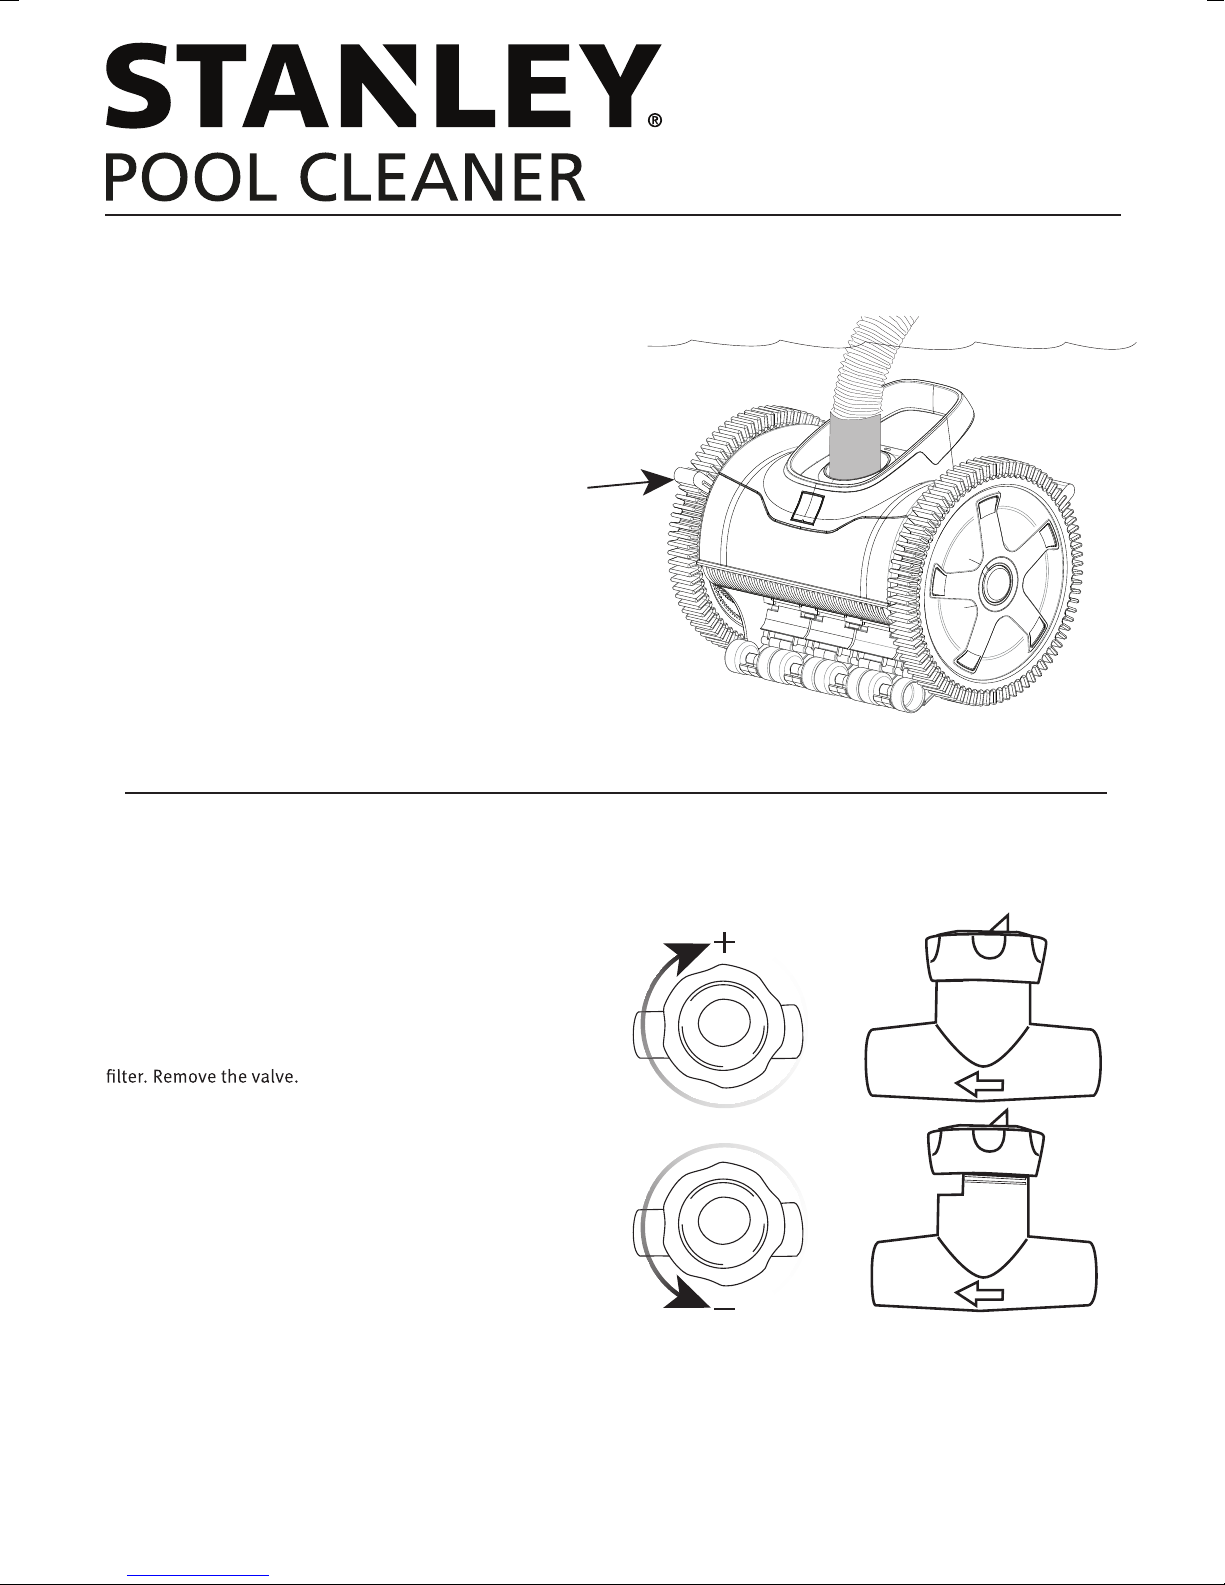
The Hose Cone Swivel (on the turbine cover) may be dirty.
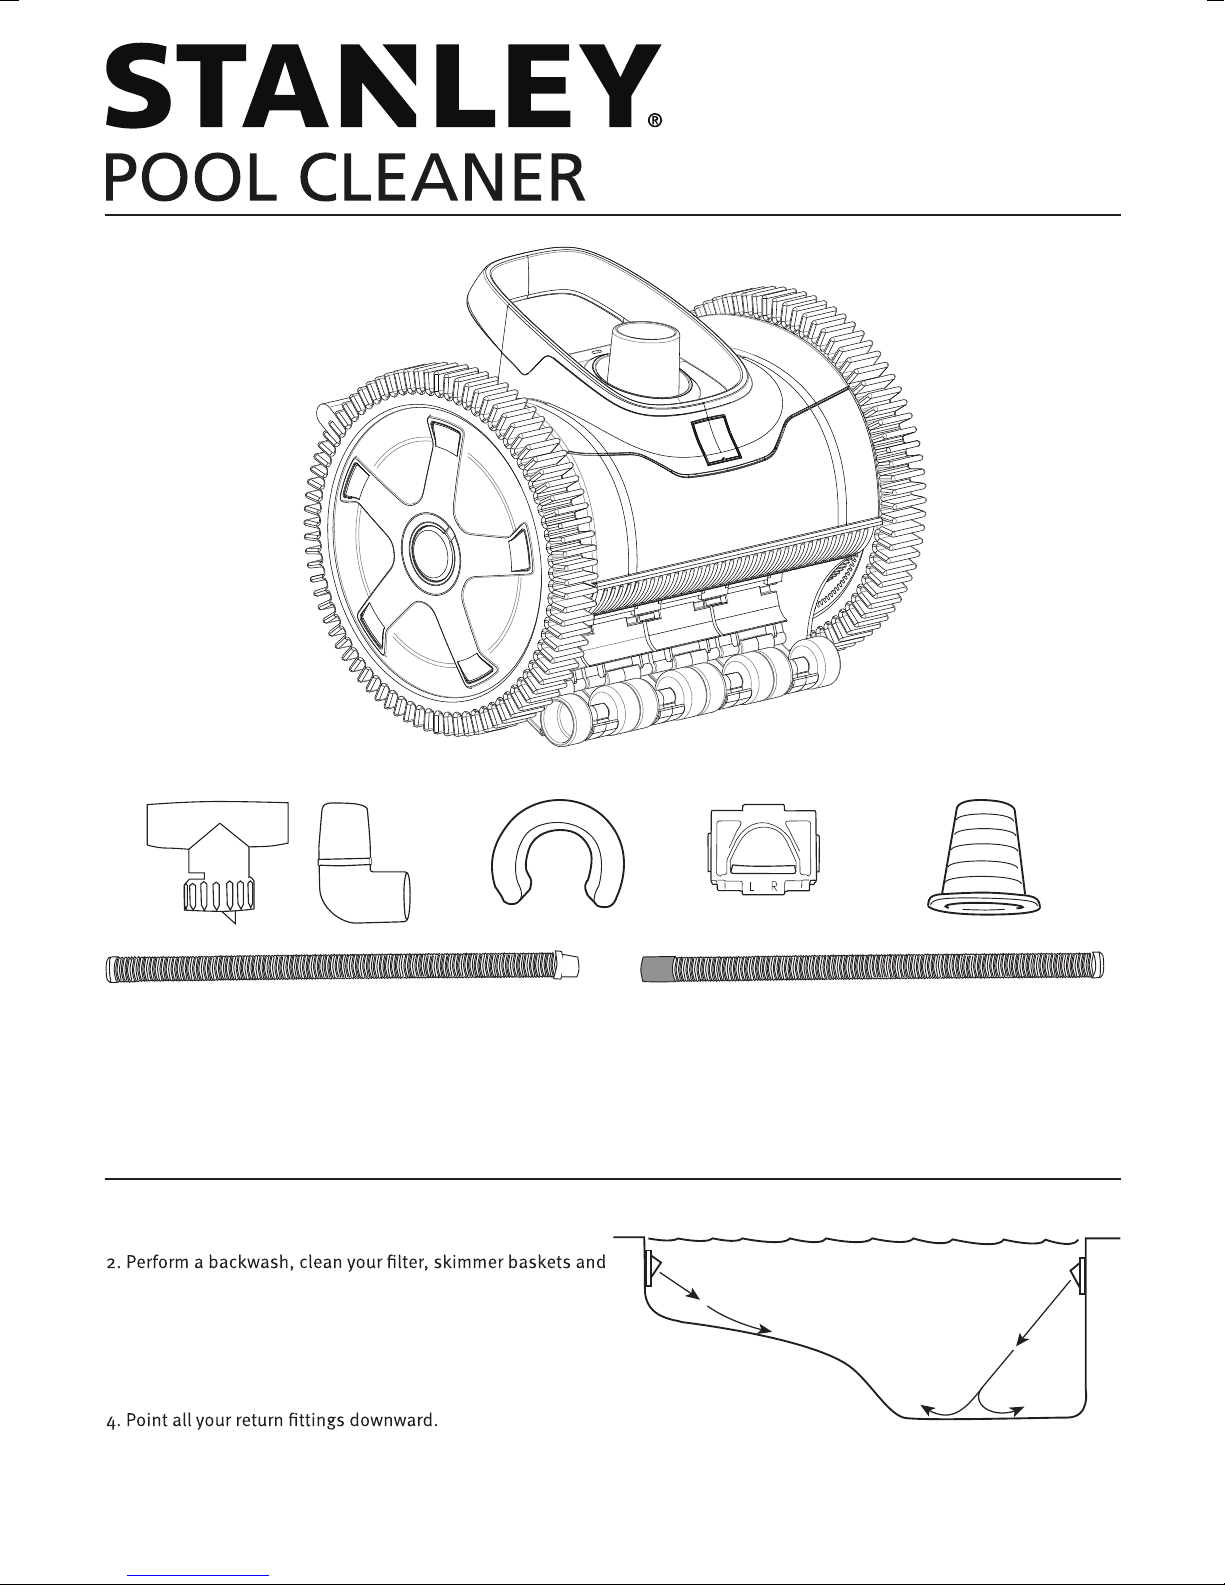
Point them down.
The tire treads and skirts may be worn down.
Too much suction or flow.
You are not using the Bypass Valve (if hook up is in skimmer).
Auto skim plate/vac plate needs adjustment.
The float(s) may be in the wrong position or missing.
The hose is too short.
Check wheel RPM.
Wrong side of vane in the turbine hub. Large oval side should
be in turbine.
Turbine hub possibly worn.
Make sure hose cone is properly placed into inlet/port/water
gate.
resistance and pops out the hose. Fix air leak.
Too little suction or flow.
Float may be in the wrong position.
Wheel hub and/or large drive gear and/or steering slide as -
sembly and/or right drive gear are worn or damaged.
Obstruction in the cleaner itself.
Wheel hub or right drive gear worn/damaged.
Bearings are worn please replace.
•
•
•
•
•
•
•
•
•
•
•
•
•
•
•
•
•
•
•
•
•
•
•
•
•
•
•
•
•
•
•
•
•