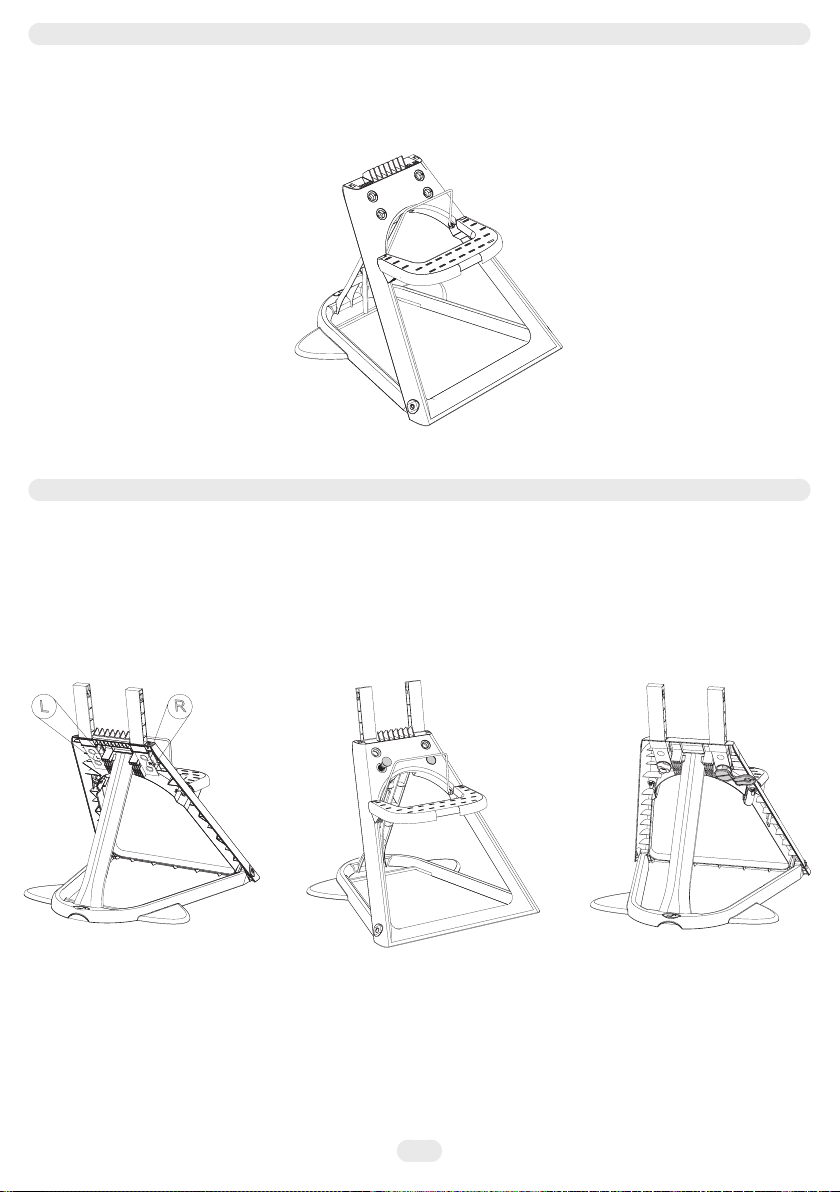
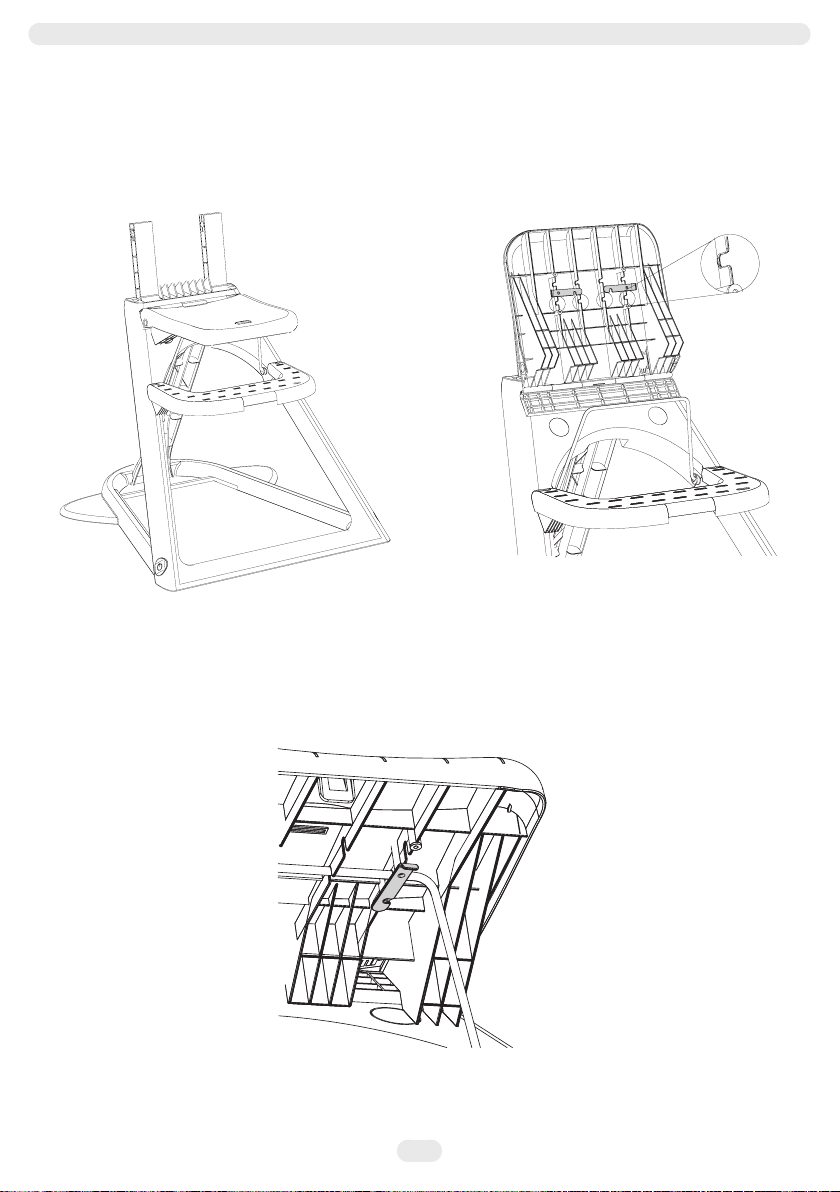
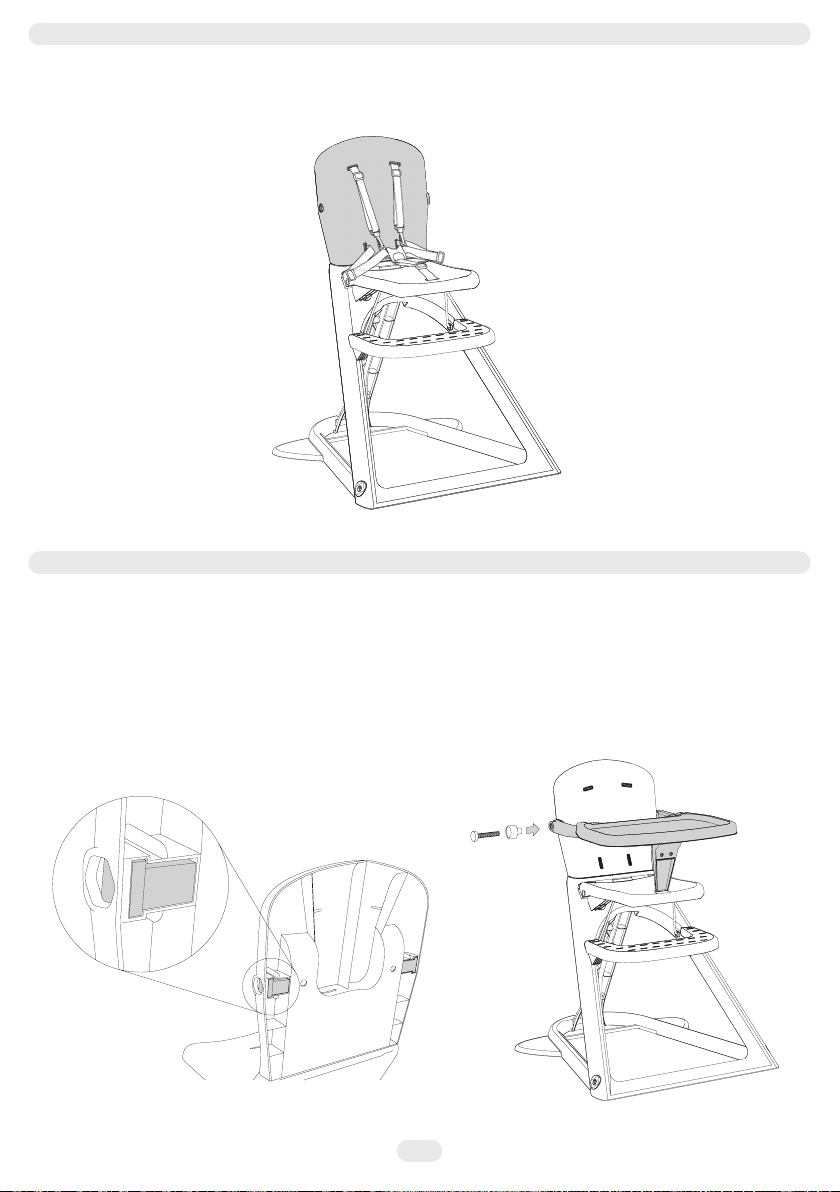
Lindam 44465 User manual

07.2008
highchair, infant chair
& junior chair
IMPORTANT! KEEP FOR FUTURE REFERENCE
THIS HIGH CHAIR IS SUITABLE FOR CHILDREN BETWEEN THE AGES OF 6 MONTHS AND 3 YEARS
IT MAY BE USED AS AN INFANT OR JUNIOR CHAIR FROM AGES 3 TO 10 YEARS
customer careline 08701 118 118 (Mon - Fri, 10am - 4pm, UK only)
Lindam Limited Hornbeam Park Harrogate HG2 8PA England www.lindam.com
product code: 44465

CONTENTS
A. Base Assembly
B. Central Leg
C. Seat
D. Foot rest
E. Back Rest Supports (x2)
F. Back Rest
G. Tray
If any components are missing or damaged do not use your highchair. Contact our careline for assistance.
H. Plastic Bolts (x2)
I. Back Rest Insert (x2)
J. Long Allen Bolts (x2)
K. Bolt Covers (x2)
L. Short Allen Bolts (x2)
M. Allen key
N. Plastic Nut Spanner
O. Plastic Nuts (x4)
A
D
E
C
B
2

3
FG
J K
LM
NO
H
I

ASSEMBLY
BASE AND FRONT LEG ASSEMBLY
1. Lay your Base Assembly (A) face down on the floor and insert the smallest bar of Central Leg (B) where
shown, and push firmly into place.
2. Swing the long bar of the Central Leg (B) upwards and swing the Base Assembly up to meet it. Locate
the locking mechanism and ‘click’ it into place.
WARNING! If you can still see a red label you have not correctly located the locking mechanism.
4

FOOT REST
3. With the metal Seat Support Bar in an upright position slot the Foot Rest (D) into place and secure from
the rear with the Short Allen Bolts (L) and tighten using the Allen Key (M).
BACK REST SUPPORTS
4. Slot the Back Rest Supports (E) into place from above, paying close attention to the ‘L’ and ‘R’ markings
on the reverse. Use the palm of your hand to tap them into position so that the holes align with those on
the Base Assembly (A). Secure by pushing the Plastic Bolts (H) through the lower holes and secure at the
rear using 2 Plastic Nuts (O). Tighten using the Plastic Nut Spanner (N).
NOTE: There are small bobbles on the back of the Plastic Nuts (O) that sit in small holes on the Base
Assembly (A). The Plastic Bolts ere designed to be a snug fit so may need tapping into place with the palm
of your hand.
5

SEAT BASE (WHEN USED AS A HIGHCHAIR)
5. Slot the Seat (C) into the upper pair of holes and secure with the 2 remaining Plastic Nuts (O) and
tighten with Plastic Spanner (N).
6. Flip the Seat (C) upwards and turn the Metal Catches to the horizontal position. The Metal Seat Support
on the Base Assembly (A) will sit in the grooves (X) when the Seat (C) is returned to the down position.
7. With the Seat (C) back in position turn the Metal Catches to secure the Metal Seat Support in place.
X
6

BACK REST
8. Slide the Back Rest (F) down over the Back Rest Supports (E) and push firmly into place.
TRAY
9. Slot back rest inserts (I) into the back rest as shown.
10. Flex the arms on the Tray (G) apart and slot them into the holes on either side of the Back Rest (F).
11. Slot the Long Allen Bolts (J) through the Long Allen Bolt Covers (K) and use them to secure the tray
and tighten them with the Allen Key (M).
12. Secure the Crotch Bar of the Tray (G) to the Seat (C) by pushing it through the slot in the Seat (C) until
it clicks into place.
7

ADJUSTING THE TRAY
13. Hold down the spring levers on the underside of the tray and slide the tray on to the arm rests.
The tray will click in to place. There are two possible positions for the tray.
8

SECURING YOUR CHILD
Your child must be secured using the five point harness. Make sure you hear a click.
To tighten the harness belts, tighten the adjusters as appropriate.
Check the harness by gently pulling it away from your child. It will remain intact.
9

USING YOUR HIGHCHAIR AS AN INFANT CHAIR
1. Remove the Tray and Arm Rests (G) and store along with this booklet in a safe place for future use.
2. Replace and re-tighten the Allen Bolts (J) and the Allen Bolt Covers (K).
10

USING YOUR HIGHCHAIR AS A JUNIOR CHAIR
1. Remove the Tray and Arm Rests (G) and store along with this booklet in a safe place for future use.
2. Lift the Back Rest (F) and remove the Safety Harness from behind and below by turning the straps and
feeding them through the slots. (NOTE: Please keep them safe for future reference)
3. Turn the catches on the underside of the Seat (C) to release the Metal Seat Support.
4. Using the Plastic Nut Spanner (N) loosen all 4 Plastic Nuts (O) and swap the positions of the Seat (C)
and the Plastic Bolts (H) around (so the seat (C) is in the lower position).
5. Replace the Plastic Nuts (O) and tighten with the Plastic Nut Spanner (N).
6. Lower the Seat (C) and locate the Metal Seat Support in the Grooves marked (Y) and secure with the
metal catches.
7. Replace the Back Rest (F).
8. Ensure the Back Rest Inserts (I) have remained in place and replace and re-tighten the Allen Bolts (J)
and the Bolt Covers (K).
Y
11

WARNING!
- Do not leave the child unattended.
- Always make sure the harness is fitted correctly.
- Do not use the highchair unless all components are correctly fitted and adjusted.
- WARNING! Be aware of the risk of open fire and other sources of strong heat such as electric bar fires,
gas fires etc. near the highchair.
- Please do not use this highchair until the child can sit up unaided.
- Do not use the highchair if any part is broken or missing.
- This highchair must be assembled and adjusted only by an adult.
- WARNING! Before each use, ensure the highchair is safely assembled and harnesses working correctly.
- WARNING! The use of a harness is necessary to guarantee the safety of child. Always use the tray
when used as a highchair.
- WARNING! Always place the highchair on a stable even surface. Never place near stairs or steps.
- WARNING! Please be aware of the danger of allowing children to play near or climb on the highchair.
Keep away from children when not in use.
- Do not seat more than one child at a time in the highchair.
- Do not place or hang heavy bags on the highchair which may affect the stability.
CARE
The booster seat with attached straps and belts may be wiped clean using a mild cleaning solution
and a damp cloth. Do not use bleach. Do not use harsh or abrasive cleaners. Rinse clean with water to
remove residue.
IMPORTANT! Inspect this product before each use for damage or loose and missing parts or sharp edges.
DO NOT use if parts are missing or broken. Contact Lindam for replacement parts and instructions.
12
Table of contents