Linden Tech SIP-T41P User manual

“Unifying the World’s Communications”
Yealink IP Phone
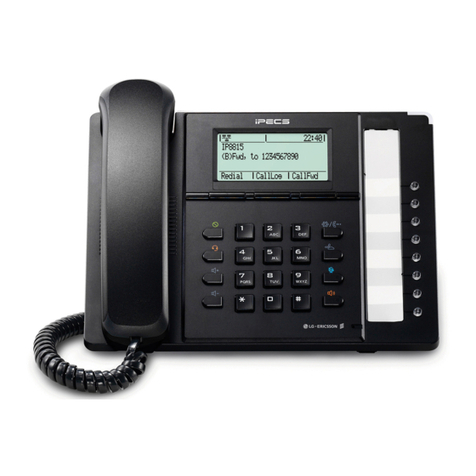
SIP-T41P Ultra-elegant IP Phone
Quick Reference User Guide
Firmware Release: 73.0
10 January 2014
HOW TO MANAGE CALL HISTORY
To access and manage Call History
•Press the History soft key to view Placed, Missed and Received
CallLog
•Press the scroll keys or to search and select and entry from
the list.
Press the Send soft key to place a call OR press Delete soft
key to delete the entry from the list.
•Press the Option soft key, and select Add to Contacts soft key to add
the entry to the local directory OR for existing entries.
•Press the Edit soft key to edit the phone number of the entry before
placing a call.
•Press Delete soft key to delete the entry from the list.
To access the contact directory and add a contact
•Press the Directory soft key and then select the Add soft key
•Select the directory Group the contact will be added to from the
drop-down list.
•Enter the contact Name (e.g. John Smith) and Number (e.g.0733334444)
•Press the Save soft key
HOW TO ACCESS VOICE MESSAGING PORTAL
To access the Voice Messaging portal
•Press the or press the Connect soft key
•When prompted enter your Pass-code and press
•At the Voice Messaging menu press to reach the Voice Portal
main menu.
•Press to access Voice Messaging and follow the voice guidance
for instructions.
•
Customizing Your Phone
Voice Message
Contact Directory
Volume Adjustment
To add a contact:
To edit a contact:
Quick Reference Guide
www.yealink.com
Call History
Note: You can add contacts from the call history easily. For more information, refer to Call History above.
To delete a contact:
To listen to voice messages(Ensure the voice mail code is already configured on the phone):
Tap Send to place a call.
Tap Add to add the entry to the local directory.
Press during a call to adjust the receiver volume of the handset/speakerphone/
headset.
Press when the phone is idle to adjust the ringer volume.
Tap Delete to delete the entry from the list.
Message waiting indicator on the idle screen indicates that one or more voice messages are
waiting at the message center. The power indicator LED slowly flashes red.
1. Tap and then tap the Connect soft key, or press .
2. Follow the voice prompts to listen to your voice messages.
1. When the phone is idle, tap , and then tap the desired call list on the left.
3. Tap after the desired entry, and then you can do the following:
1. When the phone is idle, tap , and then tap the desired group on the left.
2. Tap Add to add a contact.
1. When the phone is idle, tap , and then tap the desired group on the left.
1. When the phone is idle, tap , and then tap the desired group on the left.
3. Tap the OK soft key when the touch screen prompts “Delete the selected contact?”.
4. Tap the Save soft key to accept the change.
4. Tap the Save soft key to accept the change.
3. Enter a unique contact name in the Name field and contact numbers in the corresponding fields.
2. Tap after the desired contact.
2. Tap after the desired contact , and then tap Delete .
For more information, refer to the User Guide available online:
http://www.yealink.com/SupportDownloadfiles_ detail.aspx?CateId=1206&flag=142 Applies to firmware version 72.1 or later.
SIP-T46G
Ultra-elegant Gigabit IP Phone
Customizing Your Phone
Quick Reference Guide
www.yealink.com
Tap Blacklist to add the entry to the blacklist.
3. Edit the contact information.
SIP-T48G
Ultra-elegant Gigabit IP Phone
Copyright 2014 YEALINK NETWORK TECHNOLOGY CO.,LTD.
c
Note: You can split the conference call into two individual calls by tapping the Split soft key.
4. Tap the End Call soft key to disconnect all parties.
2. Enter the number of the second party, and then tap the Send soft key.
3. Tap the Conference soft key again when the second party answers.
All parties are now joined in the conference.
Tap Edit to edit the phone number of the entry before placing a call.
2. Tap or , or press or to scroll to the desired page.
(V72.4)
HOW TO MANAGE THE CONTACT DIRECTORY

7
HOW TO REDIAL A CALL
To call the Last number dialed
•Press the twice to call the last dialed number
To call a Previously dialed number
•Press the
•Press the scroll keys or to the desired entry from the list
•Press the or the Send soft key
•
HOW TO MUTE AND UNMUTE A CALL
To Mute a call
•Press the to mute the microphone during the call
To Un-mute a call
•Press the to un-mute the microphone during the call
HOW TO SET DO NOT DISTURB (DND) ON AND OFF
To turn DND On
•Press the DND soft key to mute the microphone during the call
To turn DND Off
•Press the DND soft key to un-mute the microphone during the call
HOW TO ADJUST CALL AND RINGER VOLUME
To adjust the Call volume
Press during a call to adjust the receiver volume of the
handset/speakerphone/ headset
To adjust the Ringer volume
Press when the phone is idle to adjust the ringer
volume
.
2
PHONE LAYOUT & FEATURE CONTROLS
UNDERSTANDING THE ICONS

3
6
Using the Handset
•Pick up the handset
•Enter the number, then press the Send soft key or
OR Using the Speakerphone
•With the Handset on-hook, press
•Enter the number, then press the Send Soft key or
OR Using the Headset
• With the headset connected, press to activate the
• Enter the number, then press the Send soft key or
HOW TO PLACE A CALL
Using the Handset
•Pick up the handset
OR Using the Speakerphone
•Press or the Answer soft key.
OR Using the Headset
• Press
HOW TO ANSWER A CALL
HOW TO END A CALL
Using the Handset
•Hang up the handset, or press the End Call soft key
OR Using the Speakerphone
•Press or the End Call soft key
OR Using the Headset
• Press the End Call soft key
HOW TO PARK AND RETRIEVE A CALL
To park a call
•While on an active call
•Press the Park soft key
•Enter the destination phone number of the extension where
the call will be retrieved from
To retrieve the parked call, do the following
•From the destination extension
•Press the Retrieve soft key
HOW TO FORWARD A CALL
To enable Call Forwarding
•Press the Menu soft key and then select:
> Features > Call Forward
•Select the desired forward type: Always Forward or Busy
Forward or No Answer Forward:
•Enter the forwarded to destination number
•For No Answer Forward,from the Press the scroll keys or
to select the desired After Ring Time.
Press the Save soft key to accept the change
HOW CREATE A CONFERENCE CALL
To create a Conference call
•Press the Conf soft key during an active call
•Enter the extension or external number of the second party,
then press the Send soft keyor
•Press the Conf soft key again when the second party
has answered the call.
All parties are now joined in the conference call
•

5
4
To place a call on hold
• Press the Hold soft key during an active call
To resume the call, do one of the following:
• Press the Resume soft key
If there is more than one call on hold
• Press the scroll keys or to select the desired held call and then
Press the Resume soft key to retrieve the desired call
HOW TO PLACE AND RESUME A CALL ON HOLD
You can transfer a call in the following ways:
BLIND Transfer - The call is transferred directly without the need to
announce the caller
• Press or the Tran soft key during an active call
The call is placed on hold.
• Enter the number you want to transfer to
• Press the Tran soft key
ASSISTED Transfer - Allows you to announce the caller prior to
releasing the call
•Press the Tran soft key during an active call.
The call is placed on hold.
•Enter the number you want to transfer to and press
•When the second party answers announce the call, then
•Press the Tran soft key
HOW TO TRANSFER A CALL
Using the Handset
•Pick up the handset
•Press the DPickup soft key
•Enter the phone number of the extension which is ringing
•Press the DPickup soft key
OR Using the Speakerphone
•Press
•Press the DPickup soft key
•Enter the phone number of the extension which is ringing
•Press the DPickup soft key
OR Using the Headset
• Press
•Press the DPickup soft key
•Enter the phone number of the extension which is ringing
•Press the DPickup soft key
HOW TO PLACE A DIRECTED CALL PICKUP
HOW TO PLACE A GROUP CALL PICKUP
Enables you to pickup an incoming call ringing at another extension,
which is a member of the same pickup group.
Using the Handset
•Pickup the handset and press the GPickup soft key
OR Using the Speakerphone
Press and press the GPickup soft key
OR Using the Headset
• Press and press the GPickup soft key
This manual suits for next models
1
