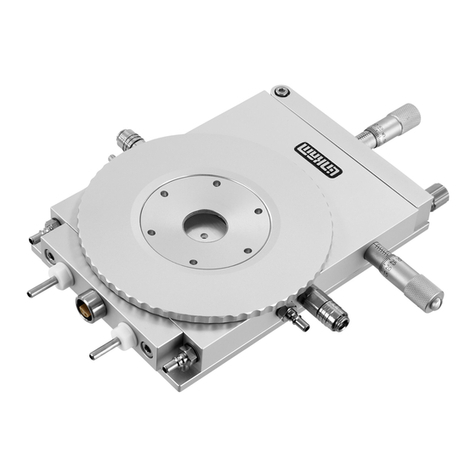
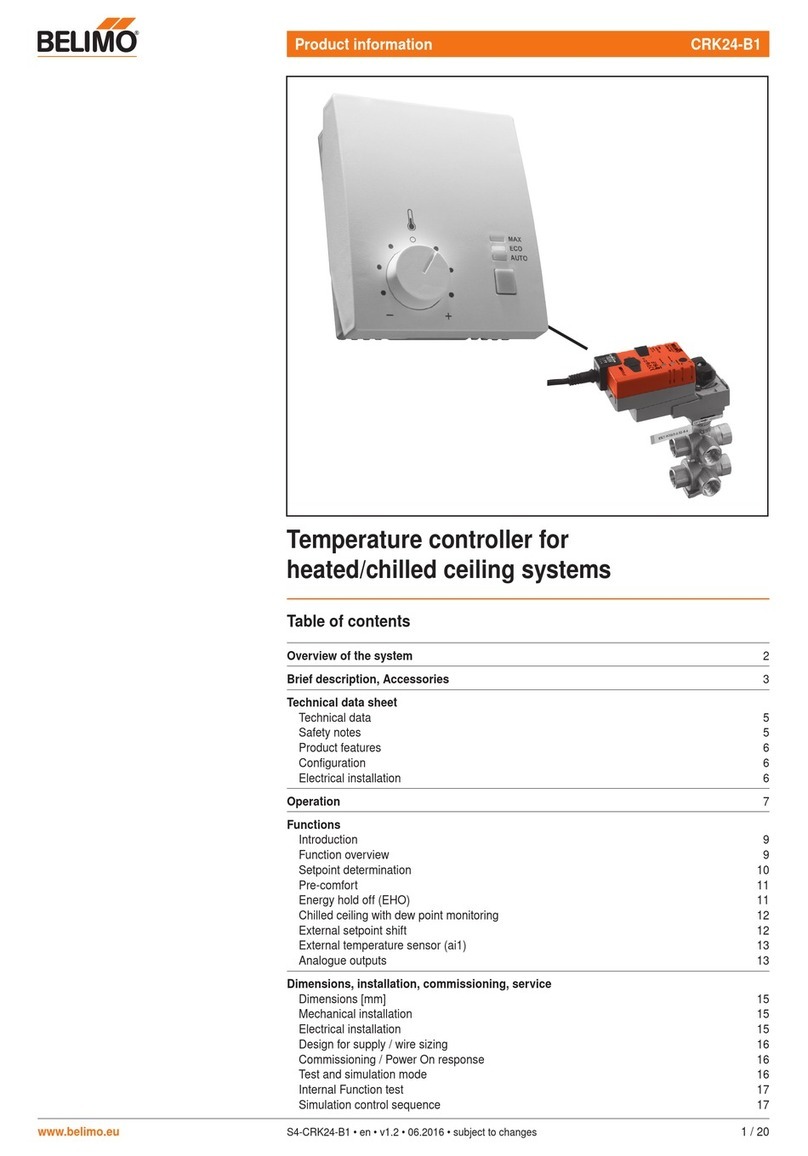
Linkam Scientific Instruments LTS120 User manual

LTS120
Temperature Controlled Stage
Linkam Scientific Instruments
USER GUIDE

2
Contents
Before Setting Up your Equipment……………………………………………………………………………………...3
Important Notice...................................................................................................................4
Warranty..............................................................................................................................4
Technical Support.................................................................................................................4
Equipment Maintenance........................................................................................................4
Feedback..............................................................................................................................4
Safety Precautions................................................................................................................5
Symbol Reference.....................................................................................................5
Introduction..........................................................................................................................6
LTS120 Stage Specification........................................................................................6
LTS120 System.....................................................................................................................6
Assembling the Microscope Slide Holder..................................................................................7
Stage Anatomy.....................................................................................................................8
Lid Assembly.............................................................................................................8
Stage Assembly.........................................................................................................8
Mounting Stage to Microscope with Dovetail Substage.............................................................9
Setting up the Condenser......................................................................................................9
Setting up ECP Water Circulator Pump..................................................................................10
Connecting the Instruments.................................................................................................11
T95 System Controller Cable Connections.........................................................................11
Sample preparation.............................................................................................................12
Loading a Sample...........................................................................................................12
Cooling Connections............................................................................................................13
Purging the Stage...............................................................................................................13
LTSE120 Option.............................................................................................................15
LTSE120 Stage with Internal Electrical Contacts...............................................................15
Using the Internal Electrical Contact................................................................................16
Lemo Connector............................................................................................................17
Liquid Crystal Stage ............................................................................................................18
Using the Liquid Crystal Cell...........................................................................................18
Appendix............................................................................................................................19
Window Assembly...............................................................................................................19
Lid Window Assembly..............................................................................................19
Bottom Window Assembly........................................................................................19
Spares and Accessories........................................................................................................20
Contact Details....................................................................................................................24

3
Before Setting Up Your Equipment
Please register your products by going to www.linkam.co.uk and click on the
product/software registration button.
You will need to register your equipment with us to:
Activate your warranty and technical support
Access the online setup videos
Permanently unlock the Linksys32 software (if purchased)
If you have purchased Linksys32 software, please install the software first. This pro-
cess will guide to register all of your products.
See Linksys32 manual for further installation instructions.
A CD with a setup videos is supplied with your system.

4
Important Notice
Please check that your Linkam equipment has not been damaged during transit. If there is any evidence of
external damage DO NOT SWITCH ON ANY ELECTRICAL ITEMS.
Contact LINKAM SCIENTIFIC or their appointed distributor immediately. Your warranty may be im-
paired if Linkam is not informed of any transport damage within 7 working days of delivery.
NO attempt should be made to repair or modify the equipment in any way, as there are no user replaceable
parts.
No attempt should be made to open the case except by qualified personnel as hazardous voltages are pre-
sent.
In order to use this equipment successfully, please take time to read this manual all the way through before
using it.
Warranty
This equipment has a warranty against defects in material and workmanship for a period of 12 months.
Linkam will either repair or replace products that prove to be defective. For warranty service or repair,
this product must be returned to Linkam or a designated service facility.
The warranty shall not apply to defects resulting from interfacing, unauthorized modification or misuse,
operation outside of the environmental specifications for the product, or improper site preparation or
maintenance.
Technical Support
Any technical questions or queries should be addressed to the Technical Support Department at the ad-
dress shown on the back of this manual.
Equipment Maintenance
Use a small quantity of isopropyl alcohol with a soft cloth and gently wipe the surface. To clean the stage,
use isopropyl alcohol (IPA) and cotton swabs. Take great care not to touch the platinum temperature
sensor protruding from the side of the heating element. The sensor is very fragile.
Product Registration
Register your Linkam instrument and software; please go to www.linkam.co.uk to fill in the Product /
software Registration form. After registration, you can login to our website to download manuals and
access 'How To Videos'.
Feedback
Your feedback will be greatly appreciated, please go to www.linkam.co.uk to fill in the Feedback form.

5
Safety Precautions
1) Read this guide before using the equipment. Save these instructions for later use.
2) Follow all warnings and instructions which may be placed on the programmer or stage.
3) If for any reason the mains fuse needs to be replaced then it must be replaced by one of the same
type and rating as shown in the equipment ratings.
4) To prevent electric shock, do not remove the cover of the controller or associated electronics.
5) Never use the equipment if a power cable has been damaged. Do not allow any heavy objects to
rest on the power cables. Never lay the power cables on the floor.
6) Do not obstruct any ventilation holes. Do not attempt to insert anything into these openings.
Provide adequate ventilation of at least 75mm all around the equipment.
7) Do not expose the equipment to water. If for any reason it gets wet then unplug it from the mains
and contact Linkam Scientific Technical Support.
8) The equipment is not intended to be used outdoors.
9) Each product is equipped with a 3-wire grounded (earth) mains plug or a free-end 3 wire
mains lead. The plug only fits into a grounded-type outlet. The free-end mains lead should be
connected to a correctly grounded 3-wire mains outlet. Do not defeat the purpose of the grounded
(earth) type plug.
Free - end mains leads are colour coded as follows :
Colour Function
Brown Live
Blue Neutral
Green/Yellow Earth (Ground)
10) If any problems occur then unplug the equipment from the mains outlet and contact Linkam Sci-
entific Technical Support.
11) Do not remove the cover from the equipment unless the mains inlet has been removed. Any
servicing should be carried out by qualified service personnel.
Symbol References
Caution:
This safety symbol is on the back panel of the equipment and warns:-
The user must not make or remove any connections while the unit is powered on.
To avoid electric shock do not remove the cover. Refer servicing to qualified service personnel.
Caution:
This warning symbol indicates that the surface labelled with this symbol may be hot.

6
Introduction
Thank you for purchasing the LTS120 Heating
and Freezing stage system. Please take the time
to read through the manual as it will help you to
make the most out of the equipment.
LTS120 Stage Specifications
Maximum temperature: 120°C
Minimum temperature: -25°C with ECP
(-40°C with water chill
at 5°C)
Maximum heating rate: 30°C/min
Objective Lens WD: 5.4mm
Condenser lens WD: 13.2mm
XY-Manipulators travel: 15mm
Aperture hole: 2.5mm
LTS120 System
The system consists of a LTS120 stage, T95-
Linksys32 System Controller.
Linksys32 with digital video capture can be added
as an option.
Please install the software on the PC first and
activate Linksys32 within 10 days.
T95-LinkPad is also available as an option.
The LTS120 stage is mounted onto the micro-
scope by using either specific stage clamps, an
adaptor plate or by simply placing on the XY
table of the microscope, using double sided adhe-
sive tape.
-LTS120 with T95-LinkPad Option

7
Assembling the Microscope
Slide Holder
The Microscope Slide Holder (1) is supplied
separately from the stage. Fix the holder to the
LTS120 stage, by following the instruction below.
Remove the screw (2).
Make sure the 2 holes on the Microscope Glass
Slide Holder are lined up with the two notches (3)
on the XY Manipulator Assembly and place the
holder in place.
Use the screw (2) to fix the Microscope Slide
Holder in place.
Note: when fitted properly the Microscope Slide
Holder should not touch the silver heating block
(4), the holder should hover about 1mm above it.
If the holder is touching the silver block or hovers
too high, remove screw (2) and flip the Micro-
scope Slide Holder over.
Note: the Microscope Slide Holder can be bent
into shape with a little force to help.
1
3
4
2

8
Stage Anatomy
Lid Assembly
Swing the Stage Lid (1) to open the Stage.
1. Stage Lid
2. Lid Insert
3. Viewing Window
4. Holes for Tube Clip Holder
or window removal tool
5. Hinge
Stage Assembly
6. Stage Lead Cable
7. Water Cooling Connector for Peltier element
8. Metal Plate Cover
9. Aperture hole (2.5mm)
10. Stage Chamber
11. Peltier Heating / cooling block (40x40mm)
12. Y-manipulator
13. X-manipulator
14. Rubber sealing o-ring
15. Gas purge valve
16. Fixing crew for microscope Sample Slide
holder
17. Microscope Sample Slide Holder
18. Alignment peg for Sample Slide Holder
1
2
3
5
Swing Stage Lid to open
4
6
7
8
9
10
11
12
13
14
15
16
17
18

9
Mounting Stage to Microscope
with Dovetail Substage
Note: the picture in the procedure is for a an
LTS350, but the LTS120 should fix the same
way.
The following description is for mounting the
stage on to microscopes which have a circular
dovetail substage assembly (1).
Attach the curved stage clamps (part no. 9542) to
the base of the stage using the supplied hex
screws and the outer most holes in the base plate.
Adjust the two positioning screws (2) so that
approximately 5mm of thread is exposed on the
inside edge of the clamp. This will roughly posi-
tion the stage in the centre of the dovetail.
Place the stage onto the dovetail, then focus a
10X objective lens on the aperture of the silver
block. Using the two positioning screws (2)
ensure that the aperture is in the centre of the field
of view and lock the stage in place by tightening
the Locking Thumbscrew (3).
For other types of microscope substage, refer to
the diagram included with the stage adaptor.
Setting up the Condenser
Place a small sample on a cover slip and place
onto the surface of the silver block. Use a 5X or a
10X lens to focus on the sample. Now close
down the microscope field diaphragm and adjust
the condenser focus so that the edges of the dia-
phragm are in focus. Now use the condenser
positioning screws to centre the condenser in your
field of view. Open the diaphragm so that it just
fills the field of view.
For more information about Koehler illumination
see the extremely informative ‘Microscopy Pri-
mer’ on the Molecular Expressions website.
http://micro.magnet.fsu.edu/primer/
index.html
9542 curved clamps set
Linkam Imaging Station
with dovetail substage
1
2
2
3

10
Setting up ECP Water Circulator
Pump
The ECP Water Circulator Pump (1) supplied
with your LTS120 stage is used to circulate water
at ambient temperature to provide the temperature
gradient needed to make the Peltier heat and cool.
The ECP must be connected to the LTS120. See
the ECP manual for instruction setting up the
ECP.
Connect the tubing to the Inlet and Outlet as
shown.
The tube is pushed directly on to the water Inlet
and Outet connectors.
Note: the ECP must be switched on first and
circulating water before the LTS120 is used.
1
Inlet
Outlet

11
Connecting the Instruments
T95 System Controller
Cable Connections
For more details on the T95 System Controller
please refer to the T95 System Controller manual.
Connect the Stage Cable Connector from the
LTS120 stage to the Stage Connection Socket (1).
T95 back panel
1

12
Sample Preparation
Note: Temperature control performance is easily
compromised. Therefore it is very important to
keep the silver heating block and microscope
glass slide clean. Use a soft cloth and IPA (iso-
propyl alcohol) to clean. Do not use excessive
force when cleaning the silver block as this will
bend the heater assembly.
Loading a Sample
Place a standard microscope glass slide
(26x76mm) in the Microscope Slide Holder, use
a spatula and tap on the microscope glass slide to
make sure that it is sitting flat on the heating
block .
Place the sample on top of the microscope glass
slide. Ensure that the sample is as small as possi-
ble and that it is as flat as possible. Heat flow into
or out of the sample is affected by the amount of
sample area in contact with the temperature con-
trolled surface.
Place a 16mm glass cover slip on top of the sam-
ple to create a flat surface for the microscope lens
to focus on.
Accurate temperatures can be obtained by keep-
ing the sample as small and flat as possible.

13
Cooling Connections
These connections need only be made if the
experiments are to be carried out below room
temperature.
The Gas Purge Valve (1) is opened when the Gas
Insert (2) is pushed firmly into the connector. A
“click” is heard when the two parts are connected
properly. To remove the Gas Insert, push the
outer sleeve of Gas Purge Valve toward the stage
and the Gas Insert (2) should drop out.
There is a second Gas Purge Valve (3) on the
opposite side of the stage to allow the gas to leave
the stage. A Gas Insert must also be inserted into
this Gas Purge Valve (3) when purging.
Purging the Stage
This method uses an inert and dry gas from a gas
cylinder to purge the stage.
1. Make sure the Stage Lid is in place and the
Stage Door is closed.
2. Either use the LinkPad touch screen or
Linksys32 software to heat the stage to 40°C.
3. From a gas cylinder connect the Gas Insert
with a tubing 3mm inner diameter and 6mm
outer diameter to the Gas Purge Valve (1).
4. Connect a Gas Insert to the opposite side Gas
Purge Valve (2).
5. Use the gas regulator to set a gas flow rate of
1.5L/min.
6. With the gas flowing through the Sample
Chamber, block the gas outlet for a few sec-
onds and releasing the gas outlet valve with a
finger. Repeat this for a few minutes to purge
the stage.
Reduce the gas flow rate to 20cc/min to continu-
ously purge the stage or remove the two Gas
Inserts to keep the chamber under closed inert
atmosphere.
Note: Helium gas is not recommended for contin-
uous purging. This gas has a very high thermal
conductivity and will cool the silver heating block
too much during an experiment and may cause the
temperature to fluctuate.
Block and release
outlet valve with
finger
1
2
3
1
To gas cylinder

14
Connect a silicon tubing 3.5mm diameter from a
gas cylinder with a flow rate of 20cc/min and
thread it through the Tube Clip Holder (1). Place
in position as seen the the opposite picture
This tube blows warm gas across the lid window
to prevent condensation on the viewing window
surface, when the stage is being used at low tem-
perature.
1

15
LTSE120 Option
Only read the following if the stage is supplied
with internal electrical contacts for LTSE120 or
Liquid Crystal Stage.
LTSE120 Stage with Internal
Electrical Contacts
The stage is supplied with two internal electrical
contact connectors (1) wired to an external Lemo
connector (2).
1
2
LTSE120 Stage

16
Using the Internal Electrical Contact
The internal electrical contact has a self-closing
spring loaded pin (1).
Using a finger tip push in the pin to open the
electrical contact and insert a wire into the contact
(2).
Release the finger when the wire is in place.
1
2

17
Lemo Connector
Remove the Lemo (1) plug by holding it firmly
and pull it gently away from the Stage.
Wire up the Lemo to your instrument.
To reconnect the Lemo, line up the red dot on the
Lemo plug (1) to the red dot on the Lemo socket
(2) and push the Lemo firmly into place.
1
2
1

18
Liquid Crystal Stage
Only read the following if your stage is a
LTSE120 Liquid Crystal Stage.
The Liquid Crystal System is supplied with a
Liquid Crystal Slide Holder (1) and 5 Liquid
Crystal Cells (5um gap, capillary fill, ITO coated
and anti parallel aligned).
Assemble the Liquid Crystal Holder (1) to the XY
Assembly as shown on page 6.
Note: make sure the Liquid Cell Holder is the
right way up as shown in the opposite picture.
Connect the two wires from the Liquid Cell Hold-
er to the Internal Electrical Conatcts as shown on
page 15.
Using the Liquid Crystal Cell
Fill the Liquid Crystal Cell (2) with your sample.
Lift the Liquid Cell Holder and slide in the Liquid
Crystal Cell.
Make sure the Liquid Crystal Cell is seated cor-
rectly as seen in the opposite diagram.
1
2
2

19
Appendix
Window Assembly
Lid Window Assembly
To replace the windows in the Stage Lid (1) use
the Window Tool (2) and align the two wide
spacing pins to the Tube Clip Holder holes and
unscrew the Lid Insert (3).
The Stage Lid and Lid Insert should be turned
upside down as shown in the diagram opposite
and reassembled in the order indicated.
The Lid Insert should be screwed down until the
cover slips are held firmly, then turn the assembly
over and screw down the Lid Insert until it is felt
to come to a stop.
Bottom Window Assembly
Use two narrow spacing pins of Window Tool (2)
to align it to the two holes of Window Locking
Ring (4) and unscrew.
Reassemble the bottom window as shown in the
opposite diagram.
1
2
3
Silicon
rubber
rings
W22G Glass
(22x0.17mm)
2
4
Silicon
rubber
rings
W22G
Glass
(22x0.17

20
Spares and Accessories
These spares are organised into convenient kits. Purchase a spares kit to avoid downtime with your stage
and eliminate future shipping costs.
The LTS120 heating element is extremely durable if used carefully. However it can be easily scratched,
which will compromise the heat flow to the sample and reduce accuracy. The platinum temperature sen-
sor is brittle and can be broken if cleaning is not carefully performed. We recommend a spare heating
element to avoid downtime with your stage while element is being repaired.
Part No. Part Name Part Description
22222 LTS Kit Full Replacement Spares Kit
WGI Water/Gas Valve Insert x2
WVC Water/Gas Valve Connector x2
SSR Silicon Rings for Lid and Base (Set of 4)
WT Window Tool (for unlocking lid insert and base locking ring)
TCH Tube Clip Holder (for Nitrogen de-fogging stage lid tube)
ORLTS Set of O-rings for the Body and Lid
ACCE Box of Glass for Windows / Sample: 22x0.17mm (x50); 16x0.17mm
(x50); 22x0.3mm (x10)
LTS/MSC 76x26mm Microscope Slide Carrier
LTS/MS Microscope glass slide (76x26x1mm) Box of 100
Part No. Part Name Part Description
22222 LTS Spare
Windows Kit Spare windows for Lid, Base and Samples
SRR Silicon Rings for Lid and Base (Set of 4)
ACCE Box of Glass for Windows / Sample: 22x0.17mm (x50); 16x0.17mm
(x50); 22x0.3mm (x10)
LTS/MS Standard microscope glass slides (76x26x1mm) Box of 100
Part No. Part Name Part Description
18010 FWP 110 volt F200 re-circulating water system
18011 FWP 240 volt F200 re-circulating water system
Other manuals for LTS120
1
Table of contents
Other Linkam Scientific Instruments Temperature Controllers manuals
Popular Temperature Controllers manuals by other brands

Critical Environment Technologies
Critical Environment Technologies PDC Series Installation and operation manual
dixell
dixell XR460C Installing and operating instructions
aci
aci WH2630A Installation & operation instructions
Novus
Novus N1050 user manual
Tech Controllers
Tech Controllers EU-401N PWM user manual
Brink
Brink Flair 325 Installation regulations
