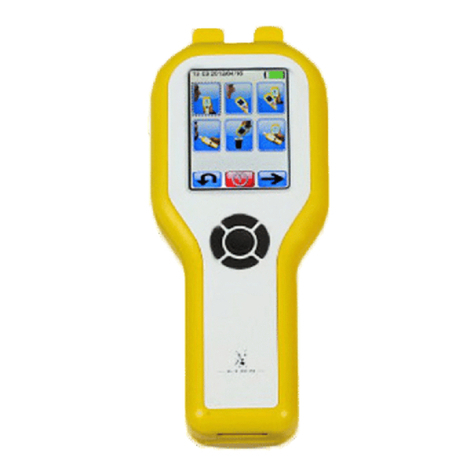
LION INTOXILYZER 8000 Manual

Oregon State Police
Forensic Services Division
OPERATION GUIDE
INTOXILYZER®8000
OPERATOR’S GUIDE


OREGON STATE POLICE IMPLIED CONSENT PROGRAM
INTOXILYZER®8000 OPERATOR’S GUIDE
TABLE OF CONTENTS
Originally Adopted: 07/13/2006 Revision #: 1.1
Revision Effective Date: 09/08/2006
INTRODUCTION....................................................................................................................................3
1.0 GETTING STARTED..................................................................................................................5
The Intoxilyzer 8000 Breath Alcohol Analyzer System...............................................................5
The Intoxilyzer 8000 Breath Alcohol Analyzer............................................................................5
Turning the Instrument Power On & Off......................................................................................7
Instrument Warm-Up Period.......................................................................................................7
External Printer Information........................................................................................................7
2.0 STEP ONE – PREPARING TO CONDUCT A TEST..................................................................8
The Operator’s Checklist ............................................................................................................8
Pre-test Observation Period........................................................................................................8
Instrument Set-up .......................................................................................................................8
Press the “Start Test” button.......................................................................................................9
Selecting a Test Method.............................................................................................................9
Entering Permit Data Manually.................................................................................................10
Entering an Operator PIN .........................................................................................................11
Scanning a Driver’s License .....................................................................................................11
Entering Driver’s License Data Manually..................................................................................12
Reviewing Data.........................................................................................................................13
Aborting a Test Sequence ........................................................................................................14
3.0 STEP TWO – CONDUCTING A BREATH TEST.....................................................................15
Testing Sequence.....................................................................................................................15
The "Ready in 00:XX” message................................................................................................15
Air Blank....................................................................................................................................16
Diagnostic Routine....................................................................................................................16
Air Blank....................................................................................................................................17
Breath Sampling Period............................................................................................................17
Air Blank....................................................................................................................................20
Continued Observation Period..................................................................................................21
Air Blank....................................................................................................................................22
Breath Sampling Period............................................................................................................23
Air Blank....................................................................................................................................26
Control Sample.........................................................................................................................26
Air Blank....................................................................................................................................27
Comment Lines.........................................................................................................................27
Printing of the Test Report........................................................................................................28
Aborting a Test Sequence ........................................................................................................29
Breath Test Refusal..................................................................................................................29
Subject Sample Agreement......................................................................................................29
ALL PRINTED COPIES ARE UNCONTROLLED AND MAY NOT BE COMPLETE Page 1 of 54

OREGON STATE POLICE IMPLIED CONSENT PROGRAM
INTOXILYZER®8000 OPERATOR’S GUIDE
TABLE OF CONTENTS
Originally Adopted: 07/13/2006 Revision #: 1.1
Revision Effective Date: 09/08/2006
4.0 STEP THREE – REVIEWING THE TEST REPORT ................................................................31
The Test Report........................................................................................................................31
Complete Test Reports.............................................................................................................31
Incomplete Test Reports...........................................................................................................32
Common Exception Messages:................................................................................................32
Suggested Corrective Action Statements.................................................................................38
Other Messages Displayed by the Instrument..........................................................................38
5.0 REPRINTING THE TEST REPORT .........................................................................................41
Requesting Copies of Test Reports..........................................................................................41
On-site Reprinting of Test Reports ...........................................................................................41
Entering Permit Data Manually.................................................................................................41
Entering an Operator PIN .........................................................................................................42
Selection of a Test Report for Reprinting..................................................................................43
6.0 CONDUCTING A JAIL RELEASE TEST.................................................................................44
Conducting a Jail Release Test................................................................................................44
The "Ready in 00:XX” message................................................................................................44
Air Blank....................................................................................................................................44
Breath Sampling Period............................................................................................................45
Air Blank....................................................................................................................................47
Aborting a Test Sequence ........................................................................................................48
Breath Test Refusal..................................................................................................................48
7.0 PLACING AN INSTRUMENT OUT-OF-SERVICE ...................................................................49
APPENDIX A: OPERATOR’S CHECKLIST ....................................................................................50
APPENDIX B: EXTERNAL PRINTER INFORMATION...................................................................51
Parts, Controls, and Indicators..................................................................................................51
Printer LED Indications.............................................................................................................52
Paper Handling:........................................................................................................................53
Paper Jams and How to Clear Them:.......................................................................................53
ALL PRINTED COPIES ARE UNCONTROLLED AND MAY NOT BE COMPLETE Page 2 of 54

OREGON STATE POLICE IMPLIED CONSENT PROGRAM
INTOXILYZER®8000 OPERATOR’S GUIDE
INTRODUCTION
Originally Adopted: 07/13/2006 Revision #: 1.1
Revision Effective Date: 09/08/2006
INTRODUCTION
Intoxicated drivers have been, and still are, the major cause of traffic fatalities in the State of Oregon
since the introduction of the automobile. The intoxicated driver is not limited to the interstate or state
highways, but can be found on every city street and county road in the state. For law enforcement
officers, the problem of the intoxicated driver is a source of major concern.
Operators constitute the cornerstone of any breath alcohol testing program. Conscientious
operators, confident in their abilities and competent with the equipment, form the foundation of a solid
program. Careless operators, unfamiliar with the operation of the equipment, generate judicial
apprehension, as do competent operators that attempt to present expert testimony in excess of their
background, training, and capabilities.
The Oregon State Police Intoxilyzer®8000 Operator’s Guide is prepared by the Forensic Services
Division and is designed to provide qualified operators with a quick reference guide to the operation of
the Intoxilyzer®8000 breath-alcohol analyzer. This guide aims to improve the quality of breath alcohol
analyses conducted in Oregon by promoting and maintaining consistency and quality among
Intoxilyzer®8000 operators. This Guide will serve as a good reference for the operation of the
Intoxilyzer®8000 instrument. You should read this guide and refer to it as needed.
For additional information, consult the following web address:
http://egov.oregon.gov/osp/forensics/lawenfresources.shtml
Organization of the Guide
The organization and content of this guide has been minimized to facilitate the quick and easy access
of reference information for the operator. It covers the steps necessary to successfully complete an
evidential breath analysis, a jail release breath analysis, and event exception messages for the
Intoxilyzer®8000 instrument.
Disclaimer
Information contained in this guide is made available as a service for training law enforcement
personnel only. It does not constitute or represent an official record of the Office of the Legislative
Counsel. The Oregon State Police, its offices, and employees make no warranty as to the accuracy,
reliability, or completeness of any statutory or Oregon case-law information contained herein and are
not responsible for any errors or omissions for results obtained from the use or misuse of this
information. Any additional inquiries regarding statutory or case-law interpretation should be
addressed to your local district attorney’s office.
CMI and INTOXILYZER are registered trademarks of CMI, Inc.
ALL PRINTED COPIES ARE UNCONTROLLED AND MAY NOT BE COMPLETE Page 3 of 54

OREGON STATE POLICE IMPLIED CONSENT PROGRAM
INTOXILYZER®8000 OPERATOR’S GUIDE
INTRODUCTION
Originally Adopted: 07/13/2006 Revision #: 1.1
Revision Effective Date: 09/08/2006
Acknowledgments
The author recognizes efforts of the following individuals and groups for their contributions to this
manual:
Department of Public Safety Standards and Training
Oregon State Police Drug Recognition Program
Implied Consent Program / Drug Recognition Program Advisory Committee
Oregon State Police Toxicology/Implied Consent Section
CMI, Inc.
ALL PRINTED COPIES ARE UNCONTROLLED AND MAY NOT BE COMPLETE Page 4 of 54

OREGON STATE POLICE IMPLIED CONSENT PROGRAM
INTOXILYZER®8000 OPERATOR’S GUIDE
1.0 GETTING STARTED
Originally Adopted: 07/13/2006 Revision #: 1.1
Revision Effective Date: 09/08/2006
1.0 GETTING STARTED
WARNING
DO NOT TURN THE POWER OFF TO THE INSTRUMENT, UNPLUG THE INSTRUMENT, OR
DISCONNECT ANY OF THE CABLES ATTACHED TO THE INSTRUMENT UNLESS
UNDER DIRECTION BY A TRAINED TECHNICIAN OF THE OREGON STATE POLICE.
The Intoxilyzer 8000 Breath Alcohol Analyzer System
The Intoxilyzer 8000 breath alcohol analyzer system is a micro-processor controlled infrared-based
breath alcohol testing device. For purposes of this guide, the System consists of two (2) primary
components: 1) the Intoxilyzer 8000 instrument, and 2) the external printer. Because the instrument is
micro-processor controlled, certain steps should be followed to ensure that a proper analysis is
performed. This segment will familiarize you with the different components, controls, and indicators of
the Intoxilyzer 8000 and provide a brief explanation for each.
The Intoxilyzer 8000 Breath Alcohol Analyzer
Figure 1 explains the parts, controls, and indicators of the Intoxilyzer 8000:
Figure 1a. Intoxilyzer 8000 Parts, Controls, and Indicators (front)
1 Instrument fluorescent display
2 Start Test button
3 Power indicator
4 Bar code scanner
5 Keyboard (PS/2) 1
2
3
4
5
ALL PRINTED COPIES ARE UNCONTROLLED AND MAY NOT BE COMPLETE Page 5 of 54

OREGON STATE POLICE IMPLIED CONSENT PROGRAM
INTOXILYZER®8000 OPERATOR’S GUIDE
1.0 GETTING STARTED
Originally Adopted: 07/13/2006 Revision #: 1.1
Revision Effective Date: 09/08/2006
Figure 1b. Intoxilyzer 8000 Parts, Controls, and Indicators (top)
6 Locked dry-gas cabinet
7 Carrying handle
8 Flexible heated breath tube
9 External standard connection
10 Mouthpiece storage area
Figure 1c. Intoxilyzer 8000 Parts, Controls, and Indicators (back)
11 Main AC power switch (rocker-switch) 14 Battery power switch (rocker-switch)
12 AC Power cord 15 Modem Line Connection (RJ-11)
13 Dry-gas regulator/pressure view port 16 External Printer Connection (25-pin)
6
8
11
13
16
10
15
14
12
7
9
ALL PRINTED COPIES ARE UNCONTROLLED AND MAY NOT BE COMPLETE Page 6 of 54

OREGON STATE POLICE IMPLIED CONSENT PROGRAM
INTOXILYZER®8000 OPERATOR’S GUIDE
1.0 GETTING STARTED
Originally Adopted: 07/13/2006 Revision #: 1.1
Revision Effective Date: 09/08/2006
Turning the Instrument Power On & Off
The Intoxilyzer 8000 has two on/off power switches located on the back of the instrument: one switch
operates the main AC power and the second switch operates the on-board battery back-up system.
To power the instrument ON, both the main AC power switch and the battery power switch must be in
the ON (UP) position for the instrument to run on AC power. The instrument’s power can appear to be
ON when only the battery switch is in the ON (UP) position, however, the instrument is not operating
on AC power in this condition. It is recommended that the main AC power switch be placed in the ON
(UP) position first followed by the batter power switch. When the instrument power is turned ON and
operating on AC power, the LED Power Indicator light on the front of the instrument will be a “green”
or “amber” color. The “amber” color indicates the battery is charging. The “green” color indicates the
battery is not charging (i.e., the battery is fully charged) or only AC power is available.
To turn the instrument’s power OFF, both the main AC power switch and the battery power switch
must be placed in the off (down) position. It is recommended that the battery power switch be placed
in the OFF (DOWN) position first followed by the main AC power switch.
To operate the instrument using the on-board back-up battery system, place the main AC power
switch in the OFF (DOWN) position and place the battery power switch in the ON (UP) position.
Although the instrument will operate in this mode, the length of time that the instrument can be used is
limited to approximately two (2) hours. It is recommended that the instrument be used with the main
AC power switch in the ON (UP) position to ensure that the instrument will not power OFF during a
test sequence. If the instrument is allowed to remain ON in battery mode, the instrument will
eventually generate an audible warning tone when the battery power becomes too low.
Instrument Warm-Up Period
When initially powering the instrument from an unheated condition, the instrument will require
approximately twenty-minutes to warm-up prior to displaying the “Ready to Start” message. During
this time, the instrument can not be used by the operator to perform a breath test sequence. The
operator will know that the instrument has completed the warm-up period and is ready to perform a
breath test when the instrument display reads “Ready to Start”.
Ready to Start
03/22/06 14:12 PST
Ready to Start
Push Button to Start
External Printer Information
Refer to Appendix B for additional information regarding the external printer attached to the
Intoxilyzer®8000 instrument.
ALL PRINTED COPIES ARE UNCONTROLLED AND MAY NOT BE COMPLETE Page 7 of 54

OREGON STATE POLICE IMPLIED CONSENT PROGRAM
INTOXILYZER®8000 OPERATOR’S GUIDE
2.0 STEP ONE –PREPARING TO CONDUCT A TEST
Originally Adopted: 07/13/2006 Revision #: 1.1
Revision Effective Date: 09/08/2006
2.0 STEP ONE – PREPARING TO CONDUCT A TEST
The Operator’s Checklist
When preparing to conduct a breath test, it is helpful for the operator to know which Test Sequence
they intend to utilize (see section on Selecting a Test Method below). If the operator intends to
conduct a Jail Release Test, there is no need to make use of an Intoxilyzer 8000 Operator’s Checklist.
In all other cases, it may be helpful for an operator to take advantage of the Operator Checklist. To
obtain a checklist, the operator may press the “F2” key on the instrument keyboard. Although strongly
recommended, use of an Operator’s Checklist by the operator is not required to successfully complete
the testing process. A sample checklist is also contained as Appendix A in this guide.
Pre-test Observation Period
The first and most important step in the breath testing process is the Pre-test Observation Period. The
Pre-test Observation Period should be conducted on all subjects prior to any breath test and must be
conducted on all subjects being tested in non-Jail Release testing situations. The subject is not
allowed to vomit, regurgitate, eat, drink, smoke, chew or take anything orally for at least fifteen
minutes prior to submitting the breath sample. This is to ensure there is no possibility of residual
alcohol or mouth contamination causing a result that does not reflect the subject’s true blood alcohol
concentration. The Intoxilyzer does monitor the breath sample throughout the entire delivery and will
automatically abort the testing sequence if any abnormalities are detected. By observing the fifteen
minute observation period, however, the possibility of residual mouth alcohol contamination is
eliminated. The Pre-Test Observation Period is recommended when using the Jail Release Test
Sequence and required in all other testing situations.
Instrument Set-up
Prior to starting the breath testing sequence, the operator should check the instrument power indicator
to ensure that the instrument power is turned on. This instrument display will be flashing and
displaying the “Ready to Start” message:
Ready to Start
03/22/2006 14:12 PST
Ready to Start
Push Button to Start
With the instrument in a Ready to Start mode, the operator should note that the time and date are
correct. If the time and/or date are incorrect, the operator should write in the proper time and/or date
of the analysis on the completed evidence card and then notify the Oregon State Police Implied
Consent Unit to have the date/time corrected. The time and date are a completely separate system in
the instrument, and the fact that the time or date may be incorrect has absolutely no effect on the
accuracy and validity of the test result.
ALL PRINTED COPIES ARE UNCONTROLLED AND MAY NOT BE COMPLETE Page 8 of 54

OREGON STATE POLICE IMPLIED CONSENT PROGRAM
INTOXILYZER®8000 OPERATOR’S GUIDE
2.0 STEP ONE –PREPARING TO CONDUCT A TEST
Originally Adopted: 07/13/2006 Revision #: 1.1
Revision Effective Date: 09/08/2006
Press the “Start Test” button
To initiate the test sequence the operator need only push the green “Start Test” button. The
instrument will acknowledge the operator’s request to start a test by updating the instrument display to
the “Jail Release (Y/N)?” message.
Selecting a Test Method
From the “Jail Release (Y/N)?” display, the operator should select either “Y” or “N” using the
instrument’s keyboard. The instrument default selection is set to answer this question “no”, and the
letter “N” is displayed on the second line of the display to indicate the selection. The operator must
confirm the selection by pressing the “Enter” key on the instrument’s keyboard.
Jail Release (Y/N)?
N
The operator should select “Y” in all instances where it is desired to evaluate a person’s blood alcohol
level for the purpose of determining the person’s eligibility for release from a jail (detox) or other
detention facility. The instrument will acknowledge the operator’s selection to conduct a jail release
test by updating the instrument display and proceeding to the “Ready in 00:XX” message, where the
00:XX message will display a period of time, generally less than 60 seconds. The operator should
refer to the next section for more information (refer to Section 6.0 – Conducting a Jail Release
Test).
The operator should select “N” in all other instances. The instrument will acknowledge the operator’s
selection by updating the instrument display to the “Scan Operator Permit or Press Enter”
message.
Scanning a Permit
When the instrument displays the “Scan Operator Permit or Press Enter” message, the operator
may use the instrument’s internal bar code scanner to read the bar code printed on an operator permit
card.
Scan Operator Permit
or Press Enter
The card should be held perpendicular to the face of the instrument directly above the keyboard. The
card should be kept as flat as possible and held still until the instrument reads the bar code printed on
ALL PRINTED COPIES ARE UNCONTROLLED AND MAY NOT BE COMPLETE Page 9 of 54

OREGON STATE POLICE IMPLIED CONSENT PROGRAM
INTOXILYZER®8000 OPERATOR’S GUIDE
2.0 STEP ONE –PREPARING TO CONDUCT A TEST
Originally Adopted: 07/13/2006 Revision #: 1.1
Revision Effective Date: 09/08/2006
the card. The operator will have approximately 30 seconds to complete the scanning process or the
instrument will default to manual entry and display the “Enter Permit #” message. The instrument will
acknowledge that a successful scan of the operator’s card was completed by alerting the operator
with an audible tone. The instrument will then proceed to the “Enter Operator PIN” message (see
Entering an Operator PIN).
Entering Permit Data Manually
From the “Scan Operator Permit or Press Enter” message, the operator may choose to enter their
operator permit information manually by pressing the “Enter” key on the instrument’s keyboard. An
operator may choose to do this in the event that they have forgotten or lost their operator permit card,
or in the event that the bar code printed on the operator permit card is unreadable by the instrument’s
bar code scanner. The instrument will acknowledge the operator’s selection to manually enter permit
information by proceeding to the “Enter Permit #” message.
Enter Permit #
The operator should type in his or her operator permit number (DPSST number). As the operator
enters information on the keyboard, the information will be displayed on the second line of the
instrument’s display. The operator must then confirm the permit information by pressing the “Enter”
key on the instrument’s keyboard. IN ORDER TO START THE TESTING SEQUENCE, A VALID
OPERATOR PERMIT NUMBER AND PIN COMBINATION MUST BE ENTERED. THE OPERATOR
CANNOT CHOOSE TO SKIP THESE STEPS. Following entry of the operator permit number, the
instrument will proceed to the “Enter Operator Name (Last, First, M)” message. If no permit number
is entered, the instrument will return to the “Ready to Start” message after approximately 60
seconds have elapsed. The instrument will abort the testing sequence if an invalid permit number and
PIN combination are entered. The “Enter Operator Name (Last, First, M)” message will look similar
to the following:
Enter Operator Name
(Last, First, M)
The operator should type his or her name just as it is to be printed on the final Completed Test
Report. As the operator enters information on the keyboard, the information will be displayed on the
second line of the instrument’s display. Generally, name information is entered in a uniform format
similar to that used by the LEDS (Law Enforcement Data System) reporting system (last name, first
ALL PRINTED COPIES ARE UNCONTROLLED AND MAY NOT BE COMPLETE Page 10 of 54

OREGON STATE POLICE IMPLIED CONSENT PROGRAM
INTOXILYZER®8000 OPERATOR’S GUIDE
2.0 STEP ONE –PREPARING TO CONDUCT A TEST
Originally Adopted: 07/13/2006 Revision #: 1.1
Revision Effective Date: 09/08/2006
name, middle name or initial), however, the operator name field is not required and no data need be
entered for the instrument to proceed through the testing sequence. Information entered into the
instrument will be printed on the Test Report in WYSIWYG (What You See Is What You Get) format.
The operator must confirm the information entered by pressing the “Enter” key on the instrument’s
keyboard. The instrument will then proceed to the “Enter Operator PIN” message.
Entering an Operator PIN
Upon successfully scanning an operator permit or the manual entry of a valid permit number and
operator name, the instrument will proceed to the “Enter Operator PIN” message. The operator
should enter his or her Personal Identification Number (PIN) and confirm the information by pressing
the “Enter” key on the instrument’s keyboard:
Enter Operator PIN Enter Operator PIN
····
As the operator enters his or her PIN information on the keyboard, an asterisk (“*”) character will be
displayed on the second line of the instrument’s display. The instrument will validate the information
provided by the operator and acknowledge that a valid PIN has been entered by proceeding to the
“Scan Subject License or Press Enter” message. If an operator does not enter his/her correct PIN,
the instrument will abort the testing sequence after three (3) unsuccessful attempts are made by the
operator. If a PIN is not successfully entered, or no PIN is entered, the instrument will return to the
“Ready to Start” message after approximately 60 seconds have elapsed.
Scanning a Driver’s License
When the instrument displays the “Scan Subject License or Press Enter” message, the operator
may use the instrument’s internal bar code scanner to read the bar code printed on a driver’s license.
Scan Subject License
or Press Enter
The card should be held perpendicular to the face of the instrument directly above the keyboard. The
card should be kept as flat as possible and held still until the instrument reads the bar code printed on
the card. The operator will have approximately 30 seconds within which to complete the scanning
process or the instrument will default to manual entry and display the “Enter Subject Name (L, F,
M)” message. The instrument will acknowledge that a successful scan of the subject’s license was
ALL PRINTED COPIES ARE UNCONTROLLED AND MAY NOT BE COMPLETE Page 11 of 54

OREGON STATE POLICE IMPLIED CONSENT PROGRAM
INTOXILYZER®8000 OPERATOR’S GUIDE
2.0 STEP ONE –PREPARING TO CONDUCT A TEST
Originally Adopted: 07/13/2006 Revision #: 1.1
Revision Effective Date: 09/08/2006
completed by alerting the operator with an audible tone. The instrument will then proceed to the
“Review Data (Y/N)?” message (see page 13).
Entering Driver’s License Data Manually
From the “Scan Subject License or Press Enter” message, the operator may chose to enter license
information manually by pressing the “Enter” key on the instrument’s keyboard. An operator may
choose to do this in the event that the subject is unlicensed, has lost or misplaced their license, or in
the event that the bar code printed on the license is unreadable by the instrument’s bar code scanner.
The instrument will acknowledge the operator’s selection to manually enter license information by
proceeding to the “Enter Subject Name (Last, First, M)” message.
Enter Subject Name
(Last, First, M)
The operator should type the name of the subject just as it is to be printed on the final Completed Test
Report. As the operator enters information on the keyboard, the information will be displayed on the
second line of the instrument’s display. Generally, name information is entered in a uniform format
similar to that used by the LEDS (Law Enforcement Data System) reporting system (last name, first
name, middle name or initial), however, the subject name field is not required and no data need be
entered for the instrument to proceed through the testing sequence. In some instances, the LEDS
format may not be appropriate and the operator may choose to deviate from this format. Information
entered into the instrument will be printed on the Test Report in WYSIWYG (What You See Is What
You Get) format. The operator must confirm the information entered by pressing the “Enter” key on
the instrument’s keyboard. The instrument will then proceed to the “Enter Subject DOB
(MM/DD/YYYY)” message.
Enter Subject DOB
(MM/DD/YYYY)
The operator should type the Date of Birth (DOB) of the driver in mm/dd/yyyy format and confirm the
information by pressing the “Enter” key on the instrument’s keyboard. As the operator enters
information on the keyboard, the information will be displayed on the second line of the instrument’s
display. The subject DOB field is a required field, however, if the DOB is unknown, it need not be
correct for the instrument to proceed through the testing sequence. A false DOB can be used (e.g.,
“01/01/1901”.
ALL PRINTED COPIES ARE UNCONTROLLED AND MAY NOT BE COMPLETE Page 12 of 54

OREGON STATE POLICE IMPLIED CONSENT PROGRAM
INTOXILYZER®8000 OPERATOR’S GUIDE
2.0 STEP ONE –PREPARING TO CONDUCT A TEST
Originally Adopted: 07/13/2006 Revision #: 1.1
Revision Effective Date: 09/08/2006
The instrument will acknowledge the entry of DOB information by proceeding to the “Enter Subject
ID #” message:
Enter Subject ID #
The operator should type the identification number for the subject and confirm the information by
pressing the “Enter” key on the instrument’s keyboard. As the operator enters information on the
keyboard, the information will be displayed on the second line of the instrument’s display. The form of
identification can be obtained from any valid form of identification issued by either a federal or state
issuing authority. The subject ID field is not required and no data need be entered for the instrument
to proceed through the testing sequence. The instrument will acknowledge the entry of subject
identification number information by proceeding to the “Enter State of Issue” message:
Enter State of Issue
The operator should type the two (2) letter designation for the jurisdiction responsible for issuing the
form of identification used in the above section and confirm the information by pressing the “Enter”
key on the instrument’s keyboard. As the operator enters information on the keyboard, the information
will be displayed on the second line of the instrument’s display. For documents issued by the US
government (i.e., Social Security Cards, etc.), the operator may enter “US” for this field. The state of
issue field is not required and no data need be entered for the instrument to proceed through the
testing sequence. The instrument will acknowledge the entry of subject identification number
information by proceeding to the “Review Data (Y/N)?” message:
Reviewing Data
Once all pre-test data has either been scanned or entered manually into the instrument, the
instrument will display the “Review Data (Y/N)?” message.
Review Data (Y/N)?
N
ALL PRINTED COPIES ARE UNCONTROLLED AND MAY NOT BE COMPLETE Page 13 of 54

OREGON STATE POLICE IMPLIED CONSENT PROGRAM
INTOXILYZER®8000 OPERATOR’S GUIDE
2.0 STEP ONE –PREPARING TO CONDUCT A TEST
Originally Adopted: 07/13/2006 Revision #: 1.1
Revision Effective Date: 09/08/2006
The operator may choose “Y” to review the subject information data entered into the instrument or
press “N” to proceed to the testing sequence. The operator must confirm the selection by pressing
the “Enter” key on the instrument’s keyboard. If “Y” is selected, the instrument will separately display
the Subject Name, Subject DOB, Subject ID #, and State of Issue. The operator can not edit the
operator permit information, but may edit the subject information if necessary. After displaying each
entry, the operator must accept the information by pressing the “Enter” key on the instrument’s
keyboard.
Aborting a Test Sequence
During the testing sequence, an operator may choose to abort the test sequence by selecting one of
two alternative methods: a) by pressing the “Start Test” button at any time during the test sequence
other than during the breath sampling period(s); or b) by pressing the “A” key on the instrument
keyboard.
NOTE
It is suggested that operators use the instrument keyboard to abort the testing sequence. If an
operator mistakenly uses the “Start Test” button to abort a test sequence while the instrument is in the
breath sampling period (i.e., “Please Blow” phase), the instrument will record a “Refused” test
sequence rather than a “Sequence Aborted” test.
ALL PRINTED COPIES ARE UNCONTROLLED AND MAY NOT BE COMPLETE Page 14 of 54

OREGON STATE POLICE IMPLIED CONSENT PROGRAM
INTOXILYZER®8000 OPERATOR’S GUIDE
3.0 STEP TWO -CONDUCTING A BREATH TEST
Originally Adopted: 07/13/2006 Revision #: 1.1
Revision Effective Date: 09/08/2006
3.0 STEP TWO – CONDUCTING A BREATH TEST
Testing Sequence
Once the permit and license information has been entered and reviewed, the instrument will proceed
to the testing sequence. The steps of the testing sequence are outlined below and are described in
more detail later in the chapter. The instrument’s testing sequence is as follows:
Pre-Test Observation Period
Air Blank
Diagnostic Test
Air Blank
Breath Sample
Air Blank
Continued Observation Period
Air Blank
Breath Sample
Air Blank
Control Sample
Air Blank
Comment Lines
Printing of Test Report
The "Ready in 00:XX” message
Depending on the amount of time necessary for the operator to complete the data entry section of
preparing to conduct a breath test, the instrument may display the “Ready in 00:XX” message with a
timer that will count down the period of time needed for the instrument to be ready to conduct a breath
test. This period of time is generally less than 60 seconds and commonly will be closer to 30 seconds
in duration. During this period, the instrument is preparing itself to conduct a test. If the instrument has
been recently used, the instrument may not require any preparation time. If desired, the operator can
abort the testing sequence by pressing the “Start Test” button. During the “Ready in 00:XX” period,
the instrument display will look similar to the figure below:
Ready in 00:39
04/10/2006 PDT
When the instrument completes the countdown, the instrument will proceed to the first step of the
testing sequence.
ALL PRINTED COPIES ARE UNCONTROLLED AND MAY NOT BE COMPLETE Page 15 of 54

OREGON STATE POLICE IMPLIED CONSENT PROGRAM
INTOXILYZER®8000 OPERATOR’S GUIDE
3.0 STEP TWO -CONDUCTING A BREATH TEST
Originally Adopted: 07/13/2006 Revision #: 1.1
Revision Effective Date: 09/08/2006
Air Blank
The instrument will initiate the testing sequence by performing an air blank. The instrument display
will display the “Air Blank” message and turn on the instrument’s internal purge pump for
approximately 20 seconds.
Air Blank
0.000
Air Blank Air Blank
0.000
The instrument will draw in room (“ambient”) air to purge the sample chamber and breath path of any
possible alcohol or other contaminants. If all the parameters are met, the instrument will proceed to
the next step. If there is a problem, the instrument will abort the test and display a message of
“Ambient Fail” on the display and print “*Invalid Test – Check Ambient Conditions” on the Test
Report (refer to Section 4.0 – Reviewing the Test Report).
Diagnostic Routine
Following the successful completion of the “Air Blank”, the instrument will perform a complete
diagnostic check on its components and operational standards.
Diagnostics Diagnostics
If no operational malfunctions are found, the instrument will display a message of “Diagnostics
Pass” and then proceed to the next step.
Diagnostics
Pass
If any malfunctions in the operation of the instrument are detected, the instrument will abort the test
displaying a message on the display.
ALL PRINTED COPIES ARE UNCONTROLLED AND MAY NOT BE COMPLETE Page 16 of 54

OREGON STATE POLICE IMPLIED CONSENT PROGRAM
INTOXILYZER®8000 OPERATOR’S GUIDE
3.0 STEP TWO -CONDUCTING A BREATH TEST
Originally Adopted: 07/13/2006 Revision #: 1.1
Revision Effective Date: 09/08/2006
Air Blank
The instrument will next perform another air blank following the successful completion of a Diagnostic
Routine. The instrument display will display the “Air Blank” message and turn on the instrument’s
internal purge pump for approximately 20 seconds.
Air Blank Air Blank
0.000
The instrument will draw in room (“ambient”) air to purge the sample chamber and breath path of any
possible alcohol or other contaminants. If all the parameters are met, the instrument will proceed to
the next step. If there is a problem, the instrument will abort the test and display a message of
“Ambient Fail” on the display and print “*Invalid Test – Check Ambient Conditions” on the Test
Report.
Breath Sampling Period
From the “Air Blank” message, the instrument will next enter the breath sampling period. The
instrument will briefly display a progress bar as a series of rectangular characters (i.e., “”) and then
begin scrolling the message “Please blow into mouthpiece to activate tone” across the top line of
the instrument’s display. At this time the operator takes command of the instrument. The instrument
display will look similar to the figure below:
piece to activate tone.
Please blow into mouth
An important factor in collecting an acceptable breath sample is the instructions that are given to the
test subject. The following instructions are recommended:
I WANT YOU TO TAKE A DEEP BREATH AND BLOW INTO THE INSTRUMENT WITH
ONE LONG, CONTINUOUS BREATH. BLOW WITH SUFFICIENT FORCE TO INITIATE
AND MAINTAIN THE AUDIBLE TONE. CONTINUE BLOWING UNTIL I TELL YOU TO
STOP. DO YOU UNDERSTAND THESE INSTRUCTIONS?
With these instructions, the operator can control the length of time that the subject delivers the
sample, assuring that the sample provided will be the best possible sample. The operator is assured
that a proper sample is being provided to the instrument when a continuous audible tone is heard and
the instrument displays the “Please Blow” message. As the subject continues to blow, several
ALL PRINTED COPIES ARE UNCONTROLLED AND MAY NOT BE COMPLETE Page 17 of 54

OREGON STATE POLICE IMPLIED CONSENT PROGRAM
INTOXILYZER®8000 OPERATOR’S GUIDE
3.0 STEP TWO -CONDUCTING A BREATH TEST
Originally Adopted: 07/13/2006 Revision #: 1.1
Revision Effective Date: 09/08/2006
indicator marks will appear across the display. When a “period” is displayed following the “Please
blow” message, making the message read “Please Blow.”, the instrument has obtained an
adequate sample and the operator may instruct the subject to stop blowing.
Please Blow
zPlease Blow.
zzzzzzz
If the subject does not provide an adequate breath sample (i.e., the “period” is not displayed), the
instrument will notify the operator by flashing the “Please Blow” message and emitting an audible
tone. The operator should re-instruct the subject on how to provide a proper sample and have him/her
blow again. If the subject, through a willful act, still does not provide a proper sample, the operator
should consider it to be a refusal. If, however, the operator believes that the subject is physically
unable to provide an acceptable sample, but the subject evacuated his/her lungs and the sample was
the best the subject could give, the operator may allow the instrument to time out. The instrument will
display the “Refusal (Y/N)?” message. The operator may select the “Y” key on the instrument
keyboard to document a refused test, or select the “N” key on the instrument keyboard to document
an “*Invalid Test - Deficient Sample” on the Test Report. After approximately one (1) minute, the
instrument will automatically time-out and print “*Invalid Test – Deficient Sample”.
A test for interfering substances is again made during this breath sampling period. If an interfering
substance is detected which would affect the breath test reading, the message “Interferent
Detected” will be displayed and an error message of “*Invalid Test – Interfering Substance
Detected” will be printed on the Test Report.
The instrument allows at least three (3) minutes for a test subject to submit an acceptable breath
sample (a continuous end-expiratory breath sample resulting in the instrument displaying a “period” at
the end of the “Please Blow” message). The instrument will terminate the breath sampling phase
before the end of the three minute period if any of the following conditions are met:
1. The subject submits an acceptable sample.
2. The subject refuses the test and the operator pushes the “Start Test” button or the “R” key on
the instrument keyboard to indicate to the instrument the operator’s request that the instrument
document the refusal. The instrument will emit an alternating audible warning tone and display
the message “Subject Test Refused”.
ALL PRINTED COPIES ARE UNCONTROLLED AND MAY NOT BE COMPLETE Page 18 of 54
Table of contents
Other LION Measuring Instrument manuals
Popular Measuring Instrument manuals by other brands

Martin Lishman
Martin Lishman Protimeter Balemaster instruction manual

AIR SYSTEMS
AIR SYSTEMS CO2-91IS operating instructions

Dwyer Instruments
Dwyer Instruments TDS2-10 Installation and operating instructions

Calypso Instruments
Calypso Instruments ULP Pro user manual

GF
GF 3-2630-X manual

ParTech
ParTech 8100 instruction manual