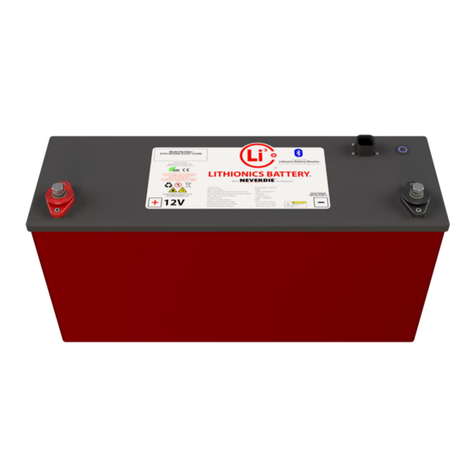
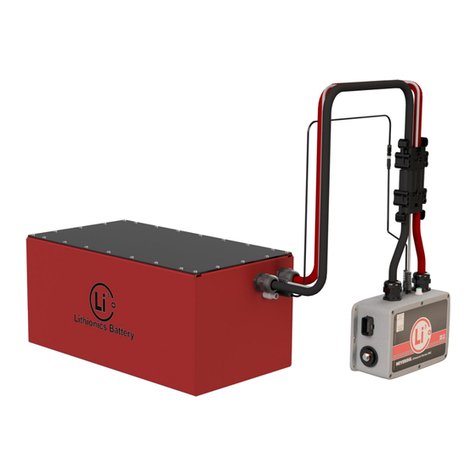
Lithionics Battery ionGen GTX12V315A-E2107-CS200RV VICTRON Assembly instructions

GTX12V315A-E2107-CS200RV INSTALLATION KIT
LITHIONICS BATTERY, CLEARWATER, FL 33765 USA | PH: 727.726.4204 | FAX: 727.797.8046 | WEB: LITHIONICSBATTERY.comRevision 01
VICTRON 2000 WATT
Installer's Guide

S A F E T Y I N F O R M A T I O N . . . . . . . . . . . . . . . . . . . . . . . . . . . . . . . . . . . . . . . . . . . . 1
I N T R O D U C T I O N . . . . . . . . . . . . . . . . . . . . . . . . . . . . . . . . . . . . . . . . . . . . . . . . . . . . . . .
W I R I N G D I A G R A M S . . . . . . . . . . . . . . . . . . . . . . . . . . . . . . . . . . . . . . . . . . . . . . . . . . 4
MAIN DIAGRAM.......................................................
INVERTER DIAGRAM...............................................
STERLING DIAGRAM..............................................
SOLAR DIAGRAM....................................................
PARTS LIST.............................................................
BATTERY INSTALLATION.......................................
EQUIPMENT MANUALS..........................................
Table of Contents
LITHIONICS BATTERY, CLEARWATER, FL 33765 USA | PH: 727.726.4204 | FAX: 727.797.8046 | WEB: LITHIONICSBATTERY.com
2
5
8
11
13
15
16
19

Safety Information
1
!
LITHIONICS BATTERY, CLEARWATER, FL 33765 USA | PH: 727.726.4204 | FAX: 727.797.8046 | WEB: LITHIONICSBATTERY.com
This manual is intended for qualified installers. Although detailed, it is designed as an overall guide to the installation and not to replace
the manufacturer’s manuals.
All work should be performed in compliance with local and national electrical codes. The installer should assume that voltage is present
at the battery terminals; use insulated tools and gloves. Always turn OFF equipment connected to the battery, and the Power switch on
the battery. This will isolate the battery from other electrical circuits. This must occur before performing any repairs or maintenance on
the system.
Proper wire size is essential when connecting the inverters, chargers and other equipment in the system. Crimped connections are
required when connecting to the battery terminals.
Read and follow the inverter, charger or other equipment manufacturer’s safety precautions prior to connecting the battery. All
charging equipment must be compatible with Lithium Iron Phosphate battery chemistry.
Links to the installation manuals relevant to this kit are listed at the back of this manual.

The Lithionics GTX12V315A-E2107-CS200 Victron kit is
based on a single GTX12V315A-E2107-CS200 battery
and a Victron 2000 watt inverter. The kit is limited to
300Amps DC. If a larger inverter or battery bank is
anticipated in a future expansion then one of our larger
kits with higher capacity components is recommended.
2
LITHIONICS BATTERY, CLEARWATER, FL 33765 USA | PH: 727.726.4204 | FAX: 727.797.8046 | WEB: LITHIONICSBATTERY.com
Introduction

The Lithionics GTX12V315A-E2107-CS200 Victron kit consists of a GTX12V315A-E2107-CS200 lithium battery, Victron
MultiPlus 2000 watt inverter (with remote panel), Victron Smart Solar MPPT charge controller and a Sterling Battery to
Battery charger (regenerative braking compatible). The optional deluxe kit also includes the following peripheral
components: three isolation switches, positive distribution buss with integrated fuses, main battery fuse holder and fuse,
negative distribution buss, Class T fuse holder and fuse, Sterling charger fuse holder and fuse. The Deluxe kit does not
include the PV array breaker (which is required to match the selected PV array voltage and amperage), cables, battery lugs,
and heat shrink.
3
LITHIONICS BATTERY, CLEARWATER, FL 33765 USA | PH: 727.726.4204 | FAX: 727.797.8046 | WEB: LITHIONICSBATTERY.com
The Kit

Main Diagram
Inverter Diagram
Sterling Diagram
Solar Diagram
Wiring Diagrams
LITHIONICS BATTERY, CLEARWATER, FL 33765 USA | PH: 727.726.4204 | FAX: 727.797.8046 | WEB: LITHIONICSBATTERY.com 4

Main Diagram
LITHIONICS BATTERY, CLEARWATER, FL 33765 USA | PH: 727.726.4204 | FAX: 727.797.8046 | WEB: LITHIONICSBATTERY.com 5
The main diagram depicts the overall layout of the system. The 4/0 positive cable is connected to the MRBF fuse block via a
300A post mounted fuse and an isolation switch.
The inverter is connected to the non-fused post of the fuse block via a Class T 250A fuse and an isolation switch.
The Class T fuse block should be mounted as close as possible to the MRBF fuse block. The isolation switch gives you the
ability to isolate the inverter in the case of a malfunction, as well as disabling the inverter if work is required on the AC
system.
If the inverter is installed more than five feet from the fuse block, the wire size should be increased to 4/0 to compensate for
voltage drop. The chassis DC grounding conductor (green) should be sized not less than one size smaller than the DC
positive conductor and have a capacity such that the DC positive fuse has an amperage rating not greater than 135% of the
current rating of this ground wire.
If the 2/0 positive cable supplying the inverter shorts to ground internally, then the chassis ground cable needs to be able to
carry enough current to blow the fuse without melting and possibly causing a fire.

Main Diagram
LITHIONICS BATTERY, CLEARWATER, FL 33765 USA | PH: 727.726.4204 | FAX: 727.797.8046 | WEB: LITHIONICSBATTERY.com
The inverter is controlled by the Digital Multi Control Panel. The front mounted switch is used to turn the system on, off, or
to charger only operation. The shore current limit is set by the control knob. Turning the knob to the right or left sets the
desired value. The current limit is shown on the 7-segment display.
The Victron BMV-712 monitors battery voltage, current, power, amp-hours consumed, and state of charge. Using the
VictronConnect app on a smartphone, you can connect to the BMV-712 via Bluetooth and customize settings, monitor data,
and update software.
The Victron Smart Solar MPPT charger is connected to the MRBF fuse block via a 40A fuse and an isolation switch. The PV
solar array is connected to the MPPT charger via a circuit breaker. The specified circuit breaker is only rated at 48VDC; if
your PV solar array has an open circuit voltage that is higher, then another circuit breaker with a higher voltage rating must
be substituted. The fuse and wire sizes are based on the Victron Smart Solar MPPT 100/30 charge controller. If a larger
controller is used then the fuse and wire sizes should be increased as required.
The Sterling Battery to Battery charger is connected to the MRBF fuse block via a 50A fuse (80A for the BB1260
charger).There is also a fuse at the starter battery, this fuse must be installed as close to the battery as possible.
6

MAIN DIAGRAM
LITHIONICS BATTERY, CLEARWATER, FL 33765 USA | PH: 727.726.4204 | FAX: 727.797.8046 | WEB: LITHIONICSBATTERY.com 7

The inverter diagram depicts a typical AC installation. The main panel has an output breaker for the
non-inverter loads. It is used to power the high-power loads that are beyond the inverter’s capacity
such as a water heater or an electric stove. The AC input must be protected with a magnetic circuit
breaker rated at 50A or less, and the cable cross-section must be sized accordingly. Make all
connections using proper crimp-on connectors (do not use twist on connectors).
The inverter has a Power Assist feature and when enabled can add up to 2kVA (2000/120=17A) to
the output during periods of peak power requirement. With a maximum input current of 50A, the
inverter can supply up to 67A (50+17).
Inverter Diagram
LITHIONICS BATTERY, CLEARWATER, FL 33765 USA | PH: 727.726.4204 | FAX: 727.797.8046 | WEB: LITHIONICSBATTERY.com 8

An RCD (Residual Current Device) type circuit breaker rated to support the expected load must be
included in series with the output, and cable cross-section must be sized accordingly. This breaker
should be as close to the inverter as possible. If this breaker is not of the RCD (Residual Current
Device) type, GFCI receptacles must be used at all AC outlets.
The inverter is provided with a ground relay that automatically connects the neutral output to the
chassis if no external AC supply is available. In an RV installation, the inverter chassis must be
connected to the vehicle chassis ground (via the negative distribution buss). The chassis grounding
conductor must be not less than one size smaller than the DC positive conductor and have a capacity
such that the DC positive fuse has an amperage rating not greater than 135% of the current rating of
this grounding wire. When using an inverter sub panel, the inverter neutrals must return to the
inverter sub panel and not the main AC panel.
Inverter Diagram
LITHIONICS BATTERY, CLEARWATER, FL 33765 USA | PH: 727.726.4204 | FAX: 727.797.8046 | WEB: LITHIONICSBATTERY.com
A warning label should be installed at the main AC panel to indicate that there is an inverter in the
system.
9

INVERTER DIAGRAM
LITHIONICS BATTERY, CLEARWATER, FL 33765 USA | PH: 727.726.4204 | FAX: 727.797.8046 | WEB: LITHIONICSBATTERY.com 10

Sterling Diagram
LITHIONICS BATTERY, CLEARWATER, FL 33765 USA | PH: 727.726.4204 | FAX: 727.797.8046 | WEB: LITHIONICSBATTERY.com
The Sterling Battery to Battery charger charges the house battery via the vehicle’s alternator. This system uses either the Sterling
BB1230 charger (Mercedes recommendation), or the BB1260 charger depending on the size of the alternator. The charger should
be programmed to charge the battery using a Lithium battery profile. The charger can also be configured to work with vehicles
using regenerative braking.
Sterling Power Battery to Battery Charger 12V input to
12V output 30amps
Sterling Power Battery to Battery Charger 12V input to
12V output up to 60amps.
11

STERLING DIAGRAM
LITHIONICS BATTERY, CLEARWATER, FL 33765 USA | PH: 727.726.4204 | FAX: 727.797.8046 | WEB: LITHIONICSBATTERY.com 12

The Victron Smart Solar MPPT charge controller uses maximum power point tracking that optimizes the match between the solar array
and the battery bank. It converts the higher voltage DC output from the solar panels down to the lower voltage needed to charge the
batteries. The PV solar array is connected to the MPPT charger with a circuit breaker (not supplied). The specified circuit breaker is rated
at 48VDC. If the PV solar array has an open circuit voltage that is higher, then another circuit breaker with a higher voltage rating must
be substituted.
The charger is connected to the MRBF fuse block via a switch and a 40A fuse. The fuse and wire sizes are based on the Victron MPPT
100/30 charge controller. If a larger controller is used then the fuse and wire sizes should be increased as required.
Remotely control and monitor the Victron Smart Solar MPPT charger with built-in Bluetooth by pairing it with your smartphone via the
VictronConnect App.
Solar Diagram
LITHIONICS BATTERY, CLEARWATER, FL 33765 USA | PH: 727.726.4204 | FAX: 727.797.8046 | WEB: LITHIONICSBATTERY.com 13

SOLAR DIAGRAM
LITHIONICS BATTERY, CLEARWATER, FL 33765 USA | PH: 727.726.4204 | FAX: 727.797.8046 | WEB: LITHIONICSBATTERY.com 14

QTY PART NUMBER DESCRIPTION COMMENTS
Parts List
LITHIONICS BATTERY, CLEARWATER, FL 33765 USA | PH: 727.726.4204 | FAX: 727.797.8046 | WEB: LITHIONICSBATTERY.com
1 BSS-5177 MRBF Terminal Fuse - 50A 80A for Sterling BB1260
1 BSS-5176 MRBF Terminal Fuse - 40A Blue Sea Systems
1 BSS-5181 MRBF Terminal Fuse - 80A Blue Sea Systems
1 BSS-5191 MRBF Terminal Fuse Block - 30 to 300A Blue Sea Systems
1 BSS-5190 MRBF Terminal Fuse - 300A Blue Sea Systems
1 BSS-5196 MRBF Surface Mount Fuse Block - Common Source Blue Sea Systems
1 BSS-5502100 Class T Fuse Block with Insulating Cover - 225 to 400A Blue Sea Systems
1 BSS-5118 Class T Fuse - 250 Amp Blue Sea Systems
1 BB123012to12 30A Sterling BB1230 12 to 12 30A Optional BB1260 (60A)
3 BSS-9003e E-Series On Off Battery Switch Blue Sea Systems
1 Victron Multiplus Compact 12-2000-80-120 Victron
1 Victron Multi Controller Victron
1 Victron Smart Solar MPPT 100/30 Victron
1 Victron BMV-712 amp hour meter Victron
1 BSS-7138 187-Series Circuit Breaker - Surface Mount 40A Blue Sea Systems, 48V max voltage
1 BSS-5006100 MAXI Fuse Block Blue Sea Systems
1 BSS-5140 MAXI Fuse - 50 Amp 80A for Sterling BB1260
1 BSS-2107 PowerBar 600A BusBar - Eight 3/8"-16 Studs Blue Sea Systems
15

Check the battery for visible damage including cracks, dents, deformation and other visible
abnormalities. The top surface of the battery and terminal connections should be clean, free
of dirt and corrosion, and dry.
Battery Installation
Battery power should be turned off prior to the installation and for
storage. Check the LED integrated into the Power button to make sure
it is completely off. If the LED is on or blinking, press and hold the
Power button for 3 seconds until LED turns off.
Lithium batteries do not release gas during normal use. There are no
specific ventilation requirements for battery installation, although
enough airflow should be provided to prevent excessive heat build-up.
The battery should be stored and installed in a clean, cool and dry place,
keeping water, oil, and dirt away from the battery. If any of these
materials can accumulate on the top surface of the battery, current
leakage can occur, resulting in self-discharge and possible short circuits.
LITHIONICS BATTERY, CLEARWATER, FL 33765 USA | PH: 727.726.4204 | FAX: 727.797.8046 | WEB: LITHIONICSBATTERY.com 16

The battery is equipped with two flat threaded terminals designed for
a 5/16” or M8 size ring terminal lug and secured by included M8 bolts,
flat washers and lock washers. When using flat washers, it is critical to
place the ring terminal lug in direct contact with the top surface of the
power terminal and then place the washers on top of the lug.
Connect the positive and negative battery cables with correct
polarity and double check the polarity of battery circuit to avoid
potential equipment and battery damage.
DO NOT place any washers between the battery power terminal and
the ring terminal lug, as this could create a high resistance path and
cause excessive heating of the connection which could then lead to
permanent battery damage or fire. If you must attach more than one
lug to each terminal, make sure at least 1/4” or 6mm of thread is
available to secure the connection. Additionally, the ring terminal lugs
need to be “clocked” in such a way that they do not interfere with
their flat conducting surfaces. Acquire and use longer M8x1.25mm
bolts if necessary.
Tighten both M8 power terminal bolts to a maximum of 108in-
lbs/12.2Nm to ensure there is good contact with the ring terminal lug.
Over tightening terminal connections can cause terminal breakage
and loose connections can result in power terminal meltdown or fire.
Battery Installation
LITHIONICS BATTERY, CLEARWATER, FL 33765 USA | PH: 727.726.4204 | FAX: 727.797.8046 | WEB: LITHIONICSBATTERY.com 17

The battery cables should be sized to handle the expected load. Refer to NEC Table 310.15(B)16 for the maximum
amperage based on the cable gauge size. Cable lengths in excess of 6 feet may require heavier gauge
wire to avoid unacceptable voltage drop.
For more information refer to the National Electrical Code for correct cable size, which can be located at www.nfpa.org The battery circuit
must be properly fused to handle the expected load and not to exceed the battery specifications.
After installation is complete, turn on the battery power by a short-press of the Power button. The LED
indicator should come on to confirm the battery’s state.
DO NOT connect multiple batteries
in series to get higher voltage as it
will damage the internal BMS.
DO NOT attempt to disassemble the
battery, as it could lead to
permanent battery damage and
voids your battery warranty!!!
Battery Installation
A link to the battery installation manual is
listed at the back of this manual
LITHIONICS BATTERY, CLEARWATER, FL 33765 USA | PH: 727.726.4204 | FAX: 727.797.8046 | WEB: LITHIONICSBATTERY.com 18
Table of contents
Other Lithionics Battery Camera Accessories manuals
Lithionics Battery
Lithionics Battery GT12V525A-F24 User manual

Lithionics Battery
Lithionics Battery GT Series User manual

Lithionics Battery
Lithionics Battery GT12V450A-F24 Guide

Lithionics Battery
Lithionics Battery NeverDie Compact Series User manual

Lithionics Battery
Lithionics Battery GTO Series User manual