LIVARNO home 414382 2201 Original instructions

MOTION SENSOR LIGHT WITH DUMMY CAMERA
IAN 414382_2201
DE AT CH
KAMERA-ATTRAPPE MIT
BEWEGUNGSMELDER
Bedienungs- und Sicherheitshinweise
PL
ATRAPA KAMERY
Z SYGNALIZATOREM
RUCHU
Uwagi dotyczące obsługi i bezpieczeństwa
SE
SKAMERAATRAPP
MED RÖRELSESENSOR
Bruks- och säkerhetsanvisningar
FI
VALEVALVONTAKAMERA
LIIKETUNNISTIMELLA
Asennus-, käyttö- ja turvallisuusohjeet
GB
MOTION SENSOR LIGHT
WITH DUMMY CAMERA
Operating and safety information
FI PL

GB
Before you start reading, please fold out the illustrations page and familiarise yourself with all of
the item’s functions.
FI
Ennen kuin luet, avaa kuvilla varustettu sivu ja tutustu sitten artikkelin kaikkiin toimintoihin.
SE
Vik ut sidan med bilderna innan du läser igenom anvisningarna. Ta sedan reda på hur alla
funktioner i artikeln fungerar.
PL
Przed lekturą instrukcji obsługi otworzyć stronę z rysunkami i zapoznać się z wszystkimi
funkcjami produktu..
DE AT CH
Klappen Sie vor dem Lesen die Seite mit den Abbildungen aus und machen Sie sich
anschließend mit allen Funktionen des Artikels vertraut.
GB Operating and safety information page 7
FI Asennus-, käyttö- ja turvallisuusohjeet sivu 14
SE Bruks- och säkerhetsanvisningar sida 21
PL Uwagi dotyczące obsługi i bezpieczeństwa strona 28
DE/AT/CH Bedienungs- und Sicherheitshinweise Seite 36

A
B C
D
5
4
13
12
10
7
1 2
3
6
9
11
10
9
OFF/ON
Sensor
mode
75%
OFF
11
8
1
4
9
ON/OFF


5
GB FI
Introduction ������������������������������������������ 7
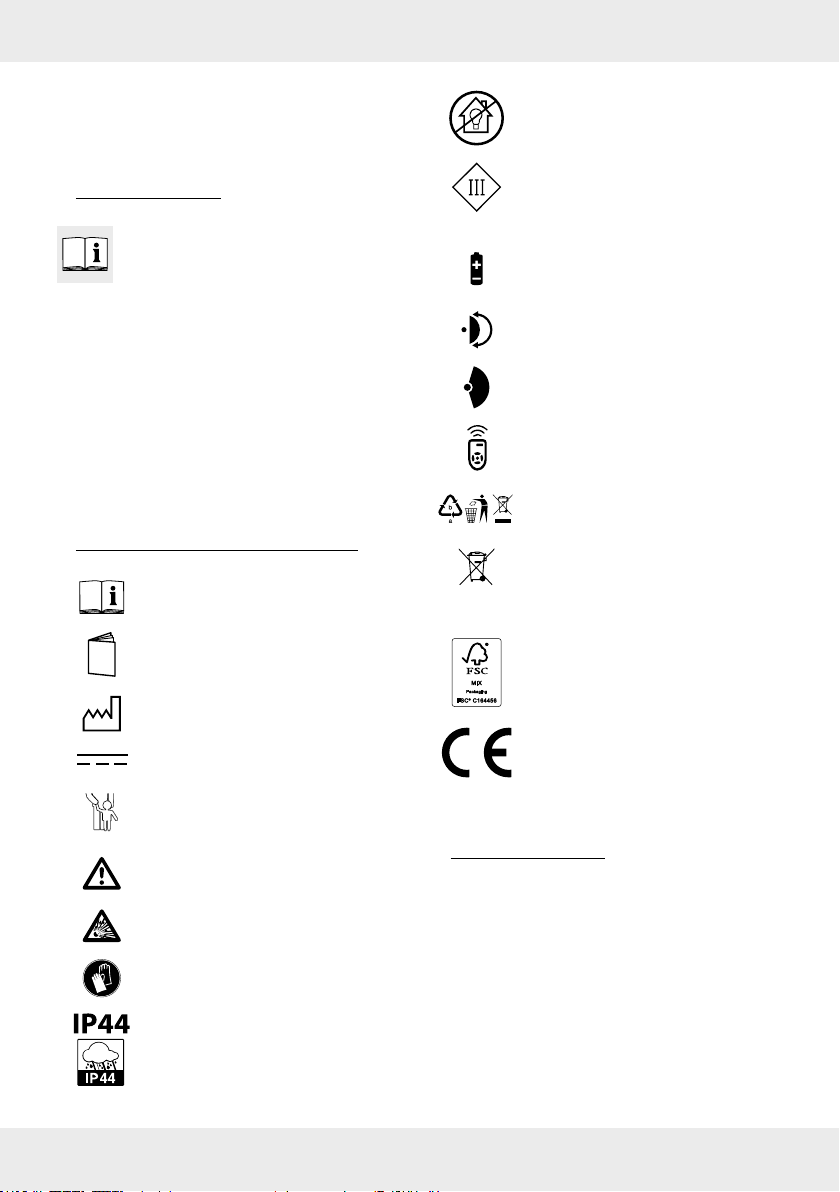
Explanation of symbols���������������������� 7
Intended use����������������������������������������� 7
Included in package���������������������������� 8
Description of parts����������������������������� 8
Technical data �������������������������������������� 8
Safety information ������������������������������ 8
Risk of leakage from batteries/
rechargeable batteries ����������������������� 9
Assembly and installation���������������� 10
First-time operation���������������������������� 10
Operation�������������������������������������������� 11
Replacing the batteries
(remote control) ��������������������������������� 11
Cleaning and storage������������������������ 12
Troubleshooting��������������������������������� 12
Disposal����������������������������������������������� 12
Warranty �������������������������������������������� 12
Service������������������������������������������������� 14
Johdanto��������������������������������������������� 14
Merkkien selitys��������������������������������� 14
Määräystenmukainen käyttö���������� 15
Toimitussisältö������������������������������������ 15
Osien kuvaus�������������������������������������� 15
Tekniset tiedot������������������������������������ 15
Turvallisuusohjeet������������������������������ 16
Paristojen/akkujenvuotovaara ������� 17
Asennus����������������������������������������������� 17
Käyttöönotto �������������������������������������� 18
Käyttö�������������������������������������������������� 18
Pariston vaihto (kaukosäädin) �������� 19
Puhdistus ja varastointi �������������������� 19
Vianpoisto ������������������������������������������ 19
Hävittäminen�������������������������������������� 19
Takuu��������������������������������������������������� 20
Huolto�������������������������������������������������� 21
Introduktion���������������������������������������� 21
Förklaring av symboler�������������������� 21
Avsedd användning �������������������������� 22
Leveransomfattning �������������������������� 22
Komponentbeskrivning �������������������� 22
Tekniska data������������������������������������� 22
Säkerhetsanvisningar ����������������������� 23
Risk för batteriläckage��������������������� 24
Montering ������������������������������������������� 24
Idrifttagning���������������������������������������� 25
Användning ���������������������������������������� 25
Byta batterier (fjärrkontroll)������������ 26
Rengöring och förvaring ������������������ 26
Åtgärda fel ����������������������������������������� 26
Avfallshantering �������������������������������� 26
Garanti������������������������������������������������ 27
Service������������������������������������������������� 28
Wstęp �������������������������������������������������� 28
Objaśnienie symboli�������������������������� 28
Użytkowanie zgodne
zprzeznaczeniem������������������������������ 29
Zakres dostawy �������������������������������� 29
Opis części ������������������������������������������ 29
Dane techniczne��������������������������������� 29
Uwagi dotyczące
bezpieczeństwa ��������������������������������� 30
Niebezpieczeństwo wycieku
elektrolitu zbaterii/
akumulatorów ����������������������������������� 31
Montaż ������������������������������������������������ 31
Uruchamianie ������������������������������������� 32
Obsługa����������������������������������������������� 33
Wymiana baterii
(pilot zdalnego sterowania) ������������ 33
Czyszczenie iprzechowywanie������� 34
Usuwanie usterek������������������������������ 34
Utylizacja �������������������������������������������� 34
Gwarancja������������������������������������������ 34
Serwis�������������������������������������������������� 36
SE PL

6
DE AT CH
Einleitung �������������������������������������������� 36
Zeichenerklärung ������������������������������ 36
Bestimmungsgemäße
Verwendung��������������������������������������� 37
Lieferumfang �������������������������������������� 37
Teilebeschreibung������������������������������ 37
Technische Daten ������������������������������� 38
Sicherheitshinweise��������������������������� 38
Risiko des Auslaufens
von Batterien/Akkus������������������������� 39
Montage���������������������������������������������� 39
Inbetriebnahme���������������������������������� 41
Bedienung������������������������������������������� 41
Batterien wechseln
(Fernbedienung)��������������������������������� 42
Reinigung und Lagerung ������������������ 42
Fehlerbehebung��������������������������������� 42
Entsorgung������������������������������������������ 42
Garantie���������������������������������������������� 43
Service������������������������������������������������� 44

7
GB
Motion Sensor Light with
Dummy Camera
zIntroduction
Congratulations on the purchase of
your new product� You have chosen
a high-quality product� Please read
these operating instructions thoroughly and
carefully� These instructions are an essential
part of the product and contain important
information on rst-time use and handling.
Always observe all safety instructions� If you
have any questions or are unsure how to
operate the product, please contact your
retailer or service centre� Please keep this
manual in a safe place and pass it on to
third parties where necessary�
zExplanation of symbols
Read the operating instructions!
Issue date of
instruction manual
(month/year)
Date of manufacture
(month/year)
Direct current
Risk of fatal injury and
accidents for infants and
children!
Observe warning notices and
safety instructions!
Explosion hazard!
Wear protective gloves!
Protected against solid foreign
objects with a diameter of
≥ 1.0 mm, splash-proof
Not suitable for indoor lighting
This symbol indicates that the
product operates with safety
extra-low voltage (SELV/PELV,
protection class III)�
Batteries included
(remote control)
Swivels and tilts
Detection angle
Motion detector
With remote control
Dispose of packaging and
product in an environmentally
friendly manner!
Risk of environmental damage
from incorrect disposal of
batteries/rechargeable
batteries!
Packaging made of FSC
certied wood mix
With the CE label, the
manufacturer conrms that this
product complies with the
applicable European directives�
zIntended use
This product is solely designed to imitate a
surveillance system� The product is intended
for automatic illumination in outdoor areas
(e�g� garden, patio, etc�)�
The product is not suitable for general indoor
lighting in the home� This product is intended
for use in private households only�
Any type of use other than that described
above or any modication of the product is
prohibited and likely to cause damage or

8GB
even personal injury� The manufacturer or
retailer accepts no liability for loss or
damage that occurs as a result of use other
than intended or incorrect use�
zIncluded in package
1 x dummy camera with motion sensor
1 x wall bracket
1 x remote control (incl� battery)
1 x
mounting material
(3 x wall plugs, 3 x screws)
1 x instruction manual
zDescription of parts
1Dummy camera with motion sensor
2Solar panel
3Guide holes
4Ball joint
5Wall bracket
6Star knob
7ON/OFF button
8Motion sensor
9Signal LED
10
Remote control
11
Screw
12
Wall plug
13
Thread
zTechnical data
Model number: 1115-S
Input: 3�7 V
max� 0,8 W
Li-ion battery: 3�7 V ,
1200 mAh
(non-replaceable)
Solar panel: 5�5 V
Light source: LEDs
Motion sensor
(detection range):
3-5 m
Protection class: III
Protection rating: IP44
Maximum projection
area: 33 cm²
Recommended
installation height: approx� 2-3 m
Dimensions (including
wall bracket): 28 x 9 x 13�5 cm
Weight: 370 g incl� batteries
Battery (remote
control): 1 x CR2025,
3 V
zSafety information
Safety information
WARNING!
RISK OF FATAL INJURY AND
ACCIDENTS FOR INFANTS AND
CHILDREN! Never leave children
unsupervised with the packaging material�
There is a danger of suffocation from the
packaging material� Children often
underestimate the dangers� Always keep
children away from the product�
This product may be used by children aged
8 years or above and by persons with
limited physical, sensory or mental
capabilities or lacking in experience and
knowledge if they are supervised or have
been instructed as to the safe use of the
product and understand the resulting risks�
Do not let children play with the product�
Cleaning and maintenance may not be
carried out by children without proper
supervision�

9
GB
RISK OF DAMAGE!
Improper handling of the product
may result in damage to the
product�
Do not use the product if you notice any
damage�
The manufacturer/distributor of this product
accepts no responsibility whatsoever for
personal injury or damage resulting from
incorrect installation or use�
Never tamper with or modify the product�
Do not immerse the product in water or any
other liquids�
Keep the product away from naked ames
and hot surfaces�
Do not open up the casing and only have
the product repaired by qualied
professionals� To that end you should
contact a specialist repairer� No liability or
warranty claims are accepted in cases
where repairs have been carried out by
unauthorised persons or the product has
been incorrectly wired or used�
The light source of this luminaire is not
replaceable�
When the light source reaches its end of
life the wohole luminarie should be
replaced�
Never look directly into the light source�
Safety instructions for
batteries/rechargeable
batteries
RISK OF FATAL INJURY!
Keep batteries/
rechargeable batteries out of the reach of
children� If swallowed, seek medical advice
immediately!
PLEASE NOTE!
The rechargeable battery
is not replaceable� When it is worn out, the
entire product must be disposed of�
EXPLOSION HAZARD!
Never
recharge non-rechargeable
batteries� Do not short-circuit and/
or open up batteries/rechargeable
batteries. They could overheat, cause a re
or explode�
Never throw batteries/rechargeable
batteries into re or water.
Do not expose the batteries/rechargeable
batteries to mechanical stress�
zRisk of leakage from
batteries/rechargeable
batteries
Avoid exposing (rechargeable) batteries to
extreme conditions and temperatures, e�g�
radiators or direct sunlight�
Avoid contact with skin, eyes and mucous
membranes! In the event of skin contact
with battery acid, rinse the affected area
immediately with plenty of clean water and
seek medical advice immediately!
WEAR PROTECTIVE GLOVES!
Leaking or damaged batteries/
rechargeable batteries can cause
chemical burns if they come into contact
with the skin� Therefore, wear suitable
protective gloves in such cases�
In the event that a battery leaks, remove it
from the product immediately to avoid
damage�
CAUTION!
This product contains a
coin battery (button cell containing
lithium)� Coin batteries can cause
severe internal chemical burn injuries when
swallowed�
CAUTION!
Dispose of spent
batteries immediately� Keep the
batteries out of reach of children! If
a battery is swallowed, seek medical
advice immediately�
WARNING: Keep out of reach of
children� Swallowing can lead to chemical
burns, perforation of soft tissue, and
death� Severe burns can occur within 2 h
of ingestion� Seek medical attention
immediately�

10 GB
zAssembly and installation
Please note:
Take the product out of its
packaging and remove all packing material�
Check that all package contents are
present�
Check if the product or individual parts are
damaged� Should you detect damage, do
not use the product� Please contact the
retailer via the service address indicated�
Decide prior to mounting where the product
is to be mounted. Before drilling the xing
holes, satisfy yourself that there is no danger
of drilling into or damaging gas or water
pipes or electricity cables in the position
where you are about to drill the holes�
Use a drill to drill the holes into the masonry�
Observe all safety instructions provided in
the operation and safety manual for your
drill� Otherwise there is a risk of serious or
fatal injury from electric shock�
Please note:
The xings included are
suitable for conventional solid masonry�
Please check independently what kind of
xings are best suited for the surface on
which you intend to mount the light� If
necessary, you should seek the advice of an
expert�
What to consider when deciding where
to mount the product:
Ensure the product illuminates the desired area�
Choose a mounting point which is clearly
visible and therefore suitable for creating a
convincing illusion of surveillance�
The motion sensor has a detection range
(eld of view) of 3 to 5 m. Make sure that
the motion sensor covers the desired area�
The recommended installation height is 2 to 3 m�
If possible, mount the light in a position
where it will not be exposed to dirt or dust
and is protected from rain and other
weathering effects�
Please note:
The solar panel should be
positioned where it will be exposed to as
much direct sunlight as possible� Even partial
shade during the day can signicantly
impair the charging process�
Orientation:
The optimum alignment is
facing south� Choose an orientation facing
slightly to the west rather than slightly to the
east�
Mounting the light
Please note:
Make sure that you mount the
wall bracket the correct way around� Refer to
Figure A for guidance�
Transfer the positions of the guide holes 3
of the wall bracket 5to the mounting
point on the wall�
Drill two holes (dia� 6 mm) and insert the
matching wall plugs
12
(see Fig� B)�
Screw the wall bracket 5 rmly in place
by inserting the screws
11
through the
guide holes 3into the wall plugs
12
and
rmly tightening them (see Fig. B).
Fix the dummy camera 1onto the wall
bracket�
Insert the thread
13
through the opening in
the wall bracket
5
and screw the star knob
6
onto the thread from below (see Fig� C)�
Ensure that it is xed rmly in place.
You can then adjust the position of the
dummy camera 1horizontally and
vertically using the ball joint 4(see Fig� D)�
z
First-time operation
Charging the battery
The battery is charged in all operating
modes� To optimise initial charging, leave
the product switched off curing charging�
Please note:
The battery is fully charged
after it has been well exposed to sunlight for
7 to 8 hours� The duration of the charging

11
GB
process depends on the battery‘s charge
level and the quality of the sunlight�
Using the remote control
Please note:
The batteries supplied are
already inserted into the product and tted
with an isolator strip� Remove this strip to
start using the product�
z
Operation
The product can be operated in three
different modes� The operating mode is
selected using the remote control
10
�
Please note:
The solar panel will turn on
the product in twilight or darkness in the
mode you have set�
Please note:
Battery charging via the solar
panel does not depend on which mode is
selected� The battery is charged continuously
at all times�
First, turn the product on by pressing the
ON/OFF button 7�
Mode: Sensor mode
Press the “Sensor mode” button on the
remote control
10
(see g. A).
If the motion sensor detects movement
within its range, the product will light up at
maximum brightness�
If no further movement is detected after
approx� 30 seconds, the LEDs will switch
off�
Once the LEDs are off and the motion
sensor is in standby, the signal LED 9will
ash red (see Fig. A).
You can also initiate sensor mode by
pressing the ON/OFF button 7�
Mode: Flash
Press the “Flash” button on the remote
control
10
�
The LEDs will ash for approx. 30 seconds.
“Sensor mode” is now activated (see
“Mode: Sensor mode”)�
Mode: 75% brightness
Press the “75%” button on the remote
control
10
�
The product will light up with low
brightness� The motion sensor is inactive in
this mode�
Switching the product o
You can switch the product off using the
remote control
10
by pressing the ON/
OFF button 7�
Please note:
You can still operate the
product using the remote control�
To do this, press the “Sensor mode” button�
You can also switch the product off using the
ON/OFF button�
zReplacing the batteries
(remote control)
Open the battery compartment of the
remote control
10
�
Squeeze the tab and remove the battery
compartment�
Remove the depleted battery and dispose
of it properly�
Insert a new battery into the battery
compartment, taking care to ensure correct
polarity (+/-)�
Push the battery compartment into the
remote control� Ensure that the battery
compartment is rmly closed.

12 GB
zCleaning and storage
Switch the product off if you want to stop
using it, store it away and/or clean it�
Regularly inspect the motion sensor 8and
the solar panel 2to make sure they are
not dirty� Remove any dirt to ensure the
product works correctly�
Keep the product and especially the solar
panel free of snow and ice in winter�
Use only a dry, lint-free cloth for cleaning�
If the product is very dirty, dampen the
cloth slightly�
zTroubleshooting
= Fault
=Cause
= Solution
= The product fails to switch on�
= The product is switched off�
= Press the ON/OFF button 7to
switch the product on�
= The light is ickering.
= The battery is almost fully discharged�
= Charge the battery (see section
"Charging the battery")�
zDisposal
Note the labels on the packaging
materials when sorting the waste;
they are marked with abbreviations
(a) and numbers (b) with the
following meanings:
1-7: Plastics
20-22: Paper and cardboard
80-98: Composite materials
You can nd out how to dispose of
the used product by contacting your
local district or city council�
In the interest of environmental
protection, when the product has
reached the end of its useful life, do
not dispose of it as general
household waste but have it
properly recycled� For information
on recycling centres and their
opening times, please contact your
local council�
Faulty or used batteries must be recycled in
accordance with Directive 2006/66/EC
and its amendments� Return batteries and/or
the product to the local recycling facilities
provided�
Risk of environmental damage
from incorrect disposal of
rechargeable batteries!
Batteries must not be disposed of as general
household waste� They may contain toxic
heavy metals* and are subject to special
waste treatment� Batteries and rechargeable
batteries that are not permanently xed
inside the product must be removed before
disposal of the product and disposed of
separately� Please ensure batteries/
rechargeable batteries are fully discharged
when disposed of! Wherever possible, use
rechargeable batteries rather than single-use
batteries�
*) Marked as followed: Cd = cadmium,
Hg = mercury, Pb = lead
zWarranty
Dear customer, This product comes with a
3-year warranty from the date of purchase�
In the event that this product is faulty, you
have legal rights against the seller of the
product� These statutory rights are not
restricted by our warranty as set out below�
Warranty terms
The warranty period begins with the date of
purchase� Please keep the original receipt in
a safe place� It is required as proof of
purchase� If a material or manufacturing
defect occurs within three years of the date
of purchase, we will repair or replace the

13
GB
product for you free of charge, or refund the
purchase price, at our discretion� This
warranty service is granted provided that the
faulty device and the proof of purchase
(receipt) are presented within three years,
along with a brief written description of the
fault and of when it occurred� If the fault is
covered by our warranty, we will return the
xed product or send you a new one. No
new warranty period shall begin upon repair
or replacement of the product�
Warranty period and statutory
warranty claims
The warranty period is not renewed after a
warranty service has been granted� This rule
shall also apply for any replaced or repaired
parts� Any damage or faults that already
existed when buying the product must be
reported immediately upon unpacking the
product� A fee is charged for any repairs that
are carried out after the end of the warranty
period�
Warranty scope
The device was carefully manufactured
according to the strictest quality guidelines
and thoroughly tested before delivery� The
warranty applies to material or
manufacturing defects� This warranty does
not apply to product parts that are subject to
normal wear and tear and can therefore be
regarded as wearing parts, or damage to
fragile parts, such as switches, rechargeable
batteries or parts that are made of glass� This
warranty is void if the product has been
damaged, improperly used or serviced� To
ensure proper use, all instructions included in
the manual must be followed carefully� All
uses and actions that users are discouraged
from or warned of in the manual must be
avoided under all circumstances� The product
is intended for private household use only,
and not for commercial activities� The
warranty is void, if the product is treated
inappropriately, if force is applied, and in
the case of any manipulation that is not
carried out by our authorised service branch�
Warranty processing
To ensure your request is handled swiftly,
please observe the following
Notes:
Please have the receipt and the article
number (e�g� IAN 123456) ready as proof
of purchase for all enquiries�
Please refer to the type plate on the product,
an engraving on the product, the cover of
the manual (bottom left) or the sticker on the
back or base of the product to nd out the
product number�
In the case of any malfunctions or other
defects, please call or email the service
department indicated below as a rst step.
After your product has been registered as
faulty, you can send it to the specied
service address, free of charge� Please
include the proof of purchase (receipt) and
information about the defect and about
when it occurred�

14 FI
zService
GB
Service Great Britain
Tel�: 00800 80040044
E-Mail: administration@mynetsend�de
IAN 414382_2201
Please have the receipt and the article
number (e�g� IAN 123456) ready as proof
of purchase for all enquiries�
You can nd an up-to-date version of the
operating instructions at: www�citygate24�de
You can download this and many other
manuals, product videos and installation
software at
www.lidl-service.com
�
Scanning the QR code on the front page will
take you directly to the Lidl Service web
page (www�lidl-service�com) where you can
access the user instructions by entering the
item number (IAN) 123456_7890�
Tyhjennyskamera
liiketunnistimella
zJohdanto
Onnittelemme sinua uuden tuotteesi
ostamisen johdosta� Olet valinnut
korkealaatuisen tuotteen� Lue tämä
käyttöopas kokonaan ja huolellisesti�
Käyttöopas on osa tuotetta ja se sisältää
tärkeitä ohjeita käyttöönottoa ja käsittelyä
varten� Noudata aina kaikkia
turvallisuusohjeita� Jos sinulla on kysyttävää
tai olet epävarma tuotteen käsittelystä, ota
yhteyttä jälleenmyyjään tai huoltopisteeseen�
Pidä tämä opas turvallisessa paikassa ja
luovuta se tarvittaessa kolmansille
osapuolille�
zMerkkien selitys
Lue käyttöopas!
Käyttöohjeen julkaisupäivä
(kuukausi/vuosi)
Valmistuspäiväys
(kuukausi/vuosi)
Tasajännite
Lasten suojaaminen
tapaturmaja hengenvaaralta!
Noudata varoituksia ja
turvallisuusohjeita!
Räjähdysvaara!
Käytä suojakäsineitä!
Suojattu kiinteiltä vierailta
esineiltä, joiden halkaisija on
≥ 1,0 mm, roiskevesitiivis

15
FI
Ei sovellu sisävalaistukseen
Tämä symboli tarkoittaa, että
tuote toimii erityisen
matalajännitteisellä (SELV /
PELV) (suojaluokka III)�
Sisältää paristoja
(kaukosäädin)
Panoroi ja kallista
Liiketunnistimen tunnistuskulma
Kaukosäätimellä
Hävitä pakkaus ja tuote
ympäristöystävällisellä tavalla!
Akkujen / paristojen
virheellisen hävittämisen
seurauksena voi olla
ympäristövahinkoja!
Pakkaus valmistettu FSC
sertioidusta sekapuusta
CE-merkinnällä valmistaja
vahvistaa, että tämä sähkölaite
on sovellettavien
eurooppalaisten direktiivien
mukainen�
zMääräystenmukainen
käyttö
Tuotetta käytetään vain valvontajärjestelmän
simulointiin� Tuote on tarkoitettu
automaattiseen valaistukseen ulkotiloissa
(esim� puutarha, terassi, jne�)�
Tuote ei sovellu huonevalaistukseen� Tämä
tuote on tarkoitettu käytettäväksi vain
kotitalouksissa�
Muu kuin yllä kuvattu käyttö tai tuotteen
muuttaminen ei ole sallittua,
ja se voi johtaa omaisuusvahinkoihin tai jopa
henkilövahinkoihin� Valmistaja tai
jälleenmyyjä ei vastaa vahingoista, jotka
ovat aiheutuneet määräystenvastaisesta tai
väärästä käytöstä�
zToimitussisältö
1 x Tyhjennyskamera liiketunnistimella
1 x seinäpidike
1 x kaukosäädin (sisältää pariston)
1 x asennusmateriaali
(3 x tappia, 3 x ruuvia)
1 x käyttöohje
zOsien kuvaus
1Tyhjennyskamera liiketunnistimella
2Aurinkopaneeli
3Ohjausreiät
4Pallonivel
5Seinäpidike
6Nuppi
7ON/OFF-painike
8Liiketunnistin
9Signaali-LED
10
Kaukosäädin
11
Ruuvi
12
Tappi
13
Kierre
zTekniset tiedot
Mallin numero: 1115-S
Tulo: 3,7 V
maks� 0,8 W
Litiumioniakku: 3,7 V ,
1200 mAh
(ei vaihdettavissa)
Aurinkopaneeli: 5,5 V

16 FI
Lamppu: LEDs
Tunnistusalueen
(tunnistusalue):
3-5 m
Suojausluokka: III
Suojausaste: IP44
Suurin projektioalue: 33 cm²
Suositeltava
asennuskorkeus: n� 2-3 m
Mitat (mukaan lukien
seinäpidin): 28 x 9 x 13,5 cm
Paino: 370 g paristoineen
Paristo (kaukosäädin): 1 x CR2025,
3 V
zTurvallisuusohjeet
Turvallisuusohjeet
VAROITUS!
LASTEN SUOJAAMINEN
TAPATURMA- JA
HENGENVAARALTA! Lapsia ei saa koskaan
jättää pakkausmateriaalien luo ilman
valvontaa� Pakkausmateriaalit voivat aiheuttaa
tukehtumisvaaran� Lapset usein aliarvioivat
vaarat� Lapset on aina pidettävä poissa
tuotteen luota�
Tätä tuotetta voivat käyttää vähintään
8-vuotiaat lapset sekä henkiöt, joiden
fyysiset, aistitoimintoihin liittyvät tai
psyykkiset kyvyt ovat heikentyneet tai joilta
puuttuu asianmukainen kokemus ja tieto,
mikäli heitä valvotaan tai opastetaan
tuotteen turvalliseen käyttöön ja he
ymmärtävät siitä aiheutuvat vaarat� Lapset
eivät saa leikkiä tuotteella� Tuotteen
puhdistus- ja huoltotoimenpiteitä ei saa
antaa lasten tehtäväksi ilman valvontaa�
HENGENVAARA!
Lapsia ei saa päästää
työskentelyalueelle asennuksen aikana�
Toimitukseen sisältyy joukko ruuveja ja
muita pieniä osia� Osat voivat olla
hengenvaarallisia nieltynä tai hengitettynä�
VAURIOITUMISVAARA!
Tuotteen epäasianmukainen käsittely
voi johtaa tuotteen vaurioitumiseen�
Tuotetta ei saa käyttää, jos siinä havaitaan
vaurioita�
Tämän tuotteen valmistaja/jakelija ei
vastaa vahingoista, jotka johtuvat
virheellisestä asennuksesta/väärästä
käytöstä�
Älä upota tuotetta veteen tai muihin
nesteisiin�
Pidä tuote etäällä avotulesta ja kuumista
pinnoista�
Älä koskaan käsittele tai vaihda tuotetta�
Älä avaa koteloa, vaan jätä korjaus
ammattilaisille� Voit tehdä tämän ottamalla
yhteyttä erikoistuneeseen korjaamoon�
Itsenäisesti suoritettujen korjausten, väärän
liitännän tai virheellisen käytön yhteydessä
vastuu ja takuuvaatimukset ovat
poissuljettuja�
LEDit eivät ole vaihdettavissa� Kun
valonlähde on kulunut loppuun, koko tuote
on vaihdettava�
Älä katso suoraan valonlähteeseen�
Turvallisuusohjeet
paristoille/akuille
HENGENVAARA!
Säilytä paristot / akut
lasten ulottumattomissa� Nielemistilanteessa
on välittömästi hakeuduttava lääkärin
hoitoon!
HUOMIO!
Akku ei ole vaihdettavissa� Kun
se on käytetty loppuun, koko tuote on
hävitettävä�

17
FI
RÄJÄHDYSVAARA!
Paristoja,
joita ei ole tarkoitettu ladattaviksi,
ei saa koskaan yrittää ladata� Älä
oikosulje paristoja / akkuja ja/tai älä avaa
näitä� Seurauksena voi olla
ylikuumeneminen, palovaara tai räjähdys�
Älä koskaan heitä paristoja / akkuja tuleen
tai veteen�
Paristoja / akkuja ei saa altistaa
mekaaniselle rasitukselle�
zParistojen/
akkujenvuotovaara
Äärioloja ja -lämpötiloja, jotka voivat
vaikuttaa paristoihin / akkuihin, on
vältettävä, esim� lämpöpatterit / suora
auringonvalo�
Iho-, silmä- ja limakalvokosketuksia on
vältettävä! Akkuhapolle mahdollisesti
altistuneet alueet on huuhdeltava
välittömästi runsaalla, puhtaalla vedellä�
Altistuksen jälkeen hakeuduttava
välittömästi lääkärin hoitoon!
KÄYTÄ SUOJAKÄSINEITÄ!
Vuotaneet tai vaurioituneet paristot
/ akut voivat aiheuttaa
palovammoja joutuessaan iholle� Tällaisissa
tapauksissa on käytettävä sopivia
suojakäsineitä�
Vuotavat paristot/akut on vaurioiden
välttämiseksi poistettava laitteesta
välittömästi�
HUOMIO! Tämä tuote sisältää
kolikkopariston (nappikenno, jossa litiumia)�
Kolikkoparisto voi aiheuttaa vakavia
sisäisiä kemiallisia palovammoja nieltynä�
HUOMIO! Hävitä käytetyt paristot
välittömästi� Pidä paristot poissa lasten
ulottuvilta! Ota heti yhteys lääkäriin, jos
paristo niellään�
VAROITUS: Säilytettävä lasten
ulottumattomissa� Nieleminen voi johtaa
kemiallisiin palovammoihin,
pehmytkudoksen puhkeamiseen ja
kuolemaan� Vakavia palovammoja voi
syntyä 2 tunnin kuluessa nielemisestä�
Hakeudu välittömästi lääkärin hoitoon�
zAsennus
Huomio:
Ota tuote pakkauksesta ja poista
kaikki pakkausmateriaalit�
Tarkista, että toimitus on täydellinen�
Tarkista, onko tuote tai yksittäiset osat
vaurioituneet� Ota yhteyttä jälleenmyyjään
käyttämällä takuukortissa ilmoitettua
huolto-osoitetta�
Ennen kiinnitysreikien poraamista varmista,
että kaasu-, vesi- tai sähkölinjoja ei saa
porata tai vahingoittaa porauspaikassa�
Käytä porauksiin tehtävään sopivaa
porakonetta� Noudata porakoneen käyttö- ja
turvallisuusohjeita� Virheiden seurauksena
voi olla tapaturma tai hengenvaarallinen
sähköisku�
Huomio:
Mukana toimitettu
kokoonpanomateriaali soveltuu normaalille
kiinteälle muuraukselle� Selvitä mikä
asennusmateriaali sopii valitsemallesi
asennuspinnalle� Tarvittaessa saat lisätietoja
tästä asiantuntijalta�
Huomioi asennuspaikan valinnassa
seuraavat seikat:
Varmista, että tuote valaisee halutun
alueen�
Valitse asennuspaikka, joka on helposti
havaittavissa ja sopii siksi valevalvontaan�
Liiketunnistimen tunnistusetäisyys on 3-5 m�
Varmista, että liiketunnistin peittää halutun
alueen�
Suositeltava asennuskorkeus on 2-3 m�
Jos mahdollista, asenna ulkovalaisin
liattomaan ja pölyttömään paikkaan, joka
on suojattu sateelta ja muilta
sääolosuhteilta�

18 FI
Huomio:
Aurinkopaneeli 2tarvitsee
suoraa auringonvaloa kuin mahdollista�
Aurinkopaneelin osittainenkin varjostus
päivän aikana voi merkittävästi heikentää
lataustehoa�
Ilmansuunta:
Optimaalinen suuntaus on
etelään päin� On suositeltavaa valita
mieluummin hieman länteen kuin itään päin
poikkeava suunta�
Valaisimen asentaminen
Huomio:
Varmista, että asennat
seinätelineen oikein päin� Katso Kuva A�
Siirrä seinäkiinnikkeen 5ohjausreikien 3
paikat asennuspaikkaan seinälle�
Poraa kaksi reikää (ø 6 mm) ja aseta
sopivat tapit
12
(katso Kuva B)�
Kiristä seinäpidike 5asettamalla ruuvit
11
ohjainreikien 3läpi tappeihin [12]ja
kiristämällä ne tiukasti (katso Kuva B)�
Kiinnitä tyhjennyskamera 1
seinätelineeseen�
Työnnä kierre
13
seinäkiinnikkeen 5
aukon läpi ja ruuvaa nuppi 6kierteeseen
alhaalta (katso kuva C)� Varmista, että se
on tukevasti paikallaan�
Tämän jälkeen voit kohdistaa
tyhjennyskameran 1vaaka- ja
pystysuunnassa pallonivelen 4avulla
(katso kuva D)�
z
Käyttöönotto
Akun lataaminen
Akku latautuu jokaisessa tilassa� Voit
saavuttaa optimaalisen latauksen alussa, kun
tuote on kytketty pois päältä�
Huomio:
Akku latautuu 7–8 tunnin kuluessa
hyvässä auringonvalossa� Latausajan kesto
riippuu akun varaustilasta ja
auringonpaisteen intensiteetistä�
Kaukosäätimen käyttö
Huomio:
Toimitetut paristot on jo asetettu
tuotteeseen ja niissä on suojanauha� Poista
tämä, jotta tuote otetaan käyttöön�
z
Käyttö
Tuotetta voidaan käyttää kolmessa eri
tilassa� Nämä voidaan asettaa
kaukosäätimellä
10
�
Huomio:
Aurinkopaneeli kytkee tuotteen
päälle hämärässä tai pimeässä
valitsemassasi tilassa�
Huomio:
Akun lataaminen aurinkopaneelin
kautta ei riipu valitusta tilasta� Lataamista
tapahtuu aina�
Käynnistä tuote ensin painamalla ON/
OFF-painiketta 7�
Tila: Anturitila
Paina „Sensor mode“ -painiketta
kaukosäätimessä
10
(katso kuva A)�
Jos liiketunnistin havaitsee liikkeen
alueellaan, valaisin syttyy täydellä
kirkkaudella�
LED-valot sammuvat noin 30 sekunnin
kuluttua, mikäli uutta liikettä ei havaita�
Heti, kun LED-valot sammuvat ja
liiketunnistin on valmis, merkkivalo 9
(katso kuva A) vilkkuu punaisena�
Lisäksi voit asettaa anturitilan painamalla
ON/OFF-painiketta 7�
Tila: Salamavalo
Paina „Sensor mode“ -painiketta
kaukosäätimessä
10
�
LED-valot vilkkuvat noin 30 sekuntia�
„Anturitila“ aktivoituu liitännässä (katso
„Tila: Anturitila“)�

19
FI
Tila: 75 % - kirkkaus
Paina „75%“-painiketta kaukosäätimessä
10
�
Tuote valaisee alennetulla kirkkaudella�
Liiketunnistin ei ole tällöin aktiivinen�
Tuotteen kytkeminen pois päältä
Voit sammuttaa tuotteen kaukosäätimellä
10
painamalla ON/OFF-painiketta 7�
Huomio:
Huomaa, että voit silti ohjata
tuotetta kaukosäätimellä�
Voit tehdä tämän painamalla „Anturitila“
-painiketta�
Vaihtoehtoisesti voit sammuttaa tuotteen
ON/OFF-painikkeella�
zPariston vaihto
(kaukosäädin)
Avaa kaukosäätimen
10
paristolokero�
Purista kielekettä ja vedä paristolokero ulos�
Poista tyhjä akku ja hävitä se
asianmukaisesti�
Aseta paristo paristolokeroon sen
napaisuuden (+/-) mukaisesti�
Työnnä paristolokero kaukosäätimeen�
Varmista, että paristolokero on tiukasti
suljettu�
zPuhdistus ja varastointi
Sammuta tuote, kun et halua tätä käyttää,
varastoit ja/tai puhdistaa sen�
Tarkista liiketunnistin 8ja aurinkopaneeli
2säännöllisesti likaantumisten varalta�
Mahdolliset epäpuhtaudet on poistettava
tuotteen asianmukaisen toiminnan
varmistamiseksi�
Pidä tuote, varsinkin aurinkopaneeli,
talvella puhtaana lumesta ja jäästä�
Käytä puhdistukseen vain kuivaa,
nukkaamatonta liinaa� Jos se on erittäin
likainen, kostuta hiukan liinaa�
zVianpoisto
= Vika
=Syy
= Korjaus
= Tuote ei käynnisty�
= Tuote on kytketty pois päältä�
= Kytke tuote päälle painamalla ON/
OFF-painiketta 7�
= Valo välkkyy�
= Akku on lähes tyhjä�
= Lataa akku (katso luku "Akun
lataaminen")�
zHävittäminen
Lajittelun yhteydessä on
noudatettava seuraavia lyhenteillä
(a) ja numeroilla (b) varustettuja
pakkausmateriaalimerkintöjä:
1–7: Muovit
20–22: Paperi ja pahvi
80 – 98: Komposiittimateriaalit
Lisätietoja hävittämisvaihtoehdoista
on saatavana paikallisilta
ympäristöviranomaisilta�
Tuotetta ei ympäristösyistä saa
hävittää kotitalousjätteenä�
Hävittämisessä on noudatettava
asianmukaisia määräyksiä� Tiedot
keräyspisteistä ja niiden
aukioloajoista ovat saatavissa
paikallisilta ympäristöviranomaisilta�
Vialliset tai käytetyt akut on kierrätettävä
direktiivin 2006/66/EY mukaisesti�
Hävitettävät akut ja/tai tuote on toimitettava
hyväksyttyihin keräyspisteisiin�
Akkujen virheellisen
hävittämisen seurauksena voi
olla ympäristövahinkoja!
Akkujen hävittäminen talousjätteiden mukana
on kielletty� Akut voivat sisältää myrkyllisiä
raskasmetalleja*) ja niitä on käsiteltävä
ongelmajätemääräysten mukaisesti� Paristot

20 FI
ja ladattavat akut, joita ei ole asennettu
pysyvästi laitteeseen, on poistettava ennen
hävittämistä ja hävitettävä erikseen� Anna
paristot ja ladattavat paristot vain, kun ne
ovat purkautuneet! Käytä ladattavia paristoja
kertakäyttöisten paristojen sijaan aina kun
mahdollista�
*) merkitty: Cd = kadmium, Hg = elohopea,
Pb = lyijy�
zTakuu
Takuuaika on 3 vuotta ostopäivästä lukien�
Kuluttajalla on oikeus palauttaa viallinen/
puutteellinen tuote myyjälle� Takuu ei rajoita
tätä oikeutta�
Takuuehdot
Takuuaika alkaa ostopäivästä� Säilytä
alkuperäinen ostokuitti huolellisesti� Kyseinen
asiakirja vaaditaan todisteena ostoksesta�
Jos tuotteessa ilmenee materiaali- tai
valmistusvirheitä kolmen vuoden kuluessa
ostopäivästä, tuote korjataan tai korvataan
ilmaiseksi harkintamme mukaan� Tämä
takuupalvelu edellyttää, että viallinen laite ja
ostotodistus (myyntitodistus) esitetään kolmen
vuoden kuluessa ja kuvataan lyhyesti
kirjallisesti mikä vika on ja milloin se ilmeni�
Jos takuumme kattaa vian, saat takaisin
korjatun tai uuden tuotteen� Uutta takuuaikaa
ei voida alkaa, kun tuote on korjattu tai
vaihdettu�
Takuuaika ja lailliset puutteelliset
vaatimukset
Takuu ei pidennä takuuaikaa� Tämä koskee
myös vaihdettuja ja korjattuja osia�
Mahdollisista vaurioista ja virheistä, joita voi
olla jo oston aikana, on ilmoitettava
välittömästi pakkauksesta purkamisen
jälkeen� Takuuajan jälkeiset korjaukset on
maksettava�
Takuun laajuus
Tuote on valmistettu tiukkojen
laatustandardien mukaisesti ja testattu
huolellisesti ennen toimitusta� Takuu koskee
materiaali- ja valmistusvirheitä� Tämä takuu
ei koske tuotteen osia, jotka ovat normaalissa
kulumisessa, joten niitä voidaan pitää
kulutusosina tai hauraiden osien
vaurioitumisena, esim� B� kytkimet, akut tai
tuotteet on valmistettu lasista� Takuu raukeaa,
jos tuote on vahingoittunut tai sitä on
käytetty tai huollettu epäasianmukaisesti�
Tuotteen oikeaa käyttöä varten kaikkia
käyttöohjeissa lueteltuja ohjeita on
noudatettava tarkasti� Käyttöä ja toimia, joita
ei suositella tai varoiteta käyttöohjeissa, on
vältettävä� Tuote on tarkoitettu vain
yksityiseen käyttöön eikä kaupalliseen
käyttöön� Takuu raukeaa väärinkäytöksestä,
voimankäytöstä ja muista toimenpiteistä,
joita valtuutettu huoltokonttorimme ei ole
suorittanut�
Käsittely takuun yhteydessä
Seuraa seuraavia ohjeita varmistaaksesi,
että pyyntösi käsitellään nopeasti
huomio:
Tiedustelujen yhteydessä on esitettävä
ostokuitti ja ilmoitettava tuotenumero (esim�
IAN 123456)�
Tuotenumero löytyy tuotteen tyyppikilvestä,
tuotteen kaiverruksesta, ohjeiden
otsikkosivulta (vasen alaosa) tai tarrasta
tuotteen takana tai pohjassa�
Jos toiminnallisia virheitä tai muita vikoja
esiintyy, ota ensin yhteys alla olevaan
huolto-osastoon puhelimitse tai
sähköpostitse�
Voit sitten lähettää vialliseksi todetun
tuotteen ostotodistuksella (kuitti) ja
yksityiskohdilla siitä, mikä vika on, ja
milloin se ilmeni sinulle ilmaiseksi sinulle
annetulle palveluosoitteelle�
Table of contents
Languages: