9GB
Setting up the light
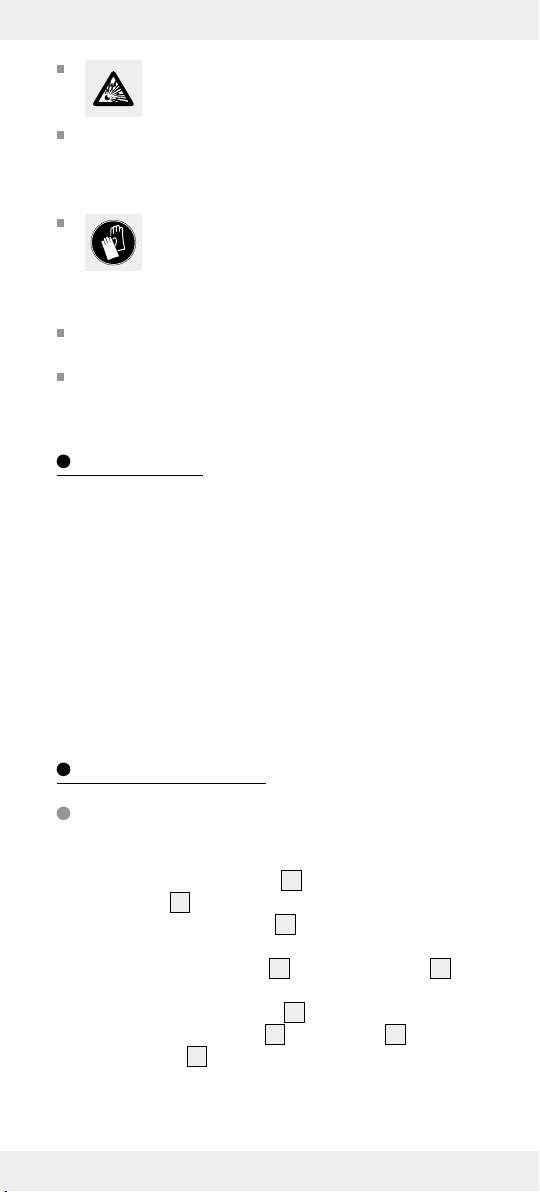
Insert the assembled solar light far enough into the
ground (lawn, flower bed) for it to be stable.
Make sure you keep proper footing and balance at all
times. Do not use any force when assembling or setting-up
the product, e.g. hammer blows. This will damage the
product. In order to achieve the best result, set the solar
garden lamp up in a place where the solar cell will get
direct sunlight for as long as possible.
Make sure that the solar cell is not influenced by any
other source of light such as yard or street lighting as
otherwise the light will not come on in twilight.
The light automatically switches on in twilight conditions
and off again when normal outdoor lighting conditions
return.
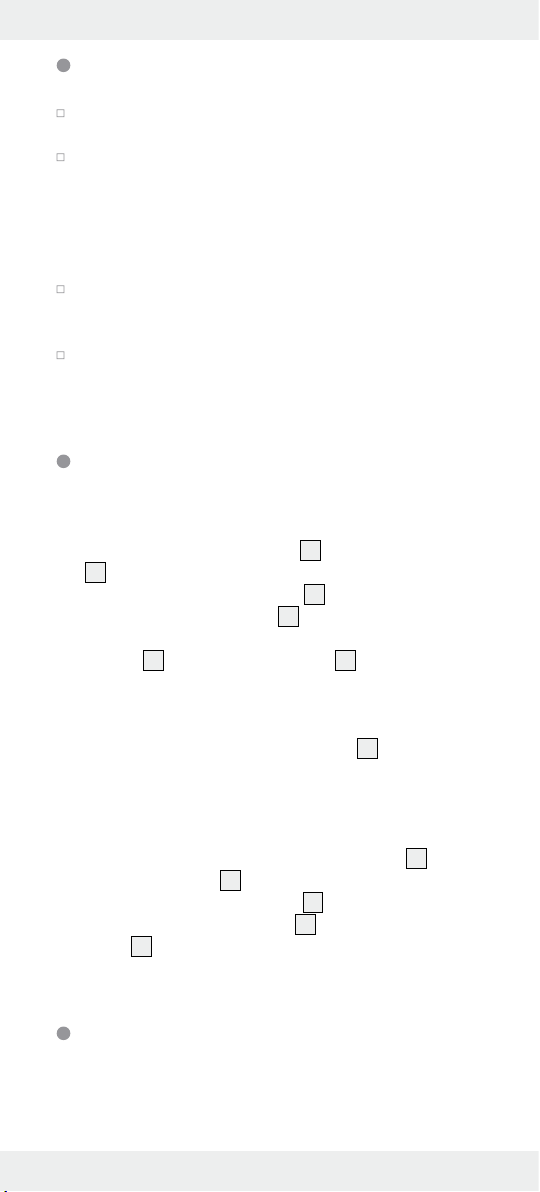
Replacing the rechargeable battery
The battery should be replaced every 12 months to ensure
optimum performance.
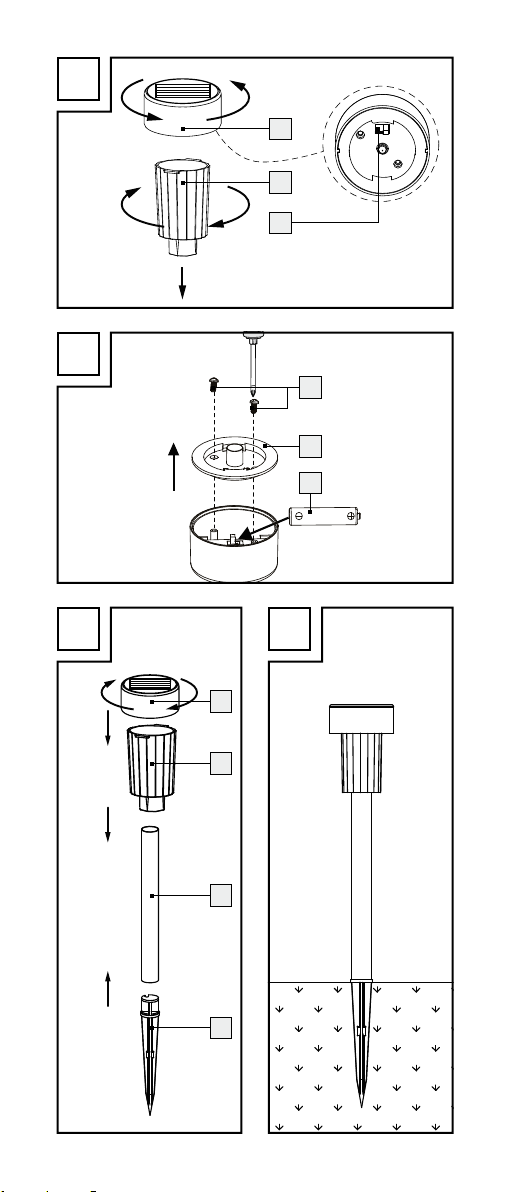
1. Separate the solar cell housing 1from the lamp shade
2by moving it anti-clockwise (see Fig. A). Switch off the
lamp with the ON-/OFF-switch 5.
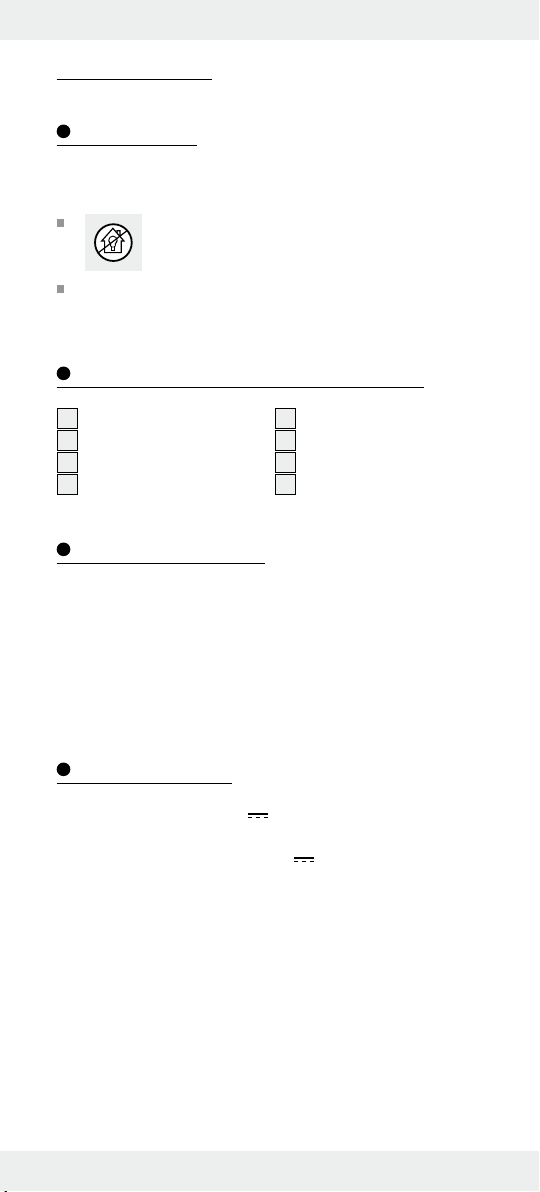
2. Loosen the fastening screws 6by using a small cross
head screwdriver and then lever out the battery compart-
ment lid 7of the solar cell housing 1with the help of a
slot screwdriver (see Fig. B).
3. Take care not to damage the cables and cable connec-
tions (see Fig. B).
4. Exchange the old rechargeable battery 8to a new one.
Take care to the correct polarity, when inserting the new
rechargeable battery. The polarity is indicated in the bat-
tery compartment. The new rechargeable battery has to
have the same technical data like the old one.
5. Now again fasten the battery compartment lid 7, fasten
the fastening screws 6by using a small cross head screw-
driver. Slide the On/Off switch 5to the position ON.
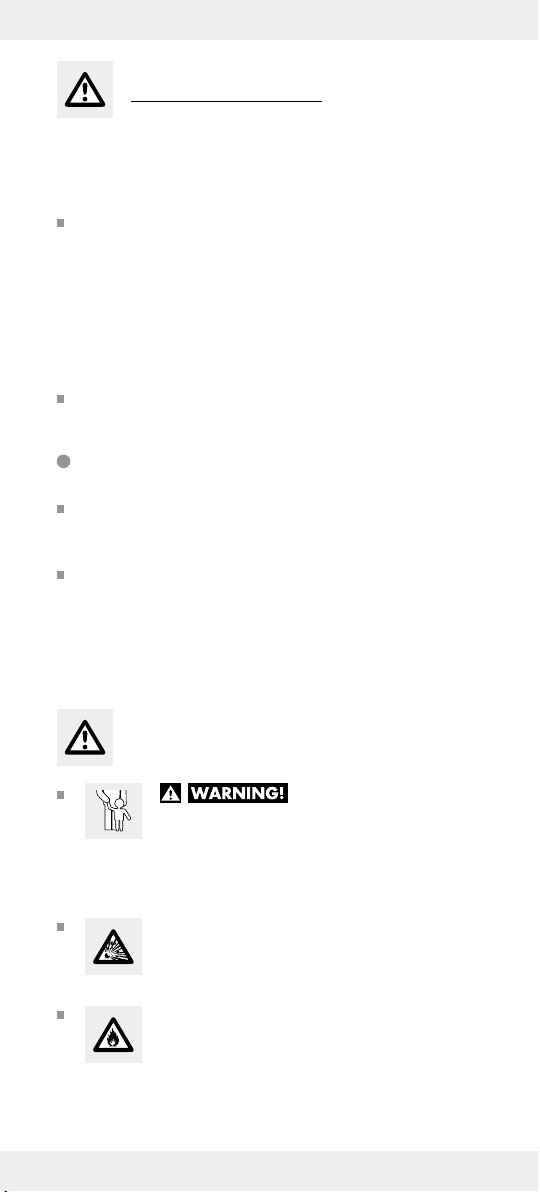
6. Connect the solar cell housing 1again to the lamp
shade 2and then connect every part of the solar lamp
to each other (see Fig. C).
Charging the rechargeable battery
Note that the solar garden light must be switched on when the
battery is charging.