Living Essentials ETMGY0139 User manual

www.Livingess.com
USER’S MANUAL
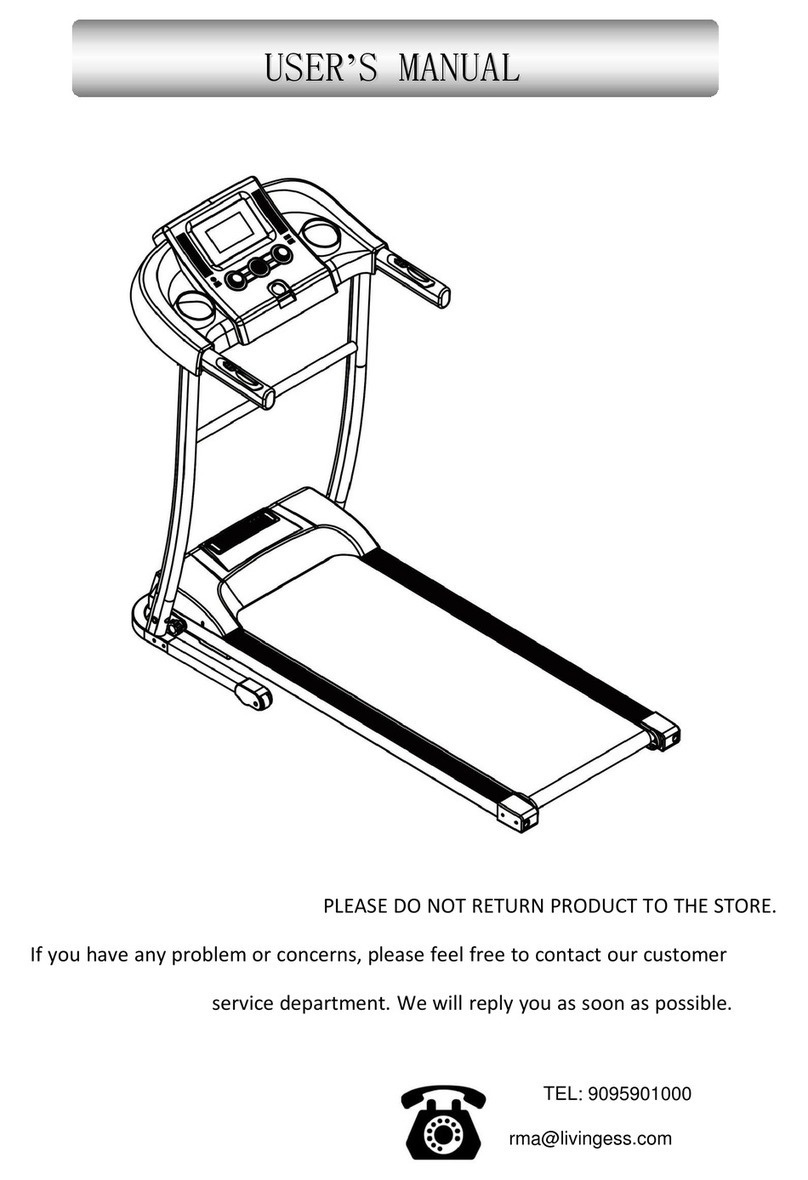
Gamma Fitness Treadmill
SKU# ETMGY0139
Thank you very much for purchasing our product.
Please read this instruction carefully before use it and keep the instruction at proper place

For faster service:
Please contact Living Essentials
Regarding any defective product(s) / Part(s).
Our Customer Service Representative will assist you
through the process of obtaining replacement part(s) .
Visit our website and fill out the Parts & Service Form,
Give us a call, or email us for replacement parts at:
1-888-818-8789
LIVING ESSENTIALS
1040 Walnut Ave.
Pomona, CA 91766
Attention: Customer Service Department
Limited Warranty
LIVING ESSENTIALS’ products are warranted to be free from defects in material and workmanship for a period of ONE YEAR:
One-year warranty from date of original purchase by consumer. If you believe your product is defective, please call, write, or e-mail our customer
service department.
Should your product be defective, LIVING ESSENTIALS will help in issuing replacement parts. Whether you call or write, please have your model
number and reference number located on the original packaging ready for our customer service team. You will be asked to tell us what product
you have, along with the date of purchase and the way you believe the product is defective. For any parts request, it must include images of the
defective part/s. Please do not ship your product back to us unless we specifically request you to do so. If it is necessary for your product to be
returned, all returns or exchanges must be made through the original store of purchase. Proof of purchase must accompany the returned product.
LIVING ESSENTIALS is not responsible for any store policies for returns or exchanges.
Note: This Warranty does NOT apply to any wear and tear. All replacement parts will be shipped standard ground service.
NO EXPEDITED Service available (for example; next day air, 2 day air service, 3 day air), there will NOT be any exceptions.
LIVING ESSENTIALS is not responsible for any consequential damages, which may arise out of the purchase, or use of any of our
product/s. LIVING ESSENTIALS is not responsible for any personal injury, or property/equipment damage from the use of such
product/s. LIVING ESSENTIALS’ liability for any breach of warranty shall be limited to replacement of the defective parts as described
above.
Important: Some states do not allow the exclusions or limitations
so the above limitations or exclusions may not apply to you.
Copyright by: LIVING ESSENTIALS and its affiliates

1. Caution
To avoid any injuries, please read this manual carefully before using.
• For safety purposes do not stand on running belt when starting the machine.
• Please stop using immediately at the rst sign of nausea.
• Please increase speed slowly if needed.
• Do not stand on belt while adjusting.
• It is recommended to wear athletic shoes when using the machine.
• Children, elderly, pregnant women, patients recovering from injuries or surgery are
prohibited to use the machine.
• Please clip the safety key on your clothing during use.
• Please rmly hold the rail bars during using.
2. Safety Notice
• Please put the machine on at ground. It is unsuitable to put the machine at follow-
ing places:
(1) Outdoors.(The machine is specially designed for indoor use only)
(2) Slanted ground or slanted places on balcony.
(3) Sunlight area or near a heater/replace.
(4) Big noisy places.
• Errors may appear if the power supply is not stable. Please do not use the same
socket together with computers, air conditioners, etc.
• It is suggested to wear athletic shoes clothing when using the machine.
• Please increase or decrease speed slowly.
• Be careful of children or other objects while folding and unfolding the machine.
• Do not put the machine near wet objects. Errors may occur if item gets wet.
3. Caution During Use
• If you do not feel well before using, please consult with your doctor or coach.
• Our company is not responsible for any injuries as a result of improper use
• Please unplug after using.
• Please unplug when moving the machine or changing parts.
• Children, elderly, and pregnant women are prohibited from using the machine.
Patients should consult their doctor before using.
• Please place the machine on a at surface. Do not place any objects 2M behind the
machine.
• Do not start the machine when it is folded.
• Keep water away from the machine, motor, power line, and plug.
• Do not use this machine in enclosed spaces or areas without air circulation.

• Do not place any objects on the machine.
• Keep plug away from hot locations or replaces.
• Please turn o machine and unplug after using.
• Please do not stand directly on the belt while starting the machine.
• Do not disassemble the machine without professional supervision.
• Please make sure the running belt is fastened before using.
4. Technical Specication
5. Assembly Instructions
First step:
Take out the machine from the box, unscrew
the adjusting knob on the both sides of the
frame respectively(suggest unscrew 3 circles).
Second step:
Uplift the handle bar to the slot corresponding
to the hinge of main frame and then screw the
knob.
Third step:
Put on the safety key.
Finish the assembly.
Product Name
Voltage
Frequency
Speed
User Capacity
Gamma Fitness Treadmill
110V
50-60Hz
0.5-7.5mph
200 LBS

6. Display Monitor
(1) Display
1.1 “TIME” window has two modes which shows the running time. ①Forward counting
time is from 0:00 to 99:59 minutes. ②Countdown is count to 0 from the set time(setting
range: 5:00~99:00 minutes). The machine will stop slowly when it counts to 0:00 and shows”
end”, then the machine will come to the standby mode after 5 seconds.
“STEP ”window shows the steps. It counts from 0 to 9999 steps. It will recount when the step
numbers reaches the top point.
Note: The window will be switched from TIME and STEP cyclically, you can press“ M”
button to switch between cyclic display mode and single display mode in motion state.
1.2 “DISTANCE” window has two modes which shows the current movement distance.
①In the forward counting mode, the distance will be increased from 0.0 to 99.9 miles, it will
recount if the distance reaches the top point. ②In the distance countdown mode, the
distance will be decreased from the setting data(setting range:1.00~99.00miles) to 0 . The
machine will stop slowly when it counts to 0:00 and shows”end”, then the machine will come
to the standby mode after 5 seconds.
“CALORIES” window has two modes which shows the calories. ①Forward mode counts
from 0 to 9999, it will recount when it reaches the top point. ②countdown mode will count
from setting calorie data( setting ranges 20~990) to 0. The machine will stop slowly when it
counts to 0:00 and shows” end”, then the machine will come to the standby mode after 5
seconds.
Note: The window will be switched from DISTANCE and CALORIES cyclically, you can
press“ M” button to switch between cyclic display mode and single display mode in
motion state.
1.3 “SPEED” window shows the current running speed, the setting range is
0.5MPH~7.5MPH. The speed will +/- 0.1MPH every time you click “+/-” button.
P1 ~ P12 are displayed under the setting of automatic selection.
1.4 After the treadmill is started, every window will be displayed cyclically at an interval of
5 seconds. You can press the "M" button to switch between cyclic display mode and single
display mode.
1.5 The maximum speed of the treadmill will be limited to 4MPH when the dashboard
deected from a horizontal direction to an arbitrary direction by more than 60 degrees.
SPEED DIST. TIME CAL. STEP

(1) Display
1.1 “TIME” window has two modes which shows the running time. ①Forward counting
time is from 0:00 to 99:59 minutes. ②Countdown is count to 0 from the set time(setting
range: 5:00~99:00 minutes). The machine will stop slowly when it counts to 0:00 and shows”
end”, then the machine will come to the standby mode after 5 seconds.
“STEP ”window shows the steps. It counts from 0 to 9999 steps. It will recount when the step
numbers reaches the top point.
Note: The window will be switched from TIME and STEP cyclically, you can press“ M”
button to switch between cyclic display mode and single display mode in motion state.
1.2 “DISTANCE” window has two modes which shows the current movement distance.
①In the forward counting mode, the distance will be increased from 0.0 to 99.9 miles, it will
recount if the distance reaches the top point. ②In the distance countdown mode, the
distance will be decreased from the setting data(setting range:1.00~99.00miles) to 0 . The
machine will stop slowly when it counts to 0:00 and shows”end”, then the machine will come
to the standby mode after 5 seconds.
“CALORIES” window has two modes which shows the calories. ①Forward mode counts
from 0 to 9999, it will recount when it reaches the top point. ②countdown mode will count
from setting calorie data( setting ranges 20~990) to 0. The machine will stop slowly when it
counts to 0:00 and shows” end”, then the machine will come to the standby mode after 5
seconds.
Note: The window will be switched from DISTANCE and CALORIES cyclically, you can
press“ M” button to switch between cyclic display mode and single display mode in
motion state.
1.3 “SPEED” window shows the current running speed, the setting range is
0.5MPH~7.5MPH. The speed will +/- 0.1MPH every time you click “+/-” button.
P1 ~ P12 are displayed under the setting of automatic selection.
1.4 After the treadmill is started, every window will be displayed cyclically at an interval of
5 seconds. You can press the "M" button to switch between cyclic display mode and single
display mode.
1.5 The maximum speed of the treadmill will be limited to 4MPH when the dashboard
deected from a horizontal direction to an arbitrary direction by more than 60 degrees.
In standby or countdown mode: Pressing “start/stop” button to start the ma-
chine. Please note that the default speed is 0.8KM/H.
Choose the preset program: Pressing “start/stop” to start the machine and the
speed will changes according to the preset speed.
In running state: Pressing “start/stop” , then the treadmill will stop slowly and
back to standby state.
“+”“-” Button is to adjust speed. Keep pressing“+”/“-”over 0.5 seconds, the speed
will keep increasing or decreasing. Please note the speed will change by 0.1km.
“M”:①In standby mode: it can switch from dierent mode, including Time,
Distance and Calories. ②In running mode: press ”M”button will switch display
mode between cyclic display mode and single display mode.
“P”: There are P01~P12, totally 12 preset programs you can choose when in
standby mode.
“Reset”: Press the “Reset” button, the treadmill will stop immediately. And the
system will restart
※REMARK: Any valid pressing, the treadmills will make a sound “Bi”.
Sports mode: Press “start” key to start the machine and the SPEED window will
count from“3 2 1 ”. Please note that the default speed is 0.8KM and you can
press“+”“-”to adjust speed.
Countdown mode: when in standby, press“M” key to choose countdown for time,
distance and calories. Press “+”“-” to set relevant data. After setting,
press“start/stop” to start the treadmill, it will count down from the set data, the
machine will stop by itself when it counts to 0.
Preset program(P01~P12): choose one program rst and then press “+”“-”to set
the running time(ranges 5:00~99:00, and the default time is 30:00), press
“start/stop” to start the machine, it will run according to the preset speed and
speed will change according to the time ”(Time/20)”.
(2) Function Of The Remote Control
(3) Functional Instruction
2.2
2.3
2.4
2.5
3.1
3.2
3.3
(1)
(2)
(3)
2.1 “Start/Stop”:

Power o the treadmill
Press the “speed -” in the machine and ”M” button in the remote control at the
same time, keep pressing for 6 seconds.
Power on the treadmill within 5 seconds, the remote control will match the ma-
chine automatically
(4) How To Match A New Remote Control
(5) Dashboard
4.1
”Start” button
In standby /countdown mode, press the button to start the treadmill. The default
speed is 0.5MPH. In preset mode, press the button, the treadmill will start and
act according to the preset value and accumulate the data.
“Stop” button
In the running state, press this button to stop the exercise and return to the stand-
by mode. Press the stop button for more than 2 seconds, the system restarts.
“Up/Down” button
It is used to adjust the speed after start up, and the adjustment range is (0.1 MPH)
/ time. Keep pressing for more than 0.5 seconds, it will continuously increase
or decrease. It also can be used to adjust the setting value in the setting
state.
"Program” button
To select 12 preset automatic programs P01 ~ P12.
"Mode" button
To switch between various modes in standby mode. Including time countdown
(setting range 5: 00 ~ 99: 00), distance countdown (setting range 1 mile ~ 99
miles), calorie countdown (setting range 20 ~ 990). After the treadmill is started,
every window will be displayed cyclically at an interval of 5 seconds. You can press
the "M" button to switch between cyclic display mode and single display mode.
”SAFE KEY” button
In case of emergency, press the ”SAFE KEY” button to cut power instantly.
5.1
5.2
5.3
5.4
5.5
5.5
4.2
4.3
-
P
M
+

(1) Fold:
Unscrew the knobs, lay the handle bar down clockwise. Then screw the
knobs to the frame.
(2) Unfold:
Loosen the knob and uplift the handle bar anticlockwise to the certain
angle, then tighten the knobs.
Pull up tightly of the running belt.
Then apply the silicone oil to the
running board. Start the machine and
let it run for 3 minutes without using.
It is recommended to do this after
every 30 hours of use. It will extend
the lifetime of running belt.
7. Fold And Unfold
8. Usage Of Silicone Oil

(1) Running belt deviates to left
Start the machine with speed 1-3KM/H (Don't stand on machine). Use the Allen wrench
to turn the screw clockwise until desired tted (see g1). Then let the machine run
without loading for 1-2 minutes. Please adjust like this until the belt is in the middle.
(2) Running belt deviates to right
Start the machine at speed 1-3 KM/H (Don't stand on machine). Use the Allen wrench
to turn the screw counterclockwise until desired tted (see g2). Then let the machine
run without loading for 1-2 minutes. Please adjust like this until the belt is in the
middle.
(3) Running belt stuck
If the running belt is not moving, use the Allen wrench to turn the screws 180 degrees
on both left and right sides until this is solved (see g3).
1. Please switch o and unplug from power outlet before checking the machine or
clearance.
2. Clean belt and dial plate after use, once every week at least.
3. Do not hang up clothes, etc. on the machine.
9. Belt Adjustment
10. Daily Maintenance

Err(or E00) No Safety key on
Panel
Safety key is not on
the panel or it is not
properly put on
1. Put safety key in the yellow area of
panel
2. Err(or E00) still shows or there is no
function, change the computer
screen/display monitor.
E2 Control Board Error Control board is
broken or pseudo
soldering on control
board
Replace control board
E4 Control Board Error Control board is
broken
Replace control board
E5 Over current
Protection
Control board short
circuit or motor
blocked
1. Open the motor cover and check
whether the motor is blocked.
Remove the block if yes.
2. Replace the control board if it’s not
blocked, or the error still shows.
E6 Motor Error Motor broken or
motor line fall o
1. Open the motor cover and check
whether the motor is broken or
whether the motor wire is connected
to control board properly. Reconnect
the wire is recommended.
2. Replace the control board if the
error still shows.
E7 Communication
Failures
Wires from the control
board to panel board
are broken or not
properly connected
1. Make sure the wires from the
control board and panel board are
connected securely and not damaged.
2. Replace the control board if the
error still shows.
E8 Overload
Protection
Excess of electricity or
user exceeded max
load weight
1. Make sure the user does not exceed
max weight capacity.
2. Reconnect power and re-start the
machine.
3. Replace the control board if the
error code still shows.
Error
Code
Meaning Problem Solution
11. Trouble Shooting
Table of contents
Other Living Essentials Treadmill manuals