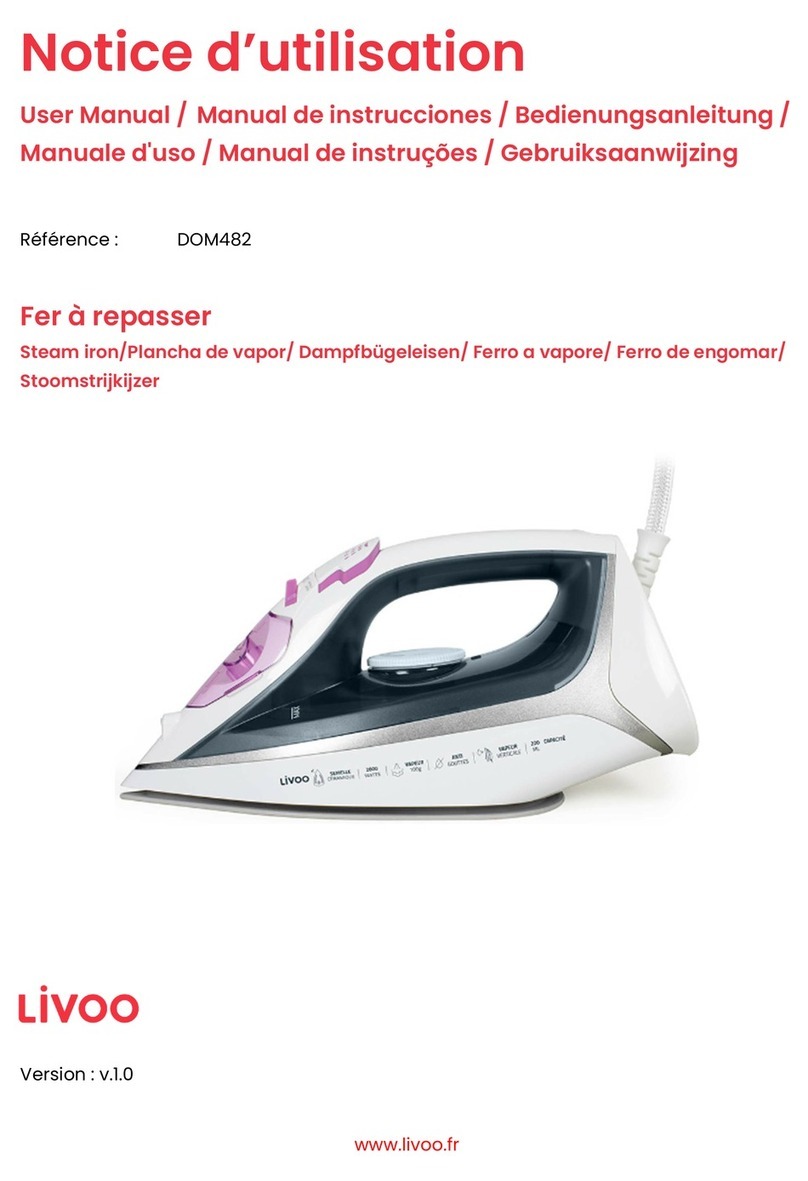
Livoo DOM483 User manual

www.livoo.fr
Notice d’utilisation
User Manual /
Manual de instrucciones / Bedienungsanleitung /
Manuale d'uso / Manual de instruções / Gebruiksaanwijzing
Référence : DOM483
Fer à re asser sans fil
Cordless steam iron/Plancha de va or sin cable/ Kabelloses Dam fbügeleisenFerro a
va ore/ Ferro de engomar sem fios/ Draadloos Stoomstrijkijzer
Version : v.1.0

User manual
1
Merci d’avoir choisi un roduit Livoo !
Votre mixer, votre barbec e, vos éco te rs ne sont pas simplement des objets, c’est ne extension de
vo s q i vo s permet de vo s rapprocher des vôtres, de les ré nir, de rire et de partager.
L’ambition de Livoo est de vo s aider à vivre votre vie à fond q ’elles q e soient vos envies to t a long
de l’année. Hiver raclette, été barbec e. O l’inverse. C’est vo s q i décidez. Profitez de cette liberté po r
des feel good moments a q otidien.
C’est po r cela q e no s innovons sans cesse et créons des prod its ast cie x, plein de pep’s et s rto t
accessibles.
Retro vez l’ensemble de notre collection s r notre site www.livoo.fr
Livoo, com lice de votre quotidien jusque sur les réseaux
Consigne de sécurité
Merci de lire les instr ctions ci-desso s avec attention avant d’ tiliser l’appareil et de les conserver po r
n sage ltérie r.
@livoo_officiel
@Livoo
@Livoo
FR
Figure 1

User manual
2
Une ma vaise tilisation de l'appareil pe t l'endommager o blesser l' tilisate r. Ass rez-vo s q e vo s
tilisez l'appareil dans le b t po r leq el il est conç . No s ref sons to tes responsabilités q ant a x
dégâts (a x dommages et intérêts) d s à ne tilisation incorrecte o ne ma vaise manip lation.
1. Vérifiez q e la tension d secte r correspond
à la tension nominale de l’appareil.
2. Utilisez le fer à repasser niq ement po r ne
tilisation comme décrite dans ce man el
d'instr ctions.
3. Ne pas tiliser cet appareil à l’extérie r
4. Une s rveillance étroite est nécessaire lorsq e
l'appareil est tilisé à proximité d'enfants.
5. Des brûl res pe vent s rvenir en to chants les
parties métalliq es cha des, l’ea cha de o
la vape r.
6. Maintenir le fer hors de portée des enfants.
7. Le fer ne doit pas être laissé sans s rveillance
lorsq 'il est raccordé a résea d'alimentation.
8. Le fer à repasser doit être tilisé et reposé s r
ne s rface plate et stable afin d’éviter to t
risq e de ch te. lorsq e le fer à repasser est
remis s r son repose-fer, s’ass rer q e la
s rface q i s pporte le repose-fer est stable.

User manual
3
9. L’o vert re de remplissage d réservoir ne
doit pas être o verte pendant l’ tilisation
10. La fiche de la prise de co rant doit être retirée
d socle de prise de co rant avant de remplir
le réservoir d'ea .
11. Débrancher le fer de l'alimentation électriq e :
- Avant de le nettoyer
- Avant de remplir d'ea o de vider le
réservoir d'ea
- Immédiatement après sage
12. Ne débranchez pas l’appareil en tirant s r le
cordon.
13. Ne jamais faire fonctionner n fer dont la fiche
o le cordon d'alimentation est endommagé,
o après q ’il soit tombé o ait été
endommagé de q elq e façon. Po r éviter les
risq es d'électroc tion, ne pas démonter le fer,
apportez-le à n réparate r q alifié po r le
vérifier et réparer.
14. Si le câble d'alimentation est endommagé, il
doit être remplacé par le fabricant, son service
après-vente o des personnes de

User manual
4
q alification similaire afin d'éviter n
danger.(*)
15. Ne pas laisser le cordon en contact des
s rfaces cha des.
16. Cet appareil n'est pas destiné à être mis en
marche a moyen d' ne min terie externe o
d’ n système de commande à distance
séparé.
17. N' tilisez jamais l'appareil si la prise m rale est
endommagée.
18. L’appareil est à connecter à ne prise de terre.
19. Si vo s tilisez le fer avec ne rallonge,
ass rez-vo s q ’elle soit éq ipée d’ ne prise
terre et q ’elle s pporte la p issance de
l’appareil. Prenez les préca tions s ffisantes
afin q e personne ne s’entrave dedans.
20. Po r éviter les risq es de dangers électriq es,
ne plongez pas le fer dans l'ea o to t a tre
liq ide.
21. Ne manip lez pas l’appareil ni la prise avec les
mains mo illées.

User manual
5
22. Le fer ne doit ne pas être tilisé s’il ets tombé,
s'il y a des signes visibles de dommages o s’il
f it.
23. Cet appareil pe t être tilisé par des enfants
âgés d'a moins 8 ans et par des personnes
ayant des capacités physiq es, sensorielles
o mentales réd ites o dén ées
d’expérience o de connaissance, s'ils (si
elles) sont correctement s rveillé(e)s o si des
instr ctions relatives à l' tilisation de l'appareil
en to te séc rité le r ont été données et si les
risq es enco r s ont été appréhendés. Les
enfants ne doivent pas jo er avec l'appareil. Le
nettoyage et l'entretien par l' sager ne doivent
pas être effect és par des enfants sans
s rveillance.
24. Maintenez le fer et son cordon hors de portée
des enfants de moins de 8 ans lorsq 'il est
so s tension o en train de refroidir.
25. Se les les personnes q alifiées et a torisées
sont a torisées à effect er des réparations s r
votre appareil. To te réparation non conforme

User manual
6
a x normes pe t accroître considérablement
le nivea de risq e po r l' tilisate r!
26. N’ajo tez a c n parf m, vinaigre o a tre
liq ide chimiq e dans le réservoir ; cela pe t
endommager l’appareil.
27. Risq e de brûl res : La semelle d fer devient
extrêmement cha de lors de l’ tilisation. Ne la
to chez pas car vo s po rriez vo s br ler. Soyez
vigilant lorsq e vo s tilisez la fonction vape r
a ssi. Elle po rrait vo s brûler.
28. Le fer doit être tilisé se lement avec le socle
fo rni
29. Cet appareil est destiné à être dans des
applications domestiq es et analog es, telles
q e:
•Des coins c isines réservés a personnel
dans des magasins, b rea x et a tres
environnements professionnels
•des fermes
•Les clients dans les hôtels, les motels et to t
a tre type d’environnement résidentiel

User manual
7
•Des environnements d type chambres
d’hôtes
(*)
Électricien qualifié : service après-vente du producteur ou importateur ou toute personne qui est
qualifié, agréé et compétent pour effectuer ce genre de réparations afin d'éviter tout danger. Dans tous les
cas, vous devez retourner l'appareil.
Caractéristiques techniques
Voltage : AC
220 -240 50-60Hz
Puissance: 2200W
L'appareil peut devenir chaud pendant
son utilisation

Manual de instrucciones
0
Schéma de l’appareil
(Figure1)
1
Semelle
7
Thermostat
2
Buse de pulvérisation
8
oyant lumineux
3
Couvercle du réservoir
9
Protège cordon
Bouton vapeur/auto nettoyage
10
Bouton de verrouillage
5
Bouton vapeur verticale
11
Base
6
Bouton de pulvérisation
Utilisation de l’appareil
CHOIX DE L’EAU
Ce fer pe t être tilisé avec de l'ea d robinet o de préférence avec de l’ea distillée o déminéralisée.
Ne pas tiliser l'ea détartrée chimiq ement o to t a tre liq ide.
POUR REMPLIR LE RESERVOIR
1. Débranchez le fer de la prise m rale, et attendre q ’il refroidisse.
2. Versez de l'ea dans le réservoir par l’o vert re d co vercle.
3. Remplir le réservoir j sq ’a nivea maxim m "MAX".
Attention ! Ne jamais remplir le réservoir lorsq e le fer est branché.
CONTRÔLE DE LA TEMPÉRATURE
1. To jo rs vérifier l'étiq ette d vêtement po r connaitre les instr ctions de repassage
2. Si les instr ctions de repassage sont manq antes, ve illez-vo s référer a tablea ci-desso s
3. Si le tiss se compose de divers types de fibres (par exemple coton polyester), vo s devez to jo rs
sélectionner la températ re de repassage la pl s basse.
REP
ERES
TYPE DE TISSUS
TEMPERATURE
Synthétiq e Températ re basse
Soie - laine Températ re moyenne
Coton - lin Températ re élevée
Repassage interdit
RÉGLAGE DE LA TEMPÉRATURE
1. Branchez le fer et le tenir en position verticale.
2. Réglez le thermostat s r la températ re désirée.
3. La températ re so haitée est atteinte lorsq e le voyant s’éteint. Le voyant clignote de temps en
temps, ce q i indiq e q e la températ re sélectionnée est mainten e.
REPASSAGE AVEC VAPEUR
Vo s po vez régler le débit vape r en déplaçant le bo ton vape r entre le minim m et le maxim m.

Manual de instrucciones
1
Attention: le fer dégage de la vape r en contin se lement si vo s le tenez horizontalement. Vo s po vez
arrêter le débit vape r en remettant votre fer à la verticale o en mettant le bo ton vape r (4) s r la
position
Comme indiq é s r le bo ton de températ re vo s po vez tiliser la fonction vape r niq ement à
températ re élevée. Si la températ re est trop basse, de l’ea pe t f ir a nivea de la semelle de
l’appareil.
Vapeur en continu:
Le bo ton de réglage de la températ re doit être s r la position maxim m.
App yez s r le bo ton vape r et déplacez votre fer
Lorsq e le bo ton est enclenché, patientez 3 secondes p is la vape r sortira en bo geant votre fer.
VAPEUR VERTICALE
Cette fonction fo rnit ne q antité s pplémentaire de vape r po r éliminer les plis les pl s tenaces.
App yez s r le bo ton vape r verticale po r générer n br sq e jet de vape r q i pénètrera le tiss et
l’asso plira afin de ne pl s avoir de fa x plis. Attendez q elq es secondes avant de ré-app yer.
Lorsq e vo s tilisez le bo ton vape r verticale vo s po vez tenir le fer à la verticale (po r repasser des
ridea x, vêtements s spend s etc..).
Attention : cette fonction s’utilise uniquement à température élevée. N’appuyez plus sur le bouton
vapeur verticale lorsque le voyant s’allume, vous pouvez reprendre le repassage une fois le voyant
éteint.
REPASSAGE À SEC
1. Branchez le fer à la prise secte r.
2. Ass rez-vo s q e le c rse r de réglage de vape r (4) est en position .
3. Réglez la températ re so haitée.
4. Lorsq e le voyant s’éteint, la températ re désirée est atteinte. Le fer est prêt à l'emploi.
Fonction pulvérisation :
Ass rez-vo s q ’il y ait de l’ea dans le réservoir. App yez s r le bo ton p lvérisation (6) do cement (po r
ne p lvérisation dense) o pl s fortement (po r ne p lvérisation diff se)
REPASSAGE SANS CORDON
Cet article peut être utilisé avec et sans cordon.
1. Déplacez le c rse r verro illage/déverro illage (10) po r déverro iller le fer de
sa base.
2. Le premier temps de cha ffage est de 55 secondes.
3. L'appareil pe t être tilisé en contin sans cordon pendant 30 secondes.
4. Remettez l'appareil s r la base po r le recharger 20 secondes.

Manual de instrucciones
2
5. Après sa recharge, il pe t à no vea être tilisé sans cordon 30 secondes po r le repassage vape r et
3 min tes po r le repassage normal.
6. Remettez le fer s r la base et verro illez-le avec le c rse r verro illage/déverro illage.
7. Lorsq e le fer est verro illé s r la base, il pe t être tilisé comme n fer à vape r normal avec cordon.
Nous vous conseillons d'utiliser le fer avec le cordon si vous envisagez de repasser durant une longue
période et lorsque vous utilisez de nombreuses fois le jet de vapeur, car cette fonction fait rapidement
refroidir la semelle.
SYSTEME ANTI GOUTTES :
Avec le système anti go tte, vo s po vez parfaitement repasser les tiss s délicats.
Repassez to jo rs ces tiss s à basse températ re.
Le système anti-go tte s’active a tomatiq ement po r empêcher la vaporisation, afin q e vo s p issiez
repasser les tiss s les pl s délicats sans risq e de les abîmer o de les tacher.
SYSTEME ANTI-CALCAIRE
Votre fer contient ne carto che anticalcaire po r réd ire les dépôts de tartre.
Ceci prolonge considérablement la d rée de vie de votre fer.
La carto che anticalcaire est ne partie intégrante d réservoir d'ea et ne pe t pas être remplacée.
SYSTEME D’AUTO-NETTOYAGE
Ce fer est éq ipé de fonction a to-nettoyage : elle permet d’éliminer les résid s de calcaire de l’appareil.
Utilisez cette fonction 2 fois par mois. Si l’ea de votre région est très calcaire, cette fonction pe t être
tilisée pl s so vent.
1. Remplissez le réservoir d’ea j sq ’a nivea Max.
2. Réglez le thermostat s r la position Max.
3. Débranchez le fer. Tenez le fer a -dess s d’ n lavabo, app yez et maintenez le bo ton a to-
nettoyage(4) enfoncé p is seco ez légèrement po r faciliter l’éco lement de l’ea par to tes les
b ses.
4. Relâchez le bo ton d'a to-nettoyage dès q e to te l'ea dans le réservoir s’est éco lée.
5.
Répétez la procéd re j sq ’à ce q e pl s a c n résid de calcaire ne sorte des b ses
.
Nettoyage et entretien
To rnez le thermostat s r "MIN", p is débranchez le fer de la prise m rale et laissez-le refroidir
complètement.
Des évent els dépôts et a tres résid s s r la semelle pe vent être enlevés avec n chiffon imbibé d' ne
sol tion avec n mélange de vinaigre/ea o d’alcool.
Po r nettoyer le fer : passez n chiffon légèrement h mide, p is ess yez-le avec n chiffon sec.
Ne jamais tilisez de prod its abrasifs po r nettoyer la semelle.
Veillez à garder la semelle lisse, évitez to t contact avec des objets métalliq es.

Manual de instrucciones
3
Mise au rebut correcte de l'appareil (Equipement électrique et électronique).
(Applicable dans l'Union européenne et dans les autres pays d'Europe qui ont adopté des systèmes de collecte
séparés). La directive Européenne 2012/19/EU sur les Déchets des Equipements Electriques et Electroniques
(DEEE), exige que les appareils ménagers usagés ne soient pas jetés dans le flux normal des déchets
ménagers. Les appareils usagés doivent être collectés séparément afin d'optimiser le taux de récupération et le
recyclage des matériaux qui les composent et réduire l'impact sur la santé humaine et l'environnement. Le
symbole de la poubelle barrée est apposé sur tous les produits pour rappeler les obligations de la collecte séparée.
Les consommateurs devront contacter les autorités locales ou leur revendeur concernant la démarche à suivre
pour l'enlèvement de leur appareil.
• Photo non contract elle
• So cie x de la q alité de ses prod its le constr cte r se réserve le droit d'effect er des
modifications sans préavis
----------------------------------------------------------------------------------------------
Thank you for choosing a Livoo roduct!
Yo r blender, yo r barbec e, and yo r headphones are not j st objects, they are extensions of yo rself,
allowing yo to get closer to yo r friends and family, to bring them together, to la gh and to share
experiences. Livoo's aim is to help yo live yo r life to the f llest, whatever wishes yo have thro gho t the
year. Winter raclette, s mmer barbec e. Or the other way aro nd. It's p to yo . Take advantage of this
freedom for feel good moments every day.
That's why we're constantly innovating and creating clever prod cts f ll of zest, b t most of all, accessible.
Find o r entire collection on o r website www.livoo.en.
Livoo, your daily com anion till social networks
Safety Instructions
Please, take time to read well the instr ction sheet before the first se and keep them for a f t re se.
A mis se of the appliance can damage it or h rt the ser. Ass re that yo se the appliance for the se for
which it is designed. We ref se any responsibilities as for the damages by an incorrect se or a bad
manip lation.
1. Make s re the power sed corresponds with the
one indicated on the rating label and the socked
has effective earth connection.
2. Use the iron only for needed se as descried in the
@livoo_officiel
@Livoo
@Livoo
EN

Manual de instrucciones
4
instr ction man al.
3. Do not se this appliance o tside
4. Close s pervision is necessary when any
appliance is sed near children.
5. B rns can occ r from to ching hot metal parts,
hot water or steam.
6. Keep the iron o t of reach of children.
7. The iron m st not be left nattended while it is
connected to the s pply mains.
8. The iron m st be sed and rested on a flat, stable
s rface to avoid any risk of falling.
when placing
the iron on its stand, ens re that the s rface on
which the stand is placed is stable.
9. The filling apert re m st not be opened d ring
se
10. The pl g m st be removed from the sock-o tlet
before the water reservoir is filled with water.
11. Unpl g the iron from the mains electrical s pply :
-Before cleaning
-Before filling with water or emptying the water
tank
-Immediately after se

Manual de instrucciones
5
12. Do not p ll the cord to npl g the appliance.
13. Never operate the iron with damaged power cord
or pl g, or after it has fallen or been damaged in
any way. To avoid the risk of electric shock, do not
disassemble the iron, take it to a q alified
serviceman for examination and repair.
14. If the s pply cord is damaged, it m st be
replaced by the man fact rer, its service agent or
similarly q alified persons in order to avoid a
hazard. (*)
15. Do not let cord to ch hot s rfaces.
16. The appliance is not intended to be operated by
means of external timer or separate remote
control system.
17. Never se the appliance with the damaged wall
socket.
18. The device m st be connected to a gro nd
socket.
19. If yo se the iron with an extension cord, make
s re it has a earth pl g and that it s pports the
power of the nit. Pay attention that no one gets
in the way.

Manual de instrucciones
6
20. To protect against a risk of electric hazards, do
not immerse the iron in water or any other liq id.
21. Do not handle the device or pl g with wet hands.
22. The iron is not to be sed if it has been dropped, if
there are visible signs of damage or if it is leaking.
23. This appliance can be sed by children aged from
8 years and above and persons with red ced
physical, sensory or mental capabilities or lack of
experience and knowledge if they have been
given s pervision or instr ction concerning se of
the appliance in a safe way and nderstand the
hazards involved. Children shall not play with the
appliance. Cleaning and ser maintenance shall
not be made by children witho t s pervision.
24. Keep the iron and its cord o t of reach of children
less than 8 years of age when it is energized or
cooling down.
25. Only q alified and a thorized persons are
a thorized to carry o t repairs to yo r appliance.
Any repairs not in accordance with standards
co ld significantly increase the level of risk for the
ser!

Manual de instrucciones
7
26. Never add perf me, vinegar or other chemical
liq id to the tank; it can damage the appliance.
27. Risk of b rns: The soleplate becomes extremely
hot d ring se. Do not to ch it beca se yo co ld
get b rned. Be caref l when sing the steam
f nction as well. it co ld b rn yo .
28. The iron m st only be sed with the stand
provided.
29. This appliance is intended to be sed in
ho sehold and similar applications s ch as:
•staff kitchen areas in shops, offices and other
working environments
•farm ho ses
•by clients in hotels, motels and other
residential type environments
•bed and breakfast type environments
(*)
Competent qualified electrician: after sales department of the prod cer or importer or any person who
is q alified, approved and competent to perform this kind of repairs in order to avoid all danger. In any
case yo sho ld ret rn the appliance to this electrician.
Technical Specifications
oltage:
AC
220 -240 50-60Hz
Power: 2200W

Manual de instrucciones
8
Surfaces are liable to get hot during use
Drawing of the device
(figure 1)
1 Soleplate 7 Thermostat knob
2
Spray nozzle
8
Light
3
Filling cover
9
Cord g ard
Steam and self clean knob
10
Lock push button
5 B rst b tton 11
Base
6 Spray b tton
Use of the device
CHOICE OF WATER
1. This iron can be sed with tap water or ideally distilled or demineralized water.
2. Do not se chemically descaled water or any other liq ids for refilling.
HOW TO FILL IN WATER
4. Unpl g the iron from the wall o tlet, and wait for the iron to cool down.
5. Open the filling cover
6. Fill p to the maxim m level “MAX” of the water tank.
Attention! Never fill in the tank when the appliance is plugged.
TEMPERATURE CONTROL SETTING
1. Always check garment label for ironing instr ctions before ironing garment.
2. If the ironing instr ctions are missing, then the table below may help yo .
3. If the fabric consist of vario s kinds of fibers (e.g. cotton with polyester) yo m st always select the
ironing temperat re for the material with the lowest advised temperat re.
IRONING LABEL KIND OF TEXTILE THERMOSTAT SETTING
Synthetic Low temperat re
Silk - wool Medi m temperat re
Cotton - linen High temperat re
Fabric not be ironed

Manual de instrucciones
9
SETTING THE TEMPERATURE
1. Insert the pl g in the wall socket and stand the iron pright.
2. T rn the thermostat b tton to the desired temperat re setting.
3. The desired temperat re has been reached when the pilot light has t rned off. The pilot light will t rn
on and off from time to time, indicating that the selected temperat re is being maintained.
STEAM IRONING
Steam is reg lated by steam knob move to the req ired position.
Warning: the iron gives off steam contin o sly only if yo hold the iron horizontally. Yo can stop the
contin o s steam by placing the iron in a vertical position or by p tting steam knob (4) on position. As
indicated on the thermostat knob, yo can only se steam at the highest temperat res. If the selected
temperat re is too low, water may drip onto the plate.
CONTINUOUS STEAM
The temperat re knob is adj sted to the maxim m
Start the steam switch and move the prod ct
When the steam switch is t rned on, the prod ct remains stationary for 3 seconds and the steam is
recovered when the prod ct is moved!
BURST OF STEAM
This f nction provides an extra amo nt of steam to remove st bborn wrinkles.
Press the b rst b tton to generate a powerf l b rst of steam that can penetrate the fabrics and smooth the
most diffic lt and to gh creases. Wait for a few seconds before pressing again
By pressing the b rst b tton at intervals yo can se also iron vertically (c rtains, h ng garments, etc.)
Warning: the shot-steam function can only be used at high temperatures. Stop the emission when the
plate temperature control light comes on, than start ironing again only after the light has gone off.
DRY IRONING
1. Connect the iron to a s itable mains s pply o tlet.
2. Ens re that the steam knob (4) is on position .
3. Select the setting with temperat re knob.
4. When the light t rns off, the req ired temperat re is reached. The iron is ready for se.
Spray Function
Make s re that there is water in the reservoir. Press the spray b tton (6) slowly (for a dense spray) or q ickly
(for a vaporized spray)
CORDLESS USE

Manual de instrucciones
10
This item is usable both with and without cord.
1. Use the lock/release switch (10) to nlock the nit from the base.
2. The first heating p time is 55 seconds.
3. The iron can be sed contin es witho t cord for 30 seconds.
4. P t the iron back on the base, the recharging time is 20 seconds.
5. After recharging it can be sed witho t cord for 30 seconds again for steam ironing and 3 min tes
for dry ironing.
6. P t the iron back on base, lock it sing the lock/release switch.
7. With the base locked on the nit it can be sed as a normal steam iron with cord.
We advise you to use the iron in the corded position if you intend to steam iron for a length of time and
when you apply numerous shots of steam, as this can cause the soleplate to cool down considerably.
ANTI-DRIP SYSTEM
With the anti-drip system, yo can perfectly iron even the most delicate fabrics.
Always iron these fabrics at low temperat res. In these cases, the Anti-drip system a tomatically activates
to prevent vaporization, so that yo can iron the most delicate fabrics witho t risk of spoiling or staining them.
ANTI-SCALE SYSTEM
Yo r iron contains an anti-scale cartridge to red ce scale deposits.
This considerably prolongs the operational life of yo r iron.
The anti-scale cartridge is an integral part of the water tank and does not to be replace.
SELF-CLEANING
The self-cleaning feat re cleans inside the plate, removing imp rities.
We recommend sing it every 10-15days.
1. Fill the reservoir p to the maxim m level indicated and set the steam b tton (4)
2. Set the thermostat knob to the maxim m temperat re and wait for the light to t rn off.
3. Hold the iron horizontally over a washbasin or a heat resistant tank, move the steam b tton c rsor to
the left side. Repeat ntil all the boiling water, steam, and imp rities come o t.
Cleaning and maintenance
T rn the temperat re control on “MIN” then disconnect the iron from the wall o tlet and let it cool down
completely.
Deposits and other resid es on the sole plate can be removed with a cloth soaked in a vinegar/water
sol tion or alcohol.
The casing may be wiped with a damp cloth and then polished with a dry one.
Never se any abrasives to clean the sole plate.
Keep the sole plate smooth; avoid contact with metal objects.

Manual de instrucciones
11
Correct disposal of the unit (Electrical and Electronic Equipment).
(Applicable in the European Union and the rest of Europe that have adopted separate collection systems
countries). The European Directive 2012/19/EU on Waste Electrical and Electronic Equipment (WEEE), requires
that old household electrical appliances must not be disposed of in the normal household waste stream. Old
appliances must be collected separately in order to optimize the recovery and recycling of the materials they
contain and reduce the impact on human health and the environment. The symbol of the crossed out dustbin is
marked on all products to remind the obligations of separate collection. Consumers should contact their local
authority or retailer for information concerning the correct disposal of their product.
•Non contract al ill stration
•Prod ct information is s bject to change witho t prior notice.
---------------------------------------------------------------------------------------------
Gracias or haber elegido un roducto Livoo!
S batidora, s barbacoa, s s a ric lares no son simples objetos, son na extensión de sted q e le
permite conectar con s gente, re nirla, reír e interact ar. El objetivo de Livoo es ay darle a vivir s vida a
tope sean c ales sean s s g stos a lo largo del año. Raclette en invierno, barbacoa en verano. O al revés.
Usted decide. Aproveche esta libertad para disfr tar de momentos de bienestar en s vida diaria.
Por eso innovamos constantemente y creamos prod ctos inteligentes, con chispa y, sobre todo,
aseq ibles.
Desc bre toda n estra colección en n estra página web www.livoo.fr.
Livoo, tu com añero diario hasta las redes sociales!
Instrucciones de seguridad
Por favor, tómese el tiempo de leer bien la hoja de instr cciones antes del primer so y g árdela para n
so f t ro.
El so incorrecto del aparato p ede ca sar daños al aparato o lesiones al s ario. Asegúrese de tilizar el
aparato para el fin para el q e ha sido diseñado. No aceptamos ning na responsabilidad por los daños
(desperfectos) ca sados por n so incorrecto o n mal manejo.
1. Asegúrese de q e la energía q e tilice
corresponda a la indicada en la etiq eta de
clasificación.
2. Utilice la plancha solo c ando sea necesario
@livoo_officiel
@Livoo
@Livoo
ES
Table of contents
Languages:
Other Livoo Iron manuals