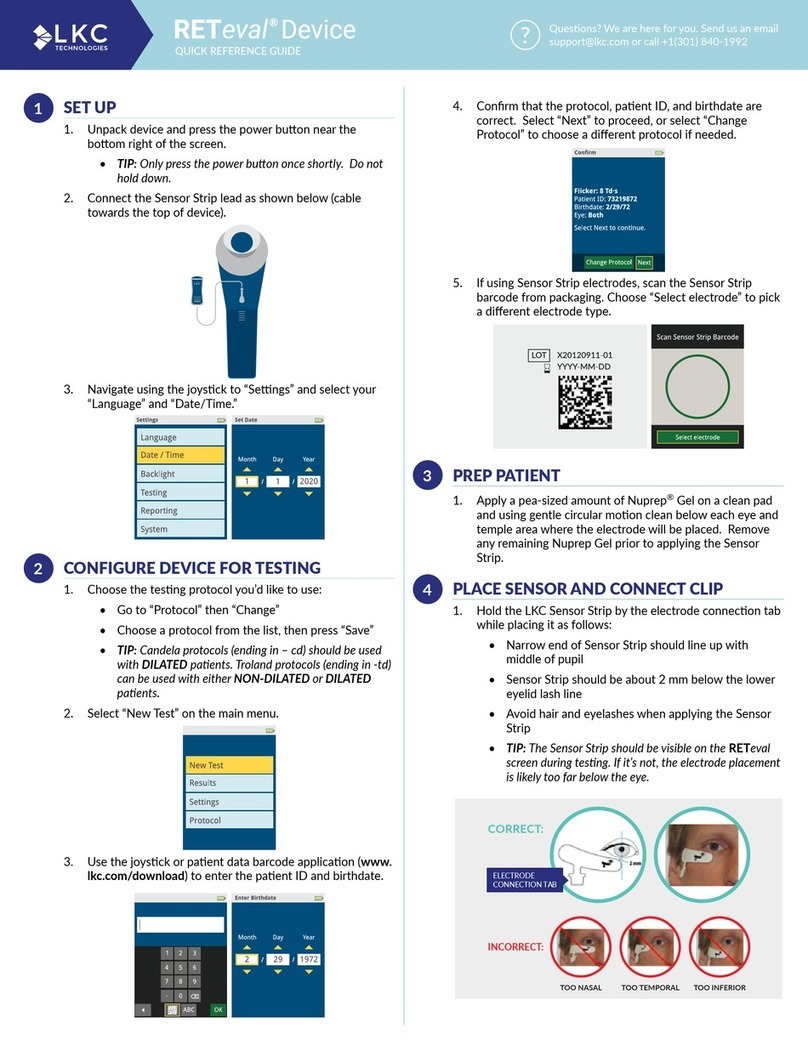
LKC TECHNOLOGIES RETeval User manual

RET
eval
™Device
User Manual
Issue Date: January 7, 2022
Rx only
2797

Copyright © 2012 –2022 LKC Technologies, Inc.
LKC Technologies, Inc., established in 1987, is ISO 13485:2016 certified and holds MDSAP and
FDA registrations and a CE certificate as a medical device manufacturer with quality products
installed in over fifty countries.
LKC Technologies, Inc.
2 Professional Drive, Suite 222
Gaithersburg, MD 20879 USA
T: +1 301 840 1992
F: +1 301 330 2237
www.lkc.com
Document number 96-023

RET
eval
Device User Manual
ii
Table of Contents
Welcome to RET
eval
™........................................................................................................ 5
What's in the box...........................................................................................................................6
Getting Started...................................................................................................................... 7
Connect the cord to the docking station and plug in........................................................................7
Let the device charge .....................................................................................................................7
Connect the Sensor Strip lead.........................................................................................................7
Device controls ..............................................................................................................................8
Main Menu....................................................................................................................................8
Settings .........................................................................................................................................9
Performing a test................................................................................................................. 12
Viewing Results................................................................................................................... 16
Results on the device ...................................................................................................................16
Results on a PC ............................................................................................................................17
Reflex testing ...................................................................................................................... 19
Choosing a protocol............................................................................................................. 20
DR Assessment ............................................................................................................................20
Other protocols ...........................................................................................................................22
Additional Activities ............................................................................................................ 23
Removing old results from the device...........................................................................................23
Updating firmware.......................................................................................................................24
Electronic medical record (EMR) support ......................................................................................24
RETeval Flicker Option......................................................................................................... 25
Flicker protocols ..........................................................................................................................25
Custom protocols.........................................................................................................................26
Flicker test results........................................................................................................................26
RETeval-S Option ................................................................................................................. 31
RETeval-S protocols....................................................................................................................31
RETeval-S test results .................................................................................................................35
RET
eval
Complete Option .................................................................................................. 39
RETeval Complete protocols........................................................................................................39
Custom protocols.........................................................................................................................51
Performing a VEP test ..................................................................................................................52
RETeval Complete test results .....................................................................................................54
Reference Intervals ............................................................................................................. 67
Using reference intervals as clinical decision limits........................................................................68
Turning reference data reporting on and off .................................................................................69
Using your own reference data.....................................................................................................69
Reference data details .................................................................................................................69
Troubleshooting Hints ......................................................................................................... 75
Charge the battery when the charge is low...................................................................................75

RET
eval
Device User Manual
iii
Measure the patient’s right eye first.............................................................................................75
Place the Sensor Strips under the correct eye ...............................................................................75
The device doesn’t show the Next button after I connect to the Sensor Strip (or other electrode
type) or after pressing the Start test button, I get an “The electrodes have been disconnected” error
....................................................................................................................................................76
The device shows “Excessive electrode noise” ..............................................................................76
The device won’t let me press the Start test button when I can see the eye...................................77
After pressing the Start test button, I get an “Excessive ambient light” error.................................77
After pressing the Start test button, I get an “Unable to calibrate” error .......................................78
The screen is blank but the power light is on.................................................................................78
The RETeval device won’t connect to my PC .................................................................................78
I get a “scan and fix” error from Windows®when placing the RETeval device in the docking station
....................................................................................................................................................79
Results are “not measurable”.......................................................................................................79
Reset settings ..............................................................................................................................79
Device language is set to an unfamiliar language ..........................................................................80
An error code is reported .............................................................................................................80
Works Cited......................................................................................................................... 81
Regulatory and Safety Information ...................................................................................... 85
Applicability.................................................................................................................................85
Intended use................................................................................................................................85
Indications for use .......................................................................................................................85
Latex statement...........................................................................................................................85
Specifications...............................................................................................................................86
Contraindications.........................................................................................................................86
Cleaning and Disinfection.............................................................................................................87
Sterilization .................................................................................................................................88
Biocompatibility ..........................................................................................................................88
Calibration and Storage................................................................................................................88
Service / Repairs..........................................................................................................................88
Product performance...................................................................................................................88
Essential performance..................................................................................................................89
Operating environment................................................................................................................89
Lifetime.......................................................................................................................................89
Precautions..................................................................................................................................89
Electromagnetic compatibility (EMC)............................................................................................90
RoHS ...........................................................................................................................................94
California Proposition 65..............................................................................................................95
Symbols.......................................................................................................................................96
Equipment identification..............................................................................................................97
Approvals ....................................................................................................................................98
Intellectual Property............................................................................................................ 99
Contact Information .......................................................................................................... 100
Support .....................................................................................................................................100
Warranty...................................................................................................................................100
Purchasing Supplies and Accessories ..........................................................................................101

RET
eval
Device User Manual
iv
European Representative...........................................................................................................102
Company ...................................................................................................................................102

Welcome to RETeval ™
RET
eval
Device User Manual 5
Welcome to RET
eval
™
Congratulations on your acquisition of the RET
eval
visual electrodiagnostic device. With the
RET
eval
device, you can offer your patients a convenient retinal diagnostic evaluation.
Every RET
eval
device comes with flicker-based protocols, and through optional upgrades, single-
flash based protocols become available through a protocol chooser that enables other
electroretinogram (ERG) and visual evoked potential (VEP) testing.
Test results are visible immediately on the device screen. The device automatically creates PDF
reports that include test results, protocol information, patient information and your practice or
institution information. These PDF reports can be transferred to any PC via a USB cable. The
RET
eval
device has an electronic medical record interface to digitally order tests for a patient
and transfer results into a supported EMR / EHR system.

Welcome to RETeval ™
RET
eval
Device User Manual 6
What's in the box
The RET
eval
device is packaged with these items. Check that all items are present.
RET
eval
device
Measures the response of the eye to light.
Docking station
Charges the RET
eval
device and enables data transfer to a PC. Connect to an
electrical outlet using the power brick.
Dust cover (not
shown)
Protects the device from dust while not in use.
Sensor Strip lead
Connects the device to Sensor Strips for testing.
USB cable
Connects the device to a PC to transfer results.
Power brick and
plates
Connects the device to an electrical outlet. Use the wall-plug option that
matches available electrical outlets.
User Manual
This document. The manual is available as a PDF located on the root directory
of the RET
eval
device.
Sensor Strips
Skin electrode arrays for measuring the eye’s electrical response. One box of
50 Sensor Strip pairs is provided.
DIN adapter
cable
Connects DIN electrodes, supplied with RET
eval
Complete.

Getting Started
RET
eval
Device User Manual 7
Getting Started
Connect the cord to the docking station and plug in
Attach the power brick plate that matches your electrical outlet to the power brick.
Connect the power cord to the docking station.
Connect the power brick to an electrical outlet. The power supply accepts 100 –240 VAC, 50/60
Hz.
Let the device charge
The RET
eval
device charges its battery when in the docking station from either the USB or power
brick connection. If the power brick is connected, charging will be significantly faster than if only
a USB connection is present. The charging status is shown on the display. If the display is blank,
press the power button to turn it on. The RET
eval
device is shipped with a partial charge.
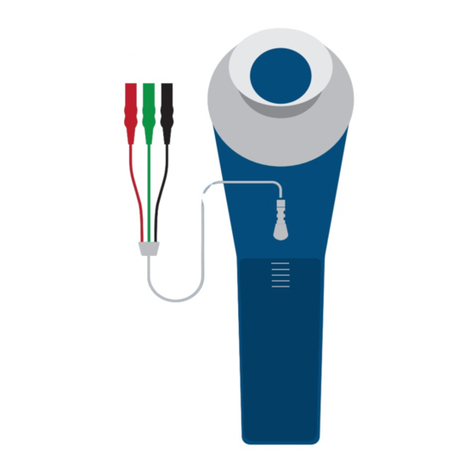
Connect the Sensor Strip lead
Connect the Sensor Strip lead to the blue Sensor Strip lead connector.
The Sensor Strip lead for regular Sensor Strips has one Sensor Strip clip,
the Sensor Strip lead for the Small Sensor Strips has two Sensor Strip
clips.
Sensor Strip Lead is long enough for most circumstances; however, if
your application requires additional length, a 24” (61 cm) long extension
is available (see Purchasing Supplies and Accessories). If an extension

Getting Started
RET
eval
Device User Manual 8
cable is used, it is necessary to loop the cable over the patient’s ear or tape the cable to the
patient’s cheek to prevent the weight of the extension from impacting test measurements.
Device controls
The RET
eval
device has an up/down/right/left/select joystick and an on-off power button.
Turning the device off
You can turn the device off at any time by pressing the power button and holding it down for at
least 1 second.
The screen goes blank immediately, but the device takes a few more seconds to turn off
completely.
Wait a few seconds after the power indicator light stops blinking before turning the device back
on.
Joystick
The joystick provides a simple and intuitive user interface. Use your thumb to push the joystick
in the desired direction.
UP and DOWN move the selection highlight up or down.
Go back one screen:
Press LEFTwhen the cursor is at the left edge of the screen.
Go forward one screen:
Press RIGHT when the cursor is at the right edge of the
screen.
Select a highlighted item:
Press SELECT.
Main Menu
The RETeval device main menu has a top status bar, four buttons, and at
the bottom a description of the currently-selected protocol. The status
bar shows the time, date, and battery charge state. The four buttons
enable the operator to start a new test, view previous results, change
system settings, and choose the protocol that will run when starting a
new test. At the bottom of the screen, the currently selected protocol is
displayed.

Getting Started
RET
eval
Device User Manual 9
Settings
Set up the RETeval device for use in your practice.
Step 1. Turn on the device.
The device goes through a brief internal test and initialization.
Step 2. Select Settings.
Step 3. Adjust each setting as you prefer.
Language
Select the language you want to use for the device’s user interface and
PDF reports.
If you select a right-to-left language (i.e., Arabic), the RIGHTand LEFT
joystick directions are swapped from the description in this manual.
Date / Time
Use the joystick to select each element of the current date. Use the
RIGHT and LEFT joystick directions to move between pages. The
device uses the date and time to label results and to compute the
patient’s age. The date and time can also be updated via scanning a
barcode at the beginning of a test using the free data barcode
application which runs on Windows (https://bit.ly/retevalbarcodereader) and smartphones
(search for RETeval on your phone’s app store).
Backlight
The LCD backlight for the operator’s display can be adjusted separately
for light-adapted and dark-adapted testing. The device will
automatically switch between those two modes as appropriate during a
test. Brighter settings may be more visible, but will slightly reduce the
number of patients you can test before needing to recharge in the
docking station. For dark adapted testing, brighter settings reduce the
time the operator needs to dark adapt to be able to see the screen clearly
but may affect the patient’s rod sensitivity. For light adapted testing, the
operator’s display can be set to high, medium, or low brightness. There
is also a “red” option that makes the display only use red light. For dark
adapted testing, there are three levels of brightness that only use red light as well as dim full-
color. The default values are medium brightness for light adapted scenarios and dim red for dark
adapted testing.

Getting Started
RET
eval
Device User Manual 10
Testing
Select Tested eye to define which eyes you want to test. For example,
you may be involved in a clinical trial where only the right eye is to be
tested. By selecting Right eye, all protocols will only test the right eye.
Choosing Both eyes, the default, tests both eyes. Selecting Choose
at test time gives you the option to choose after pressing New Test to
start running a test. Alternatively, the Done (OD) and Done (OS)
buttons can be used on the connect electrode screen to skip all
remaining tests for that eye.
Immediately after sensing an electrode being connected, the device
measures the electrical noise. If the noise is above a certain threshold, a warning message is
display about excessing electrode noise (See the Troubleshooting section for details). If the noise
is below that level, by default the measured value is not displayed. Under the Display noise
option, you can choose to always have the electrode noise visible.
Reporting
Under the reporting menu, there are many different options that affect
the displaying of results both on the device and in the reports.
Practice Information
Practice information is used to label reports. It includes the practice
name and three lines for practice address. You can use these lines for
other information if you like. Text is inserted at the blinking vertical
cursor. Use the delete key to move to the left. Practice information
is displayed on the report above the patient information as shown in the sample report on Page
18. That sample report has LKC Technologies and its address as the practice information, which
is the default for all devices. Pressing the barcode symbol enables practice information to
be scanned from an external display such as a PC monitor. Scanning is automatic and does not
require the joystick to be pressed. The free data barcode application which runs on Windows
(https://bit.ly/retevalbarcodereader) and smartphones (search for RETeval on your phone’s app
store). If the RET
eval
device has trouble scanning the barcode, ensure the eyecup is on or very
close to the display and the display brightness is set to maximum.
Page Size
The PDF reports created by the RET
eval
device can be formatted for either A4 sized paper or
letter (8.5” x 11”) sized paper.
DR limits
As described in DR Assessment section on page 20, the limit criteria for the classification of
normal for this test can be modified here.

Getting Started
RET
eval
Device User Manual 11
Reference data
For many tests using Sensor Strip electrodes, reference distributions and reference intervals are
built into the device. See page 67. This section lets you turn the reference interval reporting off,
which might be convenient, for example, if you know that the subjects you are testing are outside
the reference population tested in the database.
Report formats
With the Report formats menu, you can select if you want PDF, JPEG, or PNG output formats
for the reports. More than one option can be selected. PDF is the preferred format for printing.
JPEG may be more convenient for uploading results to certain EMR systems.
Stimulus waveforms
Luminance as a function of time can be plotted at the bottom of electrical response waveforms.
By default, this is turned off for brief-flash stimuli, but is on for extended-duration stimuli such
as long flash (on-off), sinusoidal and triangular waveforms. The advantage to showing the light
waveform for the long flash stimulus would be to show, for example, when the off response is
expected. Showing the stimulus waveform for a flicker test may be pedagogically useful as the
stimulus isn’t just near time = 0. Stimulus waveforms are shown both on the device and in the
reports.
System
To view the device’s serial number and what options are present, select
System the About under Settings. The base RET
eval
device model
indicates “DR Assessment” in the screen header. The “Flicker ERG”,
“RET
eval
–S” and “RET
eval
complete” options would be indicated as
such. Also shown on this screen is the firmware version. The number of
tests completed may also be reported here.
Selecting Memory allows you to view the number of tests stored in the
device, out of the maximum allowed of 50. On this page, you have the
option to Erase all test results or to Erase everything, which reformats the drive and then
restores the factory default files onto the reformatted drive.
Update firmware is described on page 24.
Reset settings enables you to restore all setting to the factory default condition, including the
practice information.
The boot block is the first region of the device’s storage that is read during boot. If sectors in the
boot block become bad, the device may not turn on properly every time, for example, the power
indicating LED may blink many times when the device in the docking station before staying steady
green. Rewrite boot block might fix this issue; use this button only by the request of the LKC
service department.

Performing a test
RET
eval
Device User Manual 12
Performing a test
Step 1. Remove the RET
eval
device from the docking station.
Step 2. Confirm the protocol is the one desired by looking at the protocol title at the bottom of
the screen. If not, select Protocol on the device to change. See manual section Choosing
a protocol on page 20.
Step 3. Select New Test on the device.
Step 4. Enter patient information as prompted by the device (name or identifier and date of
birth). Pressing the barcode symbol enables patient information to be scanned
from an external display such as a PC monitor. Scanning is automatic and does not
require the joystick to be pressed. The free data barcode application which runs on
Windows (https://bit.ly/retevalbarcodereader) and smartphones (search for RETeval on
your phone’s app store). The barcode application does not use the internet and does
not store any patient information. If the RET
eval
device has trouble scanning the
barcode, ensure the eyecup is on or very close to the display and the display brightness
is set to maximum.
Step 5. Confirm that the protocol and patient information are correct.
Step 6. Select a Sensor Strip packet and scan the packet barcode by placing the eyecup of the
device on or very near the barcode on the Sensor Strip packet. Scanning is automatic
and does not require the joystick to be pressed. Use a new set of Sensor Strips for each
test.
Step 7. Ask the patient to remove their eyeglasses. Contact lenses may be left in place.
Step 8. Place both the right and left Sensor Strips on the patient. Proper placement is shown
below. Alternatively, you may find it easier to place just the right Sensor Strip, test that
eye, then place the left Sensor Strip and test that eye. Handle the Sensor Strips by the
connection tab as the hydrogel is very sticky.
If you are using Small Sensor Strips, both strips must be applied to read either eye.

Performing a test
RET
eval
Device User Manual 13
The small side of the Sensor Strip should be placed on the lower eyelid, with the end of
the Sensor Strip placed under the center of the eye. The side with the connection tab
should be located near the temple.
Align the Sensor Strip such that there is no hair beneath it.
LKC Technologies recommends the use of NuPrep®(made by Weaver and company and
sold on the LKC store, https://store.lkc.com), to prepare the patient’s skin in the
electrode contact area. Use of NuPrep will achieve electrical impedance levels
comparable to corneal contact electrodes and improves adhesion on subjects with
adhesion issues. Alternately, soap and water, or an alcohol wipe may be used but will
result in increased impedance. Use alcohol-based products with caution, as the alcohol
fumes may cause irritation to the eye.
If adhesion is still a problem after using NuPrep a medical grade adhesive tape at the
ends of the Sensor Strip can be used.

Performing a test
RET
eval
Device User Manual 14
Step 9. Test the right eye.
Ask the patient to cover their left
eye with the palm of their hand.
Doing so will improve their fixation
to the red light in the device and
also open their eyelids wider to
make the pupil more visible. Small
children may prefer to leave both
eyes open and uncovered.
Connect the lead to the Sensor Strip
below the patient’s right eye with
the blue lever away from the
patient’s skin.
Select Next. If the Next button is
not present, the electrical
connection to the patient is poor or
the device is not connected
properly to the Sensor Strip: See the
Troubleshooting section of this
manual.
Tell the patient to look at the red
fixation light in the RET
eval
device and to open their eye as wide as possible. In Troland-
based protocols, the RET
eval
device requires an unobstructed view of the patient’s
entire pupil.
Press the device against the patient, positioning the device so that the patient’s pupil is
inside the large green circle. The RET
eval
device should be placed straight onto the
subject, a small gap between the eye cup and the lateral portion of the face is fine, as
long as the amount of ambient light reaching the eye through this gap isn’t excessive.
Ask the patient to relax, and to try to not blink. The patient should not talk, smile, or
grimace (doing so may lengthen the test time). For protocols that use multiple stimulus
conditions, suggest to the patient that they blink when it’s dark in order to reduce the
amount of electrical artifacts that occur during the measurement phases of test.
Select Start Test after the device has properly located the pupil. If the device
erroneously indicates something else as the pupil, reposition the device and ensure the
eyelids are sufficiently open until the pupil is properly identified. If Start Test is not
highlighted, see the Troubleshooting section of this manual.
At the beginning of each test, the RET
eval
device automatically recalibrates the light
intensity and color, during which time the patient will see brief red, green and blue
flashes. This process takes about one second. If recalibration is unsuccessful, an
“Unable to calibrate” or “Excessive ambient light” error will display. See the
Troubleshooting section of this manual.

Performing a test
RET
eval
Device User Manual 15
Wait while the device conducts the test. Testing time depends on the protocol that you
have selected and can be less than 10 seconds or as long as a couple of minutes.
After the device has indicated that the testing is complete, disconnect the lead from
Sensor Strip.
Step 10. Repeat Step 9 for the left eye.
Step 11. The results summary appears as shown on page 16. While the results are being shown,
the device saves them. Results and Main Menu buttons appear along with a
notification of successful storage upon completion of the save, which can take several
seconds. By selecting Results, you can immediately view the patient’s results and do
additional testing without having to re-enter the patient or electrode information.
Step 12. Remove the Sensor Strips from the patient’s face, starting with the end under the eye.
Alternatively, ask the patient to remove the Sensor Strips. Dispose of the Sensor Strips
in accordance with local guidelines.
Clean the eyecup and other patient-contact parts of the device and Sensor Strip lead.

Viewing Results
RET
eval
Device User Manual 16
Viewing Results
Results on the device
The DR Assessment protocol combines implicit time, amplitude, age, and
pupil response to create a unified result, which is shown immediately
after the test completes.
Diabetics with vision-threatening diabetic retinopathy typically have
larger results. For more information, refer to the DR Assessment
protocol description on Page 20.
Details for the DR Assessment results can be seen by selecting Results.
If selecting Results from the main menu, scroll up and down through
the list and select the desired test result. The results are stored in chronological order; with the
most recent result first. After showing the same summary page, the electrical and pupil
responses can be seen. The figures below show the results from the right eye; left eye results
are similarly shown.
Two periods of the electrical response, as
measured from the Sensor Strip, to a 32 Td∙s
(left) and 16 Td∙s (right) white flickering
stimulus are shown. As shown on the bottom
of the plot, the light flashes stimulating the
retina occurred at time = 0 ms and near times
= 35, 70 ms. The dotted lines indicate the
measurement points for the peak-to-peak
amplitude and implicit time (time-to-peak).
The rectangle encloses the middle 95% of
peaks in the reference data.
The pupil size as a function of time is shown
for the 4 and 32 Td∙s white flickering stimuli.
The stimuli start at time = 0. The dotted lines
show the extracted pupil diameters for the
two stimuli. The ratio of pupil areas is shown
below the plot, and it’s 95% (two-tailed)
reference interval is shown scaled for the dim
stimulus near the right edge of the plot.

Viewing Results
RET
eval
Device User Manual 17
Results on a PC
Results can be transferred to the PC in PDF (and other) formats.
Step 1. Place the RET
eval
device into the docking station.
Step 2. Connect the USB cable to the docking station and to the PC.
Step 3. The device appears on the PC like a thumb drive or external USB drive.
You can now view results or copy them to the PC as you would files in any directory on the PC. If
the RET
eval
device does not connect as a USB drive on your PC, see the Troubleshooting section
below. Patient results are located in the Reports directory on the device. For each PDF report,
there are two corresponding data files found in the Data folder. These data files have the same
file name with a different extension (.rff and .rffx rather than .pdf). The .rffx file is in an XML
format that can be used to extract numerical information from the test programmatically.
The .rff file is a binary file that contains all the raw data collected during the test procedure. Data
can be exported from a collection of .rff files using the RFFExtractor program, sold on the LKC
online store (https://store.lkc.com). Keeping the .rff data files is also recommended in case you
require technical support from LKC.
The file naming convention for results is patientID_birthdate_testdate.pdf, where the birthdate
is yymmdd (2 digit year, month, day), and the test date (“testdate”) is yymmddhhmmss (2 digit
year, month, day, hour, minute, second). With this file naming convention, past patient results
will sort next to their current results. Any spaces in the patient ID will be removed in the filename.
The PDF displays:
•Practice information, as specified in Settings (See page 10 for changing practice
information.)
•Patient information, as entered during the test
•Date and time of the test
•A description of the stimulus used. Chromaticities are reported in the (x, y) colorspace
from CIE 1931. Brightness is reported in photopic units in either Trolands or candela/m2,
depending on the protocol. In some cases, rather than reporting chromaticity (x, y) the
stimulus will be described as the brightness of the red, green, and blue LEDs separately.
•Patient results
You can print, fax, or email these PDF files just as you would any file on your PC.
The PDF shows three periods of the electrical response recorded by the Sensor Strips. In the
electrical response, the light flashes stimulating the retina occurred at time = 0 ms, 35 ms and 70
ms.
An example PDF report for the DR Assessment protocol is shown below.

Viewing Results
RET
eval
Device User Manual 18

Reflex testing
RET
eval
Device User Manual 19
Reflex testing
Additional testing can be performed on the same patient without having to reenter the patient
and electrode information. To perform multiple tests on the same patient do the following steps:
Step 1: At the end of
the test, press
“Results”.
Step 2: Review the
results of the previous
test.
Step 3: On the last
page of results,
choose “Retest”.
Step 4: Optionally
choose “Change
Protocol” before
proceeding.
This reflex testing process can be repeated indefinitely. All PDF reports performed with reflex
testing will be assembled into one multi-page report. The raw data (rff) files are not combined.
Other manuals for RETeval
2
Table of contents
Other LKC TECHNOLOGIES Medical Equipment manuals