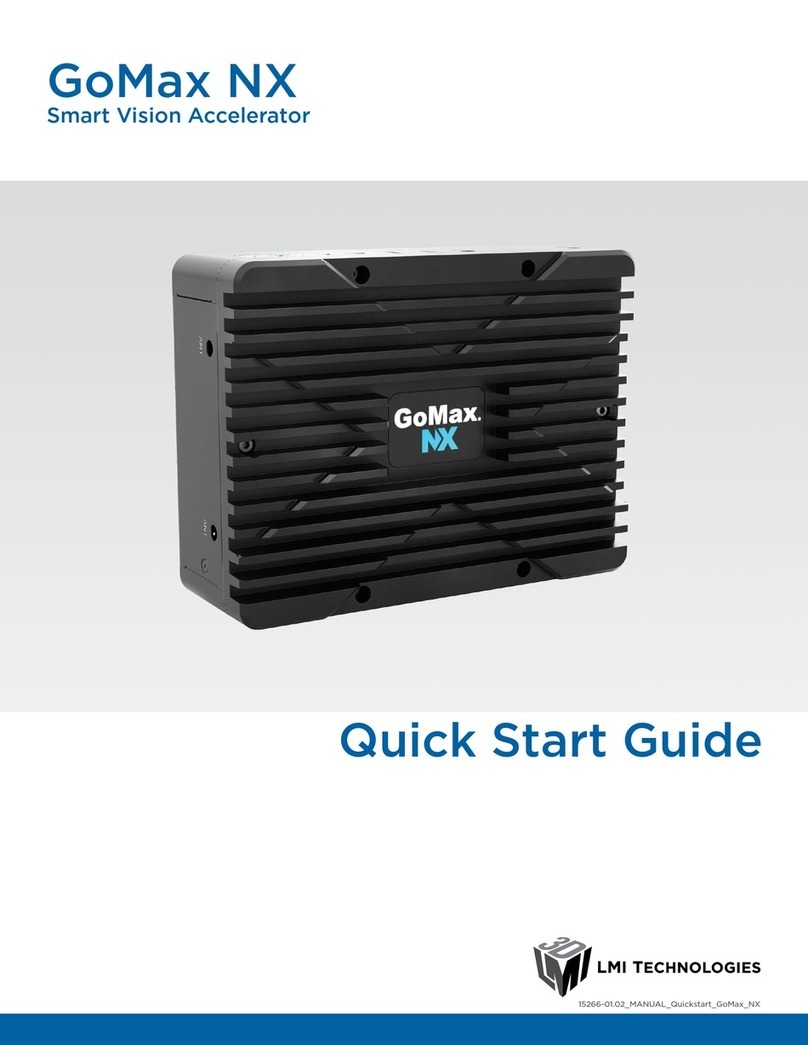
LMI Technologies GoMax Smart Vision Accelerator User manual

USER MANUAL
GoMax Smart Vision Accelerator
Firmware version:6.1.x.xx
Document revision:A

GoMax Smart Vision Accelerator:User Manual 2
Copyright
Copyright © 2021 by LMI Technologies, Inc. All rights reserved.
Proprietary
This document, submitted in confidence, contains proprietary information which shall not be
reproduced or transferred to other documents or disclosed to others or used for manufacturing or any
other purpose without prior written permission of LMI Technologies Inc.
No part of this publication may be copied, photocopied, reproduced, transmitted, transcribed, or
reduced to any electronic medium or machine readable form without prior written consent of LMI
Technologies, Inc.
Trademarks and Restrictions
GoMax™ and Gocator™ are registered trademarks of LMI Technologies, Inc. Any other company or
product names mentioned herein may be trademarks of their respective owners.
Information contained within this manual is subject to change.
Contact Information
LMI Technologies, Inc.
9200 Glenlyon Parkway
Burnaby BCV5J 5J8
Canada
Telephone: +1 604-636-1011
Fax: +1 604-516-8368
www.lmi3D.com

GoMax Smart Vision Accelerator:User Manual 3
Table of Contents
Copyright 2
Table of Contents 3
Introduction 4
Interface 6
Estimated Scan Rates and Performance 7
Safety and Maintenance 9
Electrical Safety 9
Cleaning and Maintenance 9
Environment 9
Hardware Overview 11
Protocol Support 12
Adding GoMax to a Sensor System 13
Connecting Power 14
Setting the IP Address 16
Discovering a GoMax IPAddress 19
Mounting 21
Using DIN Rail Clips 21
Mounting Directly to a Frame 21
Connecting GoMax to a Sensor System 22
Using GoMax 23
Accessing GoMax 24
Changing the Interface Language 26
Starting and Stopping Acceleration 27
Accessing Accelerated Sensors 29
Via a Web Browser 29
Via an SDK Application 30
Upgrading and Restoring GoMax 31
Monitoring GoMax Health Status 33
Configuring Network Settings 35
Setting the IPAddress 35
Configuring the GoMax Ports 35
Understanding Auto Restart 37
Understanding How GDK Tools Work with GoMax 38
Troubleshooting 39
Specifications 40
GoMax 41
Return Policy 42
Software Licenses 43
Support 46
Contact 47

GoMax Smart Vision Accelerator:User Manual 4
Introduction
The GoMax Smart Vision Accelerator is a hardware solution that accelerates any Gocator sensor to meet
inline production speeds, without the need for a PC. The plug and play functionality of GoMax lets you
quickly and easily add powerful data processing to a Gocator system, achieving faster cycle times and
enhancing overall inspection performance.
GoMax provides this compute power thanks to its NVIDIA Jetson TX2’s 256-core GPU and 64-bit quad-
core ARM processor—all in a compact, rugged case.
To accelerate sensors, GoMax takes over a portion of the sensor’s data processing (data generation, 3D
measurement, and control).
Relationship between GoMax (right)and a sensor (left)
GoMax is ideal for accelerating one or more Gocator snapshot sensors (such as Gocator 3506) or multi-
sensor, buddied Gocator laser line profile sensor systems. A single GoMax unit can accelerate one or
more sensors.

GoMax Smart Vision Accelerator:User Manual Introduction • 5
GoMax accelerating one or more Gocator sensors
You can also add multiple GoMax units to a system, each unit accelerating one or more sensors, to scale
up to faster speeds. Note however that you can't use multiple GoMax units to accelerate a single sensor.
GoMax supports digital, analog, and serial output from sensors. However, because output must
be passed to the GoMax unit and then back to the sensor, network latency will have an impact
on performance.
GoMax can accelerate GDKtools in custom firmware, with some limitations (for details, see
Understanding How GDK Tools Work with GoMax on page38). For information on developing GDKtools,
see the reference documentation and samples provided with the library.
This documentation describes how to connect and use a GoMax unit. For information on using Gocator
sensors, see the user manuals of those devices.
Notational Conventions
This documentation uses the following notational conventions:
Follow these safety guidelines to avoid potential injury or property damage.
Consider this information in order to make best use of the product.

GoMax Smart Vision Accelerator:User Manual Introduction • 6
Interface
As with Gocator sensors, you configure GoMax using an intuitive web interface.
The GoMax interface, listing four accelerated sensors
Click the icons at the top of the web interface to switch between pages, which contain a high level
grouping of settings and functionalities. In panels such as the Manage panel shown above, click the
categories to the left to switch between lower level groupings of settings.
Element Description
1 Manage page Contains settings and controls (in the Manage panel) to start and stop
acceleration, change network settings, and perform maintenance on the
GoMax unit. For more information, see the Manage panel categories
listed below.
2 Dashboard page Provides monitoring of the GoMax unit's health. For more information,
see Monitoring GoMax Health Status on page33.
3 CPULoad and Speed Provides important GoMax metrics.
4 Sensor System category Lets you start and stop acceleration of sensors. For more information, see
Starting and Stopping Acceleration on page27.
5 Networking category Contains settings for configuring the network. For more information, see
Configuring Network Settings on page35.

GoMax Smart Vision Accelerator:User Manual Introduction • 7
Element Description
6 Maintenance category Lets you upgrade firmware and perform a factory reset of the GoMax
unit. For more information, see Upgrading and Restoring GoMax on
page31.
7Status bar Displays log messages from the GoMax unit.
The web interface on an accelerated sensor is identical to the interface on an unaccelerated sensor. The
Ethernet-based output protocols (Gocator, EtherNet/IP, ASCII, and Modbus) are also identical to those
found on an unaccelerated sensor, and are fully supported.
Estimated Scan Rates and Performance
Note that the estimates are based on tests done using Gocator firmware 5.2 SR1.
The following tables provide estimates of the scan rates of Gocator 3210, 3506, and 3504 under
different field-of-view and resolution settings.
For these estimates, the following settings were used:
lExposure was set to 4 milliseconds.
lNo measurement tools added.
lReduce Occlusion and Acquire Intensity were disabled.
lUniform Spacing was enabled.
Field of View
(X x Y x MR) Spacing (mm) Sensor-only (Hz) With GoMax
(Hz)
100x154x110 0.5 6 10
100x154x110 0.2 1.8 10
100x154x110 0.1 0.5 4.7
100x154x110 0.08 0.3 4.0
100x154x110 0.05 0.15 2.1
Gocator 3210 Estimated Scan Rates
Field of View
(X x Y x MR) Spacing (mm) Sensor-only (Hz) With GoMax (Hz)
30x45x25 0.2 4.3 8.5
30x45x25 0.1 3.2 8.5
30x45x25 0.02 0.2 2.7
Gocator 3506 Estimated Scan Rates

GoMax Smart Vision Accelerator:User Manual Introduction • 8
Field of View
(X x Y x MR) Spacing (mm) Sensor-only (Hz) With GoMax (Hz)
14x18x7 0.05 2.9 7.5
14x18x7 0.02 1 6.4
14x18x7 0.01 0.3 2.9
14x18x7 0.006 0.15 2.0
Gocator 3504 Estimated Scan Rates
The following table lists the scan rate speed increase factor when accelerating Gocator 3210, 3506, and
3504 with GoMax. Sensors are set at their default resolutions. The same settings listed above were used
for these results.
Sensor Field of View
(X x Y x MR) Spacing (mm) Sensor-only (Hz) With GoMax (Hz) Speed Increase
Factor
3210 100x154x110 0.08 0.3 4.0 13.3
3506 30x45x25 0.02 0.2 2.7 13.5
3504 14x18x7 0.006 0.15 2.0 13.3
Gocator 3210, 3506 &3504 Scan Rate Increase Factors
The following table lists the running time of various measurement tools, with and without GoMax, as
well as the performance increase factor when running with GoMax.
Note that although sensor models and job file configurations will affect running times, the performance
increase factor for tools should be consistent across models and configurations.
Measurement Tool Model Running Time
on Sensor (ms)
Running Time with
GoMax (ms)
Performance Increase
Factor
Surface Hole Gocator 2510 40 11 3.5
Surface Bounding Box Gocator 2510 30 9 3.3
Surface Plane Gocator 2510 2.3 0.4 6.0
Profile Dimension Gocator 2510 0.054 0.037 1.5
Profile Intersect Gocator 2510 0.075 0.028 2.7
Cylinder Head Volume Gocator 3210 15 2.2 6.8
Performance Increase Factors

GoMax Smart Vision Accelerator:User Manual 9
Safety and Maintenance
The following sections describe the safe use and maintenance of GoMax vision accelerators.
Electrical Safety
Failure to follow the guidelines described in this section may result in electrical shock or
equipment damage.
Sensor systems GoMax are connected to should be connected to earth ground
All sensors in the system should be connected to earth ground through their housing. All sensors should
be mounted on an earth grounded frame using electrically conductive hardware to ensure the housing
of the sensor is connected to earth ground. Use a multi-meter to check the continuity between the
sensor connector and earth ground to ensure a proper connection.
Minimize voltage potential between system ground and sensor ground
Care should be taken to minimize the voltage potential between system ground (ground reference for
I/O signals) and sensor ground. This voltage potential can be determined by measuring the voltage
between Analog_out- and system ground. The maximum permissible voltage potential is 12 V but should
be kept below 10 V to avoid damage to the serial and encoder connections.
Use the power supply provided with the unit
If the power supply or cords get damaged, contact LMI Technologies for a replacement.
Use care when handling powered devices
Wires connecting to the GoMax unit should not be handled while the unit is powered. Doing so may
cause electrical shock to the user or damage to the equipment.
Cleaning and Maintenance
Keep vents clean
To avoid overheating of the GoMax unit, make sure the unit's vents are clean.
Environment
Avoid installing the GoMax unit in hazardous environments
To ensure reliable operation and to prevent damage to the GoMax unit, avoid installing the unit in
locations
lthat are humid, dusty, or poorly ventilated;
lwith a high temperature, such as places exposed to direct sunlight;
lwhere there are flammable or corrosive gases;
lwhere the unit may be directly subjected to harsh vibration or impact;

GoMax Smart Vision Accelerator:User Manual Safety and Maintenance • 10
lwhere water, oil, or chemicals may splash onto the unit;
lwhere static electricity is easily generated.
Ensure that ambient conditions are within specifications
GoMax units are suitable for operation between 0–45° C.

GoMax Smart Vision Accelerator:User Manual 11
Hardware Overview
The following illustrates the physical features of a GoMax unit.
Item Description
Power Indicator Illuminates when power is applied (blue).
USB ports USB 2.0 and 3.0 ports. Reserved for future use.
ETH1 Gigabit Ethernet port. For direct connection to PCat initial configuration and to
connect the GoMax unit to the sensor system via a hub. PCs and PLCs should only be
connected to this Ethernet port.
ETH2 Gigabit Ethernet port. Sensors can be connected to this port.
HDMI Mini HDMIport. Reserved for future use.
Power Jack Accepts screw-on connector from supplied power supply.
Air Intake Vent Intake for air flow.
Air Outlet Vent Outlet for air flow. (Opposite the intake vent; not shown.)
Serial Number Unique sensor serial number.
Mounting Holes Holes for mounting the GoMax unit (using the provided DINrail clips or mounted
directly to a frame). Four additional holes area available on the back of the unit (not
shown).
For important information on mounting orientation and the choice of mounting
points, see Mounting on page21.
For information on mounting hole specifications, see GoMax on page41.

GoMax Smart Vision Accelerator:User Manual Protocol Support • 12
Protocol Support
GoMax supports protocols for communicating with sensors over Ethernet (TCP/IP)and serial output.
The Gocator protocol is always on and its output is always available, regardless of the output
you choose. This allows simultaneous connections via an SDK application and a PLC, letting you
for example archive or display scan data on a PC while controlling equipment with a PLC.
GoMax does not support the PROFINETprotocol.
Protocols available over Ethernet
lGocator
lModbus
lEtherNet/IP
lASCII
For an overview of the Ethernet ports used by sensors, see Required Ports in the user manual of your
sensor.
Protocols available over serial
lASCII
lSelcom

GoMax Smart Vision Accelerator:User Manual 13
Adding GoMax to a Sensor System
LMIrecommends adding GoMax to a sensor system that is already fully set up and configured. For
information on setting up a sensor system, see the user manual of the sensors used in the system.
Follow the instructions in the following sections to install and perform the initial configuration of a
GoMax unit.
Sensors you intend to accelerate using GoMax must be running firmware version 5.1 or higher.

GoMax Smart Vision Accelerator:User Manual Adding GoMax to a Sensor System • 14
Connecting Power
Power is provided by the included power supply. The plug type depends on the region in which you are
using the unit.
Use only the provided power supply with the GoMax unit. Using a higher voltage power supply
will damage the unit. Take particular care not to use a Master 100 power supply with GoMax, as
the barrel connector is identical.
LMIrecommends powering up the GoMax unit and performing the initial configuration of the GoMax
unit before physically connecting the unit to the sensor system.
To connect power:
1. Connect the power supply connector to the unit and hand-tighten.
2. Plug the power adapter into an available electrical outlet.

GoMax Smart Vision Accelerator:User Manual Adding GoMax to a Sensor System • 15
An LED indicator on the unit lights when power is applied.
The unit is ready for initial configuration (setting an IPaddress).

GoMax Smart Vision Accelerator:User Manual Adding GoMax to a Sensor System • 16
Setting the IP Address
Each GoMax unit and Gocator sensor on the sensor system network must have a unique IP address. By
default, the IPaddresses of the GoMax unit's two Ethernet ports are set to 192.168.1.6 and
192.168.1.7. You should change the second port's IPaddress so that it is on a separate subnet (such as
192.168.2.6).
To set the IP address of a GoMax unit:
1. Using an Ethernet cable, first connect a computer directly to the ETH1 port on the GoMax unit.
Only use the ETH1 port when connecting a PCto the GoMax unit.
2. On the computer, launch an Internet browser and navigate to 192.168.1.6.
The GoMax web interface is displayed.

GoMax Smart Vision Accelerator:User Manual Adding GoMax to a Sensor System • 18
The Networking category settings are displayed.
4. Under Interface 1 and/or Interface 2, set the IP address and click Save.
The GoMax unit power cycles after you confirm you want to do this. Changing network settings disconnects
the GoMax unit and stops the acceleration of any accelerated sensors.
After the GoMax unit restarts, its IP addresses are changed.
5. Disconnect the laptop from the GoMax unit.

GoMax Smart Vision Accelerator:User Manual Adding GoMax to a Sensor System • 19
Discovering a GoMax IPAddress
If you can't find or connect to a GoMax unit, LMIrecommends using an IPscanner to find the unit on
your network. LMIrecommends "Free IPScanner"for this purpose, which you can download from
http://www.eusing.com/ipscan/free_ip_scanner.htm.
After downloading the software and noting where you saved it, follow the instructions below.
Make sure the GoMax unit is connected to your network, or connect to it as shown in Setting the
IP Address on page16.
To discover the IP address of a GoMax unit with Free IPScanner:
1. Launch the IP scanner by double-clicking ipscan.exe.
The application launches immediately. (The executable is not an installer.)
2. If User Account Control asks whether you want to allow the application to make changes to your device, click
Yes.
3. When FreeIPScanner is running, in the dialog that displays, click Skip.
4. Set the IP range you expect the unit to be in, and then click Start Scanning.

GoMax Smart Vision Accelerator:User Manual Adding GoMax to a Sensor System • 20
The scanner lists the devices found in the range you specify.
5. Make note of the GoMax unit's IPaddress in the list of discovered devices, and use that address to connect
to the unit.
Table of contents
Other LMI Technologies Video Card manuals
Popular Video Card manuals by other brands

Diamond Multimedia
Diamond Multimedia Radeon X1650AGP256 Specification sheet

Aztech
Aztech TNT2-AGP user manual

Nvidia
Nvidia V6800GS-512P Specifications

EVGA
EVGA GeForce GTX 580 FTW Hydro Copper 2 specification

EVGA
EVGA GeForce 9800 GT HDMI Product specifications

ATI Technologies
ATI Technologies All-In-Wonder X1800 Series Installation and setup user's guide