LOBAS Major LO TF User manual

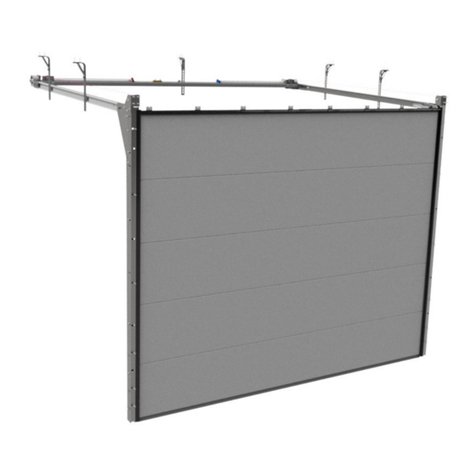
MAJOR TORSJON FREMME EKSKLUSIV / ELEGANT
LOBAS Major LO TF
Installasjonsmanual –Assembly Instruction
Portbredde > 3 m
Door width > 3 m
GA-4-19-72
REV: 08
www.lobas.no
www.lobasgarasjeporter.no
Garasjeporter
Garage doors

Beskrivelse Description
I-IV
V
VI-XI
1-7
8-9
10
11-12
13
14-17
18-19
20-21
22
Informasjon om dokumentet
Sikkerhetskrav
Medfølgende deler og skruer,
systemoversikt. Nødvendig
verktøy
Montering av ramme,
takskinner og motorfeste
Montering av portseksjoner,
braketter og hengsler
Montering av håndtak
Montering av portavstiver og
portåpnerfeste
Montering av plastdeksler
Montering av vaier, aksling og
fjærsystemer. Smøring.
Problemløsning. Installasjon
av portåpner
Demontering. Bruk og
vedlikehold
Vedlikeholds skjema
Document information
Safety requirements
Nuts and bolts. Tools
required for assembling the
door. System overview.
Assembling door frame,
tracks and engine attachment
Assembling door sections,
brackets and hinges
Assembling door handle
Assembling strut, and
operator plate
Assembling protection covers
Installing cables, shaft and
spring systems. Lubrication.
Problem solving. Installing the
motorised opener.
Disassembling the door. Use
and maintenance
Maintenance log
1-6
7
8-9 10
14-15
13
11-12
Installasjonsmanual / Assembly Instruction
Major LO TF 2
Innholdsfortegnelse -Content

Installasjonsmanual / Assembly Instruction
Major LO TF 3
ISymboler Symbols
Advarsel/Vær oppmerksom
på risiko
Visuell kontroll
Manuell operasjon
Se appendiks
Oppmåling eller bruk av vater
Tilleggsutstyr som kan legges
til dersom det er ønskelig.
Standardutstyr avhenger av
portstørrelse.
Ikke stram til skruer/muttre
Danger/Attention
Visual control
Manual operation
Information in appendix
Measure or level
Optional equipment that may
be added if the buyer asks for
it. The equipment may be
standard depending on door
dimensions.
Do not tighten bolts and nuts
II Fargekoder i
lysbildetittel
Colour codes in slide
titles
Tilleggsutstyr
Avhenger av portstørrelse
Optional equipment
Dependent on door
dimensions
III Bruksområde Area of application
•Maks. portbredde: 6 m
•Maks. porthøyde: 2,5 m
•Maks. portvekt: 165 kg
•Temperaturer: -20°C til
+50°C
•Luftfuktighet: 20-90%
•Fjærens livstid: 15000
sykluser
•Max door width: 6 m
•Max door height: 2,5 m
•Max door weight: 165 kg
•Temperature range: -20°C
to +50°C
•Humidity: 20-90 %
•Spring lifetime: 15000
cycles

Installasjonsmanual / Assembly Instruction
Major LO TF 4
IV Informasjon General information
•Denne manualen må
overleveres til
sluttbruker når
installasjonene er
fullført, og bruker må ta
vare på denne for senere
vedlikehold,
reparasjoner,
oppgraderinger etc.
•Installasjonen må
utføres i henhold til
denne manualen.
•Det anbefales å bruke
profesjonell installatør
dersom man ikke har
nødvendig kompetanse
eller utstyr.
•Korrekt installert
tilfredsstiller produktet
alle krav i EN 13241-1.
•Det anbefales at
installatør fyller ut
loggbok bakerst etter
fullført installasjon.
•Dersom portåpner skal
benyttes må denne
installeres i henhold til
åpnerens
installasjonsmanual.
•This manual must be
delivered to the user of
the door system at the
same time as the parts, or
after the assembly if a
professional is performing
the installation.
•The owner of the door
system must keep this
document for
maintenance, repair and
disassembly purposes.
•Assembling the door
system must be performed
as indicated in this
document.
•It is recommended to let a
professional perform the
installation of the door
system.
•A correctly installed door
system meets all the
requirements of the EN
13241-1 standard.
•The person installing the
door system should
complete the
documentation part at the
end of this document.
•If an automatic door
opening system is
installed, please follow the
instructions in the
appropriate installation
manual.

Installasjonsmanual / Assembly Instruction
Major LO TF 5
VSikkerhetskrav ved
montering og bruk
Safety requirements for
assembly and use
•Pass på at strømmen er
skrudd av når du eller en
installatør jobber med
elektriske komponenter på
porten.
•Aldri hopp over
sikkerhetsoperasjoner
eller monteringen av
sikkerhetsutstyr.
•Dersom en legger til, eller
lar være å bruke, enkelte
deler kan dette ha
innvirkning på systemets
funksjonalitet og sikring.
Det er derfor anbefalt å
ikke gjøre dette.
•Enkelte deler kan ha
skarpe kanter, det er
derfor lurt å bruke
hansker.
•Dersom du oppdager
skade på deler før, under
eller etter montering bør
du ta kontakt med
forhandler for å evaluere
skaden innvirkning på
portens funksjonalitet og
sikring.
•Pass på at du står å jobber
på et stabilt underlag,
spesielt når du skal opp i
høyden for å montere
takskinner og lignende.
•Sikre at barn og dyr ikke
har adgang til
arbeidsplassen.
•Bruk egnet verktøy.
•Make sure that the power
is switched off and
remains switched off
during all electrical
operations.
•Never bridge safety
operations.
•Adding or omitting parts
can affect the door
operation and thus the
safety of the equipment.
This is therefore strongly
discouraged.
•Some parts may contain
sharp edges. It is
recommended to use
gloves.
•If the equipment has signs
of damage and wear,
please contact a
professional to examine
the risks.
•Ensure that your work
environment is stable and
secure.
•Ensure that children and
animals are prevented
from entering the work
environment during the
assembly operation.
•Use the appropriate tools.

6
Kobling
Coupler
D
D
e
e
l
l
e
e
r
r
/
/
P
P
a
a
r
r
t
t
s
s
Tilleggsutstyr
Avhenger av portstørrelse
VI
2x Vertikalskinne
2x Vertical track
1x Overkarm
1x Header piece
2x Festevinkel
1x Avstandsskinne
1x Rear spacer
2x Buet skinne
2x Radius track
Støtte oppheng
Avstiver
opphengsvinkel
Opphengsvinkler
2x Horisontalskinne
2x Horisontal track
2x Bunnbrakett
2x Bottom bracket
Trinser med bolt
Roller
Sidehengsel
Roller Carrier
Midt hengsler
Hinges
Portseksjoner
Door panel
Innvendig håndtak
Door handle
2x Top Roller Boggi
2x Dual top roller
1x Portåpnerfeste
1x Operator plate
1x Motorfeste
1x Aksel Opplagring Senter
1x Nylon bearing centre
support
Torsjonsaksling med kilespor
Shaft with spline track
Torsjonsfjær
Torsion spring
Fjærbruddssikring
Spring break device
2x Trommel
2x Drum
2x Vaier
2x Lifting cable
2x Lager
2x Bearing
2x Oppspenningsstang
2x Tension bar
Plastdeksler
Plastic cover
Portavstiver
Strut
Portavstiverfeste
Strut plate
Motorfeste bak
Rear engine
attachment
Hjørnedeksel
2x Toppbrakett
2x Bracket
2x Bunnbrakett
2x Bottom bracket
Installasjonsmanual / Assembly Instruction
Major LO TF

Installasjonsmanual / Assembly Instruction
Major LO TF 7
Manuell
GH = VS + 10
FIH = VS -390
Portåpner
GH = VS + 10
FIH = VS -190
Dersom en portåpner eller en
portavstiver blir montert,
reduseres fri innkjøringshøyde
(FIH) med 1 cm.
X
2300
2300
System oversikt Major LO TF
2630 når DH
2980 når DH
16
16

Installasjonsmanual / Assembly Instruction
Major LO TF 8
VIII Liftmaster portåpnere Liftmaster engines
IX Sommer portåpner Sommer engine
,
Engine turned 90°
L
Portåpner
Engine
Maks porthøyde
Max door height
(m)
Maks portbredde
Max door width
(m)
L
(mm)
BS400N 2,3 3,0 3553
LM60EVF
LM80EVF
LM100EVF
LM130EVF
C-Rail
Porthøyde
Door height
(m)
L1
(mm)
L2
(mm)
T1
(mm)
XXXX8023CR5 2,3 3271 3151 142
XXXX8323CR5 2,3 3271 3151 142
XXXX8025CR5 2,5 3460 3340 142
EXTENSIONS
XXXX840CR5 3,0 4954 4834

Installasjonsmanual / Assembly Instruction
Major LO TF 9
XSkruer og muttere Bolts and nuts
X= Antall hengsler / X= Number of hinges Y = Antall portavstiverferster / Y = Number
of strut attachments
109526 –Self tapping screw 6,3x17 101704 –Treskrue 6x30
105770 M8 Tensiflens mutter
101754 –M6 Tensiflens mutter 111002 M6x12
101706 –Treskrue 8x45
105686 –Låseskrue M8 x 25 111001 -Track bolt –M8x17
106181 –TDBL-F-T 8,6x16z
107456 -6,3x18 TEK skrue med borspiss
A
B
D
F
G
H
I
E
C
J
Skruepose: Antall Bag reference: Quantity
Bag:
L-102: 10
Bag:
L-104: 4-12
L-105: 3
L-106: 2
L-47: 20
Bag:
L-102: 2
Bag:
L-106: 3
Bag:
L-105: 6
L-103: 8
L-104: 4-8
L-106: 3
Bag:
L-102: 10
Bag:
L-105: 6
L-104: 2-6
L-106: 3
Bag:
L-103: 8
109464 –Sleideklips -Monteres med skrue G
K
Bag:
L-04: 8-12
Tilleggsutstyr/ Optional equipment
Avhenger av portstørrelse / Depends on door dimensions
Bag:
L-95: 66
L-96: 4 x X
L-97: 2 x Y
L-99: 2 x Y
Bag:
L-97: 2 x Y
L-99: 2 x Y
L-83: 4
Endekopp
Bag:
L-22: 2
L-104: 2-6

Installasjonsmanual / Assembly Instruction
Major LO TF 10
XI Verktøy Tools
≥ 5 m
2,5 mm
4 mm
10 mm
13 mm

1Oppmåling av
portåpning
Measurement of
garage doorway
2Montering av pakning Assembling sealing on
vertical track
Installasjonsmanual / Assembly Instruction
Major LO TF 11
X
DH
DH - X
X= Skjevhet i gulv
X = Variations in the floor

Installasjonsmanual / Assembly Instruction
Major LO TF 12
3Kapping av pakning Cutting the sealing
4Montering av overkarm
på vertikalskinne
Assembling header
piece on vertical track
F
E
4 x
4 x

5.1 Montering av
avstandsskinne
Assembling rear
spacer
5.2 Montering av skinner
på portåpning
Assembling tracks on
doorway
D
H
4 x
4 x
D
H
2 x 2 x
Tips: Bruk støtte for
oppheng til å holde
rammen på plass
Tip: Use the support for
the roof attachment to
position the tracks
Installasjonsmanual / Assembly Instruction
Major LO TF 13

6.1 Kontroll av skinner på
portåpning
Control that the
assembly is level
z
6.2 Demontering av
avstandsskinne
Disassembling
rear spacer
X= Max 600mmz
B
C
10 x C
10 x
Installasjonsmanual / Assembly Instruction
Major LO TF 14

Installasjonsmanual / Assembly Instruction
Major LO TF 15
6.3 Posisjonering av
motorfeste
Positioning engine
attachment
6.4 Montering av
motorfeste
Assembling engine
attachment
AB
A=B
Tips: Legg avstandsskinne på toppen av vertikalskinne
Tip: Position rear spacer on top of vertical tracks
33,5 mm
C
3 x

Installasjonsmanual / Assembly Instruction
Major LO TF 16
7.1 Montering av
takskinner
Assembling horizontal
tracks and roof attachment
7.2 Montering av buet
skinne
Assembling radius
tracks

7.3 Montering av
takskinner
Assembling
horizontal tracks
7.4 Montering av
avstandsskinne Assembling rear spacer
Installasjonsmanual / Assembly Instruction
Major LO TF 17
E
2 x
2 x
J
1 x
F
Tips: Bruk tau til å holde takskinnene på
plass til opphengsstagene er montert
Tip: Use ropes to maintain the parts in
position
D
H
4 x
4 x

7.5
Montering av
motorfeste og
opphengsvinkel bak
Assembling rear engine
attachment and roof
attachment
7.6 Montering motorfeste
bak
Assembling rear engine
attachment
G
K
3 x
3 x
A B
A=B
2 x D
Installasjonsmanual / Assembly Instruction
Major LO TF 18

7.7 Montering
opphengsvinkel bak
Assembling rear roof
attachment
7.8 Montering av
hjørnedeksel Assembling cover
G
C
2 x
1 x
K
1 x D
1 x
E
F
Installasjonsmanual / Assembly Instruction
Major LO TF 19

7.9 Montering av
opphengsvinkler
Assembling roof
attachment
7.10 Kontroll av diagonal Control the diagonal
Installasjonsmanual / Assembly Instruction
Major LO TF 20
Y
Y
Z
Z
Montering/Assembly Vinkler/attachments
Standard løsning /standard
assembly
1 vinkel/attachment
(Pos Y)
Dersom/If: DB/DW > 4000 mm 2 vinkler/attachments
(Pos Y & Z)
Eller / Or
Dersom/If: DH > 2300 mm 2 vinkler/attachments
(Pos Y & Z)
H
GD
C
1 x
1 x
2 x
2 x
Tips: Bruk spor i vertikalskinne for å feste målebånd (se utsnitt)
Tip: Use the slot in the rail to attach the measuring tape (top left image)
X
Y
X=Y
Other LOBAS Garage Door Opener manuals
Popular Garage Door Opener manuals by other brands

Chamberlain
Chamberlain 3500 - 1/2HP Series owner's manual

ACDC
ACDC RAPTOR Installation instructions and user guide

FAAC
FAAC 412-SX manual

Overhead door
Overhead door 450A Installation instructions and owner's manual
Chamberlain
Chamberlain LiftMaster 3850PC owner's manual

Novoferm
Novoferm Novomatic 553 Installation and operating instructions