manuals.online logo
Brands
  1. Home
  2. •
  3. Brands
  4. •
  5. LOBSTER SPORTS
  6. •
  7. Receiver
  8. •
  9. LOBSTER SPORTS Phenom 1 Setup guide

LOBSTER SPORTS Phenom 1 Setup guide

Other manuals for Phenom 1

3

This manual suits for next models

2

Popular Receiver manuals by other brands

Televes ZAS HD SAT user manual

Televes

Televes ZAS HD SAT user manual

Realistic DX-75 Operating and service instructions

Realistic

Realistic DX-75 Operating and service instructions

Saris 4620 Assembly instructions

Saris

Saris 4620 Assembly instructions

Mini DTR 206C PVR user manual

Mini

Mini DTR 206C PVR user manual

RF Elements TwistPort manual

RF Elements

RF Elements TwistPort manual

Denon DN-200WS user guide

Denon

Denon DN-200WS user guide

Yamaha RX-V467 owner's manual

Yamaha

Yamaha RX-V467 owner's manual

Russound SaphIR 858 instruction manual

Russound

Russound SaphIR 858 instruction manual

Quasonix RDMS Firmware update procedure

Quasonix

Quasonix RDMS Firmware update procedure

Pioneer XV-HTD1 Service manual

Pioneer

Pioneer XV-HTD1 Service manual

ATZ HDMI-V2-44HE150 manual

ATZ

ATZ HDMI-V2-44HE150 manual

Sony XNV-770BT MyTomTom Specifications

Sony

Sony XNV-770BT MyTomTom Specifications

Grundig STR 7122 TWIN Service manual

Grundig

Grundig STR 7122 TWIN Service manual

Creative Blaster Modem user guide

Creative

Creative Blaster Modem user guide

Panduit ATLONA AT-OME-RX11 installation guide

Panduit

Panduit ATLONA AT-OME-RX11 installation guide

VOLTCRAFT UTPS-40 operating instructions

VOLTCRAFT

VOLTCRAFT UTPS-40 operating instructions

JVC KW-ADV794 instructions

JVC

JVC KW-ADV794 instructions

Litelink VT-1001 operating instructions

Litelink

Litelink VT-1001 operating instructions

manuals.online logo
manuals.online logoBrands
  • About & Mission
  • Contact us
  • Privacy Policy
  • Terms and Conditions

Copyright 2025 Manuals.Online. All Rights Reserved.

Installing Your Wi-Fi or Blue Tooth Receiver.
Repair Instructions
Elite Models that Apply: EL04-EL05-LE, Phenom1&2.
Step
Description
Tools
Picture
1
Unscrew the (4) screws that attach the control panel to the
red case.
Phillips
Screw
Driver
Control Panel - Open
2
Take the plastic cover off of the Velcro, and stick it on the
Left side of the case. (With the wires pointing toward the
control panel).
3
Connect the red and white wire (coupling) with the white
female 4-pronged housing, into the Remote 4-pronged male
connector jack.
(If you are installing the Wi-Fi or Blue Tooth Receiver ONLY
with-out the Grand Remote Receive then continue to step
5).
4 pronged Remote connector
jack.
Wi-Fi or Blue Tooth red and
white wire couple plugged into
Remote connector jack.
4
Installing The Wi-Fi or Blue Tooth Receiver And The
20 Function Remote Receivers Into The Same
Machine.
Plug the Female 4-pronged Y-pig-tail into the 4-pronged
male remote connector jack.
Plug the Wi-Fi red and white wire (coupling) with the female
4-pronged housing, into one of (it does not matter which
one) the 4-pronged male connector jacks on the Y-pig-tail.
4 pronged Remote connector
jack.
Installing Your Wi-Fi or Blue Tooth Receiver.
Repair Instructions
Connect the female 4-pronged multi color wiring of the 20
function remote receiver, into the left over 4-pronged male
Y-pig-tail connector jack.
Continue on to Step 5.
Y-Pig-Tail attached to 4-prong
Remote connector jack.
Red and white Wi-Fi female
plugged into Y-Pig-Tail.
20 function remote receiver
plugged into Y-Pig-Tail
5
Plug the green and white wire (coupling) with the white
female 3-pronged housing, into the J6 3-pronged male
connector jack.
J6 3-pronged connector jack.
Wi-Fi or Blue Tooth green and
white wire couple plugged into
J6 connector jack.
Green and white wire couple
plugged into J6 connector jack,
with additional Y-Pig-Tail
housing both red and white Wi-
Fi or Blue Tooth receiver and 20
function remote receiver.
Installing Your Wi-Fi or Blue Tooth Receiver.
Repair Instructions
6
Screw the control board back onto the case, and follow the
i-Phone or Blue Tooth quick start instructions.
Philips
Screw
Driver
7
Configuring your Wi-Fi and iPhone to connect to the
Lobster App.
Go to settings and click on “Wi-Fi” connections. Your device
will detect the network called “LobsterSports-xx”. Select
this network. Note: xx is a number unique to your machine.
For this network, press the > to adjust its settings:
a) Make sure your device is set up to detect
“LobsterSports-xx”automatically by setting your ‘Auto-
Join’ button to ON.
Click on your Lobster Remote icon on your iPhone/iTouch
device. Please allow anywhere from 30 seconds to 1 full
minute for your machine and phone to properly
acknowledge each other! Your Lobster app will tell you
when you are ready to go.
8
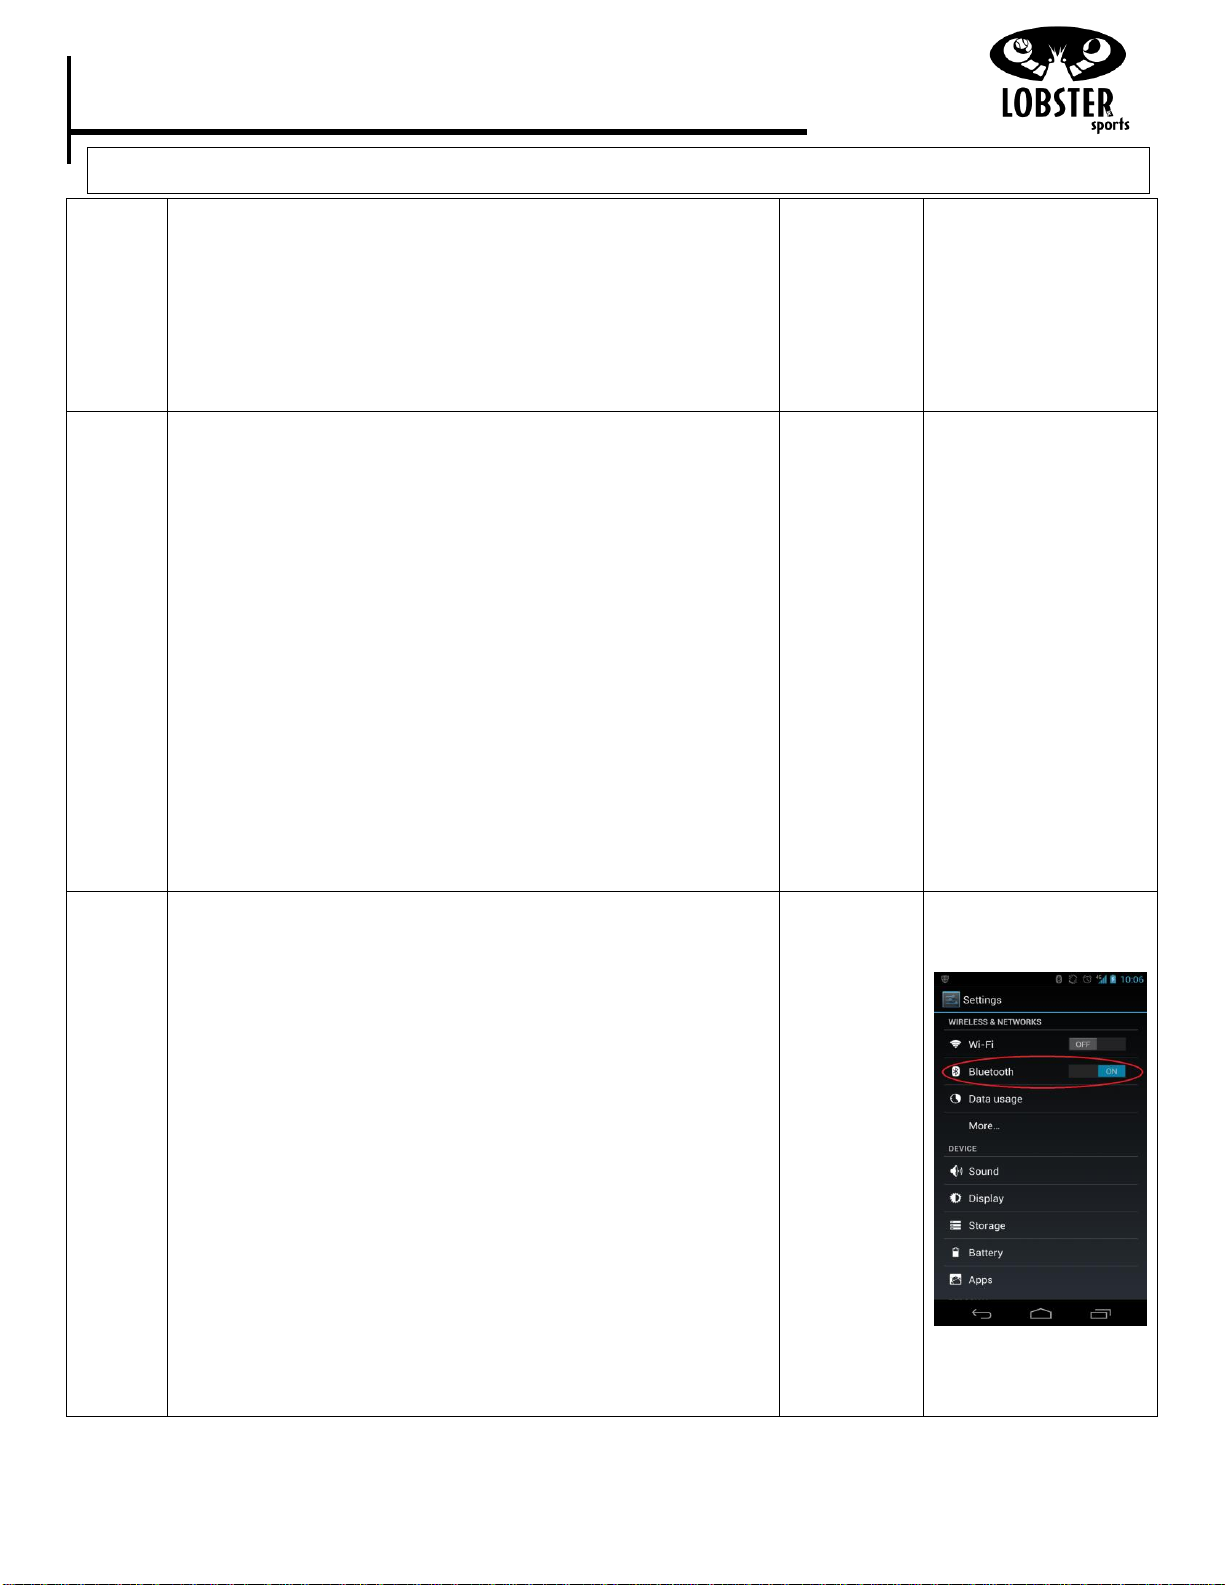
Configuring your Blue Tooth to connect to the Lobster
App.
1. Turn your Wi-Fi to the off position before scanning
for blue tooth.
2. Press ‘Scan for Devices’ in the new pop up window.
3. A device, RN42-xxxx, should be found under ‘Other
Available Devices’, where xxxx will be a unique ID
for your installed Bluetooth module.
4. Select device & type in “1234” when asked for
password. Once entered in your device will be paired.
5. Open up the Lobster Remote App and click on the 3
dots or (bars) button near the bottom of your device
Setting Screen (Android
Device).
Installing Your Wi-Fi or Blue Tooth Receiver.
Repair Instructions
(this is located close to your ‘Home’ button). NOTE:
With some new phones, you might need to hold down
a button (such as the “back” button, or “home”
button) to bring up the “secret menu”. This menu
then allows you to click on the 3 dots or (bars) button
as it will appear from the hidden menu. Upon
clicking this button, there should be a pop-up which
shows a target sign and says ‘Connect to Device’.
Click this and your App should be good to go.
Scanning for Blue Tooth
devices.
“Options” button on Android
device.
Pop up menu showing “Make
Discoverable”.