manuals.online logo
Brands
  1. Home
  2. •
  3. Brands
  4. •
  5. Loewe
  6. •
  7. Speakers
  8. •
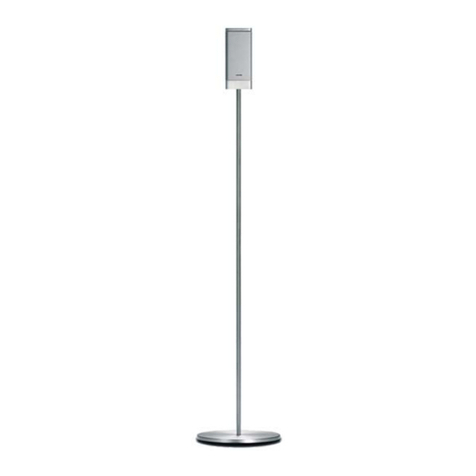
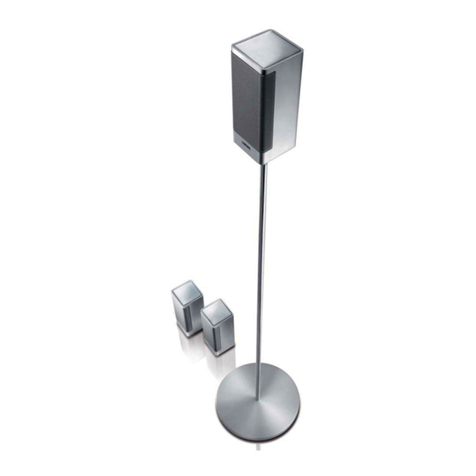
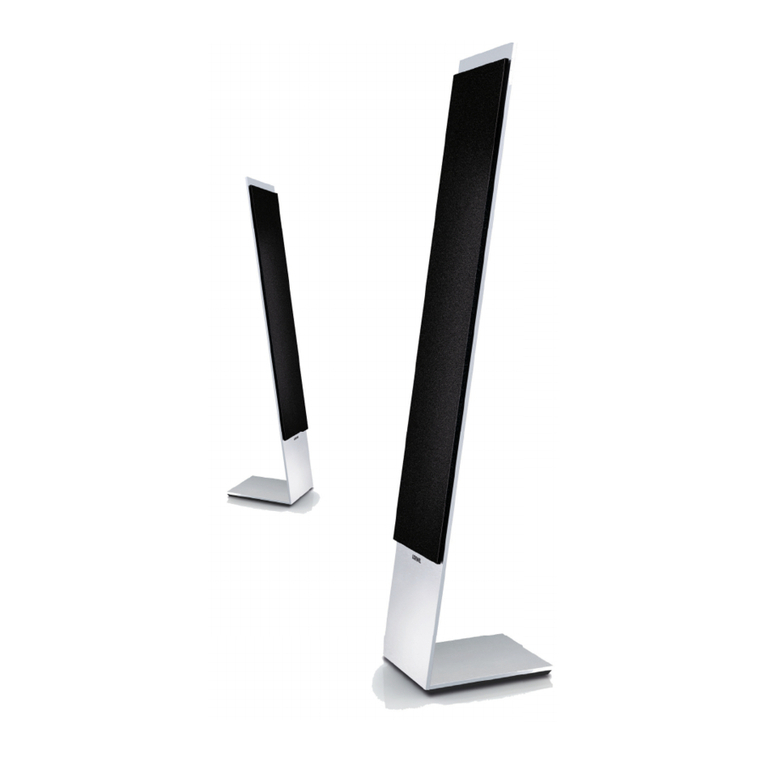
  9. Loewe Floor Stand 3D Orchestra Speaker User manual

Loewe Floor Stand 3D Orchestra Speaker User manual

35677000
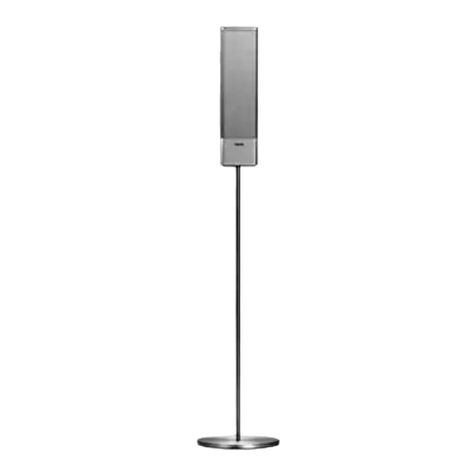
Floor Stand 3D Orchestra Speaker
Zubehör Audio
Accessoires audio
Audio accessories
Accessoires audio
Accessori Audio
Accesorios de audio
Montageanleitung, Montage-instructies, Installation instructions,
Instructions de montage, Istruzioni di montaggio, Instrucciones de montaje
Benötigtes Werkzeug d
Inbusschlüssel SW3
Hinweis: Teilweise ist benötigtes Spezial-Werkzeug
im Lieferumfang beigefügt. Ggf. wird weiteres Stan-
dard-Werkzeug (nicht im Lieferumfang) benötigt.
Outils nécessaires f
Clé Allen SW3
Remarque : dans certains cas, l‘outil spécial néces-
saire est fourni dans le contenu de livraison. Au
besoin, un autre outil standard (non fourni) peut
être nécessaire.
Volgende gereedschap nodig l
Inbussleutel SW3
Opmerking: benodigd speciaal gereedschap is ten
dele meegeleverd. Mogelijk heeft u nog ander stan-
daardgereedschap nodig (niet meegeleverd).
Strumenti necessari i
Chiave a brugola SW3
Nota: talvolta l‘attrezzo speciale necessario è com-
preso nella dotazione. Potrebbe essere necessario
un ulteriore attrezzo standard (non compreso nella
dotazione).
Required tools g
Allen wrench SW3
Note: if a special tool is needed, this may be
included in the kit. You may require further standard
tools (these are not supplied).
Herramienta necesaria e
Llave de pipa hexagonal SW3
Nota: Se incluye en parte la herramienta especial ne-
cesaria en el volumen de suministro. Es posible que
se necesite otra herramienta especial (no incluida).
Deutschland
Loewe Opta GmbH
Customer Care Center
Industriestraße 11
D-96305 Kronach
Telefon +49 9261 99-500
Telefax +49 9261 99-515
Floor Stand 3D Orchestra Speaker
Art. Nr. 71765B00
Edition 1, 13/02 KB
Änderungen vorbehalten
Wijzigingen voorbehouden
Subject to modifications
Modifications reservée
Con riserva di modifiche
Reservado el drecho a modificaciones
Opmerking l
Er bestaat de mogelijkheid, de kabels die uit het TV-
toestel naar buiten komen, in een textielslang te verleg-
gen. Deze textieslang behoort niet tot de levering. U
kunt de textielslang in verschillende lengte en kleur van
uw dealer verkrijgen.
Bestelnummer textielslang: 31947 xxx
Note g
There is the option of laying the cables, which lead out
of the TV set, together in a fabric sleeve. This fabric
sleeve is not part of the scope of delivery. You can
obtain the fabric sleeve in different lengths and colours
from your specialist dealer.
Order number for fabric sleeve: 31947 xxx
Remarque f
Il est possible de mettre les câbles qui sortent du télé-
viseur dans un tuyau en tissu. Ce tuyau en tissu ne fait
pas partie du contenu de la livraison. Vous pouvez vous
procurer un tuyau en tissu de longueurs et couleurs
différentes auprès de votre revendeur.
Numéro de commande du tuyau en tissu : 31947 xxx
Avvertenza: i
Vi è la possibilità di posare i cavi, in uscita dall’apparec-
chio TV, in un tubo flessibile in tessuto. Questo tubo fles-
sibile in tessuto non è contenuto nel volume di fornitura.
È possibile ottenere il tubo flessibile in tessuto, in diverse
lunghezze e colori, dal proprio rivenditore specializzato.
Numero d’ordine tubo flessibile in tessuto: 31947 xxx
Nota: e
Los cables del aparato de televisión se pueden guiar a
través de un tubo textil. Dicho tubo no se incluye en
el volumen de suministro. Los tubos textiles se pueden
adquirir en diversos colores y tamaños en su comercio
especializado.
Número de pedido del tubo textil: 31947 xxx
Hinweis d
Es besteht die Möglichkeit die Kabel, die aus dem
TV-Gerät herausführen, in einem Gewebeschlauch
zu verlegen. Dieser Gewebeschlauch ist nicht Teil des
Lieferumfanges. Sie können den Gewebeschlauch in
unterschiedlicher Länge und Farbe von Ihrem Fach-
händler erwerben.
Bestellnummer Gewebeschlauch: 31947 xxx
Floor Stand 3D Orchestra Speaker - 2 -
Montageanleitung Instructions de montage
Montage-instructies Istruzioni di montaggio
Installation instructions Instrucciones de montaje
Veiligheidsvoorschriften l
Leef de instructies in deze gebruiksaanwijzing na.
Wees voorzichtig bij de omgang met werktuigen.
Plaats de toestelcombinatie zo dat ze geen gevaar
vormt voor bijvoorbeeld spelende kinderen en dat
ze ook niet kan worden beschadigd.
Controleer vóór het opstellen van het toestel of
de uiteindelijke installatieplaats qua oppervlak
(drukgevoeligheid) en stabiliteit (onveranderlijk-
heid) geschikt is voor de belasting van het toestel.
Gebruik uitsluitend de door LOEWE aanbevolen
originele onderdelen.
Verder gelden ook hier de veiligheidsinstructies
voor onze tv-toestellen.
Safety instructions g
Follow the information in the instructions. Handle
tools with the necessary care and attention. Install
your combination of equipment in such a way
that it presents no danger to playing children for
example and also cannot be damaged.
Before positioning the set, please check that the
final location is suitable to bear the load of the
set in terms of surface (sensitivity to pressure) and
stability.
Only use the recommended LOEWE original parts.
The safety instructions for our TV sets also apply
here.
Instructions de sécurité f
Suivez les instructions de cette notice. Soyez
prudent lors de l’utilisation d’outils. Positionnez
vos différents appareils de telle sorte qu’ils ne
représentent aucun danger, par ex. pour des
enfants en train de jouer et qu’ils ne puissent pas
être endommagés.
Avant d‘installer l‘appareil, veuillez vérifier que
la surface (sensibilité à la pression) et la stabilité
(statique) de l‘emplacement final sont adaptées à
la charge de l‘appareil.
Utilisez uniquement des pièces d‘origine LOEWE
conseillées.
Par ailleurs, les instructions de sécurité relatives à
nos téléviseurs sont également valables ici.
Indicazioni di sicurezza i
Prestare attenzione indicazioni del presente
manuale d‘uso. Utilizzare gli attrezzi con la dovuta
cautela. Installare la combinazione di apparecchi
in modo tale che non possa essere danneggiata e
che non rappresenti un pericolo, ad esempio per i
bambini che giocano.
Prima di procedere con il montaggio
dell‘apparecchio, verificare se la superficie della
sede definitiva è adatta in termini di sensibilità alla
pressione e stabilità (statica) in considerazione del
peso dell‘apparecchio.
Utilizzare esclusivamente i componenti originali
consigliati da LOEWE.
Anche in questo caso valgono le norme di sicu-
rezza relative ai nostri apparecchi TV.
Advertencias de seguridad e
Tenga en cuenta las indicaciones del manual.
Utilice las herramientas con precaución. Instale
la combinación de aparatos de manera que no
presente riesgo, por ej., para niños que estén
jugando cerca, y de manera que no pueda sufrir
daños.
Compruebe antes de colocar el equipo, si la posi-
ción final cuenta con la superficie (sensibilidad a
presión) y la estabilidad (estática) adecuadas para
cargar el equipo.
Emplee solo las piezas originales recomendadas
por LOEWE.
Por lo demás, las advertencias de seguridad de
nuestros televisores también tienen validez en
este caso.
Sicherheitshinweise d
Befolgen Sie die Anweisungen dieser Anleitung.
Lassen Sie im Umgang mit Werkzeug die nötige
Vorsicht walten. Stellen Sie Ihre Gerätekombinati-
on so auf, dass sie, z.B. für spielende Kinder keine
Gefährdung darstellt und auch nicht beschädigt
werden kann.
Bitte prüfen Sie vor dem Aufstellen des Gerätes,
ob der finale Standort hinsichtlich Oberfläche
(Druckempfindlichkeit) und Stabilität (Statik) für
die Belastung durch das Gerät ausgelegt ist.
Verwenden Sie nur die von Loewe empfohlenen
Orginalteile.
Des weiteren haben die Sicherheitshinweise für
unsere TV-Geräte auch hier Gültigkeit.
Floor Stand 3D Orchestra Speaker - 3 -
Montageanleitung Instructions de montage
Montage-instructies Istruzioni di montaggio
Installation instructions Instrucciones de montaje
Lieferumfang d
A Bodenteller 2 Stück
B Adapter für Speaker 2 Stück
C Stütze 2 Stück
D Beipack PE Beutel 1 Stück
D1 Linsenkopfschraube mit Flansch M5 x 16 4 Stück
D2 Sperrkantenscheibe M5 4 Stück
D3 Zugentlastungsschelle 2 Stück
D4 Zylinderschraube mit Schlitz M4 x 8 4 Stück
D5 Senkkopfschraube mit Kreuzschlitz 4 Stück
E Sechskantstiftschlüssel SW3 1 Stück
Contenu de la livraison f
A Rondelle 2 unités
B Adaptateur pour speaker 2 unités
C Support 2 unités
D Sachet d'accessoires PE 1 unité
D1 Vis à tête lentiforme avec collerette M5x16 4 unités
D2 Écrou d'assemblage M5 4 unités
D3 Serre-câble 2 unités
D4 Vis cylindrique avec fente M4 x 8 4 unités
D5 Vis à tête fraisée cruciforme 4 unités
E Clé Allen SW3 1 unité
Leveringsinhoud l
A Vloerplateau 2 stuks
B Adapter voor speaker 2 stuks
C Steunen 2 stuks
D Bijartikel PE-zak 1 stuks
D1 Lenskopschroef met flens M5 x 16 4 stuks
D2 Randafsluitring M5 4 stuks
D3 Trekontlastingsklem 2 stuks
D4 Cilinderschroef met groef M4 x 8 4 stuks
D5 Platverzonken schroef met kruiskop 4 stuks
E Inbussleutel SW3 1 stuks
Dotazione i
A Piedi circolari 2 pezzi
B Adattatore per altoparlanti 2 pezzi
C Supporto 2 pezzi
D Foglio di istruzioni busta in PE 1 pezzo
D1 Vite a testa svasata con flangia M5x16 4 pezzi
D2 Rosetta dentata M5 4 pezzi
D3 Fascetta antitrazione 2 pezzi
D4 Vite cilindrica con intaglio M4x8 4 pezzi
D5 Vite a testa svasata con intaglio a croce 4 pezzi
E Chiave a brugola SW3 1 pezzo
Set of equipment supplied g
A Base plate 2 pieces
B Adapter for speaker 2 pieces
C Support bracket 2 pieces
D Accessories kit PE bag 1 piece
D1 Fillister-head screw with flange M5 x 16 4 pieces
D2 Toothed washer M5 4 pieces
D3 Strain relief clamp 2 pieces
D4 Cylinder head screw with slot M4 x 8 4 pieces
D5 Countersunk head screw with Phillips head 4 pieces
E Allen wrench SW3 1 piece
Volumen de suministro e
A Plato de suelo 2 ud.
B Adaptador para altavoz 2 ud.
C Soporte 2 unidades
D Bolsa de PE de accesorios 1 ud.
D1 Tornillo alomado con brida M5 x 16 4 ud.
D2 Arandela con bordes de bloqueo M5 4 ud.
D3 Abrazadera de descarga de tracción 2 ud.
D4 Tornillo cilíndrico con ranura M4 x 8 4 ud.
D5 Tornillo de cabeza avellanada con ranura en cruz
4 ud.
E Llave de pipa hexagonal SW3 1 ud.
A C
D1 D2
D3
D4
D5 E
B
D
Floor Stand 3D Orchestra Speaker - 4 -
Montageanleitung Instructions de montage
Montage-instructies Istruzioni di montaggio
Installation instructions Instrucciones de montaje
Bodenteller und Stütze d
Rondelle au sol et support f
Vloerplateau en steun l
Piedi circolari e supporto i
Base plate and support bracket g
Plato de suelo y apoyo e
l
Bescherm de oppervlakken tegen krassen
Roep voor de montage de hulp in van een tweede
persoon
1
Bevestig steun C op vloerplateau A met één van de 4
lenskopschroeven met flens M5 x 16 D1 en randafsluit-
ring D2 met gebruik van de meegeleverde inbussleutel
SW3 E
Haal de lenskopschroef met flens aan.
Geadviseerd aanhaalmoment ca. 3 Nm
g
Protect the surfaces against scratches
For mounting, enlist a second person for help
1
Attach the support C on the base plate A with one of
the 4 fillister head screws with flange M5 x 16 D1 and
toothed washer D2 using the supplied Allen wrench
SW3 E
Screw the fillister head screw tight.
Recommended torque: approx. 3Nm
f
Protégez les surfaces contre les rayures
Demandez l’aide d’une deuxième personne pour le
montage.
1
Fixez le support C sur la rondelle A avec l'une des 4 vis
à tête lentiforme avec collerette M5 x 16 D1 et l'écrou
d'assemblage D2 à l'aide de la clé Allen SW3 fournie E
Serrer la vis à tête lentiforme avec collerette.
Couple de serrage proposé 3 Nm environ
i
Proteggere le superfici da possibili graffiature
Per il montaggio farsi aiutare da un'altra persona
1
Utilizzando la chiave a brugola SW3 E fornita, fissare
il supporto C sui piedi circolari A con una delle 4 viti
a testa svasata con flangia M5x16 D1 e una rosetta
dentata D2
Stringere la vite a testa svasata con flangia.
Coppia consigliata ca. 3 Nm
e
Proteger las superficies contra los arañazos
Recurra a una segunda persona para realizar el montaje
1
Fije el apoyo C sobre el plato de suelo A con uno de los
4 tornillos alomados con brida M5 x 16 D1 y la arande-
la de bordes de bloqueo D2 utilizando la llave de pipa
hexagonal suministrada SW3 E
Apretar el tornillo alomado con brida.
Par de apriete propuesto aprox. 3 Nm
d
Die Oberflächen vor Verkratzen schützen
Nehmen Sie für die Montage eine zweite Person zu
Hilfe
1
Befestigen Sie die Stütze C auf dem Bodenteller A mit
einer der 4 Linsenkopfschrauben mit Flansch M5 x 16
D1 und der Sperrkantenscheibe D2 unter Verwendung
des mitgelieferten Sechskantstiftschlüssels SW3 E
Linsenkopfschraube mit Flansch festziehen.
Vorgeschlagenes Drehmoment ca. 3 Nm
SW 3 3 Nm
C
A
D2 D1 E
1
Floor Stand 3D Orchestra Speaker - 5 -
Montageanleitung Instructions de montage
Montage-instructies Istruzioni di montaggio
Installation instructions Instrucciones de montaje
Kabel mit Stecker am Bodenteller d
Câble avec prise dans la rondelle au
sol f
Kabel met stekker aan het vloerpla-
teau l
Cavo con connettore su piedi circo-
lari i
Cable with plug at the base plate g
Cable con enchufe en el plato de
suelo e
l
Bescherm de oppervlakken tegen krassen
1
Verwijder de stekker van de aansluitkabel
Schuif de stekker van onderaf door de opening in
het vloerplateau
Trek de aansluitkabel iets verder, als de steun lang
is, omhoog eruit.
g
Protect the surfaces against scratches
1
Take the plug of the connecting cable
Pass the plug through the hole in the base plate
Pull the connecting cable upwards out a little
further than the length of the support bracket.
f
Protégez les surfaces contre les rayures
1
Saisissez la prise du câble de raccordement
Passez la prise à travers le trou prévu à cet effet
dans la rondelle, depuis le bas.
Tirez le câble sur toute sa longueur vers le haut.
i
Proteggere le superfici da possibili graffiature
1
Prendere il connettore del cavo di collegamento
Far passare il connettore dal basso nell'apertura
della piastra con i piedi circolari
Tirare ancora verso l'alto il cavo di collegamento
secondo la lunghezza del supporto.
e
Proteger las superficies contra los arañazos
1
Tome el enchufe desde el cable de conexión
Pase el enchufe desde abajo por la abertura en el
plato de suelo
Extraiga hacia arriba el cable de conexión un poco
más que la longitud del apoyo.
d
Die Oberflächen vor Verkratzen schützen
1
Nehmen Sie den Stecker von der Anschlußeitung
Schieben Sie den Stecker von unten durch die
Öffnung im Bodenteller
Ziehen Sie die Anschlußleitung etwas weiter, als die
Stütze lang ist, nach oben heraus.
1
1
Floor Stand 3D Orchestra Speaker - 6 -
Montageanleitung Instructions de montage
Montage-instructies Istruzioni di montaggio
Installation instructions Instrucciones de montaje
Handhabung Adapterplatte d
Manipulation de la plaque adapta-
trice f
Bediening adapterplaat l
Uso della piastra adattatrice i
Handling of the adapter plate g
Manejo de la placa de adaptación e
l
1
Neem adapter B en stekker X van de reeds door het
vloerplateau geleide aansluitkabel.
2
Leid de stekker door de uitsparing in de adapter-
plaat, zoals op de afbeelding wordt getoond.
.
g
1
Take the adapter B and plug B X of the connecting
cable already passed through the base plate.
2
Guide the plug through the hole in the adapter
plate as shown in the sketch.
f
1
Saisissez l'adaptateur B et la prise X du câble de
raccordement passé à travers la rondelle au sol.
2
Faites passer la prise dans la fente de la plaque
d'adaptateur, comme sur l'illustration.
i
1
Prendere l'adattatore B e il connettore X del cavo di
collegamento già condotto attraverso la piastra con
i piedi circolari.
2
Far passare il connettore attraverso la cavità
presente nella piastra adattatrice, come illustrato
nello schema.
e
1
Tome el adaptador B y el enchufe X desde la línea
de conexión ya pasada por el plato de suelo.
2
Conduzca el enchufe por la escotadura en la placa
de adaptación, como se muestra en el dibujo.
1
d
1
Nehmen Sie den Adapter B und den Stecker X
von der bereits durch den Bodenteller geführten
Anschlußleitung.
2
Führen Sie den Stecker durch die Aussparung an der
Adapterplatte, wie in der Skizze dargestellt.
2
B
X
Floor Stand 3D Orchestra Speaker - 7 -
Montageanleitung Instructions de montage
Montage-instructies Istruzioni di montaggio
Installation instructions Instrucciones de montaje
Adapterplatte und Stütze d
Plaque adaptatrice et support f
Adapterplaat en steun l
Piastra adattatrice e supporto i
Adapter plate and support g
Placa de adaptación y apoyo e
l
Lijn adapterplaat B en aansluitkabel x uit ten opzich-
te van steun C, zoals wordt weergegeven.
1
Schuif de adapterplaat op het bovenste uiteinde
van de steun
Bevestig adapterplaat B met randafsluitring D2 en
lenskopschroef met flens D1
g
Align the adapter plate B and the connecting cable
x to the support C as shown.
1
Slide the adapter plate onto the upper end of the
support
Fix the adapter plate B with toothed washer D2 and
fillister head screw with flange D1
f
Disposez la plaque d'adaptateur B et le câble de
raccordement X sur le support C, comme indique
sur l'illustration.
1
Faites glisser la plaque adaptatrice jusqu'au bout
supérieur du support.
Fixez la plaque adaptatrice B à l'aide de l'écrou
d'assemblage D2 et de la vis à tête lentiforme avec
collerette D1.
i
Orientare la piastra adattatrice B e il cavo di collega-
mento x, come illustrato per il supporto C.
1
Far scorrere la piastra adattatrice sull'estremità
superiore del supporto
Fissare la piastra adattatrice B con la rosetta dentata
D2 e la vite a testa svasata con flangia D1
e
Alinee la placa de adaptación B y el cable de cone-
xión como se muestra respecto al apoyo C.
1
Deslice la placa de adaptación sobre el extremo
superior del apoyo
Fije la placa de adaptación B con arandela de bor-
des de bloqueo D2 y tornillo alomado con brida D1
d
Richten Sie die Adapterplatte B und Anschlußlei-
tung x, wie dargestellt zur Stütze C aus.
1
Schieben Sie die Adapterplatte auf das obere Ende
der Stütze
Befestigen Sie die Adapterplatte B mit Sperrkanten-
scheibe D2 und Linsenkopfschraube mit Flansch D1
1
B
D1
D2
C
X
Floor Stand 3D Orchestra Speaker - 8 -
Montageanleitung Instructions de montage
Montage-instructies Istruzioni di montaggio
Installation instructions Instrucciones de montaje
Adapterplatte und Stütze d
Plaque adaptatrice et support f
Adapterplaat en steun l
Piastra adattatrice e supporto i
Adapter plate and support g
Placa de adaptación y apoyo e
l
Draai lenskopschroef met flens D1
met behulp van de meegeleverde inbussleutel SW3
E vast
Geadviseerd aanhaalmoment ca. 3 Nm
1
Let erop dat aansluitkabel X niet beklemd raakt en
beschadigd wordt
g
Screw the fillister head screw with flange D1 tight
using the supplied Allen wrench SW3 E
Recommended torque: approx. 3Nm
1
Make sure that the connecting cable X will not be
pinched and damaged
f
Serrez la vis à tête lentiforme avec collerette D1
à l'aide de la clé Allen SW3 E fournie.
Couple de serrage proposé 3 Nm environ
1
Veillez bien à ne pas coincer ou endommager le
câble de raccordement X
i
Girare la vite a testa svasata con flangia D1
mediante la chiave a brugola SW3 E fornita fino a
fissarla
Coppia consigliata ca. 3 Nm
1
Evitare che il cavo di collegamento X venga schiac-
ciato e si danneggi
e
Atornille el tornillo alomado con brida D1
con ayuda de la llave de pipa hexagonal suminist-
rada SW3 E
Par de apriete propuesto aprox. 3 Nm
1
Preste atención a no aprisionar ni dañar el cable de
conexión X
d
Drehen Sie die Linsenkopfschraube mit Flansch D1
mit Hilfe des mitgelieferten Sechskantstiftschlüssels
SW3 E fest
Vorgeschlagenes Drehmoment ca. 3Nm
1
Achten Sie darauf, dass die Anschlußleitung X nicht
eingeklemmt und beschädigt wird
3 Nm
3
Nm
1
E
D1
X
Floor Stand 3D Orchestra Speaker - 9 -
Montageanleitung Instructions de montage
Montage-instructies Istruzioni di montaggio
Installation instructions Instrucciones de montaje
Orchestra auf Adapterplatte d
Orchestra sur la plaque adaptatrices f
Orchestra op adapterplaat l
Orchestra sulla piastra adattatrice i
Orchestra on adapter plate g
Orchestra sobre placa de adaptación e
l
1
Steek de stekker van de aansluitkabel zover mogeli-
jk (ten minste 10 mm) in contact Z
Controleer voor het bevestigen van de speaker op
de adapter
de stekkerverbinding van de aansluitkabel opnieuw
g
1
Insert the plug of the connecting cable as far as
possible (at least 10 mm) into the connector socket
Z
Before fixing the speaker on the adapter
check the plug-and-socket connection of the con-
necting cable again
f
1
Enfoncez autant que possible la prise du câble de
raccordement (10 mm au moins) dans la prise de
raccordement Z
Avant de fixer le haut-parleur sur l'adaptateur
vérifiez que le câble de raccordement soit bien
connecté.
i
1
Inserire il connettore del cavo di collegamento nel
rispettivo connettore Z lasciando più spazio possibi-
le (almeno 10 mm)
Prima di fissare l'altoparlante sull'adattatore
controllare di nuovo il collegamento a spina del
cavo di collegamento
e
1
Introduzca el enchufe del cable de la conexión
tanto como pueda (10 mm como mínimo) en la
toma de conexión Z
Antes de fijar el altavoz en el adaptador
compruebe nuevamente la conexión de enchufe del
cable de conexión
d
1
Den Stecker der Anschlußleitung soweit wie mög-
lich ( mindestens 10 mm ) in die Anschlußbuchse Z
einstecken
Vor dem Befestigen des Speakers auf dem Adapter
die Steckverbindung der Anschlußleitung nochmals
prüfen
1
Z
Floor Stand 3D Orchestra Speaker - 10 -
Montageanleitung Instructions de montage
Montage-instructies Istruzioni di montaggio
Installation instructions Instrucciones de montaje
Orchestra auf Adapterplatte d
Orchestra sur la plaque adaptatrice f
Orchestra op adapterplaat l
Orchestra sulla piastra adattatrice i
Orchestra on adapter plate g
Orchestra sobre placa de adaptación e
l
1
Plaats de speaker op de adapterplaat
Let erop dat de aansluitkabel naar de speaker niet
beklemd raakt
Draai de beide platverzonken schroeven met kru-
iskop D5 met behulp van een kruiskopschroeven-
draaier vast. Geadviseerd aanhaalmoment ca. 1,5
Nm
Kruiskopschroevendraaier is niet meegeleverd
g
1
Put the speaker on the adapter plate
Make sure not to pinch the connecting cable to
the speaker
Screw the two countersunk screws with Phillips
head D5 tight using a Phillips screwdriver. Recom-
mended torque: approx. 1.5 Nm
The Phillips screwdriver is not included in the set of
equipment supplied
f
1
Placez le haut-parleur sur la plaque adaptatrice
Veillez bien à ne pas coincer le câble de raccorde-
ment du haut-parleur
Serrez les deux vis à tête fraisée cruciforme D5 à
l'aide d'un tournevis cruciforme. Couple de serrage
proposé 1,5 Nm environ
Tournevis cruciforme non compris dans le contenu
de la livraison
i
1
Posizionare l'altoparlante sulla piastra adattatrice
Evitare che il cavo di collegamento venga schiaccia-
to nell'altoparlante
Girare le due viti a testa svasata con intaglio a croce
D5 utilizzando un cacciavite a stella fino a fissarle.
Coppia consigliata ca. 1,5 Nm
Cacciavite a croce non in dotazione
e
Proteger las superficies contra los arañazos
1
Coloque el altavoz sobre la placa de adaptación
Preste atención a que el cable de conexión hacia el
altavoz no quede aprisionado
Atornille los dos tornillos de cabeza avellanada con
ranura en cruz D5, con ayuda de un destornillador
para tornillos de ranura en cruz. Par de apriete
propuesto aprox. 1,5 Nm
Destornillador para tornillos de ranura en cruz no
incluido en el volumen de suministro
d
1
Setzen Sie den Speaker auf der Adapterplatte auf
Achten Sie darauf, dass Sie die Anschlußleitung zum
Speaker nicht einklemmen
Drehen Sie die beiden Senkkopfschrauben mit
Kreuzschlitz D5, mit Hilfe eines Kreuzschlitzschrau-
bendrehers fest. Vorgeschlagenes Drehmoment ca.
1,5 Nm
Kreuzschlitzschraubendreher nicht im Lieferumfang
1,5 Nm
1
D5
D5
Floor Stand 3D Orchestra Speaker - 11 -
Montageanleitung Instructions de montage
Montage-instructies Istruzioni di montaggio
Installation instructions Instrucciones de montaje
Anschlußkabel in Stütze einlegen d
Glisser le câble de raccordement
dans le support f
Aansluitkabel in de steun plaatsen l
Inserire il cavo di collegamento nel
supporto i
Lay the connecting cable in the
support g
Introducción del cable de conexión
en el apoyo e
l
1
Schuif de aansluitkabel enigszins omhoog in de speaker.
Begin van bovenaf de aansluitkabel in de langssleuf van
de steun te drukken.
2
De aansluitkabel verlaat de langssleuf opnieuw aan het
onderste einde van de steun.
Leid de aansluitkabel over het vloerplateau en door de
opening verder naar de onderzijde van het vloerplateau
g
1
Slide the connecting cable slightly up into the speaker.
Start from the top to push the connecting cable into
the longitudinal groove of the support.
2
At the lower end of the support the connecting cable
exits again the longitudinal groove.
Lay the connecting cable across the base plate and
through the opening to the underside of the base plate
f
1
Faites glisser le câble de raccordement dans le haut-
parleur, vers le haut.
Commencez à enfoncer le câble de raccordement dans
la cannelure du support depuis le haut.
2
Le câble de raccordement doit ressortit de la cannelure
au bas du support.
Posez le câble de raccordement sur la rondelle au sol en
le faisant glisser à travers l'ouverture de la rondelle
i
1
Far passare verso l'alto il cavo di collegamento
nell'altoparlante.
Partire dall'alto, spingendo il cavo di collegamento
lungo la scanalatura longitudinale del supporto.
2
All'estremità inferiore del supporto il cavo di collega-
mento non passa più nella scanalatura longitudinale.
Far passare il cavo di collegamento sulla piastra con i
piedi circolari, quindi attraverso l'apertura posta sul lato
inferiore di tale piastra
e
1
Deslice el cable de conexión ligeramente hacia arriba
por el altavoz.
Comience desde arriba a presionar el cable de conexión
en la ranura longitudinal del apoyo.
2
En el extremo inferior del apoyo el cable de conexión
sale de la ranura longitudinal.
Tienda el cable de conexión sobre el plato de suelo
y por la abertura hacia el lado inferior del plato de suelo
d
1
Schieben Sie die Anschlußleitung etwas nach oben in
den Speaker.
Beginnen Sie von oben die Anschlußleitung in die
Längsnut der Stütze einzudrücken.
2
Am unteren Ende der Stütze verläßt die Anschlußlei-
tung die Längsnut wieder.
Verlegen Sie die Anschlußleitung über den Bodentel-
ler und durch die Öffnung weiter zur Unterseite des
Bodentellers
1
2
Floor Stand 3D Orchestra Speaker - 12 -
Montageanleitung Instructions de montage
Montage-instructies Istruzioni di montaggio
Installation instructions Instrucciones de montaje
Anschlußkabel am Bodenteller d
Câble de raccordement sur la rondel-
le au sol f
Aansluitkabel op het vloerplateau l
Cavo di collegamento sulla piastra
con i piedi circolari i
Connecting cable at the base plate g
Cable de conexión en el plato de
suelo e
l
Bescherm het oppervlak tegen krassen
Gebruik een zachte ondergrond, wanneer u het vloerplateau
aan de omtrekzijde neerlegt
Roep voor de montage de hulp in van een tweede persoon
1
Bevestig de aansluitkabel aan de onderzijde van het vloerpla-
teau met trekontlastingsklem D3 en cilinderschroeven met
gleuf D4, zoals op de afbeelding wordt weergegeven.
2
Schroevendraaier is niet meegeleverd
Geadviseerd aanhaalmoment ca. 1 Nm
g
Protect the surface against scratches
When placing the bottom plate on its peripheral side, use a
large soft bedding layer
For mounting, enlist a second person for help
1
Fix the connecting cable at the underside of the base plate
using the strain relief clamp D3 and the fillister head screw
with slot D4 as shown in the sketch.
2
The screw driver is not included in the set of equipment
supplied
Recommended torque: approx. 1Nm
f
Protégez les surfaces contre les rayures.
La rondelle au sol doit reposer sur toute sa surface sur un
large support
Demandez l’aide d’une deuxième personne pour le montage.
1
Fixez le câble de raccordement au -dessous de la rondelle
avec le serre-câble D3 et la vis à tête cylindrique avec fente
D4, comme indiqué sur l'illustration.
2
Tournevis non compris dans la livraison
Couple de serrage proposé env. 1 Nm
i
Proteggere la superficie da possibili graffiature
Durante il posizionamento è necessario applicare una base
in tessuto morbido dalla superficie ampia lungo il perimetro
della piastra con i piedi circolari
Per il montaggio farsi aiutare da un'altra persona
1
Fissare il cavo di collegamento sul lato inferiore della piastra
con i piedi circolari installando la fascetta antitrazione D3 e le
viti cilindriche con intaglio D4, come illustrato nello schema.
2
Cacciavite non in dotazione
Coppia consigliata ca. 1 Nm
e
Protege las superficie contra los arañazos
Si el plato de suelo se coloca sobre el lado de la circunferen-
cia deberá utilizarse una base grande y blanda
Recurra a una segunda persona para realizar el montaje
1
Fijar el cable de conexión al lado inferior del plato de suelo
con la abrazadera de descarga de tracción D3 y tornillos
cilíndricos con ranura D4, como se muestra en el dibujo.
2
Destornillador no incluido en el volumen de suministro
Par de apriete propuesto aprox.. 1Nm
1
1 Nm
D3 D4
2
d
Die Oberfläche vor Verkratzen schützen.
Bei Ablage des Bodentellers auf die Umfangsseite ist eine
weiche großflächige Unterlage zu verwenden.
Nehmen Sie für die Montage eine zweite Person zu Hilfe
1
Anschlußleitung an der Unterseite am Bodenteller mit der
Zugentlastungsschelle D3 und Zylinderschrauben mit Schlitz
D4 befestigen, wie auf der Skizze dargestellt.
2
Schraubendreher nicht im Lieferumfang
Vorgeschhlagenes Drehmoment ca. 1Nm
Floor Stand 3D Orchestra Speaker - 13 -
Montageanleitung Instructions de montage
Montage-instructies Istruzioni di montaggio
Installation instructions Instrucciones de montaje
Floor Stand 3D Orchestra Speaker - 14 -
Montageanleitung Instructions de montage
Montage-instructies Istruzioni di montaggio
Installation instructions Instrucciones de montaje
Floor Stand 3D Orchestra Speaker - 15 -
Montageanleitung Instructions de montage
Montage-instructies Istruzioni di montaggio
Installation instructions Instrucciones de montaje

This manual suits for next models

1

Other Loewe Speakers manuals

Loewe We. HEAR 2 User manual

Loewe

Loewe We. HEAR 2 User manual

Loewe klang 9 Instruction Manual

Loewe

Loewe klang 9 Instruction Manual

Loewe L 2 A User manual

Loewe

Loewe L 2 A User manual

Loewe We. HEAR 1 User manual

Loewe

Loewe We. HEAR 1 User manual

Loewe Satellite Speaker User manual

Loewe

Loewe Satellite Speaker User manual

Loewe Individual Sound Universal Speaker User manual

Loewe

Loewe Individual Sound Universal Speaker User manual

Loewe klang 1 User manual

Loewe

Loewe klang 1 User manual

Loewe Concertos Acoustimass 61247 User manual

Loewe

Loewe Concertos Acoustimass 61247 User manual

Loewe SoundPort User manual

Loewe

Loewe SoundPort User manual

Loewe Reference Sound Standspeaker Slim User manual

Loewe

Loewe Reference Sound Standspeaker Slim User manual

Loewe Slim ID User manual

Loewe

Loewe Slim ID User manual

Loewe klang m1 User manual

Loewe

Loewe klang m1 User manual

Loewe Reference Sound User manual

Loewe

Loewe Reference Sound User manual

Loewe klang m1 Instruction Manual

Loewe

Loewe klang m1 Instruction Manual

Loewe Universal Speaker ID User manual

Loewe

Loewe Universal Speaker ID User manual

Loewe Center Speaker ID User manual

Loewe

Loewe Center Speaker ID User manual

Loewe Stereospeaker I 40 User manual

Loewe

Loewe Stereospeaker I 40 User manual

Loewe Centerspeaker I Compose User manual

Loewe

Loewe Centerspeaker I Compose User manual

Loewe 69280B00 User manual

Loewe

Loewe 69280B00 User manual

Loewe Speaker 2go User manual

Loewe

Loewe Speaker 2go User manual

Loewe Audiodesign Speaker 2go 52231 Series User manual

Loewe

Loewe Audiodesign Speaker 2go 52231 Series User manual

Loewe bild 5 klang User manual

Loewe

Loewe bild 5 klang User manual

Loewe klang mr1 User manual

Loewe

Loewe klang mr1 User manual

Loewe Individual Sound Satellite User manual

Loewe

Loewe Individual Sound Satellite User manual

Popular Speakers manuals by other brands

Atohm Grand Thrill Series user manual

Atohm

Atohm Grand Thrill Series user manual

Adition Audio Science & Technology FM23 quick guide

Adition Audio Science & Technology

Adition Audio Science & Technology FM23 quick guide

Sonance LCR Speaker Specification sheet

Sonance

Sonance LCR Speaker Specification sheet

Dual DMP672 quick start guide

Dual

Dual DMP672 quick start guide

Monitor Audio AWC265-T2 installation guide

Monitor Audio

Monitor Audio AWC265-T2 installation guide

LG PK3W owner's manual

LG

LG PK3W owner's manual

Videx 4838 Series Installation instruction

Videx

Videx 4838 Series Installation instruction

Valcom VIP-411-DS-IC manual

Valcom

Valcom VIP-411-DS-IC manual

Focal PS 165F user manual

Focal

Focal PS 165F user manual

Lexon TYKHO 3 user manual

Lexon

Lexon TYKHO 3 user manual

QSC AcousticDesign AD-S52 Specifications

QSC

QSC AcousticDesign AD-S52 Specifications

Meyer Sound Ashby-5C operating instructions

Meyer Sound

Meyer Sound Ashby-5C operating instructions

Fenton 100.318 instruction manual

Fenton

Fenton 100.318 instruction manual

Samsung HW-J6000R user manual

Samsung

Samsung HW-J6000R user manual

HP HSA-T001S quick start guide

HP

HP HSA-T001S quick start guide

Champion SBT340 user manual

Champion

Champion SBT340 user manual

Bose 100 J owner's guide

Bose

Bose 100 J owner's guide

Advent ADE-200A user manual

Advent

Advent ADE-200A user manual

manuals.online logo
manuals.online logoBrands
  • About & Mission
  • Contact us
  • Privacy Policy
  • Terms and Conditions

Copyright 2025 Manuals.Online. All Rights Reserved.