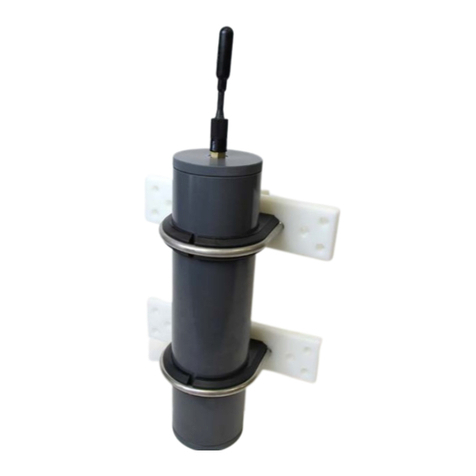
Loggerhead SNAP User manual

Snap Manual 1
SNAP MANUAL
Multi-card Long-Term Underwater Acoustic Recorder
Manual v1.0
Updated 13 June 2022
www.loggerhead.com

Snap Manual 2
Overview
Hardware
Snap is datalogger designed for collecting large amounts of underwater acoustic
recordings. Setup is designed to run through a simple button interface with a
display. No PC is needed to setup and deploy the Snap.
•HTI-96-min Hydrophone
•3 Alkaline D-Cell Bateries
•1 microSD cards formatted as FAT32
Software
Snap stores data directly as audio wav files.
Any audio analysis software (Adobe Audition, Cornell Raven, MATLAB, R,
Python) will work with these files.
For noise analysis, the open source Manta software is designed to run with audio
files collected by the Snap.
https://bitbucket.org/CLO-BRP/manta-wiki/wiki/Home

Snap Manual 3
Setting up Snap for Deployment
See the online video for a tutorial on setting up the Snap
Step 1. Prepare microSD card. microSD cards larger than 32 GB need to be
formatted as FAT32. Appendix 1 describes software that can be used to do this on
Windows PCs.
The card shipped with the Snap from Loggerhead has already been formatted as
FAT32.
Step 2. O-rings. Clean and grease o-rings with silicone grease and insert into the
groove on the ring. The o-rings (-228) are McMaster part number:
https://www.mcmaster.com/9452K66/
Step 3. Turn on power switch.
The Snap has battery holders for 1 set of 3 D-cell alkaline batteries.
Do not use NiMH or Lithium batteries.
Alkaline batteries can be packed in luggage on an airplane and can be bought in
most field locations. When traveling to remote areas it is a good idea to bring new
batteries.
The microSD cards will be scanned for free memory. There MUST be a card in
slot 1.

Snap Manual 4
Use buttons to change settings
Enter: Used to move through menu settings and accept changes.
UP/DN: Used to change values.
Display Setting
Description
UP+DN->Rec
Hold down UP + DN to start
Press Enter to change settings
UP+DN may also be used to stop a recording in progress.
Rec:
Record duration in seconds
Slp:
Sleep duration in seconds. This is the time from the END of one
recording to the START of the next recording.
Year:
Year
Month:
Month
Day:
Day of month
Hour:
Hour (24 hour time)
Minute:
Minute
Second:
Second
SF:
Sampling Frequency (in Hz): The sampling rate of the Snap can be
changed depending on the frequency of interest (the sampling rate needs
to be at least twice as high as the highest frequency you want to record).
E.g. 48 kHz sampling frequency can record sounds up to 24 kHz.
Step 5. Start Recording. Hold down the UP and DN buttons at the same time to
start recording. If this is not done, the recorder will automatically start after 15
minutes. A red LED in the end of the hydrophone will illuminate while a
recording is in process (if you are using the HTI-96-min).
Step 6. Close lid. Snap the lids into place. The water pressure will hold the lid in
place underwater. If you are deploying where the water is warm, it is best to open
the Snap and close the lid outside just prior to deployment. Since cold air expands
when heated, it is best not to close them up inside an air-conditioned room and
then deploy in water that is warmer than the air-conditioned room.
Step 7. Deploy. The Snap can be attached to a bottom mount (e.g. cinder block)
or subsurface line using hose clamps or large tie wraps.

Snap Manual 5
Retrieval
Upon retrieval, open the top lid by pushing up on opposite sides of the lip, and
pull out the Snap board. If a recording is still happening (red hydrophone LED on
and green LED on board flashing), hold down the UP + DN buttons at the same
time. This will properly close the file before stopping recording. Then switch off
the board and remove the microSD card.

Snap Manual 6
Appendix I
Formatting SD card with EaseUS Partition Master for Cards Larger than 32
GB
32 GB cards can be formatted as FAT32 in Windows with standard re-
formatting. New 32 GB cards will come formatted as FAT32 (you don’t need
to do anything).
EaseUS Partition Master Instructions
https://www.easeus.com/download/epmf-download.html
1. Click on the drive with the microSD card.
2. Click Format button the right
3. In pop-up dialog box Change cluster size to 64 KB. Click OK
4. On top of screen click on Execute 1 Operation

Snap Manual 7

Snap Manual 8
Appendix II
Two settings can only be changed by placing a text file on the microSD card,
placing it in the Snap, and turning the Snap on. The Snap ships with defaults that
work in most situations.
setup.txt Commands
All commands are optional. Default column lists values if no setting in setup.txt
file. Record duration and record interval can be set through the button interface.
Command
Function
Default
Example
Setup.txt example
SG
Hydrophone system
gain. See table for dB
gains associated with
different settings.
4
Set gain to
setting ‘10’,
which
corresponds to
11.1 dB gain
SG 10
ND
Remove DC from
audio. Turning on
increases electrical
noise
Off
Turn on feature
to remove DC
from audio
ND

Snap Manual 9
HTI Hydrophone and Recording Gain
The Snap uses a hydrophone manufactured by High-Tech Inc. The sensitivity of
the hydrophone will be on a specification sheet included with the shipment
(typically -170 dBV/uPa or -180 dBV/uPa).
The hydrophone has a red LED in the end to indicate when it is getting power.
This will only be turned on during startup and recording. The hydrophone red
LED will be off when sleeping.
The A/D converter gain can be changed through the setup.txt file. The default is
setting 4. The setting can be changed with SG command in setup.txt. The actual
setting that was used is stored to the log.txt file.
Setting
Clip Level (peak-peak)
Clip Level (peak)
Gain (dB)
0
3.12
1.56
-3.9
1
2.63
1.315
-2.4
2
2.22
1.11
-0.9
3
1.87
0.935
0.6
4
1.58
0.79
2.0
5
1.33
0.665
3.5
6
1.11
0.555
5.1
7
0.94
0.47
6.6
8
0.79
0.395
8.1
9
0.67
0.335
9.5
10
0.56
0.28
11.1
11
0.48
0.24
12.4
12
0.4
0.2
14.0
13
0.34
0.17
15.4
14
0.29
0.145
16.8
15
0.24
0.12
18.4
Other Loggerhead Measuring Instrument manuals