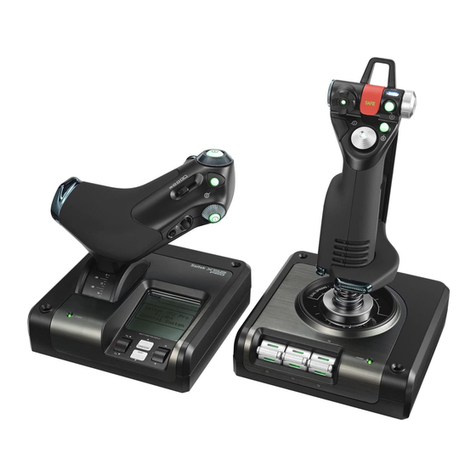
Logitech G G923 User manual

G923
Racing Wheel and Pedals For Xbox One and PC
适用于 Xbox One 和PC 的赛车方向盘及踏板
適用於 Xbox One 和PC 的賽車方向盤和踏板
Xbox One 및PC용레이싱 휠및페달
SETUP GUIDE
设置指南
設定指南
설치 가이드

3ENGLISH
CONNECTIONS AND MOUNT POINTS
1 Mounting clamps
2 Cable management cleat
3 Optional shifter connection (DB-9 male)
4 USB cable
5 Pedal unit connection (DB-9 female)
6 Power connection
7 Bolt mounting points (uses M6X1 bolts)
OPTIMAL CABLE ROUTING
USB and pedal cables (1, 2) should be routed through inner
channels.
Power and optional shifter cables (3, 4) should be routed through
outer channels.
Cables may be wrapped multiple times around cable
management cleat to take in slack.
2
3
4
1
5
6
7
14 2 3
4
3
21

4ENGLISH
USB
Xbox One
USB
PC
INSTALLATION — XBOX ONE
— PC
Attach power adapter and USB cables as shown.
Every time your racing wheel connects with your system, it will
rotate fully to each side and then to the center to calibrate.
Yourwheel will be ready once this calibration is completed.
For PC to enable the force feedback and RPM LED features on
your G923 Wheel and Pedals you must install the Logitech G HUB
software. This can be found at logitechg.com/support/g923-xb1

5ENGLISH
MOUNTING CLAMPS
G923 Racing Wheel is equipped with a built in clamping system
for mounting to a table.
Push down and rotate clamp knobs to lock or unlock.
Rotate clamp knobs to tighten or loosen clamps.
Note:
Clamp extenders should be removed for attachment
tothickertables.

6ENGLISH
BUTTONS
1 Left bumper
2 Directional pad
3 View button
4 Left stick button*
5 +/- Setting Adjustment buttons*
6 Right bumper
7 A, B, X, Y buttons
8 Menu button
9 Right stick button*
10 Setting Selection Dial and select button*
11 Xbox button
2
3
5
4
1 6
7
8
10
11
9
* requires supported games on Xbox One. Assignable in any game on PC using either in-game assignment
orLogitech G HUB software.

7ENGLISH
FORCE FEEDBACK
Your Racing Wheel contains dual motors that will provide
forcefeedback with supported games and systems.
In supported titles you will also experience our next generation
approach to force feedback: TRUEFORCE.
TRUEFORCE integrates directly with game physics and audio
to unlock high-denition, real-time force feedback. Tire grip,
suspension, weight, horsepower—even unique engine sound
resonance—are immediately and accurately felt through
thewheel.
Supported titles on Xbox One and PC may implement
TRUEFORCE high-denition force feedback. For a list
ofsupported titles visit logitechg.com/support/g923-xb1
Note:
Your Racing Wheel has an overheat protection circuit safeguard
to protect it under high-temperature operating conditions.
Inrare instances, force feedback features may shut down
duringuse while controls continue to operate.
If this occurs, allow the wheel to cool down and power it down by
unplugging it. If this occurs frequently, contact product support.

8ENGLISH
FEATURES
1 Clutch pedal
2 Brake pedal
3 Throttle pedal
4 Textured heel rest
1 2 3
4

9ENGLISH
5 Bolt mounting points (uses M6X1 bolts)
6 Patented carpet grip system
7 Carpet grip release clip
Push towards rear of pedal unit to release
8 Change pedal face position (requires 2.5mm hex key)
5
6
7
8

10 ENGLISH
USING THE DUAL CLUTCH IN-GAME
Using a dual clutch system from a grid start in a race
enables you to achieve maximum traction without the need
tond thebite point of your clutch pedal - this can give you
asignicant advantage at the start of a race.
To use the dual clutch system in-game:
1 At race start, fully depress the clutch pedal and the button
assigned to the dual clutch function (see next section for
setting instructions).
2 Select rst gear using the Gear Up Paddle and fully depress
the gas pedal.
3 As soon as you get the green light for race start, immediately
release the Dual Clutch button. The car should start moving
as the bite point of the clutch is engaged.
4 Smoothly release your foot from the clutch pedal in order to
achieve maximum traction. It’s worth practicing this last step
and modifying the bite point setting several times to nd
amethod that works for you. Once you have it perfected,
this feature can help make up several places on the grid.
Note:
Support for the dual clutch function is not possible in some
games. A list of games that support the dual clutch feature can
be found at logitechg.com/support/g923-xb1
SETTING UP THE DUAL CLUTCH SYSTEM
1 Press and hold the left and right gear paddle and Left stick
button and Right stick button together for two seconds to
enter dual clutch setting mode. The RPM LEDs will illuminate
blue and ash slowly:
Note:
Whilst in the Dual Clutch setting mode the RPM LEDs will not
respond to the game/SDK
11 ENGLISH
2 Press the button you want to set as the dual clutch button.
The only valid buttons for this are the left stick button (LSB)
and right stick button (RSB). The RPM LEDs will ash red
toshow that you’re in clutch position setting mode.
3 While in your chosen simulation or game with the car still on
a track, fully depress the clutch and gas pedals. Engagerst
gear and keep pressing the minus button down until the car
begins to move in-game. You can adjust the precise bite
point of the clutch by using the plus and minus buttons until
youare happy with the setting.
4 At this point you may test the dual clutch without
leavingthesetting mode. It is recommended you attempt
aracestart, stop the car and adjust the bite point and
thentry again until you are satised with the performance
ofthe dual clutch.
5 Press the Select button in the middle of the dial on the wheel
to exit dual clutch setting mode. The RPM LEDs will ash
ina sequence from green to blue to show that the setting
issaved. The RPM LEDs will then go out and begin responding
again to RPM output from supported games.

12 ENGLISH
RESETTING DUAL CLUTCH SYSTEM
Press and hold the left gear shift, right gear shift, and X button
for two seconds.
The RPM LEDs will all ash four times and then extinguish
toindicate that the Dual Clutch system has been reset.
The button assigned to the Dual Clutch system (LSB or RSB)
willrevert to its normal function.
USING LOGITECH G HUB
Logitech G HUB enables the following features on the G923:
• Button programming with proles that can be linked
togames.
• Adjustment of wheel settings, such as Rotation Angle
andTRUEFORCE strength.
• Testing of the various buttons, wheel and pedal functions.
G HUB WHEEL SETTINGS
Sensitivity
Alters the output response of the wheel to be more or less
sensitive. Leaving this slider at 50% will provide a linear 1:1
output. Between 51% and 100% will make the wheel increasingly
more sensitive around the centre movement of the wheel.
Between 0% and 49% will make the wheel decreasingly sensitive
around the centre movement of the Wheel.
Operating Range
The G923 is capable of up to 900 degrees of rotation. Reducing
this setting will change the point at which the wheel will reach
full steering lock. This is especially useful if you’re driving a car
with a smaller actual steering lock angle, such as a Formula1
orGT3 car.
Centering Spring (for games without force feedback)
Most games that support force feedback already model
thecorrect return to center function of the G923 based on the
virtual car. It is recommended that the Centering Spring option
be turned o for these games.
Enabling the Centering Spring option will allow you to override
the game features and adjust the strength of the return
tocenter force using the provided slider.
Torque
Only available for TRUEFORCE supported games. Torque controls
the overall force feedback strength for your G923.

13 ENGLISH
Audio Eects
Only available for TRUEFORCE supported games.
Controlstheoverall strength of the audio-related eects
(enginenote, rumble strips etc.) when using TrueForce-
compatible titles.
If you are using your G923 in older titles that do not support
TRUEFORCE then adjustment of the force feedback can be
performed from the settings menus of the game title.
G HUB PEDALS SETTINGS
Sensitivity
Alters the output response of the pedals to be more or less
sensitive. Leaving this slider at 50% will provide a linear
1:1output. Between 51% and 100% will make the pedal
increasingly more sensitive around the initial movement
of thepedal. Between 0% and 49% will make the pedal
decreasingly sensitive around the initial movement of the Pedal.
Combined Pedals
If checked, this will set the gas and brake pedals to become
twohalves of a single axis. This will help the pedals operate
correctly in older racing titles that do not support separate axes
for pedals.
Note: if left checked then the pedals will not behave correctly
in modern racing titles. If you nd that just one of your pedals
is functioning by accelerating when pressed and braking
whenreleased then you should make sure that this option
isnotchecked.
QUESTIONS?
logitechG.com/support/g923-xb1
TESTING YOUR WHEEL AND PEDALS
On the wheel and pedals screens in G HUB you can check every
button and axis on your G923 in order to ensure everything is
functioning correctly. For the wheel you can also see the eect
ofaltering the Operating range.

14 简体中文
接口与安装点
1 安装夹具
2 线缆收纳夹板
3 可 选 变 速 器 接 口( DB-9 公)
4 USB 线缆
5 踏板装置接口(DB-9 母)
6 电源接口
7 螺栓安装点(使用 M6X1 螺栓)
最佳走线方式
USB 和 踏 板 线 缆( 1、2)应 走 内 侧 线 槽 。
电源和可选的变速器线缆(3、4)应走外侧线槽。
线缆可能需要缠绕线缆收纳夹板多次才能收紧。
2
3
4
1
5
6
7
14 2 3
4
3
21

16 简体中文
安装夹具
G923 赛车方向盘配备内置夹紧系统,用于将方向盘安装到桌面上。
按下并旋转夹紧旋钮可进行锁定或解锁。
旋转夹紧旋钮可紧固或松开夹具。
请注意:
将方向盘安装到较厚的桌面上时,应取下夹具延长器。

17 简体中文
按钮
1 左缓冲键
2 方向键
3 查看按钮
4 左摇杆按钮*
5 +/- 设置调节按钮*
6 右缓冲键
7 A、B、X、Y 按钮
8 菜单键
9 右摇杆按钮*
10 设置选择转盘和选择按钮*
11 Xbox 按钮
2
3
5
4
1 6
7
8
10
11
9
* 需要 Xbox One 上的支持游戏。可通过游戏内分配或罗技 G HUB 软件为各种 PC 游戏分配按键。

18 简体中文
力反馈
赛车方向盘配备双马达,可在支持的游戏和系统中提供力反馈。
在支持的游戏中,您还将体验我们的全新一代力反馈特性:
TRUEFORCE。
TRUEFORCE 直接与游戏物理特性和音频相集成,为您带来更精细的实
时 力 反 馈 。轮 胎 抓 地 力 、悬 挂 、重 量 、马 力 甚 至 独 特 的 发 动 机 声 音 共 振
均可即时精准地反馈到方向盘上。
Xbox One 和PC 上支持此特性的游戏作品可以实现 TRUEFORCE
精准力反馈。支持游戏列表请参阅 logitechg.com/support/g923-xb1
请注意:
赛车方向盘拥有过热保护电路保护装置,可在高温操作条件下对其进
行保护。在极少情况下,力反馈功能会在方向盘使用过程中关闭,而控
制键会继续工作。
如果发生这种情况,请断开方向盘的电源,让方向盘冷却。如果这种情
况 频 繁 出 现 ,请 联 系 产 品 支 持 部 门 。

19 简体中文
特性
1 离合踏板
2 刹车踏板
3 油门踏板
4 纹理脚跟托板
1 2 3
4

20 简体中文
5 螺栓安装点(使用 M6X1 螺栓)
6 专有防滑系统
7 防滑系统释放夹
向后或向踏板装置方向推动即可释放
8 更改踏板位置(需使用 2.5 毫米六角扳手)
5
6
7
8
Table of contents
Languages:
Other Logitech G Video Game Controllers manuals

Logitech G
Logitech G G940 User manual

Logitech G
Logitech G FLIGHT RUDDER PEDALS User manual

Logitech G
Logitech G X52 User manual

Logitech G
Logitech G FLIGHT THROTTLE QUADRANT User manual

Logitech G
Logitech G FLIGHT INSTRUMENT PANEL User manual

Logitech G
Logitech G FLIGHT SWITCH PANEL User manual

Logitech G
Logitech G X52 User manual

Logitech G
Logitech G FLIGHT SWITCH PANEL User manual

Logitech G
Logitech G PRO RACING WHEEL User manual

Logitech G
Logitech G PS28 User manual