Logitech G FLIGHT INSTRUMENT PANEL User manual

logitechG.com
FLIGHT INSTRUMENT PANEL
Professional Multi-Instrument LCD Panel Simulation Controller
USER GUIDE

2English

3
4ENGLISH
10 DEUTSCH
17 FRANÇAIS
24 ITALIANO
31 ESPAÑOL
38 PORTUGUÊS
45 NEDERLANDS
52 SVENSKA
59 DANSK
66 NORSK
73 SUOMI
80 ΕΛΛΗΝΙΚΑ
87 ПОРУССКИ
94 PO POLSKU
101 MAGYAR
108 ČESKÁ VERZE
115 SLOVENČINA
122 УКРАЇНСЬКА
129 EESTI
136 LATVISKI
143 LIETUVIŲ
150 БЪЛГАРСКИ
157 HRVATSKI
164 SRPSKI
171 SLOVENŠČINA
178 ROMÂNĂ
185 TÜRKÇE
192

4English
Getting Started : FLIGHT INSTRUMENT PANEL
Congratulations on buying the Logitech G Flight Instrument Panel. The Instrument
Panel interacts in real time with Microsoft Flight Simulator X to display a choice of
cockpit screens, improving control and making your ying experiences more realistic.
Installing the Instrument Panel
To use the Instrument Panel as a standalone device, simply extend the support stand
at the back of unit as shown.
You can also x the panel to the supplied mounting bracket. Insert the screws
through the holes at the corners of the panel into the bracket behind and tighten.
If you already own a Logitech Flight Yoke System, you can mount the panel and
bracket on top of the yoke unit using the screws provided.

5English
INSTALLATION FOR WINDOWS®10, WINDOWS®8.1
AND WINDOWS®7
DRIVER INSTALLATION
1 Visit logitech.com/support/FIP to download the latest drivers and software
for your operating system.
2 With device disconnected, follow the onscreen instructions to complete
the installation.
3 At the Driver Setup screen, only when prompted, insert USB cable into one
of your computer’s USB ports, then click Next.
4 At the Driver Setup screen, only when prompted, insert USB cable into one
of your computer’s USB ports, then click Next.
5 Screen displays
Alimeter Vertical Speed Airspeed Altitude Compass Turn and Slip

6English
How to assign Flight Simulator X instrument displays
to the Pro Flight Instrument Panel
Once you have installed the appropriate plug-in for Flight Simulator X (FSX), the next
time you run FSX it will prompt you that it is attempting to load the Logitech G
Panel(s) Plug-in for FSX - click Yes on this screen.
After that you should see a Windows security warning asking you if you want to run
LogiFlightSimX.exe - click Yes on that screen.
Finally, FSX will prompt you if you wish to make LogiFlightSimX.exe a trusted piece
of software - click Yes.
Once you have installed the Panel software, the Panel buttons and controls should
be automatically congured to control their functions in FSX software. If your FSX
software does not recognise the Panel, unplug the USB cable and plug it back in.
For further help with other sims or any other questions, check the support page
at logitech.com/support/FIP.
You can select one of the above six screens to be displayed on the Flight Instrument
Panel. Press the cursor up or down buttons at the bottom centre of the panel to scroll
through the screen displays.

7English
Additional buttons
The six buttons on the left of the Instrument Panel open additional cockpit screens
or displays when ying in FSX. Each button is labelled with the corresponding display
to the right of it. The Map, Main Panel, Radios and GPS buttons will open those
screens or cockpit panels when ying most aircraft. The panel 4 and 5 buttons
will open dierent screens or panels depending on the aircraft being own.
Press the button once to open the panel or screen and again to close it (except map
where you must click on OK or press return to close the map screen).
Note: Pressing any of the six buttons when FSX is not loaded will switch the panel display o and on.
You can connect multiple Instrument Panels to your PC to show dierent cockpit
displays simultaneously. Each panel uses system resources - see Advanced options
below to connect multiple panels with maximum system performance.
Advanced options
If you have more than one PC connected to a LAN you can connect multiple
instrument panels to a secondary PC which will display ight information
from Microsoft FSX running on your primary PC. This can be useful to free up
system resources for FSX.
Denitions
Server = The PC that will be running FSX and the main
Flight controllers attached.
Client = The PC that will be linked to the Server via
the LAN. The instrument panels will be connected
to this PC to alleviate the processing stress of having
multiple screens connected to one PC.

8English
On theServer PC
1 Ensure FSX and the FIP drivers are installed and running.
2 Original retail DVD1: FSX Deluxe edition; Navigate to the SDK folder and run Setup.
exe.
3 Show hidden les. In Windows Explorer (if running Vista press Alt key) navigate
to Tools > Folder Options. Select View tab. In Advance Settings > Hidden Files and
Folders section, Select Show Hidden Files and Folders.
4 Locate SimConnect.xml
On Vista: C:\Users\username\AppData\Roaming\Microsoft\FSX\
On XP: C:\Documents and Settings\Application Data\Microsoft\FSX\
Add section within the section <SimBase.Document...>
<SimConnect.Comm>
<Disabled>False</Disabled>
<Protocol>IPv4</Protocol>
<Scope>global</Scope>
<Address>SERVER_MACHINE_IP_ADDRESS</Address>
<MaxClients>64</MaxClients>
<Port>SERVER_MACHINE_PORT_NUMBER</Port>
<MaxRecvSize>4096</MaxRecvSize>
<DisableNagle>False</DisableNagle>
</SimConnect.Comm>
Note: Find and insert the server machine IP address into the eld above from Control Panel >
Network Connections > Local Area Connection. Select Support tab.
Note: Select a port number greater than 1024 (Not 8080). We recommend using 2001.
Note: You will need to make a note of the Server machine IP address and the port number when
setting up the client machine.
On the Client PC
5 Ensure that the Flight Instrument Panel drivers are installed and working correctly.
6 Download and install Microsoft Visual C++ 2005 Redistributable Package (x86).
NOT the SP1 variant!

9English
7 Copy SimConnect.msi from server machine and install. On server machine,
default location: C:\Program Files\Microsoft Games\Microsoft Flight Simulator X
SDK\SDK\Core Utilities Kit\SimConnect\SDK\lib\
8 Create le in My Documents, a text document, rename to SimConnect.cfg
This contains:
[SimConnect]
Protocol=IPv4
Address=SERVER_MACHINE_IP_ADDRESS
Port=SERVER_MACHINE_PORT_NUMBER
MaxReceiveSize=4096
DisableNagle=0
Note: Fill in the Server machine IP address and the port number selected from Step 4.
• To start the instrument panel, start FSX on the server. You may need to allow
FSX to act as a server in the Firewall settings. If you have trouble connecting to
this machine, temporarily disable the Firewall to see if a connection can be made.
• On the client PC, start LogiFlightSimX.exe Locate at:
C:\Program Files\Logitech\FSX Plugin\
Note: If nothing appears to happen, open Task Manager and check that LogiFlightSimX.exe is in the list
of running Processes. If SimConnect cannot nd or connect to the Server PC, LogiFlightSimX.exe will only
run very briey and will not display any gauges. If this is the case try disabling the Firewall.
Tip: If the client machine fails to connect, please check the Advanced Network
Settings. Navigate Control Panel > Network Connections > Local Area Connection.
Select Properties. Highlight Internet Protocol (TCP/IP) and Select Properties.
Select Advanced. Select WINS tab. Select Enable NetBIOS over TCP/IP. Select OK
or Close and all opened windows.
Please see www.fsdeveloper.com navigate to wiki > simconnect > remote_connection
for further details.
TECHNICAL SUPPORT
Online Support: support.logitech.com
10 Deutsch
Erste Schritte: FLIGHT INSTRUMENT PANEL
Wir gratulieren zum Kauf des Logitech G Flight Instrument Panel.
Die Instrumententafel interagiert in Echtzeit mit Microsoft Flight Simulator X,
zeigt verschiedene Cockpit-Bildschirme an und sorgt für eine verbesserte Steuerung
und ein realistischeres Flugerlebnis.
Installation der Instrumententafel
Wenn die Instrumententafel als eigenständiges Gerät genutzt wird, kannst du einfach
die Stützen an der Geräterückseite ausklappen (siehe Abbildung).
Du kannst die Tafel auch an der mitgelieferten Halterung befestigen.
Führe die Schrauben durch die an den Ecken der Tafel bendlichen Bohrungen und
befestige sie an der dahinter liegenden Halterung. Wenn du bereits das Logitech
Flight Yoke System besitzt, kannst du die Instrumententafel samt Halterung mithilfe
der beiliegenden Schrauben am Steuerhorngehäuse befestigen.

11 Deutsch
INSTALLATION UNTER WINDOWS®10, WINDOWS®8.1
UND WINDOWS®7
INSTALLATION DES TREIBERS
1 Navigiere zur URL: logitech.com/support/FIP, um aktuelle Versionen von Treiber
und Software für dein Betriebssystem herunterzuladen.
2 Schließe das Gerät zunächst nicht an und befolge die Anweisungen auf
dem Bildschirm.
3 Wenn auf dem Bildschirm für die Treibereinrichtung eine entsprechende
Auorderung erfolgt, verbinde das USB-Kabel mit einem der USB-Anschlüsse
des Computers und klicke auf Weiter.
4 Bildschirmanzeigen
Höhen-
messer
Vertikale
Geschwin-
digkeit
Flug-
geschwin-
digkeit
Höhe Kompass Wende-
zeiger

12 Deutsch
So werden die Instrumentenanzeigen von Flight Simulator X dem Pro Flight
Instrument Panel zugewiesen
Nachdem du das entsprechende Plug-In für Flight Simulator X (FSX) installiert hast,
wird beim nächsten Start von FSX eine Abfrage zum Laden des Logitech G Panel Plug-
In für FSX angezeigt. Klicke auf diesem Bildschirm auf „Ja“.
Anschließend sollte eine Sicherheitswarnung von Windows mit einer Abfrage
zum Ausführen von LogiFlightSimX.exe angezeigt werden. Klicke auf
diesem Bildschirm auf „Ja“.
Schließlich erfolgt von FSX die Abfrage, ob es sich bei LogiFlightSimX.exe
um vertrauenswürdige Software handelt. Klicke auf „Ja“.
Nach Installation der Software für die Instrumententafel sollten deren Tasten
und Bedienelemente automatisch zur Steuerung der Funktionen der FSX-Software
konguriert sein. Wenn deine FSX-Software die Tafel nicht erkennt, zieh das USB-Kabel
heraus und steck es dann wieder ein.
Hilfe zu anderen Simulationen und Antworten auf sonstige Fragen ndest du auf
der Supportseite unter logitech.com/support/FIP.
Du kannst einen der Bildschirme oben auf der Instrumententafel anzeigen.
Mit den Cursortasten in der unteren Mitte der Instrumententafel kannst du durch
die Bildschirme blättern.

13 Deutsch
Weitere Tasten
Mit den sechs Tasten links auf der Instrumententafel lassen sich während
des Flugs in FSX weitere Cockpit-Bildschirme önen. Jede Taste verfügt rechts
über eine Beschriftung zur Kennzeichnung des entsprechenden Bildschirms.
Die Tasten Map, Main Panel, Radios und GPS önen bei den meisten Flugzeugen
die entsprechenden Bildschirme oder Cockpit-Instrumente. Die Tasten 4 und
5 önen abhängig vom genutzten Flugzeug unterschiedliche Bildschirme oder
Instrumentenanzeigen. Durch einmaliges Drücken kannst du den Bildschirm oder
das Instrument önen oder schließen (mit Ausnahme von Map, wo du zum Schließen
auf OK klicken oder die Eingabetaste drücken musst).
Hinweis: Wenn FSX nicht geladen ist, wird durch Drücken einer der sechs Tasten die Instrumententafel
ein- bzw. ausgeschaltet.
Du kannst mehrere Instrumententafeln mit deinem PC verbinden, um gleichzeitig
verschiedene Cockpit-Anzeigen sehen zu können. Jede Instrumententafel verbraucht
Systemressourcen – Informationen zum Anschließen mehrerer Tafeln bei maximaler
Systemleistung ndest du unten unter „Erweiterte Optionen“.
Erweiterte Optionen
Wenn du mehr als einen PC in einem LAN betreibst, kannst du mehrere
Instrumententafeln mit einem zweiten PC verbinden, auf denen Fluginformation
von Microsoft FSX angezeigt werden, das auf dem ersten PC ausgeführt wird.
Dies kann nützlich sein, um Systemressourcen für FSX freizusetzen.
Denitionen
Server = PC, auf dem FSX ausgeführt wird und an den
die Hauptugsteuerung angeschlossen ist.
Client = PC, der über das LAN mit dem Server
verbunden ist. Die Instrumententafeln werden mit
diesem PC verbunden, um die Belastung abzumildern,
die das Anschließen mehrerer Bildschirme an einen PC
mit sich bringt.

14 Deutsch
Auf dem Server-PC
1 FSX- und FIP-Treiber müssen installiert sein und funktionieren.
2 Original-DVD1: FSX Deluxe Edition; Öne den SDK-Ordner und führe Setup.exe aus.
3 Versteckte Dateien anzeigen. Navigiere im Windows Explorer (unter Vista die Alt-
Taste drücken) zu Werkzeuge > Ordneroptionen. Wähle die Registerkarte „Ansicht“
aus. Markiere unter Erweiterte Einstellungen > Abschnitt „Versteckte Dateien
und Ordner“ die Option „Versteckte Dateien und Ordner anzeigen“.
4 Suche die Datei SimConnect.xml
Unter Vista: C:\Benutzer\Benutzername\AppData\Roaming\Microsoft\FSX\
Unter XP: C:\Dokumente und Einstellungen\Anwendungsdaten\Microsoft\FSX\
Add section within the section <SimBase.Document...>
<SimConnect.Comm>
<Disabled>False</Disabled>
<Protocol>IPv4</Protocol>
<Scope>global</Scope>
<Address>SERVER_MACHINE_IP_ADDRESS</Address>
<MaxClients>64</MaxClients>
<Port>SERVER_MACHINE_PORT_NUMBER</Port>
<MaxRecvSize>4096</MaxRecvSize>
<DisableNagle>False</DisableNagle>
</SimConnect.Comm>
Hinweis: Finde die IP-Adresse des Server-Computers heraus und gib diese in das Feld
über „Systemsteuerung > Netzwerkverbindungen > LAN-Verbindung“ ein. Wähle die Registerkarte
„Support“ aus.
Hinweis: Wähle eine Portnummer über 1024 (nicht 8080). Wir empfehlen 2001.
Hinweis: Notiere dir die IP-Adresse und die Portnummer des Server-Computers für die Einrichtung
des Client-Computers.

15 Deutsch
Auf dem Client-PC
5 Die Treiber für die Fluginstrumententafel müssen installiert sein und korrekt
funktionieren.
6 Lade Microsoft Visual C++ 2005 Redistributable Package (x86)
(NICHT die SP1-Variante) herunter und installiere es.
7 Kopiere SimConnect.msi vom Server und installiere die Datei. Auf dem Server,
Standardspeicherort: C:\Programme\Microsoft Games\Microsoft Flight Simulator X
SDK\SDK\Core Utilities Kit\SimConnect\SDK\lib\
8 Erstelle eine Textdatei unter Eigene Dokumente und nenne sie „SimConnect.cfg“
Diese enthält:
[SimConnect]
Protocol=IPv4
Address=SERVER_MACHINE_IP_ADDRESS
Port=SERVER_MACHINE_PORT_NUMBER
MaxReceiveSize=4096
DisableNagle=0
Hinweis: Trage die IP-Adresse des Servers und die in Schritt 4 gewählte Portnummer ein.
• Zum Starten der Instrumententafel starte FSX auf dem Server. Möglicherweise
musst du in den Firewall-Einstellungen FSX erlauben, als Server fungieren
zu können. Wenn du Probleme hast, eine Verbindung zu diesem Computer
herzustellen, kannst du versuchen, die Firewall vorübergehend zu deaktivieren.
• Starte LogiFlightSimX.exe auf dem Client-PC. Es bendet sich unter:
C:\Programme\Logitech\FSX Plugin\
Hinweis: Wenn scheinbar keine Reaktion erfolgt, öne den Task Manager und überprüfe,
ob LogiFlightSimX.exe auf der Liste der ausgeführten Prozesse enthalten ist. Wenn SimConnect
den Server nicht ndet oder keine Verbindung herstellen kann, wird LogiFlightSimX.exe nur für kurze Zeit
ausgeführt und es werden keine Instrumente angezeigt. Falls dies passiert, deaktiviere die Firewall.

16 Deutsch
Tipp: Wenn der Client keine Verbindung herstellen kann, überprüfe die erweiterten
Netzwerkeinstellungen. Gehe zu „Systemsteuerung > Netzwerkverbindungen >
LAN-Verbindung“. Wähle „Eigenschaften“ aus. Markiere „Internet Protocol (TCP/IP)“
und „Eigenschaften auswählen“. Wähle „Erweitert“. Wähle die Registerkarte „WINS“.
Wähle „NetBIOS über TCP/IP aktivieren“. Wähle „OK“ und schließe alle geöneten
Fenster.
Weitere Details ndest du unter www.fsdeveloper.com. Navigiere zu wiki >
simconnect > remote_connection.
TECHNISCHER SUPPORT
Online-Support: support.logitech.com

17 Français
Première utilisation: PANNEAU D'INSTRUMENTS DE VOL
Nous vous remercions pour votre achat du panneau d'instruments de vol Logitech G.
Le panneau d'instruments interagit en temps réel avec le Flight Simulator X de
Microsoft pour acher plusieurs écrans de cockpit et améliorer ainsi les commandes,
pour des expériences de vol plus réalistes.
Installation du panneau d'instruments
Pour utiliser le Panneau d'instruments comme un dispositif autonome, il vous sut
d'ouvrir le support à l'arrière de l'unité comme montré ci-dessous.
Vous pouvez également xer le panneau sur le support d'installation fourni. Insérez
les vis dans les trous au niveau des angles du panneau dans le support à l'arrière et
serrez-les. Si vous possédez déjà un système Logitech Flight Yoke, vous pouvez monter
le panneau et le support sur le dessus de l'unité du manche en utilisant les vis fournies.

18 Français
INSTALLATION POUR WINDOWS®10, WINDOWS®8.1
ET WINDOWS®7
INSTALLATION DES PILOTES
1 Rendez-vous sur logitech.com/support/FIP pour télécharger les derniers pilotes
et le logiciel compatibles avec votre système d'exploitation.
2 Déconnectez le dispositif et suivez les instructions à l'écran pour terminer
l'installation.
3 À l'achage de l'écran de conguration des pilotes, lorsque vous y êtes invité,
insérez le câble USB dans l'un des ports USB de votre ordinateur et cliquez
sur Suivant.
4 Achages des écrans
Altimètre Variomètre Anémomètre Altitude Compas Virage
et dérapage

19 Français
Comment attribuer des écrans de l'instrument Flight Simulator X
au panneau d'instruments Flight Pro
Après avoir installé le module d'extension approprié pour Flight Simulator X (FSX),
à la prochaine exécution de FSX, vous recevrez un message indiquant que le logiciel
essaie de charger le module d'extension du ou des panneaux Logitech G pour FSX:
cliquez sur Oui.
Ensuite, vous devriez recevoir un message d'avertissement de sécurité Windows
vous demandant si vous souhaitez exécuter LogiFlightSimX.exe: cliquez sur Oui.
Enn, FSX vous demandera si vous souhaitez que LogiFlightSimX.exe soit considéré
comme un élément approuvé du logiciel: cliquez sur Oui.
Après avoir installé le logiciel du panneau, les boutons et les commandes devraient
être automatiquement congurés sur les fonctions prévues dans le logiciel FSX.
Si votre logiciel FSX ne reconnaît pas le panneau, débranchez puis rebranchez
le câble USB.
Pour recevoir de l'aide à propos d'autres simulateurs ou de toutes autres questions,
consultez la page de support sur logitech.com/support/FIP.
Vous pouvez sélectionner l'un des six écrans ci-dessus à acher sur le panneau
d'instruments de vol. Appuyez sur les boutons haut et bas du curseur sur la partie
centrale inférieure du panneau pour faire déler les écrans.

20 Français
Boutons supplémentaires
Les six boutons à gauche du panneau d'instruments ouvrent des écrans de cockpit
supplémentaires lors des sessions de vol dans FSX. Chaque bouton est associé
à l'écran correspondant situé à sa droite. Les boutons Carte, Panneau principal,
Radios et GPS ouvriront ces écrans ou les panneaux de cockpit lors de la plupart
des sessions de vol. Les boutons 4 et 5 du panneau ouvriront diérents écrans ou
panneaux en fonction de l'appareil utilisé. Appuyez une fois sur le bouton pour ouvrir
le panneau ou l'écran et encore une fois pour le refermer (sauf la carte, pour laquelle
vous devez cliquer sur OK ou appuyer sur Retour pour fermer l'écran).
Remarque: Si vous appuyez sur les six boutons alors que FSX n'est pas chargé, l'écran du panneau
s'activera ou se désactivera.
Vous pouvez connecter plusieurs panneaux d'instruments à votre PC pour acher
diérents écrans de cockpit simultanément. Chaque panneau utilise des ressources
système: reportez-vous aux options avancées ci-dessous pour connecter plusieurs
panneaux avec des performances système maximales.
Options avancées
Si plusieurs ordinateurs sont connectés à un réseau LAN, vous pouvez connecter
plusieurs panneaux d'instruments à un ordinateur secondaire qui achera
les informations de vol de Microsoft FSX s'exécutant sur l'ordinateur principal.
Cette option peut être utile pour libérer des ressources système pour FSX.
Dénitions
Serveur = l'ordinateur qui exécutera FSX
et les principaux contrôleurs de vol associés.
Client = l'ordinateur qui sera associé au serveur
via le réseau LAN. Les panneaux d'instruments seront
connectés à cet ordinateur pour réduire la tension
liée au traitement de plusieurs écrans connectés
à un ordinateur.
Table of contents
Languages:
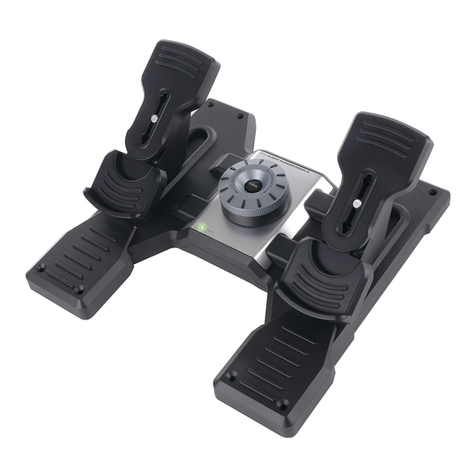
Other Logitech G Video Game Controllers manuals

Logitech G
Logitech G X52 User manual

Logitech G
Logitech G X52 User manual

Logitech G
Logitech G FLIGHT RUDDER PEDALS User manual

Logitech G
Logitech G FLIGHT SWITCH PANEL User manual

Logitech G
Logitech G PS28 User manual

Logitech G
Logitech G G923 User manual

Logitech G
Logitech G G940 User manual

Logitech G
Logitech G FLIGHT SWITCH PANEL User manual

Logitech G
Logitech G FLIGHT THROTTLE QUADRANT User manual

Logitech G
Logitech G PRO RACING WHEEL User manual