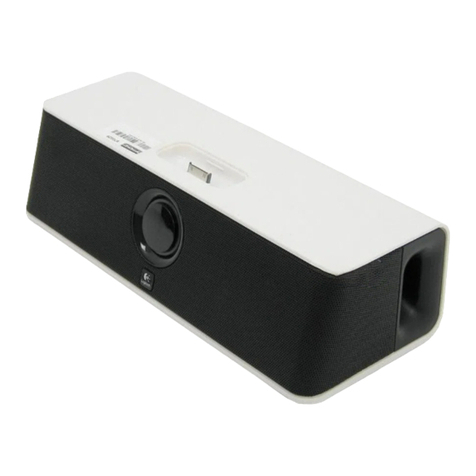
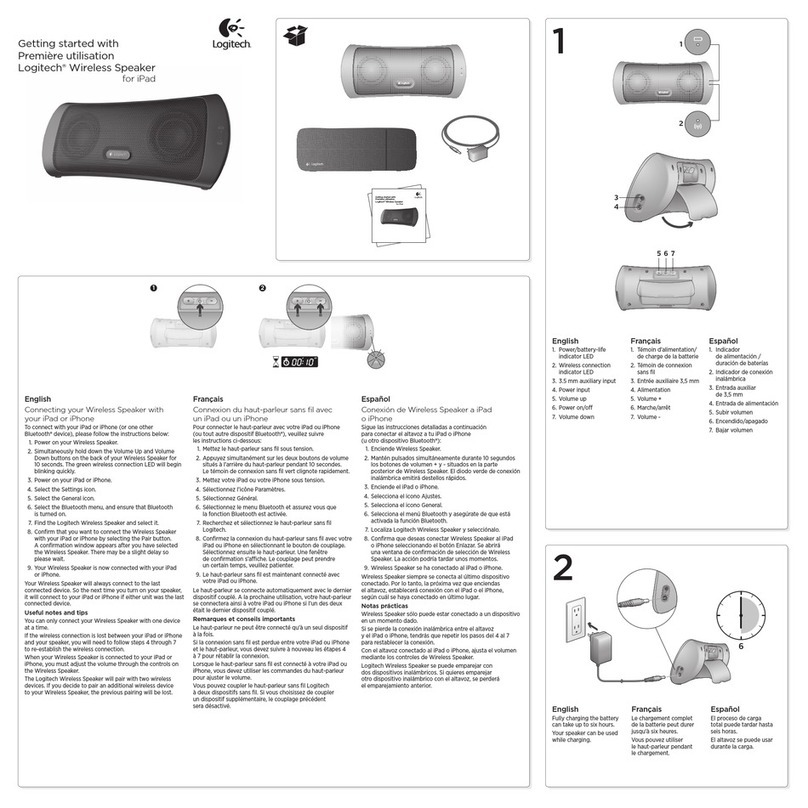
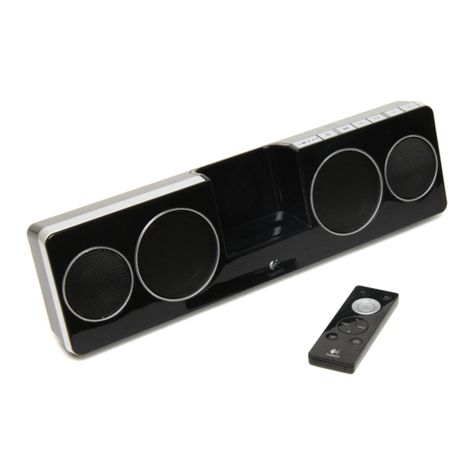
Logitech AV Stand User manual

for iPad
Getting started with
Logitech® AV Stand


3
Logitech® AV Stand
Contents
English. . . . . . . . . . . . . . . . . .4
Deutsch . . . . . . . . . . . . . . . . 10
Français . . . . . . . . . . . . . . . . 16
Italiano. . . . . . . . . . . . . . . . . 22
Español . . . . . . . . . . . . . . . . 28
Português . . . . . . . . . . . . . . . 34
Nederlands . . . . . . . . . . . . . . 40
Svenska . . . . . . . . . . . . . . . . 46
Dansk . . . . . . . . . . . . . . . . . 52
Norsk . . . . . . . . . . . . . . . . . 58
Suomi . . . . . . . . . . . . . . . . . 64
Ελληνικά . . . . . . . . . . . . . . . . . 70
По-русски . . . . . . . . . . . . . . . . 76
Magyar . . . . . . . . . . . . . . . . 82
Česká verze . . . . . . . . . . . . . . 88
Po polsku . . . . . . . . . . . . . . . 94
Slovenčina. . . . . . . . . . . . . . 100
Türkçe . . . . . . . . . . . . . . . . 106
117 . . . . . . . . . . . . . . . . .
www.logitech.com/support . . . . . . . . . . . . . . . . . . . . . . . . . . 119

Logitech® AV Stand
4 English
AV Stand features
On the front
1. IR sensor Receives infrared control
signals from the remote, it must not
be blocked.
2. Power/Function indicator
•Power on and in AUX-IN mode,
LED will flash.
•Power on and in iPad mode,
LED will light steadily.
•In standby mode, LED will be o.
3. Docking connector
Connect your iPad, iPad 2, iPhone,
iPod touch, iPod nano, iPod classic
(except 160GB) and iPod video here.
4. Volume up/down (+/-)
Adjust the output volume level.
5. Power on/Standby button
•Press and hold for standby mode..
•Press to turn on unit.
•While unit is on, press to toggle
between iPad and AUX-IN mode.
6. Left speaker Left channel
of your music is heard
7. Right speaker Right channel
of your music is heard.
8. iPad dock Supports the
connected iPad.
9. iPad clips Securely hold your iPad in
place. For first generation iPad, remove
adaptor clips.
2
9
4
1
6
3
9
5
7
8

English 5
Logitech® AV Stand
On the back
10. Reset button When unit acts
abnormally, press to reset.
11. Video Out jack To view movies or
videos, connect the TV’s composite-
input jack to this terminal.
12. DC jack (8V 2900mA )
Only connect the supplied AC adaptor
to this jack to power the unit.
13. AUX-IN jack Connect any compatible
portable audio device to this jack.
14. Bass reflex opening To ensure quality
bass eect, never block this opening.
15. Base hinge The iPad holder arm
pivots at this point.
16. Support arm Provides
flexible positioning.
Note: When docking your device or
adjusting the angle, set to uppermost
or lowermost position.
17. Dock hinge Pivots to adjust
the viewing angle.
18. Rotating head Rotates 90 degrees
counterclockwise for landscape viewing.
18
17
16
15
1413
12
11
10

Logitech® AV Stand
6 English
Remote control features
Remove the insulation tab from the battery
compartment to activate the remote before
first use.
1. Power on/Standby button
Press to turn unit on or return the unit
to standby mode.
2. Play/Pause button Press to play
or pause the audio output when
using the iPod/video modes of
your Apple device.
3. Skip backward Press to return to
the previous track when using the iPod/
video modes of your Apple device.
4. Video on/o Press to turn video
output on or o.
5. Volume up (+) Press to increase
volume output.
6. Volume down (-) Press to decrease
volume output.
7. Function button Press to toggle
between iPad and AUX-IN mode.
8. Mute button Press to silence
the audio output. Press again
to resume listening.
9. Skip forward Press to advance
to next track in iPad/video modes
of your Apple device.
1
9
2
3
4
5
6
8
7

English 7
Logitech® AV Stand
When the operation of the remote control
becomes intermittent or the eective
distance is significantly decreased,
replace the original battery with a new type
CR2032 3V lithium battery as follows:
1. Unlock 1and slide out the battery
holder 2from the remote control case.
2. Replace the weak/dead battery with
a new one. Be sure the battery is
installed correctly. The remote will not
work if the battery is installed with
wrong polarity.
3. Insert the battery holder back into
the battery slot.
Getting started
Setup for music listening
1. Connect the iPad to the stand by
carefully fitting the iPad to the 30-pin
connector. To avoid damage, do not
force the connection.
Note: For iPad 2, please attach the two adaptor
clips before placing the iPad in the stand.
2. Use the bracket to rotate the iPad
to portrait or landscape view.
3. Use the arm to adjust the iPad to
your preferred viewing angle.
4. Turn on both the speaker power and
the iPad power. Select your favorite
music source. Using the iPad, select play
and adjust the volume.
Note: When using the auxiliary input
(3.5mm connection), you must press
the FUNCTION button to toggle between
auxiliary input and the iPad connector input.
2
1

Logitech® AV Stand
8 English
Setup for on-screen typing mode
1. Connect the iPad to the stand by
carefully fitting the iPad to the 30-pin
connector. To avoid damage, do not
force the connection.
2. Use the bracket to rotate the iPad
to landscape view.
3. Adjust the arm to its lowest position.
The iPad screen will be inclined at
about a 40 degree angle to allowing
on-screen typing.
Setup for watching video
(movies, podcasts, videos).
1. Connect the iPad to the stand
by carefully fitting the iPad to the
30-pin connector. To avoid damage,
do not force the connection.
2. Use the bracket to rotate the iPad
to portrait or landscape view.
3. Use the arm to adjust the iPad
to your preferred viewing angle.
4. Position the speaker stand near
your television, within cable’s length.
5. Connect the composite video cable
to the speaker stand’s video output
and the other end to a television with
composite video input.
6. Turn on the television and select
the proper INPUT of the video source.
7. Turn on the speaker stand with
the remote control.
8. On the remote control press the video
On/O button to send iPad video to
the television.
9. On the iPad browse and select the
movie, podcast or video you want
to watch.
10. With the video selected, use the remote
and press PLAY.
11. The remote will control PLAY, PAUSE,
SKIP and PREVIOUS for movie,
podcast or videos.
English 9
Logitech® AV Stand
Resetting the Unit
If the unit is subject to a power surge,
it is possible that the internal micro-
controller may lock up and the unit will
not respond to any commands from
the front panel controls or remote
control. In this event, you can do one
of the following:
1. Detach the DC plug of the AC adaptor
from the unit and then reconnect after
about 10 seconds.
2. Use a straightened paper clip, toothpick
or similar objects to press the Reset
button which is located at the bottom
of the back side of the iPad dock.
Warning: Do not use sharp, pointed object
to press the Reset button. It can damage
the tact switch inside the unit.

10 Deutsch
Logitech® AV Stand
Funktionen des AV Stand
Vorderseite
1. Infrarot-Sensor
Empfängt Infrarot-Kontrollsignale von
der Fernbedienung; darf nicht blockiert
werden.
2. Betriebs-/Funktionsanzeige
•Wenn das Gerät eingeschaltet ist
und sich im AUX-IN-Modus befindet,
blinkt die LED.
•Wenn das Gerät eingeschaltet ist
und sich im iPad-Modus befindet,
leuchtet die LED dauerhaft.
•Ist das Gerät im Standby-Modus,
leuchtet die LED nicht.
3. Dockanschluss
Schließen Sie hier Ihr iPad, iPad 2,
iPhone bzw. Ihren iPod touch, iPod
nano, iPod classic (außer 160 GB)
und iPod video an.
4. Lauter/Leiser (+/-)
Regelt die Ausgangslautstärke.
5. Ein-/Ausschalter/Standby-Schalter
•Halten Sie diese Taste gedrückt,
um in den Standby-Modus
zu schalten.
•Drücken Sie diese Taste, um das Gerät
einzuschalten.
•Wenn das Gerät eingeschaltet ist,
wechseln Sie durch Drücken dieser
Taste vom iPad- in den AUX-IN-Modus
und umgekehrt.
6. Linker Lautsprecher
Der linke Musikkanal ist zu hören.
7. Rechter Lautsprecher
Der rechte Musikkanal ist zu hören.
8. iPad-Dock
Unterstützt das angeschlossene iPad.
9. iPad-Befestigungsclips
Damit Ihr iPad nicht verrutscht.
Sollten Sie ein iPad der ersten
Generation verwenden, entfernen Sie
die Adapterclips.
2
9
4
1
6
3
9
5
7
8

Deutsch 11
Logitech® AV Stand
Rückseite
10. Reset-Taste
Wenn sich das Gerät nicht wie erwartet
verhält, drücken Sie diese Taste,
um es zurückzusetzen.
11. Videoausgangsbuchse
Für die Wiedergabe von Filmen oder
Videos schließen Sie das Composite-
Kabel hier an.
12. DC-Buchse (8 V 2900 mA )
Schließen Sie nur das mitgelieferte
Netzteil an diese Buchse an,
um das Gerät mit Strom zu versorgen.
13. 3,5-mm-Eingangsbuchse
An diese Buchse können Sie jedes
kompatible tragbare Audiogerät
anschließen.
14. Bassreflexönung
Blockieren Sie diese Önung nie,
um einen hochwertigen Bass-Sound
zu gewährleisten.
15. Unteres Gelenkstück
An dieser Stelle kann der Arm der iPad-
Halterung bewegt werden.
16. Tragarm
Ermöglicht eine flexible Positionierung.
Hinweis: Wenn Sie Ihr Gerät anschließen
oder den Winkel anpassen, stellen Sie
die Halterung auf die oberste oder unterste
Position ein.
17. Oberes Gelenkstück
Kann zur Anpassung des Blickwinkels
bewegt werden.
18. Drehkopf
Kann um 90 Grad gegen
den Uhrzeigersinn auf Querformat
gedreht werden.
18
17
16
15
1413
12
11
10

12 Deutsch
Logitech® AV Stand
Funktionen der Fernbedienung
Entfernen Sie vor der ersten Verwendung
den Schutzstreifen vom Batteriefach,
um die Fernbedienung zu aktivieren.
1. Ein-/Ausschalter/Standby-Taste
Drücken Sie diese Taste, um das Gerät
einzuschalten oder in den Standby-
Modus zu versetzen.
2. Wiedergabe/Pause-Taste
Drücken Sie diese Taste,
um die Audiowiedergabe anzuhalten,
wenn Sie Ihr Apple-Gerät im iPod-/
Videomodus verwenden.
3. Vorheriger Titel
Drücken Sie diese Taste, um zum
vorherigen Titel zurückzukehren,
wenn Sie Ihr Apple-Gerät im iPod-/
Videomodus verwenden.
4. Video On/O
Drücken Sie diese Taste,
um die Videowiedergabe zu starten
oder anzuhalten.
5. Vol (+)
Drücken Sie diese Taste,
um die Lautstärke zu erhöhen.
6. Vol (-)
Drücken Sie diese Taste,
um die Lautstärke zu verringern.
7. Function-Taste
Drücken Sie diese Taste, um zwischen
dem iPad- und AUX-IN-Modus
zu wechseln.
8. Mute-Taste
Drücken Sie diese Taste, um die Audio-
wiedergabe stummzuschalten.
Drücken Sie die Taste erneut,
um die Stummschaltung aufzuheben.
9. Nächster Titel
Drücken Sie diese Taste,
um zum nächsten Titel zu springen,
wenn Sie Ihr Apple-Gerät im iPad-/
Videomodus verwenden.
1
9
2
3
4
5
6
8
7

Deutsch 13
Logitech® AV Stand
Wenn die Fernbedienung zwischendurch
ausfällt oder ihre Reichweite beträchtlich
nachlässt, ersetzen Sie die Originalbatterie
mit einer neuen Lithium-Batterie des Typs
CR2032 3V . Gehen Sie hierfür wie
folgt vor:
1. Entsperren Sie 1und entfernen Sie
die Batteriefachabdeckung 2
der Fernbedienung.
2. Ersetzen Sie die alte Batterie durch
eine neue. Vergewissern Sie sich,
dass die Batterie korrekt eingelegt ist.
Die Fernbedienung funktioniert nur,
wenn die Polarität stimmt.
3. Schließen Sie die Batteriefachabdeckung
wieder.
Erste Schritte
Einrichtung zum Musikhören
1. Stecken Sie Ihr iPad in den 30-Pin-
Anschluss der Halterung. Gehen
Sie dabei vorsichtig vor, um eine
Beschädigung des Geräts zu vermeiden.
Hinweis: Befestigen Sie beim iPad 2 die beiden
Adapter, bevor Sie das iPad in die Halterung
stecken.
2. Drehen Sie das iPad mithilfe
der beweglichen Halterung ins Hoch-
oder Querformat.
2
1

14 Deutsch
Logitech® AV Stand
3. Stellen Sie den Arm des Geräts auf
die gewünschte Sichthöhe ein.
4. Schalten Sie sowohl die Lautsprecher
als auch das iPad ein. Wählen Sie eine
Musikquelle. Starten Sie die Wiedergabe
über das iPad und regeln Sie die
Lautstärke.
Hinweis: Wenn Sie einen 3,5-mm-Klinkeneingang
verwenden, müssen Sie die Function-Taste
drücken, um zwischen dem 3,5-mm-
Klinkeneingang und dem iPad-Anschluss zu
wechseln.
Einrichtung zum Tippen am
Bildschirm
1. Stecken Sie Ihr iPad in den 30-Pin-
Anschluss der Halterung. Gehen
Sie dabei vorsichtig vor, um eine
Beschädigung des Geräts zu vermeiden.
2. Drehen Sie das iPad mithilfe der
beweglichen Halterung ins Querformat.
3. Stellen Sie den Arm ganz nach unten.
Der iPad-Bildschirm ist mit einem
Blickwinkel von etwa 40 Grad für
das Tippen am Bildschirm positioniert.
Einrichtung für die Videowiedergabe
(Filme, Podcasts, Videos)
1. Stecken Sie Ihr iPad in den 30-Pin-
Anschluss der Halterung. Gehen
Sie dabei vorsichtig vor, um eine
Beschädigung des Geräts zu
vermeiden.
2. Drehen Sie das iPad mithilfe
der beweglichen Halterung ins Hoch-
oder Querformat.
3. Stellen Sie den Arm des Geräts auf
die gewünschte Sichthöhe ein.
4. Positionieren Sie den
Lautsprechersockel in der Nähe
Ihres Fernsehers, innerhalb
der Reichweite des Kabels.

Deutsch 15
Logitech® AV Stand
5. Verbinden Sie das Composite-
Videokabel mit dem Videoausgang
des Lautsprechersockels und dem
Composite-Videoeingang eines
Fernsehers.
6. Schalten Sie den Fernseher ein
und wählen Sie den richtigen Eingang
für die Videoquelle.
7. Schalten Sie die Lautsprecherhalterung
mit der Fernbedienung ein.
8. Drücken Sie auf der Fernbedienung
die Video On/O-Taste, um das iPad-
Video an den Fernseher zu senden.
9. Wählen Sie auf dem iPad den Film,
den Podcast oder das Video, den bzw.
das Sie ansehen möchten.
10. Drücken Sie bei ausgewähltem
Videomodus die Wiedergabetaste
auf der Fernbedienung.
11. Sie können mit der Fernbedienung
die Wiedergabe des Films, Podcasts
oder Videos starten oder anhalten
und zum nächsten oder vorherigen
Titel springen.
Zurücksetzen des Geräts
Bei einem Stromausfall kann der
interne Mikrocontroller blockieren,
sodass das Gerät auf keine Befehle der
Bedienelemente auf der Vorderseite oder
der Fernbedienung reagiert. Gehen Sie in
diesem Fall folgendermaßen vor:
1. Ziehen Sie den DC-Stecker des Netzteils
aus dem Gerät und stecken Sie ihn nach
etwa 10 Sekunden wieder ein.
2. Drücken Sie die Reset-Taste unten auf
der Rückseite des iPad-Docks mithilfe
einer gerade gebogenen Büroklammer,
einem Zahnstocher oder Ähnlichem.
Warnung: Verwenden Sie keine scharfen,
spitzen Gegenstände zum Drücken der
Reset-Taste. Dadurch kann der Taktschalter
im Gerät beschädigt werden.

16 Français
Logitech® AV Stand
Caractéristiques de l'AV Stand
Face avant
Capteur infrarouge
Il reçoit les signaux de commande
infrarouges de la télécommande et
ne doit pas être obstrué.
1. Indicateur d'alimentation/
de fonctionnement
•Le témoin clignote lorsque l'unité
est mise sous tension et se trouve
en mode d'entrée auxiliaire.
•Le témoin est allumé en permanence
lorsque l'unité est mise sous tension
et se trouve en mode iPad.
•Le témoin est éteint lorsque l'unité
est en veille.
2. Connecteur du dock
Connectez ici votre iPad, iPad 2, iPhone,
iPod touch, iPod nano, iPod classic
(à l'exception du modèle 160 Go)
et iPod video.
4. Bouton de réglage du volume (+/-)
Ajustez le volume du son.
5. Bouton de marche/mise en veille
•Appuyez sur ce bouton et maintenez-
le enfoncé pour activer la mise
en veille.
•Appuyez sur ce bouton pour mettre
l'unité sous tension.
•Une fois l'unité sous tension,
ce bouton permet de basculer entre
les modes iPad et entrée auxiliaire.
6. Haut-parleur gauche
Diuse le canal gauche de la musique.
7. Haut-parleur droit
Diuse le canal droit de la musique.
8. Dock de l'iPad
Il soutient l'iPad connecté.
9. Clips pour l'iPad
permettent de maintenir votre iPad
de façon sécurisée. Pour les iPad de
première génération, retirez les clips
d’adaptation.
2
9
4
1
6
3
9
5
7
8

Français 17
Logitech® AV Stand
Face arrière
10. Bouton de réinitialisation
Il permet de réinitialiser l'unité en cas
de dysfonctionnement.
11. Prise de sortie vidéo
Pour visionner des films ou des vidéos,
branchez la prise d'entrée composite
du téléviseur à ce terminal.
12. Prise d'alimentation
(8 V 2 900 mA )
Pour l'alimentation de l'unité, utilisez
uniquement l'adaptateur secteur fourni.
13. Prise d'entrée auxiliaire
Elle permet de brancher tout dispositif
audio portable compatible.
Ouverture de basse réflexe
Pour ne pas altérer la qualité
des basses, ne bloquez jamais
cette ouverture.
15. Charnière de base
Le bras qui soutient l'iPad pivote
à ce niveau.
16. Bras de support
Il permet un positionnement flexible.
Remarque : lorsque vous placez l'appareil sur
le dock ou ajustez l'angle de vue, relevez ou
abaissez le bras de support au maximum.
17. Charnière du dock
Elle pivote pour permettre le réglage
de l'angle de vue.
18. Tête pivotante
Elle pivote de 90 degrés dans le sens
inverse des aiguilles d'une montre
pour permettre un achage au format
paysage.
18
17
16
15
1413
12
11
10

18 Français
Logitech® AV Stand
Caractéristiques de
latélécommande
Retirez la languette de protection
du compartiment de la pile pour
activer la télécommande avant
sa première utilisation.
1. Bouton de marche/mise en veille
Appuyez sur ce bouton pour mettre
l'unité sous tension ou la replacer
en mode veille.
2. Bouton de lecture/pause
Appuyez sur ce bouton pour lancer
ou interrompre la lecture audio
lorsque l'appareil Apple est en mode
iPod/vidéo.
3. Passage à la piste précédente
Actionnez ce bouton pour revenir
à la piste précédente lorsque l'appareil
Apple est en mode iPod/vidéo.
4. Activation/désactivation de la vidéo
Actionnez ce bouton pour activer
ou désactiver la sortie vidéo.
5. Augmentation du volume (+)
Actionnez ce bouton pour augmenter
le volume.
6. Diminution du volume (-)
Actionnez ce bouton pour diminuer
le volume.
7. Bouton de fonction
Appuyez sur ce bouton pour basculer
entre les modes iPad et entrée
auxiliaire.
8. Bouton de sourdine
Appuyez sur ce bouton pour couper
la sortie audio. Réappuyez sur
le bouton pour reprendre l'écoute.
9. Passage à la piste suivante
Actionnez ce bouton pour passer
à la piste suivante lorsque l'appareil
Apple est en mode iPad/vidéo.
1
9
2
3
4
5
6
8
7

Français 19
Logitech® AV Stand
Si vous constatez des dysfonctionnements
ponctuels ou une diminution considérable
de la portée de la télécommande,
remplacez la pile d'origine par une nouvelle
pile au lithium de type CR2032 3V
en procédant comme suit :
1. Déverrouillez 1le support de
la pile 2et extrayez-le du boîtier
de la télécommande.
2. Remplacez la pile faible ou déchargée.
Veillez à ce que la pile soit placée
correctement. La télécommande ne
fonctionnera pas si les pôles de la pile
ont été inversés.
3. Replacez le support de la pile dans
le compartiment.
Prise en main
Configuration pour écouter
de la musique
1. Branchez l'iPad au support en veillant à
le placer correctement sur le connecteur
à 30 broches. Pour éviter tout dommage,
ne tentez pas de forcer la connexion.
Remarque : pour l'iPad 2, fixez les deux clips
adaptateurs avant de placer l'iPad sur le support.
2. Utilisez la tête pivotante pour
positionner l'iPad en mode portrait
ou paysage.
2
1

20 Français
Logitech® AV Stand
3. Déplacez le bras de support pour régler
l'angle de vue de l'iPad.
4. Mettez sous tension le haut-parleur
et l'iPad. Choisissez votre source
de musique préférée. Sur l'iPad,
sélectionnez la fonction de lecture
et ajustez le volume.
Remarque : si vous utilisez l'entrée auxiliaire
(connexion 3,5 mm), appuyez sur le bouton
de fonction pour basculer entre l'entrée auxiliaire
et le connecteur de l'iPad.
Configuration pour la saisie à l'écran
1. Branchez l'iPad au support en veillant à
le placer correctement sur le connecteur
à 30 broches. Pour éviter tout dommage,
ne tentez pas de forcer la connexion.
2. Utilisez la tête pivotante pour
positionner l'iPad en mode paysage.
3. Abaissez le bras le plus possible.
L'écran de l'iPad s'incline à un angle
d'environ 40 degrés afin de permettre
la -saisie à l'écran.
Configuration pour visionner
des vidéos (films, podcasts, vidéos)
1. Branchez l'iPad au support en veillant
à le placer correctement sur le
connecteur à 30 broches. Pour éviter
tout dommage, ne tentez pas de forcer
la connexion.
2. Utilisez la tête pivotante pour
positionner l'iPad en mode portrait
ou paysage.
3. Déplacez le bras de support pour régler
l'angle de vue de l'iPad.
4. Placez le support du haut-parleur
à proximité de votre téléviseur en
fonction de la longueur du câble.
Table of contents
Languages:
Other Logitech Docking Speakers manuals

Logitech
Logitech 984-000056 - Pure-Fi Anywhere 2 Portable... User manual

Logitech
Logitech 984-000005 - Pure-Fi Anywhere Compact... User manual

Logitech
Logitech S715i User manual

Logitech
Logitech Pure-Fi Elite User manual

Logitech
Logitech Wireless Speaker User manual

Logitech
Logitech 984-000049 - Pure-Fi Dream Speaker Sys User manual

Logitech
Logitech Pure-Fi Elite User manual

Logitech
Logitech 980-000187 - Pure-Fi Express Plus Portable... User manual

Logitech
Logitech S715i User manual

Logitech
Logitech 970329-0403 - AudioStation Express For iPod User manual