PAIRING REMOTE & RECEIVER – WHEN 2 OR MORE CEILING FANS ARE INSTALLED IN ONE LOCATION
When two or more fans are located near each other, you may want to have the remote/receiver for each fan set to a
different code, so that the operation of one fan does not affect the operation of the other fan/s.
NOTE: Ensure that you have installed a single pole disconnection switch in the fixed wiring for each fan.
NOTE: Ensure power to the receiver is ON prior to pairing the remote with the receiver.
Remote / Receiver pairing for Ceiling fan 1:
•Turn OFF the mains supply to the receivers of both ceiling fans 1 and 2.
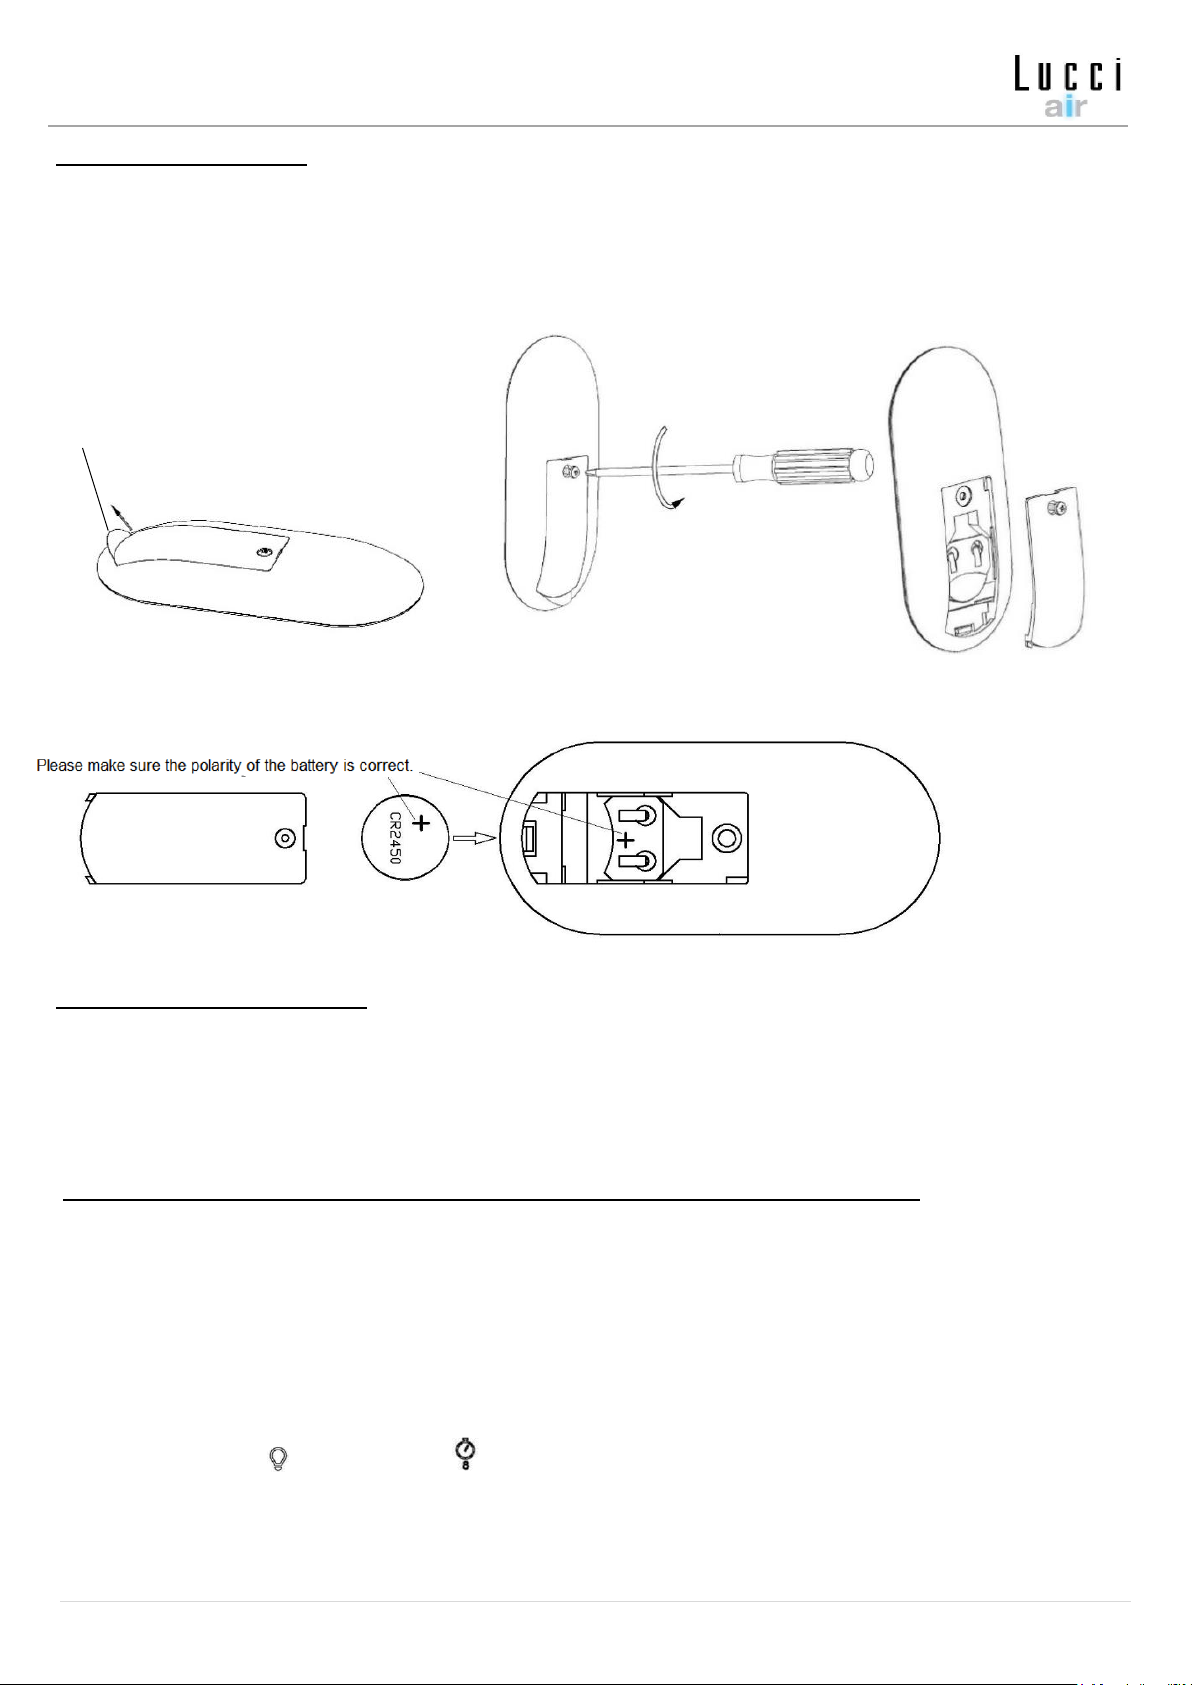
•Install the battery into the remote. Please make sure the polarity of the battery is correct. (Fig.6)
•Turn on the power to receiver 1. Keep the power OFF to receiver 2. (Each ceiling fan must have its own isolation
switch, so that only the ceiling fan that needs to be paired with the remote will be ON).
•Press and hold the “ ” light button and “ ” 8 hours timer button on the remote at the same time for 5 seconds and
then release. During the process, the indicator light will flash slowly.
•Turn ON and change the speed of ceiling fan 1 by the remote to check the operation and successful paring.
•If pairing has been unsuccessful, repeat these set of steps again.
Remote / Receiver paring for Ceiling fan 2:
•Turn off the mains supply to the receivers of both ceiling fans 1 and 2.
•Install the battery into the remote. Please make sure the polarity of the battery is correct. (Fig.6)
•Turn on the power to receiver 2. Keep the power OFF to receiver 1. (Each ceiling fan must have its own isolation
switch, so that only the ceiling fan that needs to be paired with the remote will be ON).
•Press and hold the “ ” light button and “ ” 8 hours timer button on the remote at the same time for 5 seconds and
then release. During the process, the indicator light will flash slowly.
•Turn ON and change the speed of ceiling fan 2 by the remote to check the operation and successful pairing.
•If pairing has been unsuccessful, repeat these set of steps again
RESET TO DEFAULT:
•If you like to reset your remote to be compatible to all receiver, please press the “ ” light button and “ ” 8 hours
timer button in the same time for 10 seconds, during the process the indication light will flash rapidly.