IT
9
Impiego
Controllare che l’apparecchio sia in perfette condi-
zioni:
– Controllare se ci sono difetti visibili ad occhio
nudo.
– Controllare se tutti i componenti dell’apparecchio
sono ben fissati.
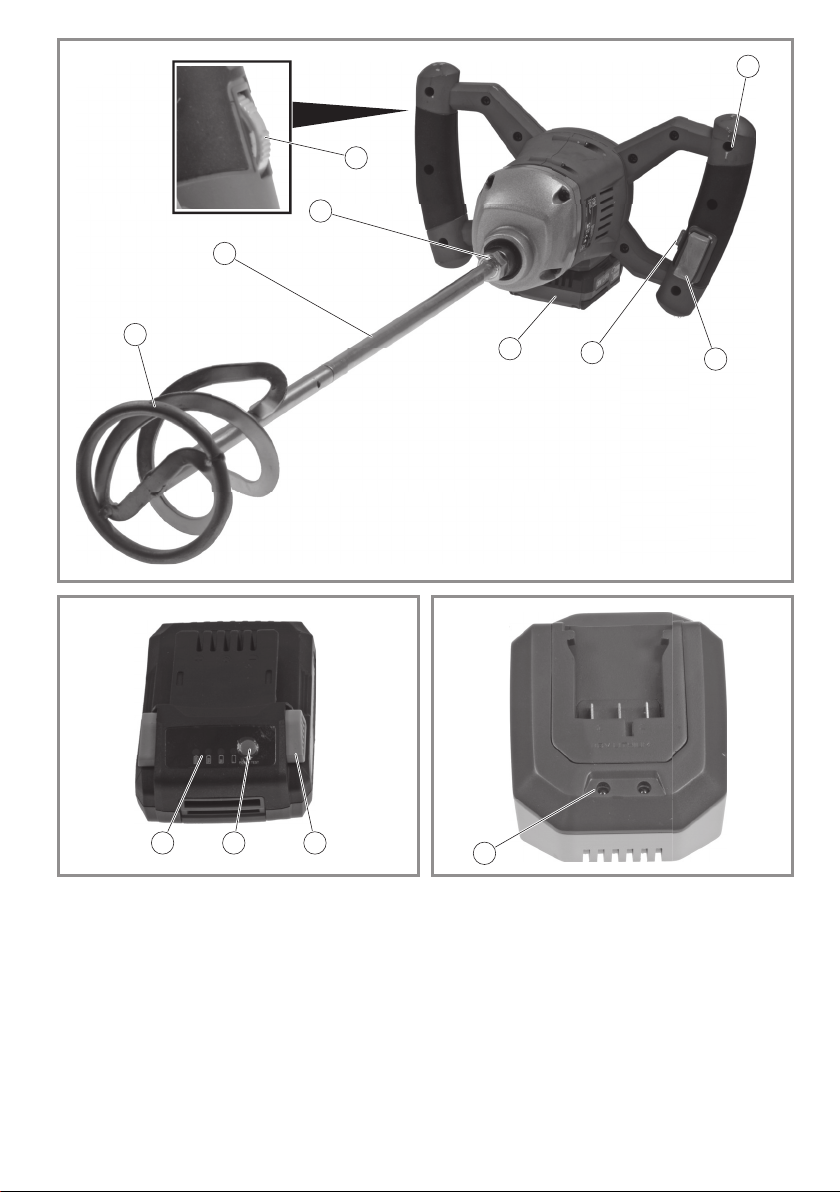
Accens./spegn.
– Tenere l’apparecchio saldamente con entrambe
le mani.
– Immergere l’agitatore verticalmente nel materiale
da miscelare.
– Per ruotare l’utensile tenere premuto l’interruttore
ON/OFF (7) con blocco di accensione (6) azio-
nato.
– Per spegnere l’apparecchio rilasciare l’interrut-
tore ON/OFF (7).
Controllo elettronico del numero di giri
L’apparecchio è dotato di un sistema di controllo elet-
tronico del numero di giri.
È possibile regolare di continuo il numero di giri
(campo di velocità: ►Dati tecnici – p. 10).
– Quando si inserisce o si toglie l’apparecchio dalla
miscela, lavorare a un numero di giri basso.
– Durante la miscelatura portare l’agitatore tramite
il vaso miscelatore. Mescolare fino a che la
miscela è stata lavorata a fondo.
Pulizia
Pulizia
Regolarmente, a seconda delle condizioni
d’impiego
Conservazione, trasporto
Conservazione
– Pulire l’apparecchio prima dell’uso.
– Si raccomanda di conservare l’apparecchio in un
luogo asciutto e ben ventilato.
Trasporto
– Per la spedizione si deve utilizzare, se possibile,
l’imballo originale.
Anomalie e rimedi
Se qualcosa non funziona…
Spesso sono solo piccoli difetti che portano a un gua-
sto. Di solito essi possono essere risolti facilmente
dall’utente stesso. Si prega di controllare nella
seguente tabella prima di rivolgersi al rivenditore. In
tal modo si risparmiano molta fatica ed anche even-
tuali spese.
Se non si è in grado di eliminare l’errore da soli, si
prega di rivolgersi direttamente al rivenditore. Le ripa- razioni inappropriate invalidano la garanzia e pos-
sono causare costi aggiuntivi a suo carico.
Pericolo di lesioni! L’apparecchio può
essere messo in funzione solo se non sono
stati riscontrati guasti. Se un componente è
difettoso, occorre sostituirlo prima della suc-
cessiva messa in funzione.
Pericolo di lesioni! L’apparecchio può
essere utilizzato solo con l’impugnatura sup-
plementare montata.
Pericolo di lesioni! Indossare occhiali pro-
tettivi. Non mettere le mani nll’agitatore in
funzione. Iniziare la miscelazione sempre
con la gamma di velocità più bassa.
Pericolo di danni al dispositivo! Il motore
può surriscaldarsi a causa di forti sollecita-
zioni durature e regimi bassi. In caso di velo-
cità maggiore, lasciare raffreddare il motore
a regime minimo.
Pericoli dovuti ad accensione involonta-
ria! Togliere sempre la spina dall’apparec-
chio prima di eseguirvi dei lavori.
Cosa? Come?
Controllare che il cavo
d’alimentazione e la spi-
na non siano danneggia-
ti.
Controllo a vista, all’oc-
correnza far effettuare la
sostituzione da un tecni-
co specializzato.
Cosa? Come?
Eliminare la polvere dalle
prese d’aria del motore. Aspirare le prese d’aria
con un aspirapolvere op-
pure utilizzare una spaz-
zola.
Pulire l’apparecchio. Pulire l’apparecchio con
un panno leggermente
inumidito.
Pericolo di lesioni! Conservare l’apparec-
chio in modo tale che non possa essere
messo in marcia dai non addetti.
Pericolo di danni all’apparecchio! Non
conservare l’apparecchio senza protezioni
in un ambiente umido.
Pericolo di lesioni! Riparazioni non appro-
priate possono provocare il malfunziona-
mento dell’apparecchio e pregiudicarne la
sicurezza. In tal modo si danneggia se stessi
e l’ambiente.
Guasto/Anomalia Causa Rimedio
L’apparecchio non funziona. L’apparecchio è difettoso? Contattare il rivenditore.
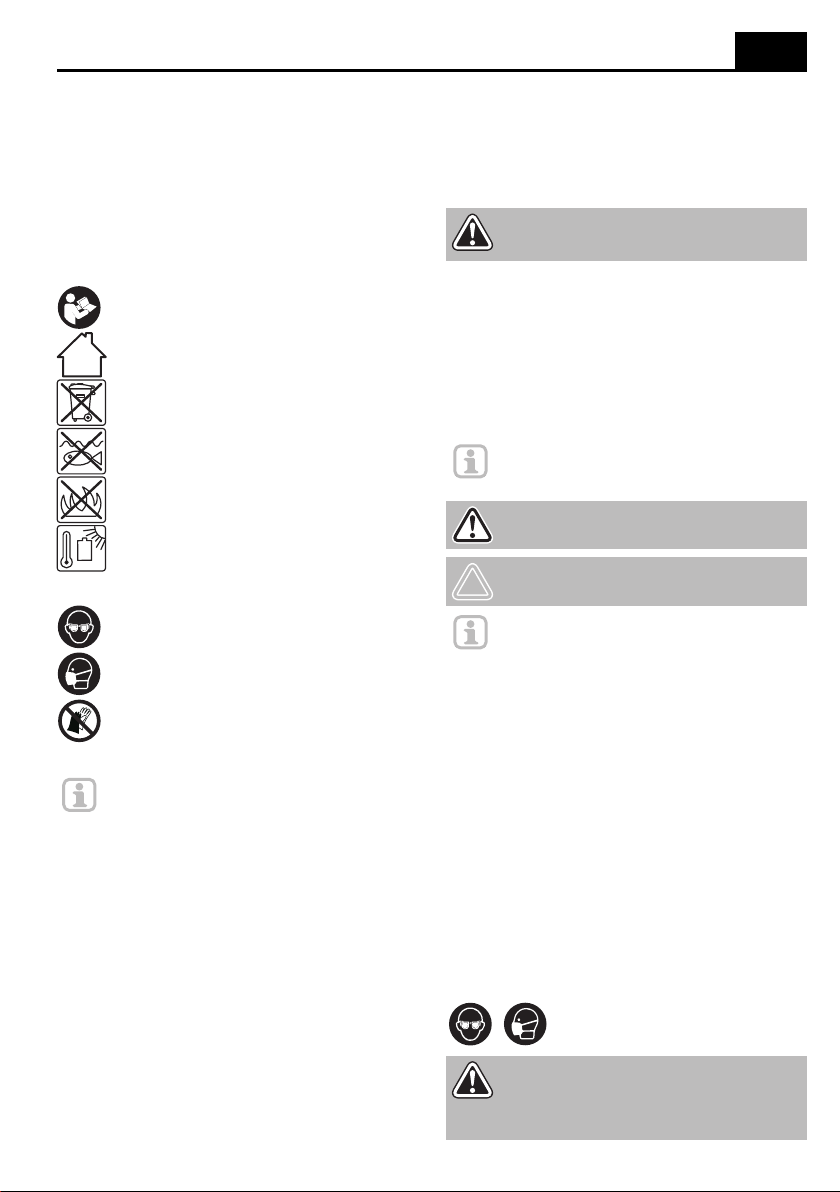
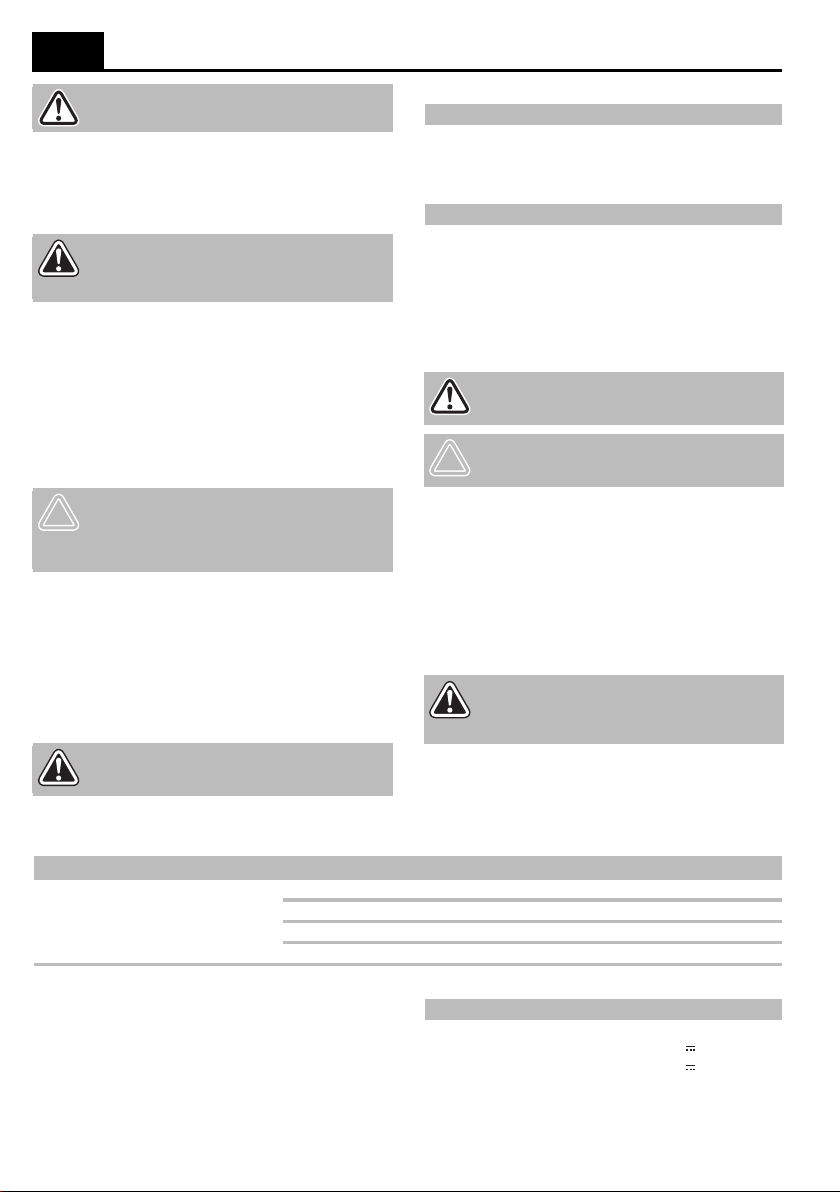
Accumulatore scarico? ►Caricamento della batteria – p. 8.
Batteria difettosa? Contattare il rivenditore.
Componenti elettrici del motore di-
fettosi? Contattare il rivenditore.