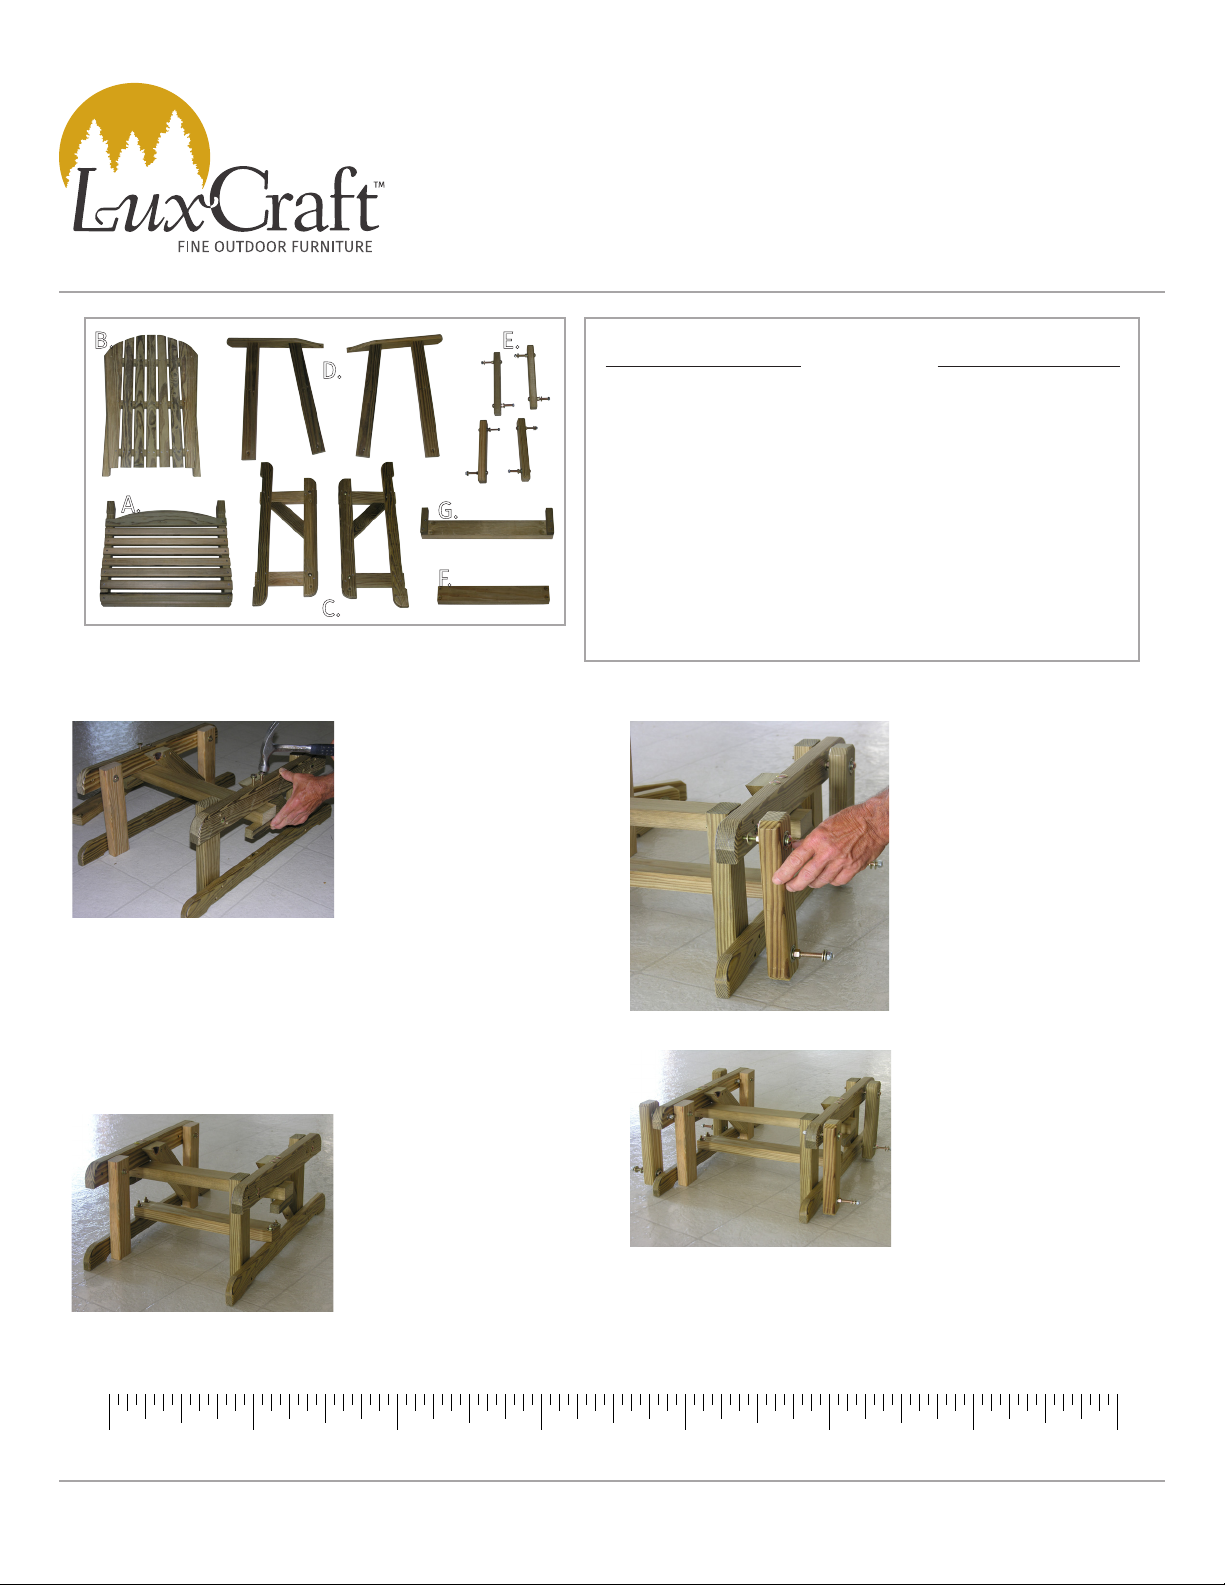
A.
B.
C.
D. E.
F.
G.
2' Adirondack Glider
Assembly Instructions
Base Parts List
1- (A) Seat Assembly
1- (B) Back Assembly
2- (C) End Piece Assembly
2- (D) Leg & Armrest Assembly
4- (E) Glider Hangers
with Bearing & Bolt Assembly
1- (F) Center Cross Piece -
2" x 3" x 17⁄"
1- (G) Center Cross Piece -
2" x 3" x 20⁄"
6- ⁄" x 4⁄" Bolts
4- ⁄" x 4" Bolts
2- ⁄" x 3⁄" Bolts
4- ⁄" x 3" Bolts
8- 2⁄" Screws
16- ⁄" Nuts
16- Washers
Hardware List
INSTRUCTIONS: *Always match numbers/letters printed on each individual piece. (1 to 1, 2 to 2, A to A, B to B, etc.)
Step 1 - To assemble
glider base, attach
center cross pieces (2"
x 3" x 20⁄" and 2" x 3"
x 17⁄") to end piece
assembly. *Match
numbers. Put four 4⁄"
bolts in top and four
4" bolts in bottom.
Secure with washers
and nuts.
(Insert 4" bolt from
bottom up.)
Step 2 - Remove one
washer and nut from
each end of glider arm
assembly. Attach one
end of glider hanger
assembly to each
pre-drilled hole in end
piece assembly. Fasten
with washer and nut.
Assembled bottom
base ready for leg
and glider hanger
assemblies.
0 1 2 3 4 5 6 7
INCH
continued on back


