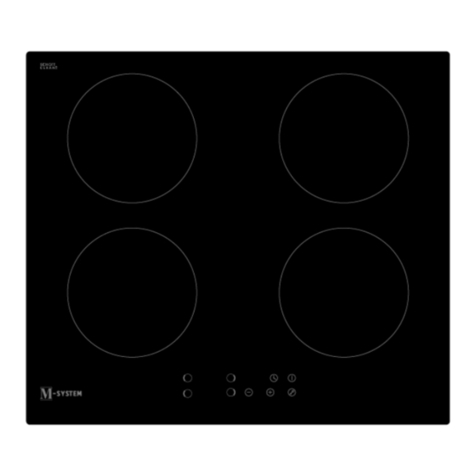
M-system MKK606 User manual

DE
KK606
KK774

2
Geachte Klant,
We danken U hartelijk voor het in ons gestelde vertrouwen bij uw keuze van de vitrokeramische
inductiekookplaat.
Teneinde dit apparaat goed te kennen raden we U aan deze gebruiksaanwijzing volledig en
aandachtig door te lezen en ze te bewaren om ten gepaste tijde te kunnen raadplegen.
INHOUD
VEILIGHEID.................................................................................................................................3
VOORZORGSMAATREGELEN VOOR GEBRUIK VAN HET TOESTEL........................................................3
GEBRUIK VAN HET APPARAAT .......................................................................................................3
VOORZORGSMAATREGELEN TEGEN BESCHADIGING........................................................................4
VOORZORGSMAATREGELEN BIJ DEFECT VAN HET APPARAAT ...........................................................4
ANDERE VOORZORGSMAATREGELEN ............................................................................................4
BESCHRIJVING VAN HET APPARAAT.....................................................................................5
TECHNISCHE KENMERKEN............................................................................................................5
BEDIENINGSPANEEL ....................................................................................................................5
GEBRUIK VAN HET APPARAAT...............................................................................................6
DISPLAY.....................................................................................................................................6
IN WERKING STELLEN EN GEBRUIK VAN HET APPARAAT.................................................6
VOOR HET EERSTE GEBRUIK ........................................................................................................6
TIPTOETSEN ...............................................................................................................................6
INWERKINGSTELLING ...................................................................................................................6
AANDUIDING RESTWARMTE ..........................................................................................................7
PROGRAMMEREN VAN AUTOMATISCH KOKEN .................................................................................7
UITBREIDBARE ZONES .................................................................................................................7
VERGRENDELING VAN HET BEDIENINGSPANEEL..............................................................................8
KOOKADVIES.............................................................................................................................8
VOORBEELDEN VAN VERMOGENREGELING.....................................................................................8
ONDERHOUD EN REINIGING....................................................................................................9
KLEINE STORINGEN VERHELPEN...........................................................................................9
MILIEUBESCHERMING..............................................................................................................9
INSTALLATIEVOORSCHRIFTEN.............................................................................................10
ELEKTRISCHE AANSLUITING ................................................................................................11

3
VEILIGHEID
Voorzorgsmaatregelen voor gebruik van het toestel
•Verwijder alle verpakkingen.
•De installatie en de elektrische aansluiting van het apparaat dienen aan een erkende
vakman toevertrouwd te worden. De fabrikant kan niet verantwoordelijk gesteld worden
voor eventuele schade voortkomend uit een foutieve inbouw of aansluiting.
•Het apparaat mag enkel gebruikt worden wanneer het gemonteerd en geïnstalleerd is in
een meubel met een gehomologeerd en aangepast werkvlak.
•Het is enkel bestemd voor gewoon huishoudelijk gebruik (bereiding van
voedingsmiddelen) met uitsluiting van alle ander huishoudelijk, commercieel of
industrieel gebruik.
•Verwijder alle etiketten en zelfklevers van het vitrokeramische glas.
•Het apparaat niet ombouwen of wijzigen.
•De kookplaat dient niet als ondergrond of werkvlak.
•De veiligheid wordt enkel verzekerd wanneer het apparaat volgens de vereiste
voorschriften op een aardleiding is aangesloten.
•Gebruik geen verlengkabel voor de aansluiting op het elektrische net.
•Het apparaat mag niet gebruikt worden boven een vaatwasmachine of een droogkast, de
vrijgekomen damp kan de elektronische apparatuur beschadigen.
Gebruik van het apparaat
•Schakel de warmtebron na gebruik steeds uit.
•Waak steeds over bereidingen die oliën en vetten bevatten want deze kunnen vlug vlam
vatten.
•Pas op voor brandwonden tijdens en na het gebruik van het apparaat.
•Kinderen het apparaat niet laten manipuleren.
•Gebruik enkel de hiertoe voorziene pannen. Bij onverhoeds aanschakelen of restwarmte
zouden andere materialen kunnen smelten of ontbranden.
•Bedek het apparaat nooit met een doek of een beschermblad. Het zou kunnen verhitten
en ontvlammen.
•Dit toestel is niet geschikt voor gebruik door personen (inclusief kinderen) met
verminderd lichamelijke, zintuiglijke waarneming of geestelijke vermogens of gebrek aan
kennis en ervaring, tenzij zij begeleiding of instructies krijgen over het gebruik van het
toestel door een persoon die verantwoordelijk is voor hun veiligheid.
•Kinderen moeten zodanig begeleid worden dat het zeker is dat zij niet gaan spelen met
het toestel.

4
Voorzorgsmaatregelen tegen beschadiging
•Beschadigde pannen of pannen met ruwe bodem (niet geëmailleerd gietijzer) kunnen het
glas beschadigen.
•De aanwezigheid van zand of andere schuurmaterialen kunnen het glas beschadigen.
•Laat geen voorwerpen (zelfs kleine) op het glas vallen.
•Vermijd het stoten van pannen tegen de rand van het glas.
•Verzeker u ervan dat de ventilatie van het apparaat verloopt volgens de instructies van
de fabrikant.
•Plaats of laat geen lege pannen op de kookplaat.
•Vermijd het contact van suiker, synthetische stoffen of aluminiumfolie met de hete zones.
Deze stoffen kunnen tijdens het afkoelen het vitrokeramische oppervlak doen barsten of
aantasten: schakel het apparaat uit en verwijder ze onmiddellijk van de nog hete zones
(opgepast: risico voor brandwonden)
•Plaats nooit een warme pan op de bedieningszone.
•Indien er onder het inbouwapparaat een lade is, zorg dan voor een voldoende afstand (2
cm) tussen de inhoud van de lade en de onderkant van het apparaat teneinde een goede
ventilatie te verzekeren.
•Leg geen ontvlambare voorwerpen (bvb. sprays) in de lade onder de kookplaat.
Eventuele bestekbakken dienen in warmtebestendig materiaal te zijn uitgevoerd.
Voorzorgsmaatregelen bij defect van het apparaat
•Bij het vaststellen van een defect, het apparaat uitzetten en de elektrische toevoer
uitschakelen.
•Schakel onmiddellijk de elektrische stroom van het apparaat uit indien er een barst of
spleet in de vitrokeramiek is en verwittig de dienst na verkoop.
•De herstellingen dienen enkel door gespecialiseerd personeel te worden uitgevoerd. In
geen geval het apparaat zelf openen.
•WAARSCHUWING: Als het glazen kookoppervlak gebroken is, schakel het toestel uit
om een mogelijke elektrische schok te voorkomen.
Andere voorzorgsmaatregelen
•Zorg ervoor dat de pan steeds in het midden van de kookzone staat. De bodem van de
pan moet de kookzone zoveel mogelijk bedekken.
•Gebruik geen synthetische of aluminium kookpannen: deze kunnen op de nog hete
zones smelten.

5
BESCHRIJVING VAN HET APPARAAT
Technische kenmerken
Bedieningspaneel
Type Total effekt Zone Normal Diameter
MKK606 6400 W
Links voor
Links achter
Rechts achter
Rechts voor
1000 / 2200 W
1200 W
1800 W
1200 W
145 / 220 mm
155 mm
190 mm
155 mm
MKK774 7000 W
Links voor
Links achter
Rechts achter
Rechts voor
1000 / 2200 W
1200 W
1800 W
1800 W
145 / 220 mm
155 mm
190 mm
190 mm
Aanduiding van het vermogenniveau
[ + ] toets
Aan / Uit
[ - ] toets zones Uitbreidbare zone toets

6
GEBRUIK VAN HET APPARAAT
Display
Display Aanduiding Functie
0. Nul Kookzone geactiveerd
1…9 Vermogenniveau Keuze kookniveau
A Onmiddellijke opwarming Automatisch koken
E Foutmelding Defect elektronisch circuit
H Restwarmte De kookzone is warm
L Vergrendeling Kookplaat vergrendelen
IN WERKING STELLEN EN GEBRUIK VAN HET APPARAAT
Voor het eerste gebruik
Poets uw toestel met een vochtige doek en droog het af. Gebruik geen detergent, deze kan op
het glas een blauwachtig waas doen verschijnen.
Tiptoetsen
Uw apparaat is uitgerust met tiptoetsen waarmee u de verschillende functies kan instellen. Het
aanraken van de toets zet de functie in werking. Deze activering wordt weergegeven door een
lichtje, een aflezing en/of een geluidssignaal.
Druk niet op meerdere toetsen tegelijk.
Inwerkingstelling
•In- en uitschakelen van de kookplaat :
Actie Bedieningspaneel Display
Inschakelen Druk op [ 0/I ] 4 x [ 0 ]
Uitschakelen Druk op [ 0/I ] geen of [ H ]
•In- en uitschakelen van een kookzone :
Actie Bedieningspaneel Display
Kiezen Druk op [ + ] [ 0 ]
Instellen Druk op [ + ] [ 1 ] tot [ 9 ]
Uitschakelen Druk op [ - ] [ 9 ] tot [ 0 ] [ H ]
Indien binnen de 20 seconden geen regeling is uitgevoerd, valt de elektronica terug op de
wachtpositie.

7
Aanduiding restwarmte
Als na het uitzetten van de kookzones of het volledig uitzetten van de kookplaat, de kookzones
nog warm zijn, wordt dit aangegeven door [ H ].
Het symbool [ H ] gaat uit wanneer de kookzones zonder gevaar kunnen aangeraakt worden.
Zolang het lampje van de restwarmte blijft branden, de kookzones niet aanraken en geen enkel
warmtegevoelig voorwerp op de kookzones plaatsen. Gevaar voor brand of brandwonden!
Programmeren van automatisch koken
Alle kookzones zijn uitgerust met een hulpmiddel voor automatisch koken. De kookzone
functioneert eerst een zekere tijd op volle kracht en vermindert dan automatisch het vermogen
op de uitgekozen warmte.
•Programmeren van automatisch koken :
Actie Bedieningspaneel Display
De zone kiezen Druk op [ + ] [ 0 ]
Het vermogen kiezen Druk op [ + ] van [ 1 ] naar [ 9 ]
Automatisch koken kiezen Druk opnieuw op [ + ] [ 9 ] knippert met [ A ]
Het vermogen kiezen Druk op [ - ] van [ 9 ] naar [ 8 ] [ 7 ]
(vb. « 7 ») tot [ 7 ] [ 7 knippert met [ A ]
•Stopzetten van automatische bediening :
Actie Bedieningspaneel Display
De zone kiezen Druk op [ + ] van de zone [ 7 ] knippert met [A]
Het vermogen kiezen Druk op [ - ] [ 0 ]
Uitbreidbare zones
•Verkleinen of vergroten de diameter:
Actie Bedieningspaneel Display
De zone kiezen Druk op [ + ] [ 0 ]
Instellen Druk op [ + ] [ 0 ] tot [ 9 ]
De diameter verkleinen Drukken op [ ] controlelampje aan
De diameter vergroten Drukken op [ ] controlelampje uit

8
Vergrendeling van het bedieningspaneel
Om te vermijden dat een selectie van de kookplaat wordt gewijzigd, bijvoorbeeld bij het poetsen
van het glas, kan het bedieningspaneel worden vergrendeld (behalve de toets aan/uit [ 0/I ]).
•Vergrendelen :
Actie Bedieningspaneel Display
Kookplaat inschakelen Druk op [ 0/I ] [ 0 ] of [ H ]
Vergrendelen Druk gelijktijdig op [ - ] en [ + ]
linksvoor
Druk opnieuw op [ + ] [ L ]
•Ontgrendelen :
Actie Bedieningspaneel Display
Kookplaat inschakelen Druk [ 0/I ] [ L ]
In de 5 seconden na de start:
Actie Bedieningspaneel Display
Kookplaat ontgrendelen Druk gelijktijdig op [ - ] en [ + ]
linksvoor [0]or[H]
Druk opnieuw op [ - ]
KOOKADVIES
Voorbeelden van vermogenregeling
(de hieronder vermelde waarden zijn enkel richtgevend)
1 - 2 Smelten
Opwarmen Sauzen, boter, chocolade, gelatine
Kant- en klaargerechten
2 - 3 Opzwellen
Ontdooien Rijst, pudding en bereidde gerechten
Groenten, vis, diepgevroren producten
3 - 4 Stoom Groenten, vis, vlees
4 - 5 Water Gekookte aardappelen, soep, pasta
Verse groenten
6 - 7 Zachtjes koken Vlees, lever, eieren, braadworsten
Goulash, rollade, pens
7 - 8 Koken
Braden Aardappelen, beignets,
platte koeken
9 Braden
Op kooktemperatuur brengen Steaks, omeletten
water

9
ONDERHOUD EN REINIGING
•Laat het apparaat eerst afkoelen, anders is er risico voor brandwonden.
•Maak niet de haardplaat schoon als het glas te heet is: risico van brandwond
•Verwijder de kookresten met een beetje water met afwasproduct of een in de handel
aanbevolen product voor vitrokeramiek.
•Gebruik in geen geval toestellen die met “stoom” of met “druk” werken.
•Geen voorwerpen gebruiken die de vitrokeramiek kunnen beschadigen (zoals
schuursponzen of mespunten…)
•Gebruik geen schuurproducten, deze kunnen het apparaat beschadigen.
•Droog het apparaat met een propere doek.
•Verwijder onmiddellijk suiker of spijzen die suiker bevatten.
KLEINE STORINGEN VERHELPEN
De kookplaat of de kookzone werkt niet :
•de kookplaat is slecht op het elektrisch net aangesloten
•de veiligheidszekering is gesprongen
•kijk na of de vergrendeling niet is ingeschakeld
•de tiptoetsen zijn met water of vet bespat
•er staat een voorwerp op de tiptoetsen
Het symbool [ E ] licht op :
•Het elektronisch systeem is ontregeld.
•Ontkoppel de kookplaat en sluit opnieuw aan.
Een enkele zone of alle zones vallen uit :
•de veiligheid is in werking getreden
•deze treedt in werking wanneer u vergeten heeft een kookzone uit te schakelen
•de veiligheid treedt eveneens in werking wanneer één of meerdere tiptoetsen bedekt zijn
•een pan is leeg en de bodem is oververhit
•de kookplaat beschikt eveneens over een automatische vermindering van het vermogen
en van een automatische uitschakeling bij oververhitting
De bediening van automatisch koken treedt niet in werking :
•de kookzone is nog warm [ H ]
•het maximum kookniveau staat aan [ 9 ]
Het symbool [ L ] licht op :
•Zie hoofdstuk vergrendeling
MILIEUBESCHERMING
•de verpakkingsmaterialen zijn ecologisch en recycleerbaar.
•de elektronische apparaten bevatten edele metalen. Informeer u bij uw administratie over
de recyclagemogelijkheden.
•Werp het apparaat niet weg met het huisvuil
•Doe beroep op de daartoe voorziene ophaaldienst of
breng uw elektrisch apparaat naar het containerpark
van uw gemeente
10
INSTALLATIEVOORSCHRIFTEN
De montage dient enkel door erkende specialisten te worden uitgevoerd.
De gebruiker dient de wetgeving en de normen van het land van zijn verblijfplaats na te leven.
Plaatsen van de waterdichte strip
De zelfklevende strip geleverd met het apparaat vermijdt infiltratie in het meubel.
Het plaatsen dient met grote zorg volgens onderstaande tekening te worden uitgevoerd.
Inbouw
Type Uitsparing voor vlakbouw
MKK606 560 x 490 mm
MKK776 750 x 490 mm
•De afstand tussen de kookplaat en de muur dient minstens 50 mm te bedragen.
•De kookplaat is een apparaat toebehorend aan de beschermingsklasse « Y ».
Ingebouwd mag zich een hoge kastwand of een muur aan een zijde en aan de
achterzijde bevinden. Aan de andere zijde mag geen enkel meubel of apparaat hoger
zijn dan het kookvlak.
•De bekledingen van de werkbladen dienen te worden uitgevoerd in warmtebestendige
materialen (100°C)
•De materialen van het werkblad kunnen opzwellen bij contact van vocht. Om de
uitsnijding te beschermen, bestrijk deze met een vernis of een speciale lijm.
•De strippen aan de muurranden dienen hittebestendig te zijn.
•Installeer de kookplaat niet boven een niet geventileerde oven of een vaatwasmachine.
•Onder de omkasting van het apparaat een afstand van 20 mm voorzien om een goede
verluchting van de elektronische apparatuur te verzekeren
•Indien er zich een lade onder de kookplaat bevindt, vermijd er ontvlambare voorwerpen
in op te bergen (bv. spray) en voorwerpen die niet warmtebestendig zijn.
•Voor de afstand tussen de kookplaat er de erboven geplaatste dampkap, dient u de
instructies van de fabrikant van de dampkap te volgen. Bij gebrek aan instructies, dient u
een afstand van minimum 760 mm te respecteren.
•De verbindingskabel mag na aansluiting aan geen enkele mechanische spanning
onderhevig zijn, zoals bijvoorbeeld een lade.
De beschermfolie (3) verwijderen en
de dichtingstrip (2) op de rand van de
kookplaat plakken op 2 mm van de
buitenrand

11
ELEKTRISCHE AANSLUITING
•De installatie en de aansluiting op het elektrische net mag enkel toevertrouwd worden
aan een vakman (elektricien) die op hoogte is van de voorgeschreven normen.
•Na het monteren moeten de stukken die onder spanning staan beschermd blijven.
•De nodige aansluitgegevens staan op het kenplaatje et het aansluitingsplaatje aan de
onderkant van het apparaat.
•Het apparaat dient door middel van een meerpolige stroomonderbreker van het net
gescheiden te zijn. Staat deze open (niet aangesloten), dan moet de contactopening
minstens 3mm bedragen.
•Het elektrische circuit dient van het net gescheiden te zijn door middel van de nodige
voorzieningen zoals bijvoorbeeld beveiligingsschakelaars, zekeringen, differentiële
schakelaars en contacten.
•Indien het toestel niet voorzien is van een bereikbaar stopcontact, dan moeten middelen
voor uitschakeling aan de vaste installatie toegevoegd worden inovereenstemming met
de installatieregeling.
•De voedingsslang moet zo geplaatst worden zodat deze de hete delen van de kookplaat
of de oven niet raakt.
Let op !
Dit apparaat is voorzien voor een aansluiting op een netspanning van 230V~ 50 / 60 HZ
Verbind steeds de aarding. Respecteer het aansluitingsschema.
De aansluitdoos bevindt zich onder de kookplaat.
Om het deksel te openen, gebruik een schroevendraaier en plaats deze in de twee gleuven
voor de twee pijlen.
* berekend met de coëfficiënt van gelijktijdigheid volgens de standaard EN 60 335-2-6/1990
Aansluiting van de kookplaat
Gebruik voor de verschillende aansluitingen de bruggen in messing die zich in de aansluitdoos
bevinden.
Een fase 230V~1F :
Plaats een brug tussen 1 en 2.
Verbind de aarding met de aansluitklem "aarde", neutraal N met de aansluitklem 4, de fase L
op de aansluitklem 1 of 2.
Twee fasen 400V~2F :
Verbind de aarding met de aansluitklem "aarde", neutraal N met de aansluitklem 4, fase L1 met
de aansluitklem 1 en fase L2 met de aansluitklem 2.
Let op ! De draden goed doorsteken en de schroeven goed aanspannen.
Voeding Aansluiting Kabelsectie Kabel Zekering
230V~ 50 / 60Hz 1 Phase + N 3 x 2.5 mm² H 05 VV - F
H 05 RR - F 25 A *
400V~ 50 / 60Hz 2 Phases + N 5 x 2.5 mm² H 05 VV - F
H 05 RR - F 2x 16 A *
We kunnen niet verantwoordelijk gesteld worden voor ongevallen voortkomend uit een
slechte aansluiting of ongevallen die gebeuren door toestellen zonder of met een defecte
aardi
g
.

12
Dear customers,
Thank you for having chosen our induction ceramic hob.
In order to make the best use of your appliance, we would advise you to read carefully the
following notes and to keep them for a later consulting.
SUMMARY
SAFETY.....................................................................................................................................13
PRECAUTIONS BEFORE USING ....................................................................................................13
USING THE APPLIANCE...............................................................................................................13
PRECAUTIONS NOT TO DAMAGE THE APPLIANCE...........................................................................14
PRECAUTIONS IN CASE OF APPLIANCE FAILURE ............................................................................14
OTHER PROTECTIONS................................................................................................................14
DESCRIPTION OF THE APPLIANCE.......................................................................................15
TECHNICAL DATA ......................................................................................................................15
CONTROL PANEL.......................................................................................................................15
USE............................................................................................................................................16
DISPLAY...................................................................................................................................16
STARTING UP THE APPLIANCE.............................................................................................16
BEFORE USING YOUR NEW HOB ..................................................................................................16
SENSITIVE TOUCHES .................................................................................................................16
STARTING-UP ...........................................................................................................................16
RESIDUAL HEAT INDICATION.......................................................................................................17
AUTOMATIC COOKING................................................................................................................17
EXTENSION ZONE......................................................................................................................17
CONTROL PANEL LOCKING .........................................................................................................18
COOKING ADVICES.................................................................................................................18
EXAMPLES OF POWER SETTING ..................................................................................................18
MAINTENANCE AND CLEANING............................................................................................19
WHAT TO DO IN CASE OF A PROBLEM................................................................................19
ENVIRONMENT PROTECTION................................................................................................19
INSTALLATION INSTRUCTIONS.............................................................................................20
ELECTRICAL CONNECTION ...................................................................................................21

13
SAFETY
Precautions before using
•Unpack all the materials.
•The installation and connecting of the appliance have to be done by approved
specialists. The manufacturer cannot be responsible for damage caused by installation or
connecting errors.
•To be used, the appliance must be well-equipped and installed in a kitchen unit and an
adapted and approved work surface.
•This domestic appliance is exclusively for the cooking of food, to the exclusion of any
other domestic, commercial or industrial use.
•Remove all labels and self-adhesives from the ceramic glass.
•Do not change or alter the appliance.
•The cooking plate cannot be used as freestanding or as working surface.
•The appliance must be grounded and connected conforming to local standards.
•Do not use any extension cable to connect it.
•The appliance cannot be used above a dishwasher or a tumble-dryer: as steam may
cause damage.
Using the appliance
•Switch the heating zones off after using.
•Keep an eye on the hob whilst cooking using grease or oils that may quickly ignite.
•Be careful not to burn yourself while or after using the appliance.
•Make sure no cable of any fixed or moving appliance contacts with the glass or the hot
saucepan.
•Never cover the appliance with a cloth or a protection sheet. This could become very hot
and catch fire.
•This appliance is not intended for use by persons (including children) with reduced
physical, sensory or mental capabilities, or lack of experience and knowledge, unless
they have been given supervision or instruction concerning use of the appliance by a
person responsible for their safety.
•Children should be supervised to ensure that they do not play with the appliance.
•Metallic objects such as knives, forks, spoons and lids should not be placed on the hob
surface since they can get hot.

14
Precautions not to damage the appliance
•Raw pan bottoms or damaged saucepans (not enamelled cast iron pots,) may damage
the ceramic glass.
•Sand or other abrasive materials may damage ceramic glass.
•Avoid dropping objects, even little ones, on the vitroceramic.
•Do not hit the edges of the glass with saucepans.
•Make sure that the ventilation of the appliance works according to the manufacturer’s
instructions.
•Do not put or leave empty saucepans on the vitroceramic hobs.
•Sugar, synthetic materials or aluminium sheets must not contact with the heating zones.
These may cause breaks or other alterations of the vitroceramic glass by cooling: switch
on the appliance and take them immediately out of the hot heating zone (be careful: do
not burn yourself).
•Never place any hot container over the control panel.
•If a drawer is situated under the embedded appliance, make sure the space between the
content of the drawer and the underside of the appliance is large enough (2cm). This is
essential to guarantee correct ventilation.
•Never put any inflammable object (ex. sprays) into the drawer situated under the
vitroceramic hob. All cutlery drawers must be resistant to heat.
Precautions in case of appliance failure
•If a defect is noticed, switch off the appliance and turn off at the main electrical supply.
•If the ceramic glass is cracked or fissured, you must unplug the appliance and contact
the after sales service.
•Repairing has to be done by specialists. Do not open the appliance by yourself.
•WARNING: If the surface is cracked, switch off the appliance to avoid the possibility of
electric shock.
Other protections
•Note sure that the container pan is always centred on the cooking zone. The bottom of
the pan must have to cover as much as possible the cooking zone.
•Do not to use aluminium or synthetic material containers: they could melt on still hot
cooking zones.

15
DESCRIPTION OF THE APPLIANCE
Technical data
Total power Total power Heating zone location Power Diameter
MKK606 6400 W
Front left
Rear left
Rear right
Front right
1000 / 2200 W
1200 W
1800 W
1200 W
145 / 220 mm
155 mm
190 mm
155 mm
MKK774 7000 W
Front left
Rear left
Rear right
Front right
1000 / 2200 W
1200 W
1800 W
1800 W
145 / 220 mm
155 mm
190 mm
190 mm
Control panel
Power display
[ + ] key
[ - ] key for all
heating zones
On/Off key
Extension zone

16
USE
Display
Display Designation Function
0. Zero The heating zone is activated
1…9 Power level Selection of the cooking level
E Error message Electronic failure
A Heat accelerator Automatic cooking
H Residual heat The heating zone is hot
L Locking The control panel is locked
STARTING UP THE APPLIANCE
Before using your new hob
Clean your hob with a damp cloth, and then dry the surface thoroughly. Do not use detergent
which risks causing blue-tinted colour on the glass surface.
Sensitive touches
Your ceramic hob is equipped with electronic controls with sensitive touch keys. When your
finger touches the key, the corresponding command is activated. This activation is validated by
a control light, a letter or a number in the display and/or a “beep” sound.
Touch only one key on the same time.
Starting-up
•Start-up/ switch off the hob
Action Control panel Display
To start Press key [ 0/I ] [ 0 ]
To stop Press key [ 0/I ] nothing or [ H ]
•Start-up/ switch off a heating zone
Action Control panel Display
Increase power Press key [ + ] [ 1 ] to [ 9 ]
Decrease power Press key [ - ] [ 9 ] to [ 1 ]
Stop Press simultaneous [ + ] and [ - ] [ 0 ] or [ H ]
If no action is made within 20 second the electronics returns in waiting position.

17
Residual heat indication
After swittching off of a heating zone or the complete stop of the hob, the heating zones are still
hot and indicates [ H ] on the display.
The symbol [ H ] disappears when the heating zones may be touched without danger.
As far as the residual heat indicators are on, don’t touch the heating zones and don’t put any
heat sensitive object on them. There are risks of burn and fire.
Automatic cooking
All the cooking zones are equipped with an automatic cooking device. The cooking zone starts
at full power during a certain time, then reduces automatically its power on the pre-selected
level.
•Switching on the automatic cooking :
Action Control panel Display
Zone selection Press key [ + ] [ 0 ]
Full power setting Press key [ + ] Pass from [ 1 ] to [ 9 ]
Automatic cooking Re-press key [ + ] [ 9 ] blinking with [ A ]
Power level selection Press key [ - ] [ 9 ] pass to [ 8 ] [ 7 ]
(for example « 7 ») [ 7 ] blinking with [ A ]
•Switching off the automatic cooking :
Action Control panel Display
Zone selection Press key [ + ] [ 7 ] blinking with [ A ]
Power level selection Press key [ - ] [ 0 ]
Extension zone
•Switch off/on the extension zone
Action Control panel Display
select zone Press key [ + ] [ 0 ]
Increase power Press key [ + ] [ 0 ] to [ 9 ]
Switch off Touch key [ ] Extension zone
light is off
Switch on Touch key [ ] Extension zone
light is on

18
Control panel locking
To avoid modifying a setting of cooking zones, in particular with within the framework of
cleaning the control panel can be locked (with exception to the On/Off key [ 0/I ]).
•Locking
Action Control panel Display
Start Press [ 0/I ] [ 0 ] or [ H ]
Hob locking Press simultaneously [ - ]
and [ + ] at front left No modification
Press key [ + ] [ L ] on 4 displays
•Unlocking
Action Control panel Display
Start Press key [ 0/I ] [ L ] on 4 displays
In the 5 seconds after start :
Action Control panel Display
Unlocking the hob Press simultaneously [ - ]
and [ + ] at left [ 0 ] or [ H ]
Press key [ - ]
COOKING ADVICES
Examples of power setting
(the values below are indicative)
1 to 2 Melting, Reheating Sauces, butter, chocolate, gelatine
Dishes prepared beforehand
2 to 3 Simmering, Defrosting Rice, pudding, sugar syrup
Dried vegetables, fish, frozen products
3 to 4 Steam Vegetables, fish, meat
4 to 5 Water Steamed potatoes, soups, pasta, fresh vegetables
6 to 7 Medium cooking, Simmering Meat, liver, eggs, sausages,
7 to 8 Cooking Potatoes, fritters, waffles
9 Frying, roasting, Boiling water Steaks, omelettes, fried dishes, water

19
MAINTENANCE AND CLEANING
•Do not clean the hob if the glass is hot: risk of burn.
•Remove light marks with a damp cloth with washing up liquid diluted in a little water.
Then rinse with cold water and dry the surface thoroughly.
•Highly corrosive or abrasive detergents and cleaning equipment are likely to cause
scratches and must be avoided.
•Ensure that the bottom of pans is dry and clean. Ensure that there are no grains of dust
on your ceramic hob or on the bottom of the pan. Sliding rough saucepans will scratch
the surface.
•Spillages of sugar, jam, jelly, etc. must be removed immediately. You will thus prevent
the surface being damaged.
WHAT TO DO IN CASE OF A PROBLEM
The hob or the cooking zone doesn’t start-up :
•The hob is badly connected to the electrical system.
•The protection fuse has blown.
•The locking function is activated
•The sensitive keys are covered by grease or water.
•An object is covering the control panel.
The symbol [ E ] displays :
•The electronic system is defective.
•Disconnect and replug the hob.
One or all cooking zones cut-off :
•The safety system has engaged
•You forgot to cut-off the cooking zone for a long time.
•One or more sensitive keys are covered.
•The pan is empty and has overheated.
•The hob also has an automatic reduction of power level and breaking Automatic
overheating
The control panel displays [ L ] :
•Refer to the chapter control panel locking page
The automatic cooking system doesn’t start-up :
•The cooking zone is still hot [ H ]
•The highest power level is set [ 9 ]
ENVIRONMENT PROTECTION
•The packaging material is ecological and can be recycled.
•The worn appliances contain certain noble metals. Apply to the local government about
the possibilities of recycling.
•Don't dispose of your appliance with general household waste
•Get in touch with the waste collection centre of your local
council that control the recycling of household appliances.

20
INSTALLATION INSTRUCTIONS
The installation comes under the exclusive responsibility of specialists.
The installer is held to respect the legislation and the standards enforce in his home country.
How to stick the gasket:
The gasket supplied with the hob avoids all infiltration of liquids in the cabinet.
His installation has to be done carefully, in conformity of the following drawing.
Fitting - installing:
Reference Cut-size
MKK606 560 x 490 mm
MKK776 750 x 490 mm
•Ensure that there is a distance of 50 mm between the hob and the wall or sides.
•The hobs are classified as “Y” class for heat protection. Ideally the hob should be
installed with plenty of space on either side. There may be a wall at the rear and tall units
or a wall at one side. On the other side, however, no unit or divider must stand
higher than the hob.
•The piece of furniture or the support in which the hob is to be fitted, as well as the edges
of furniture, the laminate coatings and the glue used to fix them, must be able to resist
temperatures of up to 100 °C.
•The mural rods of edge must be heat-resisting.
•Not to install the hob to the top of a not ventilated oven or a dishwasher.
•To guarantee under the bottom of the hob casing a space of 20 mm to ensure a good air
circulation of the electronic device.
•If a drawer is placed under the work, avoid to put into this drawer flammable objects (for
example: sprays) or not heat-resistant objects.
•Materials which are often used to make worktops expand on contact with water. To
protect the cut out edge, apply a coat of varnish or special sealant. Particular care must
be given to applying the adhesive joint supplied with the hob to prevent any leakage into
the supporting furniture. This gasket guaranties a correct seal when used in conjunction
with smooth work top surfaces.
•The safety gap between the hob and the cooker hood placed above must respect the
indications of the hood manufacturer. In case of absence of instructions respect a
distance minimum of 760 mm.
•The connection cord should be subjected, after building, with no mechanical constraint,
such for example of the fact of the drawer.
Stick the gasket (2) two millimeters
from the external edge of the glass,
after removing the protection sheet (3).
This manual suits for next models
1
Table of contents
Languages:
Other M-system Hob manuals

M-system
M-system MGK-6 Specification sheet

M-system
M-system MI-76 User manual

M-system
M-system MKK - 603 IX User manual

M-system
M-system MI-75 User manual

M-system
M-system MKK - 902 User manual

M-system
M-system MFCDI 94 Series Technical manual

M-system
M-system MI600 User manual

M-system
M-system MGKWT-90 Installation and operating instructions

M-system
M-system MCK-30 Technical manual

M-system
M-system MKK - 602 IX User manual