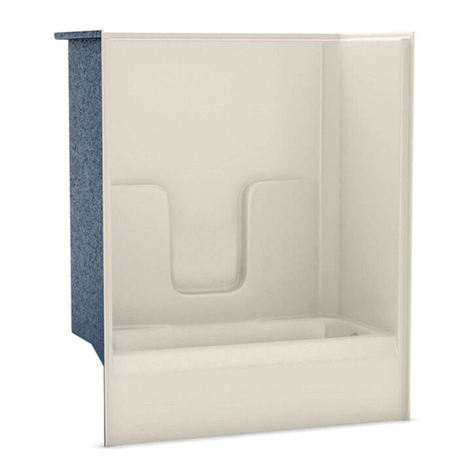
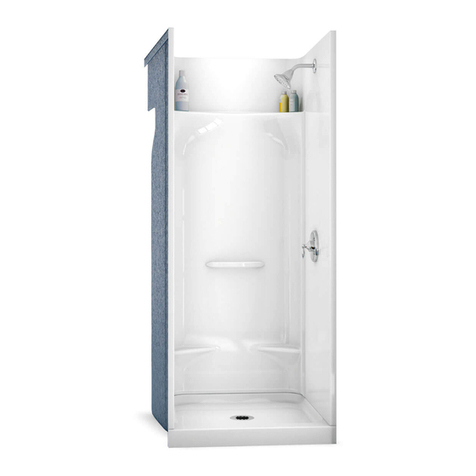
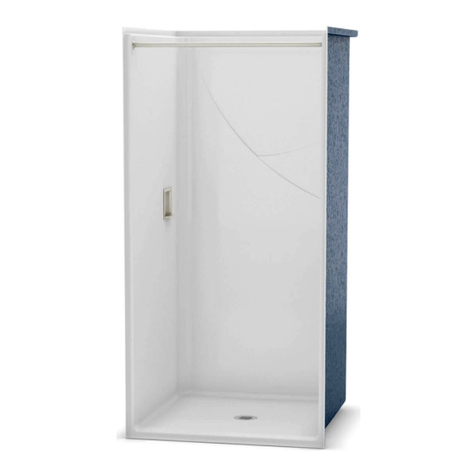
MAAX 107223 User manual

mSafety Guidelines P.2
mRequired Tools P.4
mKit Contents P.4
mPreparation Hints & Tips P.5
mInstallation Procedure P.5
mMaintenance & Surface Repair P.15
mWarranty Information P.16
INSTALLATION INSTRUCTIONS SHOWER WALL KITS AND PANELS
SAVE THIS GUIDE FOR FUTURE REFERENCE.
Read all instructions carefully before proceeding.
Serial number
IMPORTANT • Record the serial number
Atwo person installation is recommended.
Version française à partir de la page 17
Versión en español a partir de la pagina 33
MODEL
107223 • 107224 • 107225 • 107226 • 107227 • 107228 • 107229 • 107230

IMPORTANT NOTICE
IMPORTANT NOTICE: Indicates that equipment or
property damage can result if instructions are not
followed.
Read and Understand the Manual
It is the responsibility of any individual who installs or
maintains this product to fully understand and follow
proper installation and maintenance procedures. Be aware of
the inherent dangers in the use of power tools when installing
this product. Read and understand all Warnings, Cautions, and
Important Notices in this manual.
Work Safely
DO NOT proceed if any doubt arises about the method
of performing anything found in this or other MAAX
manuals. The installation of this product can require using
power tools. Do not use power tools without adequate training.
If necessary, hire or consult a trained professional for expert
assistance before continuing.
Use Proper Tools
Always use proper tools during the installation of the
products. Using tools other than those listed could
adversely affect the integrity of floors, pipes, walls, or this
product and could result in water damage or other damage to
floors, pipes, walls, or other portions of your building or home.
Do Not Use Nails
The panels mount to walls with 100% clear silicone
sealant only. It is NOT recommended to use GE brand
of 100% silicone. Never use hammers, nails, or screws. They
adversely affect the integrity of this product. Nails and screws
could puncture the walls, resulting in water or other damage to
floors, pipes, walls, or other portions of your building or home.
Inspect Before Cutting
Make sure no electrical wiring or plumbing is present
before cutting into a wall to install any accessories.
Wall Conditions
Inspect the walls before installing the wall panels.
Never install panels over damp walls or an existing
mold condition.
CAUTION
CAUTION: Indicates a potentially hazardous situation
which, if not avoided, may result in injury.
Use Proper Installation Methods
Follow all instructions related to wall surface
preparation. Failure to follow such instructions could
cause the panels to detach from the wall surface after
installation, resulting in personal injury. Failure to follow these
instructions could result in water damage.
The MAAX Assurance — if our product is
properly installed and maintained, as stated in
these instructions, it will not leak.
Remember –Remember –
Safety FirstSafety First
IMPORTANT NOTICE
MAAX, cannot anticipate every possible
circumstance that might involve a
potential hazard during the installation
of our product(s). The warnings and
instructions in this installation guide
are, therefore, not all-inclusive. If a tool,
installation procedure, or work method
that is not specifically recommended by
MAAX is used, you must satisfy yourself
that it is safe. You should also make
sure that the MAAX product(s) will not be
damaged by the methods you choose.
MAAX will not be held responsible for
water damage of any kind in connection
with the installation of one of our MAAX
bath / shower / panel kits.
WARNING
To avoid product damage, personal
injury, or even possible death, carefully
read, understand, and follow all the
instructions in this installation guide
before installing this product(s). Do not
use cleaning fluids or operate power
tools unless you read and understand
the instructions and warnings. Proper use
of tools and the products described in
this guide is your responsibility.
WARRANTY
Refer to the Warranty section in
this manual for complete details.
Save this manual for future
reference.
Important information on cleaning,
maintenance, and repair is contained
within.
Safety Guidelines
2

Lifting Hazard
To avoid personal injury, use two people to move
cartons weighing more than 51 lbs. The box
containing the wall panels can weigh up to 120 pounds.
Use the appropriate lifting devices to move the load. Always
use two people when lifting heavy or bulky cartons. DO NOT
attempt to lift objects that are too heavy.
WHEN CARRYING A HEAVY LOAD—GET HELP!
Slipping Hazard
Do not install this product in the presence of water.
Installing this product without drying all surfaces, or in
the presence of water, could cause you to slip and fall due to
wet floors or spilled fluids. Personal injury can result from slips
or falls. Before installation, dry all surfaces, including the floor,
with a cloth or paper towel. Clean up all spilled fluids
immediately.
Tripping Hazard
Personal injury can result from tripping over power
cords, tools, or other items. DO NOT leave items laying
around the work area.
Personal Protection
Be sure to use all personal protective
equipment, such as sturdy work boots,
preferably with steel toes, gloves, and hard hat, if necessary,
to ensure your own safety. To prevent possible damage to
your hearing, always wear ear protection, such as earmuffs or
earplugs, when working around power tools.
Cutting Hazard
The installation of the walls may require using power
tools. Keep hands away from the cutting edge of any
tool used in the installation of our product. Placing
fingers in or around the cutting blades could result in serious
personal injury.
Sharp Edge Hazard
After cutting the edge of a panel, it can be sharp. Wear
protective gloves to prevent personal injury.
Room Temperature
Allow the panels to adjust to room temperature
for at least six hours before installation, and
consult the 100% silicone sealant manufacturer’s
instructions for storage and surface preparation. The panels
should be installed at temperatures not less than 18°C. Panels
should not be installed in areas where the temperature may
drop below freezing. Failure to follow this recommendation
could adversely affect the silicone sealants which holds the
panels to the wall. If the panels are not correctly adhered to the
walls, they may fall off, causing possible injury to someone in or
around the shower.
Grab Bars
We recommend that shower compartments be
equipped with support grab bars that comply with the
most recent edition of ANSI-A117.1 requirements.
Grab bars must be anchored to structural support (wall studs)
behind the panels. Do not rely on the panels only for grab bar
support!
WARNING
WARNING: Damage and injury can be incurred if the
instructions are not followed.
Eye Protection
Be sure to use all personal protective equipment to
ensure your own safety. To avoid eye injury, always
wear protective glasses with side shields when using power
tools. Also, make sure no one else can be injured by flying
particles when using power tools.
Fire Hazard
Personal injury or death can result from a
fire caused by flammable liquids or
silicone sealants. Cleaners or solvents can be highly explosive,
resulting in personal injury or even death, when not used
properly. Clean up any flammable substance immediately.
Sparks or open flames can cause flammable substances to
ignite. DO NOT smoke while working on or near any
flammable substance.
Solvents Hazard
Follow all manufacturer’s safety instructions for silicone
sealants and denatured alcohol. Alcohol vapors are
both flammable and hazardous to breathe. Silicone vapors
may irritate eyes and nose. Personal injury can result from
improperly handling or use of products, such as denatured
alcohol. Always follow the manufacturer’s recommendations for
the safe use of these products. Ventilate any work area before
beginning to apply silicone sealants, cleaning agents, or
solvents.
Fumes Hazard
The fumes from the silicone and solvents used
by the installer can be harmful if used in an
unventilated room. Always work in a well-ventilated area. To
keep the area well-ventilated, open windows and use exhaust
fans. If adequate ventilation is not achievable or practical, use
respiratory protective equipment.
Dust Hazard
When cutting or drilling the product, use a dust
collection method which prevents dust particles
from going into the air. Always work in a well-ventilated area.
Always use government health and safety agency approved
dust mask when cutting, drilling, or sanding MAAX products.
Power Tool Hazard
To prevent personal injury or possible death,
always follow the electrical safety
recommendations of the power tool’s manufacturer. Do not use
power tools in an unsafe manner. Power tools should only be
connected to a circuit protected by a ground-fault circuit
interrupter (GFI).
Shock Hazard
Never use electric power tools around water,
condensation, or other liquids. Electric shock
can cause severe burns, significant injuries, and even death. If
an extension cord is required, always use government health
and safety agency approved extension cord. Power cords
should only be connected to a circuit protected by a ground-
fault circuit interrupter (GFI).
Safety Guidelines
3

Electrical Shock Hazard
Contacting live electrical wiring with power tools
or hand tools can cause serious injury or death.
Make sure all related circuit breakers are turned OFF. Test for
live circuits or wiring inside any wall where installation of the
MAAX product requires cutting into a wall.
Electrocution Hazard
Water and other liquids conduct electric current
and can create a short circuit, resulting in injury
or death. Keep all liquids away from electrical cords and power
tools. DO NOT create a short circuit between a source of
electricity and a liquid by being in contact with both
simultaneously.
General Information
Required Tools
m100% clear silicone sealant
mCircular saw with 60 to 80 tooth carbide blade
mSaber saw (straight up and down travel) with bi-metal blade
(14 teeth per inch)
mDrill with 3/8” drill bit
mHole saw for shower faucet/shower head
mTape measure
mMasking tape (2” wide)
mLevel
mCaulking gun
mClean paper towels or shop towels
m2 x 4 lumber, as required for bracing (see Bracing
Instructions)
mIndustrial grade, hot glue gun and glue sticks (optional)
mDenatured alcohol
Kit Contents
Confirm that all parts of this kit have been included before
beginning installation.
These products include 2 panels and 1 corner trim:
107223/107227 : 36 in. side wall kit
107224/107228: 42 in. side wall kit
These products include 1 panel an 1 corner trim (combine
with a 2 panel kit for an alcove installation):
107225/107229: 62 in. back wall
107226/107230: 50 in. back wall
For best results, use 100% clear silicone sealant for bonding this
product to a properly constructed and prepared sub wall. You
will need one tube of 100% clear silicone sealant (tube sized to
fit a standard caulking gun) for every 1440 square inches or 10
square feet, or, 4 to 10 tubes for an average shower. Follow the
application recommendation located in the Panel Installation
section of this manual.
It is NOT recommended to use GE brand of 100% silicone.
Unpackaging
mUse care when opening the box so that you do not damage
the panels.
mThis product is shipped to you or your retail center after
careful inspection. After purchasing the kit, carefully unbox
and inspect the product for any shipping damage that may
have occurred. If damage is found, report it immediately to
the store of purchase. After inspection and during installation,
protect the products from construction damage by moving
them to another room or area until ready to install.
mStore panels in a flat area to avoid warpage until the time of
installation. Do not store the panels outside of the original
packaging in a vertical position.
mPlease use the model number located on the side of the
box or the front of this manual when contacting us with
questions concerning the installation of this unit.
mMake sure the walls are the correct size and are in good
condition. Installation of damaged product will void the
warranty.
Safety Guidelines General Information
4

Helpful Hints
mRead these instructions carefully and familiarize yourself
with the various parts of the kit.
mThe variety of installations possible for this kit may require
procedures other than those shown. Ensure construction is
correctly sized, plumb, and square.
mSave the large cardboard box for protection of the shower
floor during the installation process and to use as a
template for cutting the back shower wall panel.
mAllow sufficient time for the parts in this kit to adjust to room
temperature. We do not recommend installation of this
product at temperatures below 65 degrees (18.3 °C).
mSawhorses with 2 x 4 cross-members or a worktable are
helpful during the installation process.
mAlways transport the panels vertically. Use care when laying
the panels flat to prevent flexing, especially when panels
have a cutout in them.
mStore unused materials away from the work area to prevent
accidental damage.
mIf the shower is placed over a garage or on an outside wall,
care must be taken to ensure that the shower is properly
insulated from cold temperatures.
Preparation Tips
mMeasure the width of the back wall (with green board)
installed. This measurement cannot exceed the width of back
panel. If the wall opening is too large, other methods or two
panels will be required to cover the wall.
mTurn off the hot and cold water supply.
mRemove faucet handles, escutcheons, filler spouts, and/or
anything mounted to the wall (i.e. towel bars, soap dishes,
etc.).
mAlways measure the location of the plumbing cutouts from
the back wall forward and from the ledge of the shower
base upward.
mEnsure all plumbing or electrical work inside the walls is
finished prior to installation of the wall panels.
mPrepare the area with 1/2” (13 mm) moisture-resistant
drywall or concrete board. Never install our products directly
on any structure that is, or may become, wet or damp.
mTrial fit the side panels before you begin. The panels have a
finished side and a nonfinished backer side.
mWalls must be solid and square within 1/8” of true. Shim or
trim the opening, as required. This kit has been designed with
some adjustability for minor alignment problems.
mThe wall surface must be free of dirt, film, waxes, or any
other residues.
mIf you are installing a recessed accessory, cut the hole
after the panel is installed and fully supported by the wall.
Remember to position the accessory between the wall studs.
Caulking Tips
mWhen job is complete, inspect all caulked areas for gaps
and fill as needed.
mClean up any excess silicone that was missed using
denatured alcohol and a clean cloth.
mBe very careful not to disturb caulk joints.
Installation Procedure
Wall panels can be installed over a variety of products. If you
intend to apply the panels to any surface other than those
described, consult with a professional contractor. Use the
following sections when installing this product over:
mDRY WALL
mPLASTER
mCEMENT/CONCRETE
mTILE
mWALLPAPER
mMASONITE
Dry Wall
mSurface must be dry, smooth, and free of any dust, soap
scum, or any other contaminants.
mTo ensure proper adhesion of the wall panels, the wall
surface must be sealed with a water or oil-based primer/
sealer.
mAfter the primer/sealer is completely dry, complete the
installation following the instructions in this manual.
Plaster
Depending on the condition of the existing wall surface,
additional silicone may be required to ensure contact between
the substrate and the wall panel.
mSand textured or swirled finishes smooth.
mClean the wall surface with a damp cloth to remove any
dust, soap scum, or any other contaminants. The wall
surface must be dry and smooth.
mTo ensure proper adhesion of the wall panels, the wall
surface must be sealed with a water or oil-based primer/
sealer.
mAfter the primer/sealer is completely dry, complete the
installation following the instructions in this manual.
Cement/Concrete
Depending on the condition (flatness) of the existing wall
surface, additional silicone may be required to ensure contact
between the substrate and the wall panel.
mTo ensure proper adhesion of the wall panels, the complete
area must be sealed with two coats of water or oil-based
primer/sealer.
mAfter the primer/sealer is completely dry, complete the
installation following the instructions in this manual.
Tile
Depending on the condition of the existing wall surface,
additional silicone may be required to ensure contact between
the substrate and the wall panel.
IMPORTANT NOTICE
Old ceramic tiles, if solidly adhered, do not need to be
removed. All plastic tiles must be removed.
Preparation Hints & Tips Installation Procedure
5

mRemove or reattach any loose ceramic tiles. Old tiles and
front edge ceramic tiles should be reset for appearance
only.
mRemove any tile accessories attached to the walls.
mRemove the bottom row of tile and cut a ventilation gap in
the substrate.
mSurface must be dry, smooth, and free of any dust, soap
scum, or any other contaminants.
mComplete the installation following the instructions in this
manual.
Wallpaper
mAll wallpaper must be removed from the area being
covered. Clean the wall surface to remove any dust, soap
scum, or any other contaminants. The wall surface must be
dry and smooth.
mTo ensure proper adhesion of the wall panels, the complete
wall surface must be sealed with two coats of water or oil-
based primer/sealer.
mAfter the primer/sealer is completely dry, complete the
installation following the instructions in this manual.
Masonite
mClean the wall surface to remove any dust, soap scum, or
any other contaminants. The wall surface must be dry and
smooth.
mTo ensure proper adhesion of the wall panels, the wall
surface must be sealed with a water or oil-based primer/
sealer.
mAfter the primer/sealer is completely dry, complete the
installation following the instructions in this manual.
Followed carefully, these installation instructions will result
in an easy, trouble-free installation of your product. Any
deviations, additions, and/or deletions from the prescribed
installation, without prior written approval, will void the warranty
covering this product.
Disclaimer
mThe information contained in this Installation Manual
is given free of charge. It is based upon technical data
which we believe to be reliable and is intended for use, by
persons having knowledge of this technical area, at their
own discretion and risk. MAAX assumes no responsibility
for results obtained or damage incurred from the use of this
material either in whole or in part by the buyer.
mThis manual will give you basic instructions for the
installation of the product in a step-by-step sequence that
will work in most types of installations. If you have an
installation application that is not covered in this manual,
please call your MAAX directly for additional information
about your application.
mFollow all installation instructions. Failure to follow these
instructions could result in personal injuries, water damage,
or other damage to floors, pipes, walls, or other portions of
your building or home.
Filler Boards
If an existing wall covering (i.e. tile) does not extend to a
height equal to the height of the panel, it will be necessary to
install a filler board to that height. The filler board must equal
the thickness of the existing wall covering (tile). Usually, 1/4”
masonite or similar material is adequate. If desired, the filler
board can extend from the top edge of the tile to the ceiling.
A
B
A
B
Note: Failure to use a filler board to properly install the panels
could result in water damage or other damage to floors, walls,
or other portions of your building or home.
Wallboard Installation
Note: If the wall panels will be installed over an existing
shower wall surface, proceed to the next section.
Install 1/2” moisture-resistant cementboard or greenboard
over back (1), front (2), and rear (3) wall surfaces of the rough
opening.
1. Measure and cut openings for the shower faucet(s) and
shower head before installation.
2. Install the wall board with a 1/2” gap above the shower
base side lip to prevent possible water (wicking affect)
damage.
BK-WB- 0 0 1
1
2
3
1
2
3. The cementboard or greenboard MUST be cut to fit up
against the front edge of the shower base.
Installation Procedure
6

IMPORTANT NOTICE
For a finished appearance, install greenboard up to the front
edge of the shower base, leave a 1/2” gap between the shower
base and the greenboard.
In addition, if baseboard trim (not included) will later be
installed along the floor next to the shower base, a 1/2” gap
between the floor and bottom of the greenboard is
recommended (see illustration below).
1/2"
1/2"
1/2"
4. Apply a coat of water or oil-based primer/sealer to all
the surfaces of the cementboard or greenboard (follow
the manufacturer’s instructions). Allow the primer to dry
thoroughly before installing the wall panels.
Panel Installation
Back Panel
If the back wall measures less than the width of the panel, cut
the panel to fit the opening (for alcove installation only).
1. Using a builder’s square, make sure the shower base
is perpendicular to the side walls. If the walls are out of
square, the bottom of all the panels may need to be cut to
follow the contour of the shower base.
2. If the shower base is not perpendicular to the wall, use
a level and draw a line around the alcove on all three
walls. Measure the distance from the line to the top of the
shower base.
3. Transfer these measurements to both side panels and the
back panel. Cut the bottoms of the panels.
Note: For any panels with tile patterns, this process will keep
the faux grout lines running level, although the bottom
tiles may not be evenly sized from the shower base to
the first faux grout line. Since every installation is slightly
different, it is up to the installer to create a pattern match
that is visually pleasing.
4. For alcove installation only: If the back panel must be
cut (side-to-side) to fit the opening, find and mark the
center of the back wall in the alcove opening. Use a level
to draw a line from the shower base to a point above the
height of the wall panel.
C
C
L
L
C
L
Installation Procedure
7

5. For alcove installation only: Place the panel, finished
side facing up, on a flat surface. Using a pencil, lightly
mark the center of the back panel.
6. For alcove installation only: Take several
measurements, bottom-to-top, from the center line to each
wall surface. These measurements will ensure the back
panel fits the exact contour of the two.
side walls.
7. For alcove installation only: Transfer the measurements
onto the front surface of the back panel.
Note: The back panel can be cut slightly smaller than the
opening because the side panels will cover any small
gap (less than 1/4 inch).
Cutting the side panel to precisely fit the back wall is not
necessary if a corner molding, supplied in some kits, is
used. This corner molding can cover some gaps.
WARNING
Dust Hazard
When cutting or drilling the wall products, use
a dust collection method which prevents dust
particles from going into the air. Always work in a well-
ventilated area. To keep the area well-ventilated, open
windows and use exhaust fans. Always use government
health and safety agency approved dusk mask when
cutting, drilling, or sanding wall products.
8. Place pieces of masking tape over the area where the
saw contacts the finished surface of the panel.
9. Cut the panel using a circular saw with a 60-80 tooth
carbide blade or a saber saw with a bi-metal blade (14
teeth per inch).
IMPORTANT NOTICE
Any cutout for accessories should have rounded corners
(sharp corners can promote stress cracks).
10. For alcove installation only: Dry fit the back panel, and
make any necessary adjustments. Temporarily secure the
back panel to the wall in order to properly fit the front and
rear panels.
IMPORTANT NOTICE
DO NOT force a panel to fit a bowed or curved wall as it may
break; furthermore, the resiliency of the panel can break the
silicone bond to the wall surface.
Installation Procedure
8

Side Panel (with shower controls)
If the side panels do not require cutting to size, proceed to Step 5.
Note: Cutting the side panel to precisely fit the back wall is
not necessary if a corner molding, supplied in some kits, is
used. This corner molding can cover some gaps.
1. Place the panel on top of the shower base and slide it
against the back wall panel. If the side panel has only one
finished edge, make sure that the finished edge is facing
out.
2. Scribe (mark) the panel, as shown. If the panel is wider
than the wall, take this width into consideration when
scribing the panel.
Note: Precisely scribing and cutting the panel will provide a
clean 90 degree corner with no need for corner molding.
3. Place the wall panel, finished side facing up, on a flat
surface. Place pieces of masking tape over the area where
the saw contacts the wall panel.
4. Cut the panel using a circular saw with a 60-80 tooth
carbide blade or a saber saw with a bi-metal blade (14
teeth per inch).
5. Measure the openings for the shower controls and shower
head.
6. Place the wall panel, finished side facing up, on a flat
surface. Transfer the measurements to the panel.
WARNING
Dust Hazard
When cutting or drilling the wall product, use a dust
collection method which prevents dust particles from going
into the air. Always work in a well-ventilated area. To keep
the area well-ventilated, open windows and use exhaust
fans. Always use government health and safety agency
approved dust mask when cutting, drilling, or sanding wall
products.
Installation Procedure
9

7. Cut clearance holes using a router, saber saw, or hole
saw. Drill or cut from the finished side of the panel. For
best results, when drilling, place a scrap of wood beneath
the hole to ensure a clean cut.
8. Dry fit the panel, and make any necessary adjustments.
Side Panel (without shower controls)
If the panel does not require cutting to size, proceed to the
next section.
1. Place the panel on top of the shower base and slide it
against the back wall panel.
2. Scribe (mark) the panel, as shown. If the panel is wider
than the wall, take this width into consideration when
scribing the panel.
Note: Precisely scribing and cutting the panel will provide a
clean 90 degree corner with no need for corner molding.
3. Place the wall panel, finished side facing up, on a flat
surface. Place pieces of masking tape over the area where
the saw contacts the wall panel.
WARNING
Dust Hazard
When cutting or drilling the wall product, use a dust
collection method which prevents dust particles from going
into the air. Always work in a well-ventilated area. To keep
the area well-ventilated, open windows and use exhaust
fans. Always use government health and safety agency
approved dust mask when cutting, drilling, or sanding wall
products.
4. Cut the panel using a circular saw with a 60-80 tooth
carbide blade or a saber saw with a bi-metal blade (14
teeth per inch).
5. Dry fit the panel, and make any necessary adjustments.
Installation Procedure
10

Panel Installation
WARNING
Fumes Hazard
The fumes from the silicone and solvents used
by the installer can be harmful if used in an
unventilated room. Always work in a well-ventilated area.
To keep the area well-ventilated, open windows and use
exhaust fans. If adequate ventilation is not achievable or
practical, use respiratory protective equipment.
1. Clean the backs of each panel with denatured alcohol or
another non oil-based cleaning solvent.
IMPORTANT NOTICE
Do not use oil-based cleaners, such as mineral spirits, to
clean the panels. The oil in the cleaner will prevent the panel
from adhering properly to the wall.
2. Apply the silicone in 1-1/4” diameter dots every 8 to 10
inches apart over the surface of the panel. Follow the
silicone manufacturer’s instructions and note all ventilation
and installation precautions.
BK-PI-002b
3. Corner: Install left-hand panel (1) first. Then, install right-
hand panel (2).
Alcove: Install back panel (1) first. Then, install left-hand
panel (2). Finally, install right-hand panel (3).
1
2 3
12
4. Firmly press the surface of each panel against the wall. It
is important to apply hand pressure to the entire surface of
the panel to bond it to the wall surface.
Installation Procedure
11
Corner
Alcove

Temporary Bracing
Install temporary bracing to hold the three panels in place until
the silicone holds the panels completely in place (typically 24
hours).
IMPORTANT NOTICE
To ensure contact between the panels and walls until the
silicone sets, install temporary bracing after completing
installation. The bracing should be constructed from lengths of
2 x 4’s. Failure to brace in the manner described could keep
the panels from adhering, resulting in personal injury, as well
as water damage or other damage to floors, walls, or other
portions of your building or home.
IMPORTANT NOTICE
To prevent scratches or other damage, make sure there are
no nails or other foreign objects in the surface of the bracing
that is placed against the panel.
If the horizontal braces are fastened to the vertical braces
using nails or screws, make sure the fasteners do not
penetrate the surface of the panel. Also, to prevent possible
damage to the walls, do not apply excessive pressure to the
braces.
Corner Installation:
For corner shower wall installation use the following illustrated
bracing design.
ATTENTION: Additional bracing may be required if the
wall panel does not make full contact to the
wall it is adhered to.
These boards need to
be attached to the two
outlying boards
Attach this
board to
the wall
Attach this
board to
the wall
Alcove Installation:
1. Place two or three braces against the back wall. Place two
braces on panels that are 48” or less and three braces on
panels greater than 48” wide.
2. Place two braces against each left and right wall.
3. Install (wedge) three horizontal braces (six total) against
the left and right wall braces.
Installation Procedure
12

4. Insert small blocks between the front-to-rear panel braces
and the back panel braces. These will apply pressure to
the back panel to hold it in place.
5. Remove the braces after 24 hours.
Corner Molding (if applicable)
Installing the corner molding is optional. If the panels were
scribed and cut to create a tight-fitting corner, then the corner
molding can be eliminated. If, however, there are gaps
between the front/rear panel, the corner molding should be
installed. Either option, if done properly, is acceptable.
If the optional soap dish was installed, cut one piece of molding
to fit above the soap dish and one for below the soap dish.
Note: Either clear or color matched silicone can be used to
install corner molding strips.
1. Measure and cut the corner moldings to length.
BK-CM-001b
2. Dry fit the corner molding.
BK-CM-002
WARNING
Fumes Hazard
The fumes from the silicone and solvents used
by the installer can be harmful if used in an
unventilated room. Always work in a well-ventilated area.
To keep the area well-ventilated, open windows and use
exhaust fans. If adequate ventilation is not achievable or
practical, use respiratory protective equipment.
3. Clean the surface of the panels and the back of the molding
with denatured alcohol or another non-oil based solvent.
Installation Procedure
13

IMPORTANT NOTICE
Do not use oil-based cleaners, such as mineral spirits, to
clean the panels. The oil in the cleaner will prevent the panel
from adhering properly to the wall.
4. Apply two 1/8 to 1/4” beads of silicone to the back of the
corner molding, as shown.
BK-CM-0 04
5. Press the corner moldings into place. Remove any excess
silicone.
6. Place at least three pieces of masking tape on each
corner molding to hold it in place until the silicone adheres
to the wall panel.
Final Caulking
Apply a bead of the 100% silicone sealant.
IMPORTANT NOTICE
Follow the manufacturer’s instructions on the tube for proper
application. Allow at least 24 hours for silicone to set before
using the shower enclosure.
1. Apply 100% silicone sealant to all of the inside seams, as
shown.
BK-FC-001
2. Also, apply 100% silicone sealant to the exterior edges, as
shown. This silicone sealant is nonpaintable.
BK-FC-002
The installation is now complete. DO NOT discard these
installation instructions. PLEASE LEAVE THEM WITH THE
HOMEOWNER.
Attaching Shower Doors and Accessories
For other accessories, such as shower door, shelf, please
consult the detailed installation guides of these products
Installation Procedure
14

Care and Cleaning
The wall products are stain and abrasion resistant; however,
the finish requires reasonable care.
IMPORTANT NOTICE
Because cleaning products change over time, always check
the manufacturer’s instructions to make sure it is compatible
with solid surface acrylic or with fiberglass reinforced
polyester. DO NOT use a cleaner if the label indicates it
should not be used on solid surface acrylics or fiberglass
reinforced polyester. DO NOT use spray-on cleaners that
require daily use without immediately rinsing with water to stop
the chemical cleaning reaction because damage will result
and void the warranty.
Day-To-Day Cleanup
Simply wipe the surfaces with a clean towel to remove
watermarks and residues. All wall products can be cleaned
with warm water, a soft cloth, and normal household
detergents or cleansers, such as Fantastic, Formula 409,
Clorox Clean-up, Handy Andy, Mr. Clean, Dow Scrubbing
Bubbles, Lysol Foaming Tub and Tile Cleaner, Top Job,
or Lestoil. Always rinse off cleaners within five minutes of
application.
Occasional scrubbing with household abrasive cleaners
ensures that the original luster is maintained.
Caulking Joints
Inspect caulking joints monthly for damage or any signs of
separation from the mating surface. Cracks in the caulking will
allow water to leak into the surrounding surfaces. Reapply
caulking to any joint showing signs of wear or cracking.
Failure to inspect and repair caulking joints will void the
warranty.
Maintenance & Surface Repair
15

PRINTED IN CANADA / IMPRIMÉ AU CANADA / IMPRESO EN CANADA 2021-02-22 10042890
www.maax.com
Technical Services / Service technique / Servicio técnico
T. 1 877 GET-MAAX (1 877 438-6229)
F. 1 888 361-2045
LIMITED WARRANTY — UNITED STATES
MAAX Bath Inc. oers express limited warranty on each of its products. This warranty extends only to the original owner/end-user for personal
household use. For commercial uses, additional limitations apply.
For accessing product Limited warranty please visit:
www.maax.com/us-warranty
MAAX Bath Inc. oers express limited warranty on each of its products. This warranty extends only to the original owner/end-user for personal
household use. For commercial uses, additional limitations apply.
For accessing product Limited warranty please visit:
www.maax.com/ca-warranty
LIMITED WARRANTY — CANADA
GARANTIE LIMITÉE — CANADA
MAAX Bath Inc. ore une garantie limitée expresse sur chacun de ses produits. Cette garantie s’adresse uniquement au propriétaire/
utilisateur original pour un usage personnel domestique. Des restrictions additionnelles s’appliquent aux utilisations commerciales
Pour accéder à la garantie limitée de votre produit, veuillez consulter le site :
www.maax.com/garantie

17
GUIDE D’INSTALLATION MURS ET EMSEMBLE DE MURS DE DOUCHE
CONSERVER POUR UN USAGE ULTÉRIEUR.
Lire toutes les instructions attentivement avant de commencer
l’installation.
Numéro de série
IMPORTANT • Noter le numéro de série
Une installation par deux personnes est recommandée.
mConsignes de sécurité P.18
mOutils requis P.20
mContenu de l’ensemble P.20
mAstuces utiles et conseils de préparation P.21
mProcédure d’installation P.22
mEntretien et réparation de la surface P.31
mInformations sur la garantie P.32
Versión en español a partir de la pagina 33
MODÈLE
107223 • 107224 • 107225 • 107226 • 107227 • 107228 • 107229 • 107230

AVIS IMPORTANT
AVIS IMPORTANT: Des dommages et blessures peuvent
être encourus si les instructions ne sont pas suivies.
Lire et comprendre le guide d’installation
Il incombe à toute personne qui installe ou entretient ce
produit de bien comprendre et de suivre les procédures
d’installation et d’entretien appropriées. Soyez conscient des
dangers inhérents à l’utilisation d’outils électriques lors de
l’installation de ce produit. Lisez et comprenez tous les
avertissements, mises en garde et avis importants de ce manuel.
Travaillez en toute sécurité
NE PAS continuer en cas de doute sur la méthode
pour exécuter quoi que ce soit dans ce manuel ou
dans d’autres manuels MAAX. L’installation de ce produit peut
nécessiter l’utilisation d’outils électriques. N’utilisez pas d’outils
électriques sans une formation adéquate. Si nécessaire,
engagez ou consultez un professionnel qualifié pour une
assistance spécialisée avant de continuer.
Utilisez des outils appropriés
Utilisez toujours des outils appropriés et en bon état
lors de l’installation des produits. L’utilisation d’outils
autres que ceux énumérés pourrait nuire à l’intégrité des
planchers, des tuyaux, des murs ou de ce produit et pourrait
entraîner des dégâts d’eau ou d’autres dommages aux
planchers, tuyaux, murs ou autres parties de votre bâtiment ou
de votre maison.
N’utilisez pas de clous
Les panneaux se montent aux murs uniquement avec
un mastic silicone 100% transparent. Il n’est PAS
recommandé d’utiliser d’utiliser le silicone 100% de la marque
GE. N’utilisez jamais de marteaux, de clous ou de vis. Ils
peuvent nuire à l’intégrité de ce produit. Les clous et les vis
pourraient perforer, entraînant des dégâts d’eau ou d’autres
dommages aux planchers, tuyaux, murs ou autres parties de
votre bâtiment ou de votre maison.
Inspecter avant de couper
Assurez-vous qu’aucun câblage électrique ou
plomberie n’est présent avant de couper dans un mur
pour installer des accessoires.
Conditions du mur
Inspectez les murs avant d’installer les panneaux.
N’installez jamais de panneaux sur des murs humides
ou sur une condition de moisissure existante.
ATTENTION
ATTENTION: indique une situation potentiellement
dangereuse qui, si elle n’est pas évitée, peut entraîner des
blessures.
Utilisez des méthodes d’installation appropriées
Suivez toutes les instructions relatives à la préparation
de la surface du mur. Le non-respect de ces
instructions pourrait entraîner le détachement des
panneaux de la surface du mur après l’installation, entraînant
des blessures corporelles. Le non-respect de ces instructions
peut entraîner des dégâts d’eau.
MAAX assure que si le produit est installé
et entretenu correctement, comme décrit
dans ces instructions, il n’y aura pas de
fuite.
N’oubliez pas: laN’oubliez pas: la
sécurité avant toutsécurité avant tout
AVIS IMPORTANT
MAAX, ne peut pas anticiper toutes les
circonstances possibles qui pourraient
impliquer un danger potentiel lors
de l’installation de nos produits. Les
avertissements et les instructions de ce
guide d’installation ne sont donc pas
exhaustifs. Si un outil, une procédure
d’installation ou une méthode de travail qui
n’est pas spécifiquement recommandée par
MAAX est utilisé, vous devez vous assurer
qu’il est validé. Vous devez également vous
assurer que le ou les produits MAAX ne
seront pas endommagés par les méthodes
que vous choisissez. MAAX ne sera pas
tenu responsable des dégâts d’eau de
toute nature liés à l’installation de l’un de
nos ensembles bain / douche / panneau
MAAX.
ATTENTION
Pour éviter d’endommager le produit,
de se blesser ou même de provoquer
la mort, lisez attentivement, comprenez
et suivez toutes les instructions de ce
guide d’installation avant d’installer ce
(s) produit (s). N’utilisez pas de liquides
de nettoyage ou n’utilisez pas d’outils
électriques à moins d’avoir lu et compris les
instructions et les avertissements. Il est de
votre responsabilité d’utiliser correctement
les outils et les produits décrits dans ce
guide.
GARANTIE
Reportez-vous à la section Garantie
de ce manuel pour plus de détails.
Conservez ce manuel pour
référence future.
Des informations importantes sur le
nettoyage, l’entretien et la réparation y
sont contenues.
Consignes de sécurité
18

Risque de manipulation
Pour éviter les blessures, utilisez deux personnes pour
déplacer les boîtes pesant plus de 51 livres. La boîte
contenant les panneaux muraux peut peser jusqu’à 120
livres. Utilisez les dispositifs de manipulation appropriés
pour déplacer la charge. Utilisez toujours deux personnes pour
soulever des boîtes lourdes ou volumineuses. N’essayez PAS de
soulever des objets trop lourds.
LORSQUE VOUS TRANSPORTEZ UNE CHARGE LOURDE -
OBTENEZ DE L’AIDE!
Risque de glissade
N’installez pas ce produit en présence d’eau.
L’installation de ce produit sans sécher toutes les
surfaces, ou en présence d’eau, peut vous faire glisser et
tomber en raison de sols humides ou de liquides renversés.
Des blessures corporelles peuvent résulter de glissades ou de
chutes. Avant l’installation, séchez toutes les surfaces, y
compris le sol, avec un chiffon ou une serviette en papier.
Nettoyez immédiatement tout liquide renversé.
Risque de trébuchement
Des blessures peuvent résulter d’un trébuchement sur
des cordons d’alimentation, des outils ou d’autres
objets. NE laissez PAS d’objets sur la zone de travail.
Protection personnelle
Veillez à utiliser tous les équipements de
protection individuelle, tels que des bottes de
travail robustes, de préférence avec des embouts en acier, des
gants et un casque, si nécessaire, pour assurer votre propre
sécurité. Pour éviter d’éventuels dommages à votre audition,
portez toujours des protections auditives, tels que des casques
antibruit ou des bouchons d’oreille, lorsque vous travaillez à
proximité d’outils électriques.
Risque de coupure
L’installation des murs peut nécessiter l’utilisation
d’outils électriques. Gardez vos mains éloignées du
tranchant de tout outil utilisé dans l’installation de notre
produit. Le fait de placer les doigts dans ou autour des lames de
coupe peut entraîner des blessures graves.
Risque de bord tranchant
Après avoir coupé le bord d’un panneau, il peut être coupant.
Portez des gants de protection pour éviter les blessures.
Température ambiante
Laisser les panneaux s’ajuster à la température
ambiante pendant au moins six heures avant
l’installation, et consulter les instructions du
fabricant du mastic 100% silicone pour le stockage et la
préparation de la surface. Les panneaux doivent être installés à
des températures d’au moins 18 ° C. Les panneaux ne doivent
pas être installés dans des zones où la température peut
descendre sous le point de congélation. Le non-respect de cette
recommandation pourrait nuire aux mastics de silicone qui
maintiennent les panneaux au mur. Si les panneaux ne sont pas
correctement collés aux murs, ils peuvent tomber et blesser
quelqu’un dans ou autour de la douche.
Barres d’appui
Nous recommandons que les compartiments de douche
soient équipés de barres d’appui conformes à la dernière
édition des exigences ANSI-A117.1. Les barres d’appui
doivent être ancrées au support structurel (poteaux muraux)
derrière les panneaux. Ne comptez pas uniquement sur les
panneaux pour le support de la barre d’appui!
ATTENTION
AVERTISSEMENT: Des dommages et blessures peuvent
être encourus si les instructions ne sont pas suivies.
Protection des yeux
Assurez-vous d’utiliser tous les équipements de
protection individuelle pour assurer votre propre
sécurité. Pour éviter les blessures aux yeux, portez toujours
des lunettes de protection avec écrans latéraux lorsque vous
utilisez des outils électriques. Assurez-vous également que
personne d’autre ne peut être blessé par des particules
volantes lors de l’utilisation d’outils électriques.
Risque d’incendie
Des blessures corporelles ou la mort
peuvent résulter d’un incendie causé par
des liquides inflammables ou des mastics silicone. Les
nettoyants ou les solvants peuvent être hautement explosifs,
entraînant des blessures corporelles ou même la mort,
lorsqu’ils ne sont pas utilisés correctement. Nettoyez
immédiatement toute substance inflammable. Des étincelles
ou des flammes peuvent provoquer l’inflammation de
substances inflammables. NE FUMEZ PAS lorsque vous
travaillez à proximité d’une substance inflammable.
Risque de solvants
Suivez toutes les instructions de sécurité du fabricant
pour les mastics en silicone et l’alcool dénaturé. Les
vapeurs d’alcool sont à la fois inflammables et dangereuses à
respirer. Les émanations de silicone peuvent irriter les yeux et
le nez. Des blessures peuvent résulter d’une mauvaise
manipulation ou utilisation de produits, tels que l’alcool
dénaturé. Suivez toujours les recommandations du fabricant
pour une utilisation sûre de ces produits. Aérez toute zone de
travail avant de commencer à appliquer des mastics silicones,
des agents nettoyants ou des solvants.
Risque d’émanation
Les émanations du silicone et des solvants utilisés
par l’installateur peuvent être nocifs s’ils sont utilisés
dans une pièce non ventilée. Travaillez toujours dans un endroit bien
ventilé. Pour garder la zone bien ventilée, ouvrez les fenêtres et
utilisez des ventilateurs d’extraction. Si une ventilation adéquate n’est
pas possible ou pratique, utiliser un équipement de protection
respiratoire.
Risque de poussière
Lorsque vous coupez ou percez le produit, utilisez
une méthode de dépoussiérage qui empêche les
particules de poussière de pénétrer dans l’air. Travaillez toujours
dans un endroit bien ventilé. Utilisez toujours un masque
antipoussière approuvé par l’agence gouvernementale de santé et
de sécurité lors de la coupe, du perçage ou du ponçage des
produits MAAX.
Risque lié aux outils électriques
Pour éviter des blessures corporelles ou la mort
possible, suivez toujours les recommandations
de sécurité électrique du fabricant de l’outil électrique.
N’utilisez pas d’outils électriques d’une manière dangereuse.
Les outils électriques ne doivent être connectés qu’à un circuit
protégé par un disjoncteur de fuite à la terre (GFI).
Risque de choc
N’utilisez jamais d’outils électriques à proximité
d’eau, de condensation ou d’autres liquides. Les
chocs électriques peuvent provoquer de graves brûlures, des
blessures graves et même la mort. Si une rallonge est
nécessaire, utilisez toujours une rallonge approuvée par l’agence
gouvernementale de santé et de sécurité. Les cordons
d’alimentation ne doivent être connectés qu’à un circuit protégé
par un disjoncteur de fuite à la terre (GFI).
Consignes de sécurité
19

Risque d’électrocution
Le contact avec des câbles électriques sous
tension avec des outils électriques ou des outils
à main peut entraîner des blessures graves ou la mort.
Assurez-vous que tous les disjoncteurs associés sont
désactivés. Testez les circuits sous tension ou le câblage à
l’intérieur de tout mur où l’installation du produit MAAX
nécessite une découpe dans un mur.
Risque d’électrocution
L’eau et d’autres liquides conduisent le courant
électrique et peuvent créer un court-circuit,
entraînant des blessures ou la mort. Gardez tous les liquides à
l’écart des cordons électriques et des outils électriques. NE
PAS créer de court-circuit entre une source d’électricité et un
liquide en étant en contact avec les deux simultanément.
Informations générales
Outils requis
mMastic silicone transparent à 100%
mScie circulaire avec lame en carbure de 60 à 80 dents
mScie sabre (course droite de haut en bas) avec lame
bimétallique (14 dents par pouce)
mPercer avec un foret de 3/8 po
mScie cloche pour robinet de douche / pomme de douche
mRuban à mesurer
mRuban de masquage (2 po de large)
mNiveau
mPistolet à calfeutrer
mDes serviettes en papier ou des serviettes propres
m2 x 4 bois, au besoin pour le contreventement (voir les
instructions de contreventement)
mPistolet à colle chaude de qualité industrielle et bâtons de
colle (facultatif)
mAlcool dénaturé
Contenu de l’ensemble
Vérifiez que toutes les pièces de cet ensemble ont été incluses
avant de commencer l’installation.
Ces produits comprennent 2 panneaux et 1 moulure de
coin:
107223/107227: Ensemble de murs de côté 36 po.
107224/107228: Ensemble de murs de côté 42 po
Ces produits comprennent 1 panneau et 1 moulure de
coin (à combiner avec un ensemble de 2 panneaux pour
une installation en alcôve):
107225/107229: Mur arrière 62 po
107226/107230: Mur arrière 50 po
Pour de meilleurs résultats, utilisez un mastic silicone
transparent à 100% pour coller ce produit à un sous-mur
correctement construit et préparé. Vous aurez besoin d’un tube
de mastic silicone transparent à 100% (tube dimensionné pour
s’adapter à un pistolet à calfeutrer standard) pour chaque 1440
pouces carrés ou 10 pieds carrés, ou de 4 à 10 tubes pour
une douche moyenne. Suivez la recommandation d’application
située dans la section Installation du panneau de ce manuel.
Il n’est PAS recommandé d’utiliser le silicone 100% de la
marque GE.
Déballage
mSoyez prudent lors de l’ouverture de la boîte afin de ne pas
endommager les panneaux.
mCe produit est expédié à vous ou au magazin après une
inspection minutieuse. Suite à votre achat, déballez
soigneusement et inspectez le produit pour tout dommage
de transport qui aurait pu survenir. En cas de dommage,
signalez-le immédiatement au magasin. Après l’inspection et
pendant l’installation, protégez les produits des dommages
de construction en les déplaçant dans une autre pièce ou
zone jusqu’à ce qu’ils soient prêts à installer.
mPlacer les panneaux dans un endroit plat pour éviter toute
déformation jusqu’au moment de l’installation. Ne placer
pas les panneaux en dehors de l’emballage d’origine en
position verticale.
mVeuillez utiliser le numéro de modèle situé sur le côté
de la boîte ou à l’avant de ce manuel lorsque vous nous
contactez pour des questions concernant l’installation de ce
produit.
mAssurez-vous que les murs sont de la bonne taille et en
bon état. L’installation d’un produit endommagé annulera la
garantie.
Consignes de sécurité Informations générales
20
This manual suits for next models
7
Table of contents
Languages:
Other MAAX Plumbing Product manuals
Popular Plumbing Product manuals by other brands

Helvex
Helvex Nuva TV-203 installation guide

aquabrass
aquabrass blade 68026 installation guide

Helvex
Helvex MEP-2004 installation guide

Moen
Moen Brushed Bronze 128880BB Illustrated parts list

Uponor
Uponor Combi Port XS Installation and operation manual

Hans Grohe
Hans Grohe Talis M51 200 2jet 72813 Series Assembly instructions

WimTec
WimTec SanTec PROOF Installation and operating instructions

Kohler
Kohler BodySpa K-1015 installation guide

Iper Ceramica
Iper Ceramica CASSINO installation guide

Graff
Graff 7080 installation instructions

American Standard
American Standard Cadet 2798.010 Specification sheet

IKEA
IKEA ALSVIK AA-291132-2 Assembly instructions