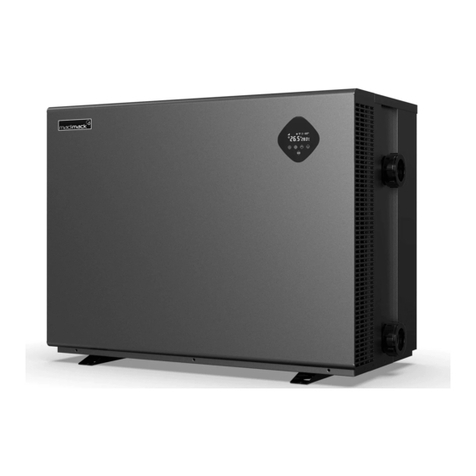
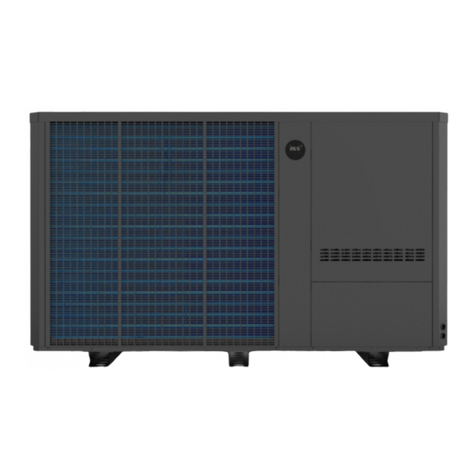
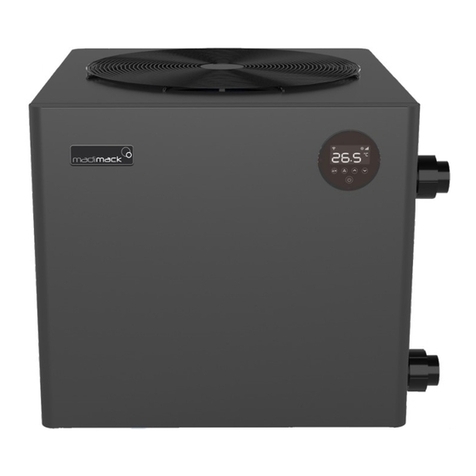
Madimack Elite Series User manual

Elite Series
INVERTER POOL HEAT PUMP
USER'S MANUAL


Table of contents
A. Safety Precautions 1!
1.!Warning! 1!
2.!Attention! 2!
3.!Safety! 2!
B. About your heat pump 3!
1.!Transportation! 3!
2.!Accessories! 3!
3.!Features! 3!
4.!Operating!condition!and!range! 4!
5.!Introduction!of!different!modes! 4!
6.!Technical!parameters! 5!
7.!Dimensions! 6!
C. Installation 7!
1.!Installation!requirements! 7!
3.!Wiring!requirements! 8!
4.!Electric!wiring!Diagram! 9!
5.!References!for!protecting!devices!and!cable!specification! 9!
D. Operation guidance 10!
1.!Display!Functions!10!
2.Operation!Instruction!11!
E. Testing 13!
F. Maintenance 14!
G. Trouble shooting for common faults 16!
H. Appendix 18!
I. Wifi operation 22!

www.madimack.com.au
1
A. Safety Precautions
We have provided important safety messages in this manual for the installation, maintenance and repair
of your heater.
Please read thoroughly and obey all safety messages.
Environmentally friendly R32 Refrigerant is used in this heat pump
1. Warning
This WARNING sign denotes a hazard. It calls attention to a procedure,
practice, or the like, which, if not correctly performed or adhered to, could
result in personal injury or injury to a third party. These signs are rare, but
are extremely important.
a. Keep the heat pump away from fire source.
b. Unit must be placed in a well-ventilated area; indoor or enclosed areas are not
allowed.
c. Repair and disposal must be carried out by trained service personnel
d. Vacuum the system completely before welding.
Welding should only be carried out by professional trained personnel.

www.madimack.com.au
2
2. Attention
a. Please read the following instructions before installation, use and maintenance.
b. Installation, must be completed only by competent persons only, and in accordance with this manual.
c. Check all water connections are sealed and tested before operating the heat pump
d. Except for the methods recommended by the manufacturer, do not use any methods to accelerate
the defrosting process or clean the frosted parts.
e. If a repair is required, please contact the nearest after-sales service center. The repair process must
be strictly in accordance with this manual. Repairs made by unauthorized persons may void the
warranty.
f. Correctly set temperature required for personal preference making sure to avoid overheating or
overcooling.
g. Please do not stack substances or other materials which may block the air flows to the inlet or outlet
areas. This causes the efficiency of the heater to be reduced, and may damage the machine.
h. Do not use or stock combustible gas or liquids such as thinners, paint and fuel, to avoid fire!
i. In order to optimize the heating effect, please install heat preservation insulation on pipes between
swimming pool and the heater, and please use a recommended cover on the swimming pool.
j. Connecting pipes of the swimming pool and the heater should be less than 10m.
3. Safety
a. Please keep the main power supply out of reach from the children.
b. If power is suddenly disconnected during operation, and later the power is restored, the heater will
start up automatically.
c. Please switch off the main power supply in high storm weather to prevent the machine from damage
that could be caused by lightning strikes.
d. Any repairs should be carried out in a well-ventilated area. Any source of ignition is prohibited during
the inspection.
e. Safety inspections must be carried before the maintenance or repair for heat pumps with R32 gas in
order to minimize the risk.
f. If R32 gas leaks during the installation process, all operations must be stopped immediately and call
your local service center.

www.madimack.com.au
3
B. About your heat pump
1. Transportation
a. Always keep upright
b. Do not lift with the water unions
(The titanium heat exchanger
inside the heat pump may be damaged)
2. Accessories
3. Features
a. DC Twin-rotary inverter compressor of Mitsubishi
b. DC Brushless fan motor
c. EEV Technology
d. Quick hot gas defrosting with Saginomiya 4-way valve
e. High-efficiency twisted titanium heat exchanger
f. Sensitive and accurate temp control and water temp display
g. High pressure and low pressure protection
h. Full protection on electrical system

www.madimack.com.au
4
4. Operating condition and range
To pr o v id e yo u co m f o rt a n d pl e a su r e , pl e ase s e t sw i m m ing p o o l w a t er t e m p er a tur e e ffi c ie n t ly a n d
economically.
a. Air temperature operating range: -10℃~43℃
b. Heating temperature setting range: 18℃~35℃
c. The heat pump will have best performance in operating temperature range of ambient Air 15℃~
25℃
5. Introduction of different modes
a. The heat pump has two modes: Boost and Silent
b. They have different strengths under different conditions.
Mode
Modes
Strength
Boost mode
Heating capacity: 20% to 100% capacity
Intelligent optimization
Fast heating
Silence mode
Heating capacity: 20% to 80% capacity
Sound level: 3dB (A) lower than Boost mode

www.madimack.com.au
5
6. Technical parameters
Model
ES70/
240MM
ES90/
240MM
ES110/
240MM
ES130/
240MM
ES150
/240MM
ES170/
240MM
ES210/
240MM
ES260/
240MM
ES260S/
400MM
PERFORMANCE CONDITION: Air 27°C/ Water 27°C/ Humid. 80%
Heating capacity (kW)
7.0
9.0
11.0
13.0
15.0
17.0
21.0
26.0
26.0
COP Range
14~6.6
14~6.6
14~6.4
14.5~6.6
15~6.6
15~6.5
14.8~6.4
15~6.5
15~6.8
PERFORMANCE CONDITION: Air 15°C/ Water 26°C/ Humid. 70%
Heating capacity (kW)
5.0
6.3
7.7
9.0
10.5
11.5
14.5
17.0
17.0
COP Range
7.3~4.4
7.0~4.4
7.5~4.5
7.5~4.5
7.7~4.6
7.8~4.6
7.1~4.6
7.5~4.6
7.5~4.6
TECHNICAL SPECIFICATIONS
Advised pool volume
(m3) *
15~30
20~45
30~55
35~65
40~70
40~80
50~95
60~120
60~120
Operating air
temperature (
℃
)
-10℃~43℃
Power supply
230V 1PH
400V 3ph
Rated input power
(kW)
0.14~1.14
0.19~1.43
0.21~1.71
0.25~2.0
0.29~2.28
0.29~2.5
0.41~3.15
0.51~3.7
0.51~3.7
Rated input current
(A)
0.62~5.17
0.84~6.51
0.97~7.78
1.15~9.09
1.30~10.38
1.34~11.36
1.86~14.33
2.3~16.8
0.73~5.33
Maximum input
current (A)
7.5
8.5
10
12
13.5
15
17
20
7
Sound level at 10m
dB(A)
16.5~26.0
16.8~26.1
16.6~27.9
20.1~28.7
19.3~32
21.1~31.8
18.9~32.2
21.5~32.9
21.5~32.9
Advised water flux
(m³/h)
2~4
2~4
3~5
4~6
5~7
6~8
8~10
10~12
10~12
Water connection
(mm)
40
Remarks:
This heat pump is able to perform normal within air temp -10℃~+43℃, efficiency will not be guaranteed
out of this range. Please take into consideration that the pool heater performance and parameters are
different under various conditions.
Related parameters are subject to adjustment periodically for technical improvement without further
notice. For the most up to date details please refer to nameplate on the heat pump.

www.madimack.com.au
6
7. Dimensions
E
D
C
FG
A
H
B
※ Above data is subject to modification without notice.
Note: The picture above and the specification diagram of the pool heater is for the technician’s
installation and layout reference only. The product is subject to adjustment periodically for improvement
without notice.
A
B
C
D
E
F
G
H
ES70/
240MM
410
645
404
440
890
250
75
658
ES90/
240MM
410
645
404
440
890
250
75
658
ES110/
240MM
410
645
404
440
890
290
75
658
ES130/
240MM
410
645
404
440
890
280
75
658
ES150/
240MM
410
645
404
440
970
320
75
658
ES170/
240MM
410
710
404
440
1060
320
75
658
ES210/
240MM
410
710
404
440
1060
460
75
758
ES260/
240MM
410
710
404
440
1060
640
75
958
ES260S/
400MM
410
710
404
440
1060
640
75
958
Name
Size(mm)
Model

www.madimack.com.au
7
C. Installation
1. Installation requirements
Only competent persons are authorised to install the heat pump and should be educated with the
relevant building codes and standards of their current state or local governing body for all electrical,
mechanical and water services to prevent danger or damage to the unit.
a. Location and clearances
The inverter pool heat pump should be installed in a well-ventilated place.
b. Typical installation diagram
Installations can differ dependent on site conditions below is only a representation of one possibility.
Note: the inlet and outlet positions for the pipework is a representation only and can be positioned
differently

www.madimack.com.au
8
2. Placing the unit and water connections
a. Placing the unit and fixing
• The frame must be fixed by bolts (M10) to a concrete foundation or brackets. The concrete
foundation must be solid and fastened; the bracket must be strong enough and anti-rust treated.
• Do not stack substances that will block air flow near the inlet or outlet area, and there should be
no obstuction within 50cm behind the machine. Suffication of air reduces the efficiency of the
heater and could damage the unit.
• The machine may need an additional pump (not supplied). The recommended pump must
adhere to the specification-flux of the machine, please refer to the technical parameters.
b. Water connections and condensation
• The inlet and outlet water unions should not be installed with soft flexible pipes. The heat pump
must be connected with rigid pipes!
• When the machine is running, condensation is created and discharged from the bottom. Please
place the drainage nozzle (accessory) into the hole and clip it well, then connect a pipe to drain
the condensation water away.
3. Wiring requirements
a. Connect the heat pump to an appropriate power supply, the voltage should comply with the rated
voltage of the product.
b. The machine must be earthed
c. Wiring must be handled by a professional technician according to the circuit diagram.
d. Install electrical protection device according to local code for wiring
e. The layout of power cable and signal cable should be orderly and not affecting each other.

www.madimack.com.au
9
4. Electric wiring Diagram
a. For power supply: 230V 50Hz
b. For power supply: 400V 50Hz
Attention: The pool heat pump must be earthed.
5. References for protection devices and cable specification
※ Above data is subject to modification without notice.
Note: The above data is associated to power cables less than 10m. If the power cable is longer than
10m, the wire diameter must be increased in accordance with current regulations. The signal
cable can be extended to a maximum of 50m.
MODEL
ES70/
240MM
ES90/
240MM
ES110/
240MM
ES130/
240MM
ES150
/240MM
ES170/
240MM
ES210/
240MM
ES260/
240MM
ES260S/
400MM
Breaker
Rated Current
A
9
10.5
12
14.5
16.5
18
21
24
9
Rated Residual
Action Current
mA
30
30
30
30
30
30
30
30
30
Distribution Box (Not Supplied)
Earth
Power Supply
230V 50Hz
Breaker
Fuse
Power Cable
Heat Pump Wiring Board
Distribution Box (Not Supplied)
Power Supply
400V 50Hz
Earth
Breaker
Fuse
Power Cable
Heat Pump Wiring Board

www.madimack.com.au
10
D. Operation guidance
1. Display Functions
Symbol
Designation
Function
ON/OFF
Power On/Off
WiFi setting
Unlock
Lock/Unlock Screen
Speed Mode
Two modes: Boost Silence
UP/DOWN
Tem p e r atu re S e tt ing & D i s pl a y in g
a. Standby mode or Screen lock:Only symbol lights up, screen and other buttons turn darker.
b. Power off mode: Only symbol will light up,No display on screen.
c. The controller has a power-saving mode and will not display bright when locked.
d. The controller has a built-in memory so all parameters are saved in the event of power loss

www.madimack.com.au
11
2.Operation Instruction
a. Screen Lock
1) Press button for 3 seconds to lock or unlock the screen
2) Display automatically locks in no input is detected after 30 seconds.
b. Power On
Press for 3 seconds to unlock screen, Press to power on machine.
c. Temperature Setting
Press and to display and adjust set temperature.
d. Mode Selection
Press to switch between boost mode , silent mode
Default mode is Boost
Please choose boost mode for initial heating
e. WIFI
Download Inverquark app from Apple app store or Google Play store.
Set up new account, enter WiFi password and click add new device (Enter area code +61 when
registering by phone number)
When the screen is unlocked, hold button for 3 seconds, after symbol will begin flashing.
WiFi connection process has now started on the unit.
Now press Bind Device on mobile device.
System should now have connected within the minute and now enjoy controlling the unit through WiFi.
When WiFi is connected symbol is displayed.
To c l ear the WiFi setting history on machine. When the screen is on, press and hold for 10
seconds, symbol will flash fast for 10 seconds then switch off.

www.madimack.com.au
12
d. Defrost cycle
• Automatic active defrosting
When the machine is operating in low temperatures it is very common for ice to build up on the
external coil. The heat pump has a built in defrost protection program which will activate when it
senses ice starting to form.
When machine is defrosting, starts flashing; after defrosting is on continuously
• Forced defrosting,
If the heat pump requires manually defrosting for testing or a sensor is faulty please follow these
instructions, the machine must be in heating mode and the compressor is working continuously for
more than ten minutes, Whilst the unit is running, press and on the
controller simultaneously and hold for 5 seconds. When the symbol is flashing, defrost has
started, and will continue until the external coil temperature reaches a certain temperature adequate
for continuued operation. If the symbol stops flashing forced defrost has stopped.
*Note: the interval between forced defrosting should be more than 30 minutes apart.

www.madimack.com.au
13
E. Testing
1. Heat pump checks before use
a. The air inlets and outlets are free of any debris and are not obstructed.
b. Refrigeration pipes or components are not installed in a corrosive environment.
c. Check electric wiring connections are tight and adhere to the electrical schematic
d. Check for water leaks around the machine and all new water connections
2. Refrigerant leak detection
a. Leak testing is prohibited in enclosed areas
b. Any source of ignition is prohibited during leak checks.
c. Leak detection fluids can be used with most refrigerants but the use of products containing
chlorine should be avoided as the chlorine may react with the refrigerant and corrode the
copper pipe.
d. Vacuum the machine completely before welding. Welding should only be carried out by a
professional person in a service center.
e. Please stop immediately if a gas leak occurs, and contact your local service center.
3. Trial Run
a. The circulation pump must start before the heat pump and stop after the heat pump to avoid
any damage occurring to the machine.
b. In order to protect the heat pump, the machine is equipped with a time lag start function, the fan
will run 1 minute earlier than the compressor when starting the machine, and it will stop running
1 minute later than the compressor when power off the machine.
c. After the heat pump starts, check for any abnormal noises from the machine.
Running status codes and corresponding values
4. Running status check
a. Press and hold for 5 seconds, a
beep sound should be heard and it will
enter into running status mode
b. Use and to switch through
the different values
c. Press again to quit can running
status mode
Symbol
Content
Unit
C0
Inlet water temp
℃
C1
Outlet water temp
℃
C2
Ambient temp
℃
C3
Exhaust temp
℃
C4
Outer coil pipe temp
℃
C5
Gas return temp
℃
C6
Inner coil pipe tem
℃
C9
Radiator temp
℃
C10
Electronic expansion
valve opening
P

www.madimack.com.au
14
F. Commissioning
1. Flow Rates
Each Pool Heat Pump has a minimum flow rate requirement please check the specification table
water flux section to ensure the circulation pump in use is adequately sized.
Calibrating the flow rate.
By using the running status function on the touch controller, it is easy to calibrate the check
valves installed for optimum flow rates through the heat pump.
OPTIMUM FLOW RATE DIFFERENTIAL FROM INLET TO OUTLET IS BETWEEN 2-3 DEGREES
Madimack Heat Pumps have a built-in flow switch which will deactivate the heating function if not
enough water flow is detected. The Heat Pump has a large range operation up to a
seven-degree differential. If the temperature differential is above 7 degrees, the flow switch or E6
Error will be displayed indicating not enough flow detected.
Recommended procedure
a. Fully open all valves including the by-pass and switch the unit on to max temp.
b. If Error E3 is displayed slowly close by pass valve until unit initiates.
c. Wait 3-4 minutes until heat pump is at 100% Capacity
d. Check inlet and outlet temperature through on screen controller running status check
e. Open the by-pass valve to increase temperature differential
f. Close the by-pass valve to decrease temperature differential
g. Once optimum temperature achieved lock position of by-pass if possible.

www.madimack.com.au
15
G. Maintenance
1. In the winter season when unit is not operating for long periods of time or if prone to freezing.
a. Switch off all power supply to prevent any machine damage.
b. Drain water completely from the machine.
c. Cover the machine body when not in use.
2. Only clean this machine with household detergents or clean water, NEVER use gasoline, thinners or
any similar fuel.
3. Check bolts, cables and connections regularly.
4. If repairs or removal is required, please contact an authorized service center.
5. Do not attempt to work on the equipment by yourself. Improper operation may cause danger.
6. To re d u ce ri sks , s a fe t y ins p e ctions must be carried out before the maintenance or repairing for heat
pumps with R32 gas.
!!Important:
Unscrew the water nozzle of inlet
pipe to let the water flow out.
When the water in machine freezes in
winter season, the titanium heat exchanger
may be damaged.
“
SWITCH OFF
”
power supply to the heater
before cleaning, examination or repairing
supply of the heater before cleaning,
examination and repairing

www.madimack.com.au
16
H. Trouble shooting for common faults
1. Repairing Guidance
-----------------------------------------------------------------------------------------------------------------------------------------
WARNING:
If repairs or removal is required, contact authorized service center.
Requirements for Service Personnel
a. Any person who is involved with working on or breaking into a refrigerant circuit should hold a
current valid certificate from an industry-accredited assessment authority, which authorizes their
competence to handle refrigerants safely in accordance with an industry recognized assessment
specification.
b. Do not attempt to work on the equipment by yourself. Improper operation may cause danger.
c. Strictly comply with the manufacturer's requirements when charging R32 gas and equipment
maintenance. This chapter focuses on special maintenance requirements for swimming pool heat
pump with R32 gas. Please refer to the technical service manual for detailed maintenance
operation.
d. Vacuum system completely before welding. Welding should only be carried out by professional
person in a service center.
2. Problems without an error code
----------------------------------------------------------------------------------------------------------------------------------------
Failure
Reason
Solution
Heat pump doesn’t run
No power
Wait until the power recovers
Power switch is off
Switch on the power
Fuse is broken
Check and change the fuse
The breaker is off
Check and turn on the breaker
Fan running but with
insufficient heating
Evaporator blocked
Remove the obstacles
Air outlet blocked
Remove the obstacles
3-minute start delay
Wait patiently
Display normal, but no heating
Set temperature too low
Set proper heating temp.
3-minute start delay
Wait patiently
If above solutions don’t work, please contact your installer with detailed information and your model
number. Please don’t try to repair it yourself.
Note: If the unit frequently breaks the circuit breaker, please stop the machine immediately by switching
off the main power and contact your dealer or local repair centre.
1. The fuse is frequently broken
2. Leakage circuit breaker activated

www.madimack.com.au
17
Protection & Failure code
NO.
Display
Protection code description
1
E3
No water flow protection
2
E5
Power supply excesses operation range
3
E6
Excessive temp difference between inlet and outlet water. Insufficient
water flow protection
4
Eb
Ambient temperature too high or too low protection
5
Ed
Anti-freezing reminder
NO.
Display
Failure code description
1
E1
High pressure protection
2
E2
Low pressure protection
3
E4
3 phase sequence protection (three phase only)
4
E7
Water outlet temp too high or too low protection
5
E8
High exhaust temp protection
6
EA
Evaporator overheat protection (only at cooling mode)
7
P0
Controller communication failure
8
P1
Water inlet temp sensor failure
9
P2
Water outlet temp sensor failure
10
P3
Gas exhaust temp sensor failure
11
P4
Evaporator coil pipe temp sensor failure
12
P5
Gas return temp sensor failure
13
P6
Cooling coil pipe temp sensor failure
14
P7
Ambient temp sensor failure
15
P8
Cooling plate sensor failure
16
P9
Current sensor failure
17
PA
Restart memory failure
18
F1
Compressor drive module failure
19
F2
PFC module failure
20
F3
Compressor start failure
21
F4
Compressor running failure
22
F5
Inverter board over current protection
23
F6
Inverter board overheat protection
24
F7
Current protection
25
F8
Cooling plate overheat protection
26
F9
Fan motor failure
27
Fb
Power filter plate No-power protection
28
FA
PFC module over current protection
This manual suits for next models
9
Table of contents
Other Madimack Heat Pump manuals
Popular Heat Pump manuals by other brands

Zodiac
Zodiac Z400 iQ Spare Parts/Accessories Instructions Manual

Pentair
Pentair ULTRATEMP 70 Installation and user guide

joule
joule Cyclone Installation & maintenance manual

Nibe
Nibe SOLAR 40 Installer manual

Black & Decker
Black & Decker BDXBT53 instruction manual

Bard
Bard W18HA-A installation instructions

Bard
Bard W18H2 installation instructions

Bryant
Bryant Preferred 225B Product data

Midea
Midea MCCU-14CN1 Technical manual

York
York YMB018 THRU 060 Technical guide

Ingersoll-Rand
Ingersoll-Rand A4AC4018A1000A Installer's guide

Crystal Enterprises
Crystal Enterprises BP-50HS-A Directions for installation and maintenance