manuals.online logo
Brands
  1. Home
  2. •
  3. Brands
  4. •
  5. Magnavox
  6. •
  7. TV
  8. •
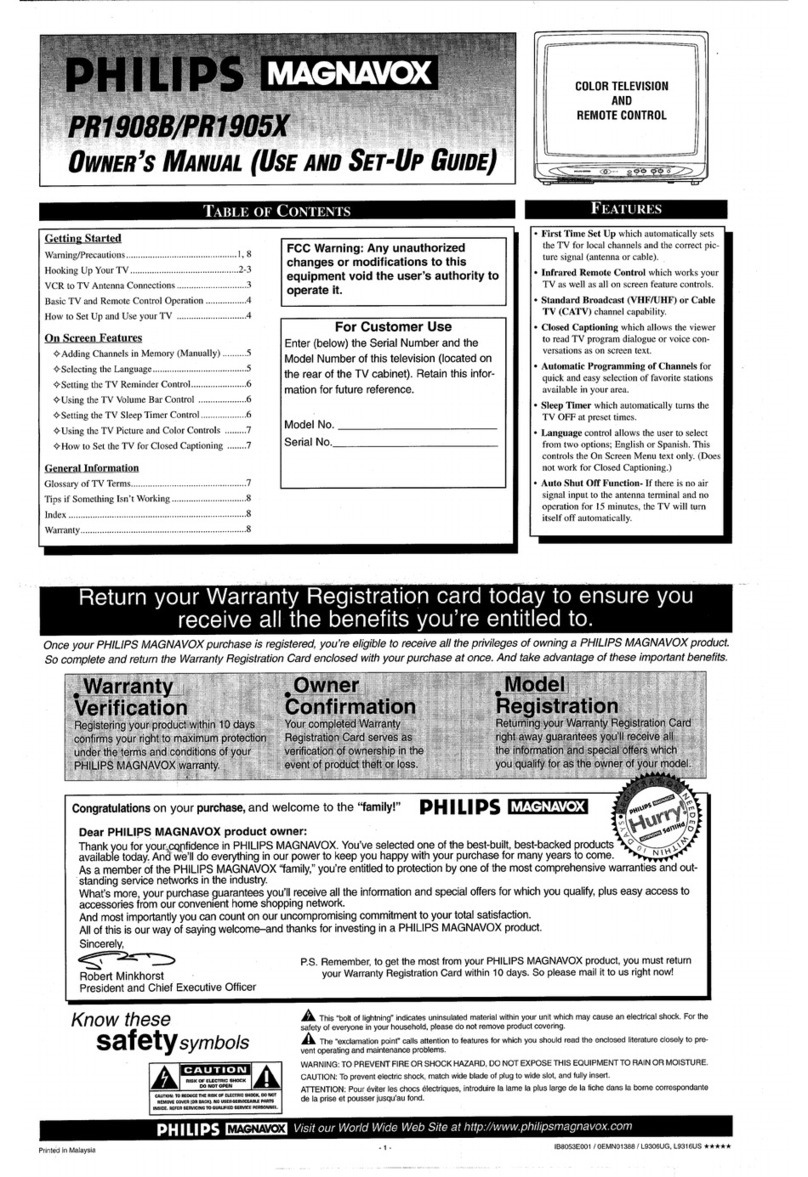
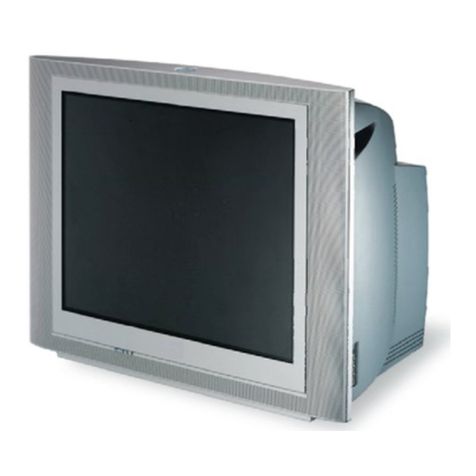
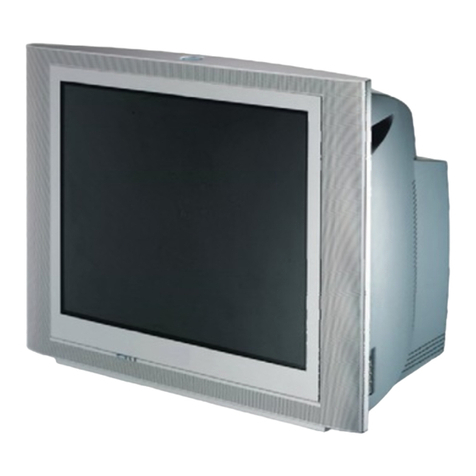
  9. Magnavox PR1916C121 User manual

Magnavox PR1916C121 User manual

AND
P&Jt c/ .l
[t_) Getting Started
Warning/Precautions .............................. l, 8
Hooking Up Your TV ................................ 2
VCR to TV Antenna Connections ............................. 2
Basic TV and Remote Control Operation ................. 3
How to Use the First Time Set-Up Control .............. 3
_--_ On-Screen Features
+Setting the TV for Cable TV Operation ............. 4
'¢,Adding Channels in Memory (Automatically)...4
+Adding Channels in Memory (Manually) .......... 4
_'Using the Surf Control ........................................ 5
+ Using the Smart Picture Control ........................ 5
'_Using the Smart Sound Control .......................... 5
_Adjusting the TVPicture .................................... 6
+Setting the TV Sleep Timer Control ................... 6
_Using the TV Volume Bar Control .................... 6
_-How to Set the TV for Closed Captioning ........7
+Using the On-Screen Language Option .............. 7
WGeneral Information
Glossary of TV Terms ................................................ 7
Tips if Something Isn't Working ............................... 8
Index .......................................................................... 8
Warranty ..................................................................... 8
• First Time Set Up which automatically scts the
TV for local channels and the correct picture
signal (antenna orcable).
• Infrared Remote Control which works your
TV as well as all on-screen feature controls.
• Standard broadcasl (VHF/UHF) or Cable
TV (CATV) channel capability.
• Closed Captioning which allows the viewer to
read TV program dialogue or voice conversa-
tions as on-screen te_t.
•Automatic Programming of channels for
quick and easy selection of favorite stations
available in your area.
On-Screen Features (in either English or
Spanish) which show helpful messages for
setting of TV controls (such as color adjustment,
timer settings, and channel memory.)
•Sleep-Timer which automatically turns the TV
OFF at preset times.
Smart Button for the control of TV Sound and
Picture levels. Use the Smart Button on the
remote to quickly adjust Smart Sound (to keep
volume levels consistent during program
changes or commercial breaks), and Smart
Picture (for automatic picture adjustments on a
variety of program sources).
Once your MAGNA VOX purchase is registered, you're eligible to receive all the privileges of owning a MAGNAVOX product. So corr_plete
and return the Warranty Registration Card enclosed with your purchase at once. And take advantage of these, important benefits.
Congratulationson your purchase,and welcome to the "family!" _VOX
Dear MAGNAVOX product owner: £mart. Very smart:
Thank you for your confidence in MAGNAVOX.You've selected one of the best-built, best-backed products
available today. And we'll do everything in our power to keep you happy with your purchase for many years to come.
As a member of the MAGNAVOX 'lamily," you're entitled to protection by one of the most comprehensive warranties and outstanding service networks in the
industry.
What's more, your purchase guarantees you'll receive all the information and special offers for which you qualify, plus easy access to accessories from our con-
venient home shopping network.
And most importantly you can count on our uncompromising commitment to your total satisfaction.
All of this is our way of saying welcome-and thanks for investing in a MAGNAVOX product.
Sincerely,
__"_='_ P.S. Remember, to get the most from your MAGNAVOX product, you must return your
Robed Minkhorst Warranty Registration Card within 10 days. So please mall it to hasright now!
President and Chief Executive Officer
Know these
safetysymbo/s
CAUT1ON:TO MDUaE THi RIOK OF ELIECTI_ I;HOCK. DOk_T
fliMOME CG_R IOR IIN:K), NO U4EI_ERVI_ABLIE p/Ug_ll
,llll_. MFEI_ M,MCJN_ TDOUALIFwD I_JWIC_ P_N_NNEL
A This "bolt of lightning" indicates uninsulated material within your unit may cause ar electrical shock. For the safety
of everyone in your household, please do not remove product covering.
A The "exclamation point" calls attention to features for which you should read the enclosed literature closely to pre-
vent operating and maintenance problems.
WARNING: TO PREVENT FIRE OR SHOCK HAZARD, DO NOT EXPOSE THIS EQUIPMENT TO RAIN OR MOISTURE.
CAUTION: To prevent electric shock, match wide blade of plug to wide slot, and fully insert.
ATTENTION: Pour 6viter les chocs 61ectriques, introduire la lame la plus large de la fiche dans la borne eorrespondante
de la prise et pousser jusqu'au fond.
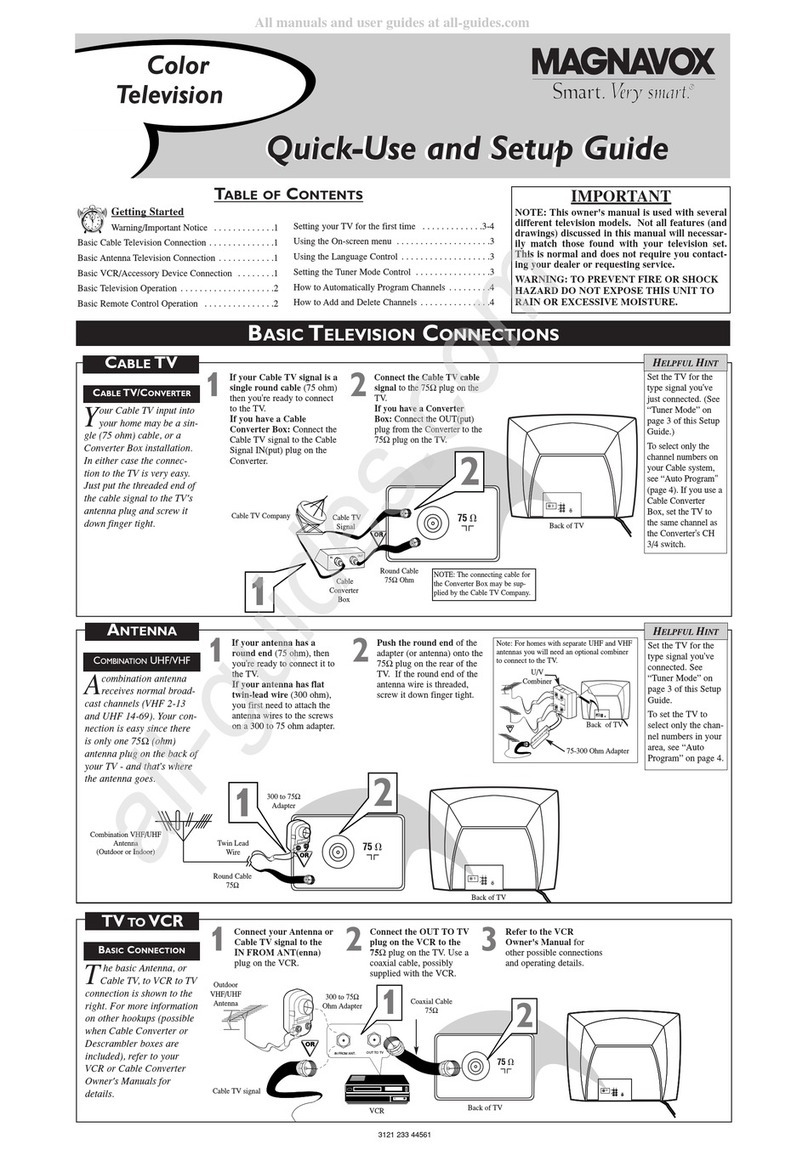
Vour Cable YV input
•into your home may be
a single (75 ohm) cable, or
a Converter Box installa-
tion. In either case the
connection to the TV is
very easy. Just put the
threaded end of the cable
signal to the TV's antenna
plug and screw it down
tight.
If your Cable TV sig-
nal is a single round cable (75
ohm) then you're ready to con-
nect to the TV.
If you have a Cable TV
Converter Box:
Connect the Cable TV signal to
the Cable Signal IN(put) plug
on the Converter.
Conn-ectctthe Cable TV
icable to the ANTENNA/CABLE
plug on the TV.
If you have a Cable TV
Converter Box:
Connect the OUT(put) plug
from the Converter to the
ANTENNA/CABLE plug on the
TV.
Cable TV Company Cable TV Signal Input
Cable TV Converter Round Cable
Box Connection 75_ Ohm
NOTE: The connecting cable for
the Converter is supplied from
the Cable TV Company. ]
Back of TV
Remember, g
set the TV for the
type signal you've
just connected (see
page 3 of this Set-
Up Guide.)
To select only the
channel numbers on
your Cable system
see "Auto Program"
(page 3). If you use
a Cable Converter
box, set the TV to
the same channel as
the converter's CH
3/4 switch (on the
rear of the convert-
er.)
normal
broadcast channels (VHF
2-13 and UHF 14-69).
Your connection is easy
since there is only one
75[2 (ohm) antenna plug
on the back of your TV-
and that's where the anten-
na goes.
oj you may have
separate antennas.
One antenna is for VHF
channels (2-13) and the
other antenna is for UHF
channels (14-69).
For homes with separate
UHF/VHF antennas, you
will need an optional
"combiner" before you can
connect to the TV. See the
"Smart Help" section (to
the right on this page)for
ordering details.
your antenna has a
round cable (75 ohm) on the
end, then you're ready to con-
nect it to the TV.
If your antenna has flat twin-
lead wire (300 ohm), you first
need to attach the antenna wires
to the screws on a 300 to 75
ohm adapter.
_Push the round end of the
adapter (or antenna) onto the
ANTENNA/CABLE plug on
the rear of the TV. If the round
end of the antenna wire is
threaded, screw it down tight.
Wire
300 to 75/2
Adapter )
Combination VHF/UHF Antenna
(Outdoor or Indoor) Round Cable
75[2
-_AAttach the separate
Outdoor UHF Antenna
(Twin-lead 300 Ohm)
Outdoor VHF Antenna
(Twin-lead 300 Ohm)
__ • L
<_Push the round end of the combiner
onto the ANTENNA/CABLE plug on I
[the rear of the TV.
U/V Combiner
Back of TV
Back of TV
Outdoor VHF Antenna
(Round 75 Ohm cable) 75-300 Ohm Adapter
Round Cable 75_
Remember, I
be sure to set the
TV for the type sig-
nal you've connect-
ed (see page 3 of
this Set-Up Guide.)
To set the TV to
select only the
channel numbers in
your area see how
to "'Program" or
"Add" channels in
memory on page 3.
To order any
optional accessory
contact your dealer
or call the toll-free
accessory ordering
number (1-800-292-
6066):
• UHF/VHF
Combiner:
(SBV 1133AO1)
• 75-300 Ohm
Adapter:
(SBVI I13AO1 )
• 300-75 Ohm
Adapter:
(483521827003)
_C e basic Antennu, or
able T_, to VCR to
TV connection is shown to
the right. For more infor-
mation on other hookups
(possible when Cable
Converter/Descrambler
boxes are included) refer
to your accessory VCR
and Cable Converter
Owner's Manual for
details.
Connect your
Antenna or Cable TV signal
to the IN FROM ANT(enna)
plug on the VCR.
_Connect the OUT TO TV
plug on the VCR to the
ANTENNA plug on the TV
(connecting cable supplied
with the VCR.)
Outdoor VHF/UHF _300 to 75['1 Ohm
_ .dapter _
y. -" " _. INFROM ANT,
Cable TV signal
<_Refer to the Owner's
Manual included with your
VCR for other possible con-
nections and TV/VCR operat-
ing details.
Round Cable
75(2 Supplied with VCR
Back of TV
VL'R
:he POWER
tutton to turn the TV ON.
ILJ
_2_--'_--_r_ss the VOLUME UP
(k) or DOWN (V) button to
adjust the sound level.
<_fJress the CHANNEL UP I
(A) or DOWN (Y) button to
select TV channels. €
Remclnbcr, !
You can press any
button on the front
of the TV to turn
the TV ON.
The tuned channel
number will always
briefly appear when
the TV is first
turned ON (and
with channel
changes.) You can
also press the STA-
TUS button (on the
remote) to see what
channel the TV is
ON.
lOad the supplied bat-
ries into the remote."
1. Remove the battery
compartment lid on the
back of the remote.
,Place the batteries (2-
AAA) in the remote. Be
sure the (+) and (-) ends
of the batteries line up
correctly (inside of case is
marked.)
3. Reattach the battery lid.
__hannel Scan Button
Press to scan up or down
through channel numbers.
Press to see the current channel number on the TV screen.
Also press this button to clear the TV screen after control
'adjustments.
Press the M button to show on-screen controls. Press Channel
A or • buttons to move through the list of controls. Press the
Volume (+, -) buttons to 'adjust the MENU controls.
Power Button
Press to turn TV ON arid OFF.
Volume t-I and €41 Bullims
Press to adjust the TV ,,,ound level. When used with the MENU but-
ton, press to adjust the gelected on-screen (MENU) feature controls.
Press to select weviously viewed channels.
For example: You are watching channel 4 and change to chan-
nel 10 (using the channel number buttons). Press SURF and
your TV will return to channel 4. Press SURF again and your
TV will return to channel 10. Turn to page (5) to see how the
"SURF" control is used to quickly select a series of channels.
l'qu ml_r Buttons
Press 1__o number buttons to select TV channels. For
channel 6..press "0" first; then "6".
SIt_u Button
Press to set the TV to automati-
cally turn itself OFF. See page (6)
for details.
Mute Button
Press to turn the sound OFF on the TV. Press again to
return the sound to its previous level.
Smart Button
Press to select automatic settings for TV Picture and
Sound. Smart Picture for factory preset video levels on a
variety of program sources, Smart Sound to control TV
sound levels during program changes or commercial
breaks. See page (5) for details.
_c e"SETUI'" on-.screen
ontrol is automatically
selected when you first plug-
in your TV and press the
MENU button (on the TV or
the remote.)
First Time Setup takes care
of some basic TV control set-
tings for you. Follow the
steps in this section to quick-
ly add area channel numbers
into the TV's memory, and set
the TV for your connected
signal (Antenna or Cable.)
Press the MENU (M)
button to select SETUP. Press
the VOLUME (+) button (on
the remote or TV) to show the
list of SETUP items.
Press CHANNEL • or • on
the remote (or MENU • or •
on the TV) to choose any
SETUP item listed.
2-_W-]th SELECT LAN-
GUAGE control highlighted,
press the VOLUME (+) button
to set the language of the TV's
Menu controls. (Either English
or Espanol/Spanish).
_With AUTO CABLE
SELECT control highlighted,
press (+) button to automatical-
ly set the TV to receive either
Cable TV or Antenna signals
(connected at the rear of the
TV.)
PROGRAM--
With
Icontrol highlighted, press (+)
]button to automatically add
Iavailable channels into the
[TV's memory.
I SETUP
DSELECT LANGUAGE I
fiZ*T
PRESS, TO
SELECT LANGUAGE
TV set to receive Cable
TV supplied channels.
ISETUP
DAUTO CABLE
_X_T
PRESS *TO
DETERMINE
IF CABLE CHANNELS ARE PRESENT
PLEASE WAIT
CABLECHANNELS
ARE PRESENT
NO
CABLECHANNELS
PRESENT
to receive Antenna
supplied channels.
PRESS ÷TO
AUTOPROGRAMCNANNELS
"RED" channel numbers
have been added to memory
r"__Press the
I__/ rernote's STATUS button
¢or use "EXIT")to back
I ! out of the SETUP Menu.
3
Remember, SETUP is a first-
use, one-time operation and
will not have to be repeated
(even if the TV is unplugged.)
If the SETUP Menu disappears
and you are not finished, just
press the MENU and (+) buttons
to return to the SETUP screen.
lfyou went
through First Time Setup
(page 3), this task has already
been completed for you.
You need to make sure that
the TV is set to pick up either
Cable TV stations or Antenna
signals. In other words, the
TV needs to know whether
you have connected a Cable
TV signal or a normal anten-
na to its ANTENNA plug (see
page 2).
Press the MENU (M)
button on the remote, then the
CHANNEL • or • buttons
(or press the MENU • or •
on the TV) to select the word
CABLE with the TV's on-
screen Arrow.
_Press the VOLUME (+)
or (-) buttons (on the TV or the
remote) to select either:
YES- If you DO have Cable
TV connected to the
TV. Channels 1-125
can be selected.
If you have an Antenna
connected to the TV.
Channels 2-69 can be
selected.
Try it out.
Press the CHAN-
NEL A• buttons
and scan the chan-
nels. CHAr works
only after STATUS
button is pressed to
clear the screen (or
Menu times out -
about 1 minute.)
Remember, to set
the TV to select the
channels on your
Cable system, or in
your area, see the
"Autoprogram" and
"Adding Channels "
in the section
below.
IJ you went
through First Time Setup
(page 3), this task has already
been completed for you.
Auto-Program is for adding
local area channel numbers
into the memory of the TE.
This makes it easy for you to
select only your area (or
Cable system) channels when
the CHANNEL ••buttons
are pressed.
Press the MENU (M)
button on the remote, then the
CHANNEL • or • buttons
(or the MENU • or • buttons
on the TV) to select the word
PROGRAM with the TV's on-
screen Arrow.
_ Press the VOLUME
button (on the TV or the (+)
remote) to PROGRAM.
_Press the VOLUME (+)
button again to start the TV
search for area channels.
Flashing channel numbers will
count upward on the screen as
the TV looks for channels to
"ADD".
.f_::.:.
PRESS .* TO AUTO
PROGRAM CHANNELS
<[_You may press any button
(on the TV or remote) to stop
the channel search at any time.
When the channel search is
completed the TV will return to
the last viewed channel.
The TV screen will be blocked
off until the search for channels
is done.
"RED" channel numbers have been
added to lhe TV's memory.
"WHITE" channel numbers are not
in the TV's program memory.
[--__Try it out. Press
_r,_/ CHANNEL •• buttons
]/_and see which channels
[ _ have been added.
To drop any unwanted channels
from the TV's memory, see
how to "Manually" delete
channels in the section below.
When searching for channels the
TV screen display may jitter
slightly. This is normal and does
not indicate a need for service.
uto-Program (see above)
adds all the channels it
can find (on your Antenna or
Cable TV system) into the
TV's memory. SavelDelete
channels makes it easy for
you to add other channels, or
drop unwanted channels,
from the list of channels in
the TV's memory.
Press the MENU (M)
button on the remote, then
the CHANNEL •or •but-
tons (or the MENU •or •
on the TV) to select the word
CHANNEL with the TV's on-
screen Arrow.
_P-ress Channel Number
buttons on the remote (or
CHANNEL •• buttons on the
TV) to select the channel you
want to SAVE (or DELETE.)
_Press the VOLUME (+)
button to SAVE the selected
channel number into memory.
Press (-) button to DELETE a
channel from memory.
_4_ Press the STATUS button
to clear the screen after adding
I(or deleting) all the channels
you want.
12
The channels you SAVED
should appear. The channels
you DELETED should not
appear.
To SAVE a channel above 100,
usetheCHAT buttonsonthe
TV. The remote number buttons
only go up to channel 99.
A eries oJ up to four previ-
ously viewed channels
can be selected from the
SURF button on your remote
control. With this feature you
can easily switch between
different TV programs that
currently interest you.
Press the MENU (M)
button on the remote, then
press the CHANNEL • or •
(or the MENU •or • buttons
on the TV) to select the word
SURF with the TV's on-screen
Arrow.
Press the VOLUME (+)
or (-) buttons to select the
number of channels. (Either 2,
3, or 4 channels.)
'_Press STATUS button on ]
the remote control to clear the /
screen. /
2 CHANNEL SURF - Current and
I one previous channel.
I3CHANNEL SURF - Current and
two previous channels.
I4 CHANNEL SURF - Current and
Ithree previous channels.
IANNELSURF
Remcmber, li
to use SURF, first
select the desired
channels with the
number buttons on
the remote. (For
example: 02, 06, 11,
and 22.) Then press
the SURF button on
the remote to quick-
ly select the chan-
nels..
Try it out. Enter
the number of
desired channels
and then press the
SURF button. You
should see only the
2, 3, or 4 channels
you selected for
SURE Great for
viewing evening
news or sports pro-
gramming.
ether you're watching
movie or a video
game your TV has automatic
9icture settings matched for
your current program source
or content. The Smart Picture
feature quickly resets your
TV's picture for a number of
different types of programs
and viewing conditions you
may have in your home.
Each Smart Picture setting is
Preset at the factory to auto-
matically adjust the TV's
Brightness, Picture, Color,
Tint, and Sharpness levels.
_Press the Smart button
on the remote.
Press the Menu (M) • or •
button to select the desired
Smart Menu feature (highlight-
ed with arrow).
_With the Smart Picture
control selected, press the (+)
or (-) button repeatedly to select
any of the preset viewing cate-
gories (Example: Video Games,
Movies, etc.).
<_Press the STATUS
to clear the screen, button
Remember,
the Smart Picture
settings are stored
into the TV at the
factory and can
only be reset by
field and service
technicians.
re you tired of thc" s_)_t_d
commercials following
you into the next room or all
through the house? Smart
Sound allows you to keep a
desired volume level that the
TV sound will not go above.
This makes for an even, more
consistent sound by reducing
the peaks and valleys that
can occur during program
changes or commercial
breaks.
ess the Smart button
on the remote.
Press the Menu (M) • or •
button to select the desired
Smart Menu feature (highlight-
ed with arrow).
With the Smart Sound
control selected, press the (+)
or (-) button to turn the volume
level control ON or OFF.
'_Press the STATUS button
to clear the screen when com-
pleted.
':_,'::_ S MART
DSOUNO
_c adjust youl 7V picture
ontrols, select a channel
and follow the steps shown to
the right.
NOTE: The Smart Picture
control can automatically
adjust your TV°s picture for a
variety of programs and
viewing conditions. See page
5 for details.
Press the MENU (M)
button on the remote, then
press the CHANNEL •or •
(or press MENU • or • but-
tonson the TV) until the desired
control shows on-screen.
[z2_ Pr--_-_ssthe VOLUME (+)
and (-) to adjust the selected
picture control.
,_P--_-_ STATUS button (or 1
i IEXIT Menu) to clear the screen/
Iwhen picture adjustments are I
Ic°mpleted' I_
ORIGHTI'd_S_
DPICTURE
Renieniber, Iil
with the bar scale
centered the control
settings are at nor-
mal mid-range lev-
els.
IgRIFAt.T./iF.,,S_
Press (-) or (+) until
darkest parts of the
picture are as bright
as you prefer.
PICTURE Press
(-) or (+) until light-
est parts of the pic-
ture show good
detail.
COLOR Press (-)
or (+) to add or
eliminate color.
TINT Press (-) or
(+) to obtain natural
skin tones.
£JtARES£,g_
Press (-) or (+) to
improve detail in
the picture.
ve you eveJ jallen
sleep in front of the 7V
only to have it wake you up
at two in the morning with a
test pattern screeching in
your ears? Well, your TV
can save you all that trouble
by automatically turning
litself off.
_ss the SLEEP but-
ton on the remote.
Press the MENU (M) button
on the remote, then press the
CHANNEL •or • (or press
the MENU •or • buttons on
the TV) to select the word
SLEEP with the TV's on-
screen Arrow.
I
_ Press the SLEEP button
repeatedly to pick the amount
of time (15 minutes to 2 hours
ahead) before the TV will turn
itself off.
The VOLUME (+) or (-) but-
tons can also be used to set the
amount of time.
_Press the STATUS button
to clear the screen after you
have set the time for the TV to
turn off.
A few seconds before the TV is
to shut off a message will come
on the screen telling you
GOOD NIGHT.
Remember. ID
If you ever want to
see how many min-
utes are left before
the TV shuts itself
off, press the STA-
TUS button on the
remote.
If you want to stop
a SLEEP TIMER
setting, reset the
timer back to OFF.
You could also turn
the TV off, and then
back on again, to
cancel a setting.
Pressing any key on
the remote or TV in
the last 60 seconds
will cancel the
SLEEP TIMER set-
ting.
e the Volume Bar con-
rol to see the TV's vol-
ume level settings on the TV
screen. Once set the Volume
Bar will be seen each time
the VOLUME buttons (on the
TV or remote) are pressed.
MENU (M)
button on the remote, then
press the CHANNEL • or •
(or press the MENU • or •
buttons on the TV) to select the
word VOL. BAR with the
TV's on-screen Arrow.
,<_P--_ess the VOLUME (+)
or (-) buttons to turn the VOL
BAR control ON or OFF.
<_Press STATUS button to
clear the screen. l
_;_i_::_i_i_:_:_:_::ii_i::i::ii_:iii::!ii_ii::::::_:ii7_:_:::_:::iiii_:_i__::_;:_...........
LVOLUME III_I_ '''''--'
Try it out. _[
Press the VOL••
buttons. The VOL-
UME BAR should
appear at the bot-
tom of the screen.
NOTE: The TV's
volume level can
also be lowered
when the set is
turned OFF.
tOSed Captioning allows
ou to read the voice
content of television pro-
grams on the TV screen.
Designed to help the hearing
impaired, this feature uses
on-screen "text boxes" to
show dialogue and conversa-
tions while the TV program is
in progress.
Note: Broadcast stations will
often use spelling abbrevia-
tions, symbols, dropouts and
other grammatical shortcuts
in order to keep pace with the
on-screen action. These type
factors vary upon the source
of the captioned text material
and do not indicate a need
for service on the part of the
TV.
MENU (M)
button on the remote, then
press the CHANNEL •or •
(or press the MENU •or •
buttons on the TV) to select the
word CAPTION with the TV's
on-screen Arrow.
-a--..
_'-_IPress vOLUME (+) or (-)
buttons to select the desired
Closed Caption (CC) mode -
For Example: CAPTION 1.
Note: _ "CAPTION 1" is
the most used mode to view
captioned material. Caption
modes 2, 3, and 4 are seldom
used by broadcast stations.
_'_P---re_essthe STATUS button
after making your Caption
mode selection. The TV dis-
play will clear and Captioning
material (if available on the
currently selected TV program)
will appear on the TV screen.
To cancel, set the CAPTION
feature to OFF when finished
viewing.
NOTE: The "CCI W/MUTE" setting automatically
swtiches the TV to the Closed Caption 1 mode
whenever the MUTE button (on the remote control)
is pressed. The Closed Caption 1 mode will turn
OFF when the TV sound is returned or unmuted.
Remember, g
not all TV programs
and product com-
mercials are made
for broadcast with
Closed Caption
(CC) information
included. Neither
are all Closed
Caption modes
(CAPTION 1-4, or
TEXT 1-4)) neces-
sarily being used by
a broadcast station
during the transmis-
sion of a closed
caption program.
Refer to your area's
TV program listings
for the stations and
times of Closed
Caption shows.
6
iThis symbol will appear with chan-
nels that contain Closed Captioning
material.
CAPTION 1, 2, 3, or 4 mode: dia-
logue (and descriptions) for the action
on the captioned TV program shows
on-screen. (See Smart Help on this
page.)
TEXT 1, 2, 3, or 4 mode: often used
for channel guide, schedules, or bulletin
board information for CC programs.
Text mode blocks the TV screen.
_BEGUN_
ljyou went
through First Time Setup
(page 3), this task has already
been completed for you.
For our Spanish speaking TV
owners an on-screen LAN-
GUAGE option is present.
With the LANGUAGE control
you can set the TV's on-
screen features to be shown in
either English or Spanish
text.
Press MENU (M)
button on the remote, then
press the CHANNEL • or •
(or press the MENU • or •
buttons on the TV) to select the
word LANGUAGE with the
TV's on-screen Arrow.
_Press the VOLUME (+)
or (-) buttons to select either
the English or Spanish
(ESPANOL) language option.
Text for the on-screen Menu
will change to the selected lan-
guage.
'<_Press STATUS button on
I ]the remote control to clear the
\
w_
+utllllll|HHII
Remember.
The Language con-
trol only makes the
TV's on-screen
(MENU) items
appear in English or
Spanish text. It does
not change the lan-
guage of other on-
screen text features
such as Closed
Captioned (CC) TV
shows.
Coaxial Cable * A single solid antenna wire normally matched with a metal plug (F-type)
end connector that screws (or pushes) directly onto a 75 Ohm input found on the Television
or VCR.
Display * An on screen message or graphics that help the user operate and adjust his
Television feature controls. See On Screen Displays (OSD).
On Screen Displays (OSD) * Refers to the wording or messages generated by the televi-
sion (or VCR) to help the user with specific feature controls (color adjustment, program-
ming, etc.).
Menu * An on-screen listing of feature controls shown on the Television screen that are
made available for user adjustments.
Programming * The procedure of adding or deleting channel numbers into the Television's
memory circuits. In this way the Television "remembers" only the locally available or desired
channel numbers and skips over any unwanted channel numbers.
Remote Sensor Window * A window or opening found on the Television control panel
through which infrared remote control command signals are received.
Status * Allows the user to quickly confirm what channel number is currently being viewed.
Status can also be used to clear the Television of on screen displays or information (rather than
waiting for the displays to "time out" or automatically disappear from the screen).
Twin Lead Wire * The more commonly used name for the two strand 300 Ohm antenna wire
used with many indoor and outdoor antenna systems. In many cases this type of antenna wire
requires an additional adapter (or balun) in order to connect to the 75 Ohm Input terminals
designed into the more recent Televisions and VCRs.
lease make these simple
checks before calling for
service. Theses tips can save
you time and money since
charges for TV installation
and adjustment of customer
controls are not covered
under your warranty.
CAUTION: A video source
(such as a video game,
Compact Disc Interactive -
CDI, or TV information
channel) which shows a con-
stant non-moving pattern on
the TV screen, can cause pic-
ture tube damage. When not
in use, turn the video source
OFF. Regularly alternate the
use of such video sources
with normal TV viewing.
No Power
Check the TV power cord.
Unplug the TV, wait 1
minute, then reinsert plug
into outlet and push POWER
button again.
Check to be sure outlet is not
on a wall switch.
This TV is equipped with
protective circuitry that shuts
the TV off in case of moder-
ate power surges. Should
this occur turn the TV back
on by pressing the POWER
button once or twice, or
unplug (wait 10 seconds) and
then replug the power cord at
the AC outlet. This feature is
NOT designed to prevent
damage due to high power
surges such as those caused
by lightning, which is not
covered by your warranty.
•Check the VOLUME buttons.
Check the MUTE button on
the remote control.
No Picture
•Check the CABLE/YES NO
control for correct position.
•Check antenna connections
on the rear of the TV. Are
they properly secured to the
antenna plug on the TV?
Re-mote Doesn't
Work
Check batteries. Replace
with AAA Heavy Duty (Zinc
Chloride) or Alkaline batter-
ies if necessary.
Clean the remote and the
remote sensor window on the
TV.
Check the TV power cord.
Unplug the TV, wait 1
minute, then reinsert plug
into outlet and push POWER
button again.
Wrong Channel
(9r no Channels
above 13)
• Repeat channel selection.
• Add desired channel num-
bers (CHANNEL control)
into TV memory.
• Check CABLE/ YES NO
control for correct position.
Cleanine and Care
inplug the TV before clean-
ing.
Avoid using anything abra-
sive that could scratch the
screen.
• Wipe the TV screen with a
clean cloth dampened with
water.
• Gently wipe cabinet surfaces
with a clean cloth or sponge
dampened with cool clear
water. Use a clean dry cloth
to dry the wiped surfaces.
• Occasionally vacuum the
ventilation holes or slots in
the cabinet back.
Accessories ............ 2
Add Channels .......... 4
Surf .................. 5
Antenna Connect ........ 2
Autoprogram ........... 4
Batteries ............... 3
Cable TV Connect ....... 2
Cable TV Control ........ 4
Display ............... 3
Channel Memory ........ 4
Closed Caption .......... 7
Coaxial Cable .......... 2
Controls/TV ............ 3
Controls/Remote ........ 3
Features ............... 1
First Time Use .......... 3
Glossary .............. 7
Language ............. 7
Menu Button ........... 3
Minus(-) Buttons ........ 3
Plus(+) Button .......... 3
Precautions ........... 1, 8
Programming ........... 4
Remote Control ......... 3
Service ................ 8
RF Cable .............. 2
Safety Notes ............ 1
Sensor Remote .......... 3
SETUP ................ 3
Sleep Timer ............ 6
Smart Picture ........... 5
Smart Sound ........... 5
Status Button ........... 3
Tips for Service ......... 8
VCR Connections ....... 2
Volume Bar ............ 6
Warranty .............. 8
COLOR TELEVISION
90 Days Free Labor
One Year Exchange Warranty on Parts (Two Years Exchange Warranty on Color Picture Tube)
This product must be carried in for repair.
WHO IS COVERED?
You must have proof of purchase to receive warranty service. A sales receipt or other
document showing that you purchased the productis considered proof of purchase.
WHAT IS COVERED?
Warrantycoveragebegins theday youbuy yourproduct. For90 daysthereafter,all
parts willbe repairedor replaced,and laboris free. From90 days toone year from
theday ofpurchase, all partswillbe repairedor replaced,butyou pay for all labor
charges. Fromone totwoyearsfromtheday ofpurchase, you payfor thereplace-
mentor repairofall partsexceptthecolorpicturetube,and for all laborcharges.
Aftertwo years from theclayofpurchase, youpay for the replacementor repairofall
parts,and for all laborcharges.
All parts,includingrepairedand replacedparts,are coveredonlyfor the originalwar-
rantyperiod. When thewarrantyonthe productexpires,thewarrantyon all replaced
and repairedpartsalso expires.
WHAT IS EXCLUDED?
Yourwarrantydoes not cover:
•labor chargesfor installationorsetupofthe product,adjustmentofcustomercon-
trolsonthe product,and installation or repairof antennasystemsoutsideof the
product.
•productrepairand/orpart replacementbecause of misuse,accident,unauthorized
repairor othercausenotwithinthe controlof PhilipsConsumerElectronics
Company.
•receptionproblemscausedby signalconditionsor cableor antennasystemsout-
sidethe unit.
•a productthat requiresmodificationor adaptationto enableit tooperatein any
countryotherthan the countryfor whichit was designed,manufactured,approved
and/orauthorized,or repairofproductsdamaged bythesemodifications.
• incidentalor consequentialdamagesresultingfrom theproduct. (Somestatesdo
notallowthe exclusionofincidentalor consequentialdamages,so the above
exclusionmay notapplyto you. This includes,butisnotlimitedto, prerecorded
material,whethercopyrightedor notcopyrighted.)
•a productusedforcommercialor institutionalpurposes.
WHERE IS SERVICE AVAILABLE?
Warranty service is available in all countries where the product is officially distributed
by Philips Consumer Electronics Company. In countries where Philips Consumer
Electronics Company does not distribute the product, the local Philips service organi-
zation will attempt to provide service (although there may be a delay if the appropriate
spare parts and technical manual(s) are not readily available).
MAKE SURE YOU KEEP...
Pleasekeep your sales receipt or other document showing proof of purchase. Attach
it to this owner's manual and keep both nearby. Also keep the original box and pack-
ing material in case you need to return your product.
BEFORE REQUESTING SERVICE...
Pleasecheck your owner's manual before requesting service. Adjustments of the
controls discussed there may save you a service call.
TO GET WARRANTY SERVICE IN U.S.A., PUERTO RICO OR U.S.
VIRGIN ISLANDS...
Takethe product to a Philips factory service center (see enclosed list) or authorized
service center for repair. When the product has been ,'epaired,you must pick up the
unitat the center. Centers may keep defective parts.
(In U.S.A., Puerto Rico and U.S.Virgin Islands, all implied warranties, including
implied warranties of merchantability and fitness for a particular purpose, are limited
in duration to the duration of this express warranty. Because some states do not
allow limitations on how long an impliedwarranty may last, this limitation may not
apply to you.)
TO GET WARRANTY SERVICE IN CANADA ....
Taketheproduct to a Philipsconsumerservicecenter(listedbelow),self-servicing
dealeror authorizedservice depot.
PhilipsElectronicsLtd.
601 MilnerAvenue, Scarborough,Ontario, M1B 1M8
(416) 292-5161
4977 LevyStreet, St. Laurent,Quebec, H4R 2N9
(514) 956-0210
1741 BoundaryRoad., Vancouver,B.C., V5M 3Y7
(604) 294-3441
(In Canada,thiswarrantyisgiveninlieuofall otherwarranties. No otherwarranties
are expressedor implied,includingany impliedwarrantiesof merchantabilityorfit-
nessfor a particularpurpose. Philipsisnotliableunderanycircumstancesfor any
direct,indirect,special,incidentalorconsequentialdamages,howsoeverincurred,
even ifnotifiedofthe possibilityofsuchdamages.)
REMEMBER...
Pleaserecordthe modeland serial numbersfound on theproductbelow. Also,
pleasefill out and mailyour warrantyregistrationcard promptly. Itwillbe easier forus
to notify you if necessary.
MODEL #
SERIAL #
Phillps Service Company, P.O.Box 555, Jefferson City,Tennessee 37760
(423) 475-8869
IB7410-E001 8

Other Magnavox TV manuals

Magnavox \ User manual

Magnavox

Magnavox \ User manual

Magnavox U26-O1AA Installation instructions

Magnavox

Magnavox U26-O1AA Installation instructions

Magnavox 27MS343S User manual

Magnavox

Magnavox 27MS343S User manual

Magnavox MS2730C - 27i Color Tv Manual

Magnavox

Magnavox MS2730C - 27i Color Tv Manual

Magnavox 32MT6015D - 32" Integrated Real Flat Sdtv Owner's manual

Magnavox

Magnavox 32MT6015D - 32" Integrated Real Flat Sdtv Owner's manual

Magnavox TP2592 User manual

Magnavox

Magnavox TP2592 User manual

Magnavox \ User manual

Magnavox

Magnavox \ User manual

Magnavox 20MS3442/17OM User manual

Magnavox

Magnavox 20MS3442/17OM User manual

Magnavox 32MV319R User manual

Magnavox

Magnavox 32MV319R User manual

Magnavox 42MF438B - 42" LCD TV User manual

Magnavox

Magnavox 42MF438B - 42" LCD TV User manual

Magnavox 40MF401B/F7 User manual

Magnavox

Magnavox 40MF401B/F7 User manual

Magnavox 47MF439B - 47" LCD TV User manual

Magnavox

Magnavox 47MF439B - 47" LCD TV User manual

Magnavox 43ME347V User manual

Magnavox

Magnavox 43ME347V User manual

Magnavox 20MS334R - 20" Real Flat User manual

Magnavox

Magnavox 20MS334R - 20" Real Flat User manual

Magnavox 37MF231D - Hook Up Guide User manual

Magnavox

Magnavox 37MF231D - Hook Up Guide User manual

Magnavox \ User manual

Magnavox

Magnavox \ User manual

Magnavox 27MT5405 - 27" Hdtv Monitor User guide

Magnavox

Magnavox 27MT5405 - 27" Hdtv Monitor User guide

Magnavox PR1397 User manual

Magnavox

Magnavox PR1397 User manual

Magnavox 23MT2336 - 23" Stereo Tv User manual

Magnavox

Magnavox 23MT2336 - 23" Stereo Tv User manual

Magnavox 17MD255V User manual

Magnavox

Magnavox 17MD255V User manual

Magnavox 40MV336X User manual

Magnavox

Magnavox 40MV336X User manual

Magnavox 46ME313V/F7 A User manual

Magnavox

Magnavox 46ME313V/F7 A User manual

Magnavox TS2573C10 User manual

Magnavox

Magnavox TS2573C10 User manual

Magnavox 32MD350B/F7 User manual

Magnavox

Magnavox 32MD350B/F7 User manual

Popular TV manuals by other brands

GE GE TV user guide

GE

GE GE TV user guide

Nexus NX4203S120 user manual

Nexus

Nexus NX4203S120 user manual

Panasonic TX-32CW304 operating instructions

Panasonic

Panasonic TX-32CW304 operating instructions

Panasonic QuintrixF TX-29PS1D operating instructions

Panasonic

Panasonic QuintrixF TX-29PS1D operating instructions

Logik L26FE12I instruction manual

Logik

Logik L26FE12I instruction manual

Skyvue OBX-32000-L owner's manual

Skyvue

Skyvue OBX-32000-L owner's manual

Sony Bravia KD-65X80K Setup guide

Sony

Sony Bravia KD-65X80K Setup guide

Philips Matchline 46PP910A user manual

Philips

Philips Matchline 46PP910A user manual

Toshiba 27AF46C Service manual

Toshiba

Toshiba 27AF46C Service manual

Sanyo CM21KX81 Service manual

Sanyo

Sanyo CM21KX81 Service manual

Samsung HLR5078WX Service manual

Samsung

Samsung HLR5078WX Service manual

Samsung PS-42D51S Owner's instructions

Samsung

Samsung PS-42D51S Owner's instructions

Philips TPM16.1L Service manual

Philips

Philips TPM16.1L Service manual

Westinghouse CW40T2RW user manual

Westinghouse

Westinghouse CW40T2RW user manual

Panasonic TX-P58V10E operating instructions

Panasonic

Panasonic TX-P58V10E operating instructions

Panasonic TX-32PX20P operating instructions

Panasonic

Panasonic TX-32PX20P operating instructions

Toshiba 43U6763DAT operating instructions

Toshiba

Toshiba 43U6763DAT operating instructions

Hisense 32D20 Quick setup guide

Hisense

Hisense 32D20 Quick setup guide

manuals.online logo
manuals.online logoBrands
  • About & Mission
  • Contact us
  • Privacy Policy
  • Terms and Conditions

Copyright 2025 Manuals.Online. All Rights Reserved.