manuals.online logo
Brands
  1. Home
  2. •
  3. Brands
  4. •
  5. magnetoplan
  6. •
  7. Whiteboard
  8. •
  9. magnetoplan Infinity Wall X User manual

magnetoplan Infinity Wall X User manual

Infinity Wall X
X
Montageanleitung
Mounting Instructions
Infinity Wall X
Artikel Art-Nr. Magnetische Montageplatten* Klebepunkte* Schrauben* Dübel*
Article Art-No. Magnetic assembly plates** Adhesive Dots* Screws Dovels**
Infinity Wall X, 880 x 1180 mm (B x H)
Infinity Wall X, 880 x 1180 mm (W x H)
1040400 2 4 8 8
Infinity Wall X, 980 x 1980 mm (B x H)
Infinity Wall X, 980 x 1980 mm (W x H)
1041100 4 2 16 16
Infinity Wall X, Projection, 1180 x 1890 mm (B x H), Format 16:10
Infinity Wall X, Projection, 1180 x 1890 mm (W x H), Size 16:10
1041401 4 2 16 16
Herzlichen Glückwunsch
zu Ihrem Kauf!
Verpackungsinhalt - pro Tafel | Package contents – per board
Benötigtes Werkzeug | Required tools:
DE // Gutes Design macht Qualität sichtbar
Wir gratulieren Ihnen zum Kauf Ihres neuen magnetoplan Qua
li-
tätsprodukts. Wie kein anderer Hersteller von visuellen Kommu-
nikations- und Präsentationsmittel haben wir für Sie in den letz-
ten Jahren ein konsequent aufeinander abgestimmtes Sortiment
entwickelt, das von A – Z auf Design und Ästhetik abgestimmt ist.
Für die einwandfreie Wandbefestigung Ihrer Infinity Wall X oder
Infinity Wall X, Projection, beachten Sie bitte nachfolgende Mon-
tageanleitung. Sollten Sie Fragen haben, wenden Sie sich bitte
an unseren Customer-Service,
Tel: 06122 / 709-0.
Ihr magnetoplan-Team aus Wiesbaden
EN // Good design makes quality visible
We would like to thank you for purchasing a magnetoplan
high-quality product. Unlike any other visual communication
and presentation media manufacturer, we have developed a
range of products for you in recent years which are systemati-
cally conceived to be compatible with each other from A – Z in
terms of design and aesthetics.
Please pay attention to the following assembly instructions to
ensure that you mount your Infinity Wall X or Infinity Wall X,
Projection correctly. If you have any questions, please call our
customer service on: +49 (0)6122 709-0.
Your magnetoplan team in Wiesbaden
16 x
8x
16 x
8x
4x
2x
* pro Paneel ** per panel
Art-Nr. | Art-No. 1040400
Art-Nr. | Art-No. 1041100
1041401 2x
4x
DE // Anbringung magnetische Montageplatten
Befestigen Sie die Magnetplatten (300 x 300 mm)
an der Wand, wie auf den Zeichnungen dargestellt.
EN // Attaching magnetic assembly plates
Fix the magnetic assembly plates (300 x 300 mm) onto the
wall as shown in the plans.
4x Dübel Ø 6mm
4x dowels Ø 6mm
1x Magnetplatte 300 x 300 mm
1x magnetic assembly plates 300x300 mm
4x Schrauben 4x40
4x screws 4x 40
DE // Die mitgelieferten Schrauben und Dübel sind für Stein-
wände vorgesehen. Bei anderen Arten von Trägerwänden
verwenden Sie bitte angemessenes Montagematerial.
Achten Sie darauf, dass der Schraubenkopf tief genug
in die Montageplatte versenkt werden kann, ohne
überzustehen. Auf diese Weise wird die magnetische
Tragkraft gewährleistet.
EN // The screws and dowels included are intended for stone
walls. For other types of support walls, please use ap-
propriate assembly materials. Make sure that the screw
head can be inserted deep enough into the assem-
bly plate without protruding in order to
guarantee the magnetic load-bearing capacity.
DE // Achten Sie darauf, dass die Wand eben ist und der
Montage nichts im Wege steht.
Die magnetische Oberfläche der Montageplatte muss
für optimale Tragkraft vollkommenen Kontakt mit der
Rückseite des Whiteboards herstellen. Montieren Sie
die Montageplatten so, dass sie eine glatte Oberfläche
ergeben.
EN // Make sure that the wall is even and that nothing is
impairing installation. The magnetic surface of the
assembly plate must make complete contact with the
back of the whiteboard to ensure optimum load-
bearing capacity. Mount the assembly plates in such
a way that they form a smooth surface.
DE // Bei Unebenheiten benutzen Sie bitte Füllplatten, die in
verschiedenen Stärken im Baumarkt erhältlich sind (nicht
im Lieferumfang enthalten).
EN // If the surface is uneven, please use filler plates which are
available in various thicknesses in hardware stores (not
included in the delivery contents).
2
DE //
2
DE //
Bei Unebenheiten benutzen Sie bitte Füllplatten, die in
2
Bei Unebenheiten benutzen Sie bitte Füllplatten, die in
verschiedenen Stärken im Baumarkt erhältlich sind (nicht
2
verschiedenen Stärken im Baumarkt erhältlich sind (nicht
im Lieferumfang enthalten).
2
im Lieferumfang enthalten).
EN //
2
EN //
If the surface is uneven, please use filler plates which are
2
If the surface is uneven, please use filler plates which are
available in various thicknesses in hardware stores (not
2
available in various thicknesses in hardware stores (not
included in the delivery contents).
2
included in the delivery contents).
1
DE //
1
DE //
Achten Sie darauf, dass die
1
Achten Sie darauf, dass die
Montage nichts im Wege steht.
1
Montage nichts im Wege steht.
Die magnetische Oberfläche der Montageplatte muss
1
Die magnetische Oberfläche der Montageplatte muss
für optimale Tragkraft
1
für optimale Tragkraft
Rückseite des Whiteboards
1
Rückseite des Whiteboards
die Montageplatten so, dass sie eine glatte Oberfläche
1
die Montageplatten so, dass sie eine glatte Oberfläche
ergeben.
1
ergeben.
DE // Kontrollieren Sie, ob die Montageplatten eine glatte Ober-
fläche ergeben, indem Sie eine Wasserwaage genau über
2 Montageplatten legen. Die Wasserwaage muss platt
auf beiden Montageplatten aufliegen. Wenn erforder-
lich, justieren Sie bitte die Füllplatten.
EN // Check whether the assembly plates produce a flat
surface by placing a water level right on top of 2
assembly plates. The water level must lie flat on both
assembly plates. If necessary, please adjust the filler
plates.
3
DE //
3
DE //
Kontrollieren Sie, ob die Montageplatten eine glatte Ober-
3
Kontrollieren Sie, ob die Montageplatten eine glatte Ober-
fläche ergeben, indem Sie eine Wasserwaage genau über
3
fläche ergeben, indem Sie eine Wasserwaage genau über
2 Montageplatten legen. Die
3
2 Montageplatten legen. Die
auf beiden Montageplatten aufliegen
3
auf beiden Montageplatten aufliegen
lich, justieren Sie bitte die Füllplatten.
3
lich, justieren Sie bitte die Füllplatten.
EN //
3
EN //
Check whether the assembly plates produce a flat
3
Check whether the assembly plates produce a flat
4
DE //
4
DE //
Die mitgelieferten Schrauben und Dübel sind für Stein-
4
Die mitgelieferten Schrauben und Dübel sind für Stein-
wände vorgesehen. Bei anderen Arten von Trägerwänden
4
wände vorgesehen. Bei anderen Arten von Trägerwänden
verwenden Sie bitte angemessenes Montagematerial.
4
verwenden Sie bitte angemessenes Montagematerial.
Achten Sie darauf, dass der
4
Achten Sie darauf, dass der
in die Montageplatte versenkt
4
in die Montageplatte versenkt
überzustehen. Auf diese Weise wird die magnetische
4
überzustehen. Auf diese Weise wird die magnetische
Tragkraft gewährleistet.
4
Tragkraft gewährleistet.
Infinity Wall X
Infinity Wall X
1040400 - 880 x 1180 mm (B x H)
DE // Positionierung der Montageplatten, 1 Paneele
Bei einer Paneele der Infinity Wall X werden die Montageplatten
wie auf der Abbildung unten angebracht. Wichtig ist ausreichend
Abstand zu den Seiten.
EN // Positioning the assembly plates, 1 panel
When positioning 1 Infinity Wall X panel, the assembly plates
must be affixed as shown in the figure below. It is important to
ensure there is sufficient space to the sides.
DE // Positionierung der Montageplatten, 2 Paneele
Bei 2 Paneelen der Infinity Wall X werden die Montageplatten
wie auf der Abbildung unten angebracht. Jeweils 2 Platten pro
Paneele werden am äußeren Ende angebracht. Weitere 2 Platten
aus dem Lieferumfang der zweiten Paneele verbinden diese und
sorgen für extra starken Halt. Wichtig ist ausreichend Abstand zu
den Seiten.
EN // Positioning the assembly plates, 2 panels
When positioning 2 Infinity Wall X panels, the assembly plates
must be affixed as shown in the figure below. A further 2 plates
from the delivery scope of the second panel interconnect these
and provide extra strong support.
It is important to ensure there is sufficient space to the sides.
DE // Positionierung der Montageplatten, 3 Paneele
Bei 3 und mehr Paneelen der Infinity Wall X werden die Montage-
platten auf die gleiche Vorgehensweise angebracht. Wichtig ist
ausreichend Abstand zu den Seiten.
EN //
Positioning the assembly plates, 3 panels
For 3 and more Infinity Wall X panels, the assembly plates must be
affixed using the same method. It is important to ensure there is
sufficient space to the sides.
880mm
50mm
1180mm
880mm
50mm
1180mm
880mm
50mm
1180mm
1760 mm
880mm
2640 mm
2360 mm
880mm
50mm
1180mm
3540 mm
880mm
50mm
1180mm
± 50 mm
K
l
e
b
e
p
u
n
k
t
e
|
A
d
h
e
s
i
v
e
D
o
t
Die schematischen Abbildungen dienen zur Veranschaulichung. Die Montageplatten müssen an der Wand befestigt werden, nicht an der Infinity Wall X.
Diese schematische Abbildung dient nur zur Veranschaulichung. Die Montageplatten müssen an der Wand befestigt werden, nicht auf der Infinity Wall X.
Infinity Wall X
1041100 - 980 x 1980 mm (B x H)
980mm
50mm
1980mm
300mm
980mm
1960mm
1980mm
300mm
50mm
2940mm
980mm
1980mm
300mm
50mm
DE // Positionierung der Montageplatten, 1 Paneele
Bei einer Paneele der Infinity Wall X werden die Montageplatten
wie auf der Abbildung links angebracht. Wichtig ist ausreichend
Abstand zu den Seiten.
EN // Positioning the assembly plates, 1 panel
When positioning 1 Infinity Wall X panel, the assembly plates
must be affixed as shown in the figure on the left. It is important
to ensure there is sufficient space to the sides.
DE // Positionierung der Montageplatten, 2 Paneele
Bei 2 Paneelen der Infinity Wall X werden die Montageplatten wie
auf der Abbildung links angebracht. Jeweils 2 der Platten pro
Paneele werden am äußeren Ende angebracht. Die restlichen vier
Platten verbinden die beiden Panele und sorgen für extra starken
Halt. Wichtig ist ausreichend Abstand zu den Seiten.
EN // Positioning the assembly plates, 2 panels
When positioning 2 Infinity Wall X panels, the assembly plates
must be affixed as shown in the figure on the left. 2 plates must
be affixed to the outer edge of each panel. The remaining four
plates connect both panels and provide extra strong support.
It is important to ensure there is sufficient space to the sides.
DE //
Positionierung der Montage-
platten, 3 Paneele
Bei 3 und mehr Paneelen der Infinity Wall
X werden die Montageplatten auf die glei-
che Vorgehensweise angebracht. Wichtig
ist ausreichend Abstand zu den Seiten.
EN //
Positioning the assembly
plates, 3 panels
For 3 and more Infinity Wall X panels, the
assembly plates must be affixed using the
same method. It is important to ensure
there is sufficient space to the sides.
± 50 mm
K
l
e
b
e
p
u
n
k
t
e
|
A
d
h
e
s
i
v
e
D
o
t
Infinity Wall X
Infinity Wall X, Projection
1041401 - 1180 x 1890 mm (B x H)
1180mm
50mm
1890mm
300mm
1180mm
2360mm
1890mm
300mm
50mm
3540mm
1180mm
1890mm
300mm
50mm
Nicht Beschreibbar // not writable
DE // Positionierung der Montageplatten, 2 Paneele
Bei 2 Paneelen der Infinity Wall X, Projection werden die Monta-
geplatten wie auf der Abbildung links angebracht. Jeweils 2 der
Platten pro Paneele werden am äußeren Ende angebracht. Die
restlichen vier Platten verbinden die beiden Panele und sorgen
für extra starken Halt. Wichtig ist ausreichend Abstand zu den
Seiten.
EN // Positioning the assembly plates, 2 panels
When positioning 2 Infinity Wall X, Projection panels, the assem-
bly plates must be affixed as shown in the figure on the left. 2
plates must be affixed to the outer edge of each panel. The re-
maining four plates connect both panels and provide extra strong
support. It is important to ensure there is sufficient space to the
sides.
DE //
Positionierung der Montage-
platten, 3 Paneele
Bei 3 und mehr Paneelen der Infinity Wall
X, Projection werden die Montageplatten
auf die gleiche Vorgehensweise ange-
bracht. Wichtig ist ausreichend Abstand
zu den Seiten.
EN //
Positioning the assembly
plates, 3 panels
For 3 and more Infinity Wall X, Projection
panels, the assembly plates must be
affixed using the same method. It is im-
portant to ensure there is sufficient space
to the sides.
DE // Positionierung der
Montageplatten,
1 Paneele
Bei einer Paneele der Infinity Wall
X, Projection werden die Montage-
platten wie auf der Abbildung links
angebracht. Wichtig ist ausreichend
Abstand zu den Seiten.
EN // Positioning the
assembly plates,
1 panel
When positioning 1 Infinity Wall X,
Projection panel, the assembly plates
must be affixed as shown in the figure
on the left. It is important to ensure
there is sufficient space to the sides.
± 50 mm
K
l
e
b
e
p
u
n
k
t
e
|
A
d
h
e
s
i
v
e
D
o
t
DE // End of life
magnetoplan®- eine Marke der Holtz Office Support GmbH −
garantiert Qualitätsprodukte mit einer langen
Nutzungsdauer. Sollten Sie dennoch ein defektes Produkt
erhalten, nehmen Sie bitte umgehend Kontakt mit uns auf.
Wir sorgen für eine rasche und angemessene Lösung.
Sollten Sie das Produkt aus irgendeinem Grund nicht mehr be-
nutzen (wollen), denken Sie daran, dass es vermutlich Personen,
Stiftungen oder ehrenamtliche Einrichtungen in Ihrer Umgebung
gibt, die es gerne von Ihnen übernehmen würden. Auf diese Wei-
se bieten Sie dem Produkt „ein zweites Leben“ und verlängern
somit seine Nutzungsdauer. Sollte das nicht der Fall sein möch-
ten wir Sie bitten, die Tafel auf die behördlich und/oder gesetzlich
vorgeschriebene Art und Weise zu entsorgen. Unsere Produkte
beinhalten, abhängig von der Art der Tafel, Komponenten aus
Holz, Pappe und Metall. Die verwendeten Materialien sind um-
weltfreundlich und können hervorragend recycelt werden.
Da wir stets auf Nachhaltigkeit achten, sind wir im Rahmen eines
umfassenden Zertifizierungs-Verfahrens als „Wiesbadener
ÖKOPROFIT-Betrieb“ ausgezeichnet worden. Im Rahmen
der „Wiesbadener Ökoprofit Zertifizierung“ haben wir unseren
betrieblichen Umweltschutz erneut auf den Prüfstand gestellt,
um weitere Verbesserungen in Hinsicht Umwelt zu erzielen. Wir
setzen uns nicht nur für Ressourcenschonung im Betrieb ein,
sondern übernehmen zugleich Verantwortung für eine nach-
haltige Umwelt- und Lebensqualität in Wiesbaden und ganz
Deutschland. Vielen Dank für Ihren Beitrag zu einer umwelt-
freundlicheren Zukunft.
EN // End of life
magnetoplan®- a brand of Holtz Office Support GmbH −
guarantees high-quality products with a long operating
life. However, should you receive a defect product, please
contact us immediately. We will provide a quick and appropriate
solution.
If for any reason you no longer (want to) use the product, please
remember that there are probably people, charities or
voluntary institutions near you that would be happy to take it off
your hands. By doing this, you are giving the product “a second
life” and are thus extending its operating life. If this is not the
case, we would ask you to dispose of the board as stipulated by
regulatory and/or statutory provisions. Depending on the type of
board, our products contain components made of wood,
cardboard and metal. The materials used are environmentally-
friendly and can be recycled very easily.
As sustainability is always at the back of our minds, we have
been recognised as a “Wiesbaden ÖKOPROFIT company” as
part of a comprehensive certification programme. As part of
the “Wiesbaden Ökoprofit Certification”, we have put the
environmental protection efforts within our company to the test
once again in order to improve our environmental performance
even more. We are not only committed to resource conservation
within our company, but at the same time take responsibility for
sustainable environmental quality and quality of life in Wiesbaden
and across the whole of Germany. Thank you very much for
contributing to a more environmentally-friendly future.
DE // Hinweise zur Reinigung der Infinity Wall X
1. Um zu verhindern, dass die Tinte verschmiert, wischen Sie
sie nur ab, wenn sie komplett getrocknet ist. Dies ist sehr
wichtig bei unseren lackierten bzw. bedruckten Boards, da es
sonst zu Beschädigungen kommen kann.
2.
Wischen Sie die getrocknete Tinte nur mit einem sauberen (!)
Tuch oder Papiertüchern ab. Siehe Reinigungs-Set auf der
Rückseite dieser Montageanleitung oder folgende Artikel:
+ Pumpspraydose Tafelreiniger, 125 ml (12303) oder 250 ml (12300)
+ Tafellöscher magnethaftend (12289, 12295 oder 12293).
3.
Reinigen Sie das Board täglich mit einem der oben auf-
geführten Reinigungssprays, um einen guten Zustand zu
erhalten.
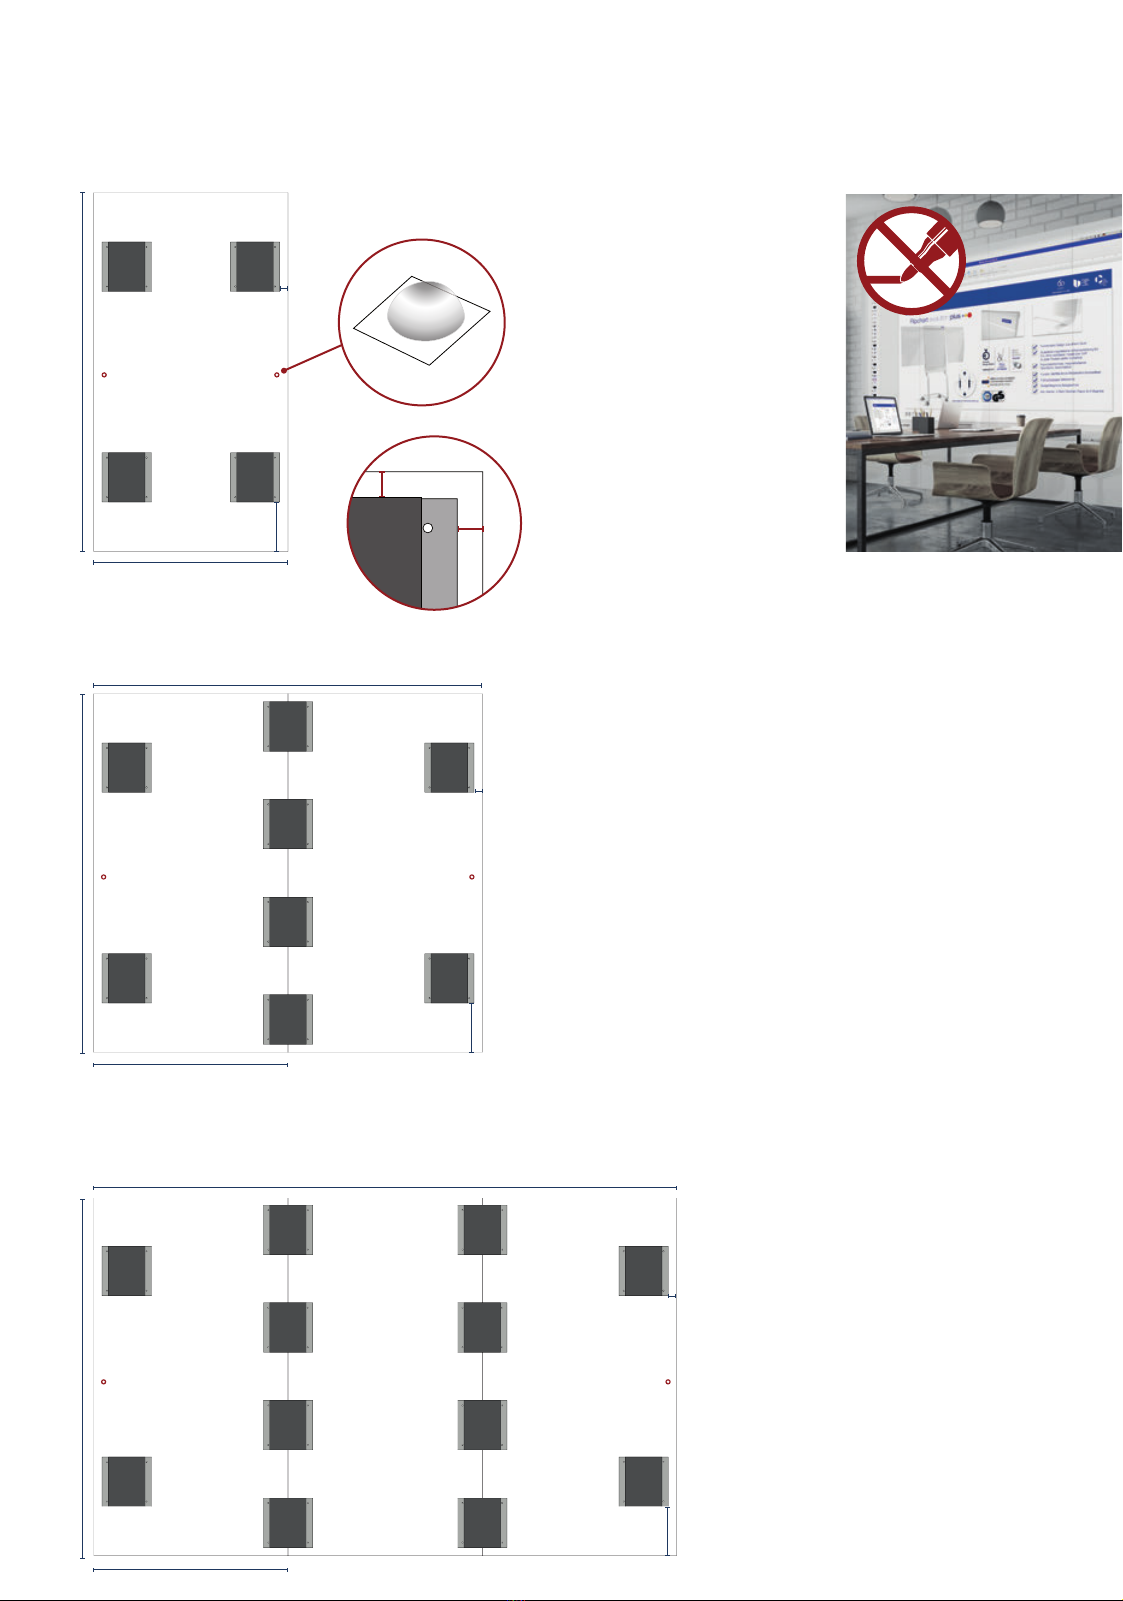
4. Verwenden Sie bitte NIEMALS andere Reiniger, als echte
Whiteboard-Reiniger. Andere Reiniger, wie z.B. Fensterreini-
ger können zu aggressiv für das Board sein und permanente
Schäden auf der Oberfläche verursachen.
Bitte beachten Sie! Einige Markenschreiber, auch von nam-
haften Herstellern, lassen sich sehr schlecht entfernen. Nutzen
Sie ebenfalls die oben empfohlenen Reinigungssprays, auch bei
diesen Produkten.
EN // Tips for cleaning the Infinity Wall X
1. In order to avoid smearing the ink, only wipe it when it is
completely dry. This is very important for our painted or
printed boards, as it can otherwise lead to damages.
2.
Only wipe the dry ink with a clean (!) towel or paper towel,
which we recommend for our whiteboards. See the cleaning
set on the back of this assembly manual or the following items:
• Pump spray can board cleaner, 125 ml (12303) or 250 ml
(12300)
• Magnetic board cleaner (12289, 12295 or 12293).
3. Clean the board every day with one of the cleaning sprays
mentioned above in order to keep it in good condition.
4. Please NEVER use cleaning products which are not
proper whiteboard cleaners. Other cleaning products, such as
window cleaning products, may be too aggressive for the board
and damage the surface permanently.
Please be careful! Some markers, even from renowned
manufacturers, leave marks that can be very difficult to remove.
Also use the cleaning sprays recommended above, even for
these products.
Art.-Nr. 12299
Board- und Flipchartmarker PRO+, je 1 x schwarz, rot, blau, und grün 4 St. | Pcs.
Board- and flipchart markers PRO+, 1 x black, red, blue and green
Pumpspraydose Tafelreiniger, 250 ml | Whiteboard cleaner spray, 250 ml 1 St. | Pc.
Universal-Reiniger, 100 g Dose | Universal cleaner, 100 g 1 St. | Pc.
Magnete discofix standard in grau, Ø 30 x 8 mm 10 St. | Pcs.
magnets discofix standard in grey, Ø 30 x 8 mm
magnetoplan Löscher, magnethaftend | magnetoplan Blotter, magnetic 1 St. | Pc.
Packung Löschpapier, 100 Blatt | Blotting paper, 100 sheets 1 St. | Pc.
magnetoplan.de
a brand of HOLTZ OFFICE SUPPORT | Germany
HOLTZ OFFICE SUPPORT GmbH
Berta-Cramer-Ring 14-16
65205 Wiesbaden | Germany
E-Mail: [email protected]
Fon: +49 6122 709-0
Fax: +49 6122 709-66
Postfach 4140 | D-65031 Wiesbaden
DE // Zum Schutz Ihres Whiteboards empfehlen wir
nur original magnetoplan®-Zubehör zu verwenden!
EN // To protect your whiteboard, we recommend using
only original magnetoplan®accessories!
Größe | Size
Haftkraft | Strength VE | Qty.
Art.-Nr.
Ø 15 x 9 mm ca. 1,0 kg 10 St./Pckg. | 10 Pcs./pack 1680015
Ø 20 x 10 mm ca. 1,6 kg 8 St./Pckg. | 8 Pcs./pack 1680020
Ø 25 x 11 mm ca. 2,5 kg 6 St./Pckg. | 6 Pcs./pack 1680025
Ø 30 x 13 mm ca. 3,0 kg 4 St./Pckg. | 4 Pcs./pack 1680030
Ø 20 x 10 mm ca. 4,8 kg 4 St./Pckg. | 4 Pcs./pack 1681020
Board- und Flipchartmarker PRO
+
, je 1 x schwarz, rot, blau, und grün 4 St. |
Board- and flipchart markers PRO
+
, 1 x black, red, blue and green
Pumpspraydose Tafelreiniger, 250 ml |
Whiteboard cleaner spray, 250 ml
Art.-Nr.
12299
, je 1 x schwarz, rot, blau, und grün 4 St. |
Pcs.
Ø 20 x 10 mm ca. 4,8 kg 4 St./Pckg. |
, je 1 x schwarz, rot, blau, und grün 4 St. |
www.magnetoplan.de
ALL RIGHTS RESERVED
© HOLTZ OFFICE SUPPORT GmbH | 2019
| Germany
a brand of
HOLTZ OFFICE SUPPORT
| Germany
To protect your whiteboard, we recommend using
only original magnetoplan
®
accessories!
| Germany
Brillante Design-Magnete
Brilliant Design Magnets
Design-Magnete auch für Glasboards
Design Magnets also for Glassboards
ferroscript®Zubehör-Set
Accessoires Set

Popular Whiteboard manuals by other brands

3M Post-it Flex Write Surface quick start guide

3M

3M Post-it Flex Write Surface quick start guide

Plus M-12S user manual

Plus

Plus M-12S user manual

Ricoh A6500 operating instructions

Ricoh

Ricoh A6500 operating instructions

SMART Board SBID8055i-G5-SMP quick start guide

SMART Board

SMART Board SBID8055i-G5-SMP quick start guide

ONfinity CM2 PRO manual

ONfinity

ONfinity CM2 PRO manual

Polycom Instructor FS HDX quick reference

Polycom

Polycom Instructor FS HDX quick reference

Smart Technologies SMART Board 400 Assembly instructions

Smart Technologies

Smart Technologies SMART Board 400 Assembly instructions

SMART Board M700 Series installation guide

SMART

SMART Board M700 Series installation guide

Ricoh D5520 operating instructions

Ricoh

Ricoh D5520 operating instructions

SMART 6000S Series Basic classroom troubleshooting

SMART

SMART 6000S Series Basic classroom troubleshooting

Ipevo IW2S quick start guide

Ipevo

Ipevo IW2S quick start guide

PolyVision a3 CeramicSteel Serif installation guide

PolyVision

PolyVision a3 CeramicSteel Serif installation guide

Copernicus iRover2 IFP300 Assembly guide

Copernicus

Copernicus iRover2 IFP300 Assembly guide

Hitachi HILU-86101 installation manual

Hitachi

Hitachi HILU-86101 installation manual

EVERWhite Edison Series quick start guide

EVERWhite

EVERWhite Edison Series quick start guide

Plus M-18 Series Assembly manual

Plus

Plus M-18 Series Assembly manual

Magiboards BGG104 Assembly instruction sheet

Magiboards

Magiboards BGG104 Assembly instruction sheet

Vibe Interactive Collaboration Board user manual

Vibe

Vibe Interactive Collaboration Board user manual

manuals.online logo
manuals.online logoBrands
  • About & Mission
  • Contact us
  • Privacy Policy
  • Terms and Conditions

Copyright 2025 Manuals.Online. All Rights Reserved.