Maino MPS12 User manual

MAINO ENRICO-ADRIANO di Roberto Maino & C. S.n.c. - Since 1945
Via Roma, 4 - 070 OLTRONA SAN MAMETTE (CO) Italy
Tel. +39-031-891478 ; Fax. +39-031-891457 ; Tlx. 380050 Como I
Email: mai[email protected]t - Internet http://www.maino.it
CCIA Como 0198979 - C.F. + P.I: IT-01555980133 - C.M. CO-0 855
INCUBATRICI; INCUBATORS; BRUTAPPARATE; BROEDMASCHINEN; INCUBATEURS;
COUVEUSES; INCUBADORAS
Maino Incubatrici
INCUBATOR USER'S MANUAL: MPS12 (UK18)
All our Incubators are manufactured in Italy, with the utmost care, taking into account all aspects of quality of
materials and the environmental factors to produce a quality, efficient, incubator.
How to use this manual.
Text by this symbol MUST be adhered to, as there may be a risk to the user or the incubator, includ-
ing its contents.
Text by this symbol are operational instruction for best results.
Packing: To open the carton using a knife or similar tool. Carefully cut the tape on the top of the box, and open.
Insid th box -
Packing List:
no.1 Incubator Base
no.1 Incubator Top with working Parts
no.1 ater Basin
no.1 Thermometer
Before switching on the incubator, read through this instruction booklet.
Make sure the electrical voltage (tension) is the same as on the written technical information (the
label placed near the thermostat). Make sure the incubator plug that is used to connect the
incubator to the power socket is suitable to use, and if not, contact your local electrician.

1. Setting Up The Incubator prior to use:
1.1 Plac th Egg Tray in the base of the incubator.
1.2 Wat r Pot - Place the water pot in the base. Do Not fill with water at this time.
To Switch off the incubator, turn off the electric socket at the wall and remove the plug from
the socket. The incubator will return to its previous settings when it is plugged back in annd switched
on.
3.0 Plug in your incubator and switch on the electrical socket. The fan should start operating and the LED on the
control card glow red.
1.3 Plac th Lid on the base, after first removing the thermometer, and its protective case, from the underside of
the lid
2.0 Siting your Incubator
Basic features of the room where you place the Incubator:
• The incubator must be placed in a clean, ventilated room, but away from draughts.
• It must be supported on a solid surface
• The room temperature must be between 18 – 23 °C. and 15 – 50 % Relative Humidity. Cold Air (Less than 18 °C will
lead to uneven air temperature in the incubator, and could cause a reduce in element life.
• Do not use in greenhouses ( temperature too variable) or bedrooms for humans or animals. Oxygen is needed by chick
embryos in the incubator, eggs that breathing then expel carbon dioxide thus reducing the oxygen levels in the air!
This is very harmful to both human and animal health.
• The machine should be placed OUT of contact with any liquids, that could prejudice the incubators operation and/or
also become very dangerous in operation!.
• The incubator is manufactured and designed to incubate eggs only. The incubator has not been designed or tested as a
drying unit for any product.
3.1 Allow th incubator to s ttl . Allow the incubator to reach and maintain temperature for 8 hours minimum.
This is to ensure all components are operating correctly.
4.0 Selection of Optimum Hatching Eggs. ith most eggs, they should be no older than within 8 days from the
date they were laid. Each with good weight, size and without defects or cracks. Eggs should be from healthy
breeding flocks . Do not incubate eggs collected on the day they were laid.
4.1 Setting your Hatching Eggs. Remove the incubator lid, and place carefully down. Mark each egg with a “0” and
a “X” on opposite sides of the egg. Lay all the eggs on the tray with all the “X”’s showing. These marks help you
to turn the eggs. Replace the incubator lid. And allow the incubator to reach temperature.
4.2 Turning your Hatching Eggs. Your incubator is a manual turning incubator. Turn your eggs from “O” to “X”,
or “X” to “O”, a minimum of twice a day, prefereably three times ( so each night the egg lies on a different side ).
3.2 Adjusting th t mp ratur . Once the temperature is settled, take a thermometer reading. You can adjust the
temperature up or down by turning the little stick near the red LED hole. Only little movements are
needed.Clockwise turns up the temperature and anti-clockwise lowers the temperature. Leave the incubator to
settle for 30 minutes between adjustments.
Do Not Cover the Air Exchange Hole(s) over the fan on your incubator. All Embryos breathe in
Oxygen and excrete Cardon Dioxide (like us), so by covering the air hole you can suffocate your chicks
and they may die.
1.4 Th rmom t r - Remove the thermometer from its protective shipping case, and carefully place vertically in
the hole in the top of the incubator. It will only fit into one hole, and does not need to be forced in.

5.0 Humidity.
Hatching Eggs, during Incubation, need to lose about 13-15% of their egg weight in water vapour, so that the Air Sac is the
correct size for hatching. Loss of too much or too little water vapour can cause the chick embryos not to hatch. By reading the
Relative Humidity (RH%) we know what percentage of the air is water vapour, and whether to add more water or take away
some. Through experience you will get to know the best percentage Relative Humidity to run your
incubator at for your eggs. Our advice to start you off is to use the settings in the Species Chart
To read Relative Humidity you need a Hygrometer Accessory.
If you do not wish to use a hygrometer, keep the water pot full throughout the incubation. DO NOT add
more water than in the water pot as this can increase the humidity level too high and cause damage to the
incubator. ( More can be added if you are using a Hygrometer accessory)
IN ALL CASES DO NOT ALLOW YOUR INCUBATOR TO HAVE WATER CONDENSATION IN
IT FOR LONG PERIODS OF TIME AS THIS CAN CAUSE IRREPAIRABLE DAMAGE TO
COMPONENTS.
NEVER SPRAY OR SPRINKLE WATER INSIDE THE INCUBATOR AS THIS CAN CAUSE THE
ELEMENT TO FAIL, KILLING ALL YOUR EMBRYOS. If you must spray your eggs, take the tray
of eggs out of the incubator and spray away from the incubator, then replace them.
umidity is directly proportional to the surface area of water in an incubator. To increase
humidity, add more surface area, (add another container) to decrease humidity, remove surface area.
i.e.Cover a container with tape. Increasing the depth of water does not increase humidity, only means
that it will last longer at the current humidity
6.0 Egg Candling. Egg candling should be done after 8 or 18 days after insertion of the
eggs in the incubator. hen candling an egg, you are looking: at the embryo
development, and with some candlers you may be able to see life; the air sac size,
checking it’s growing, and that it is not floating; Identify Eggs that do not have an
embryo in them; and to identify diseased eggs. Eggs that are imperfect or infertile should
be discarded. Candling is a skill that will develop with experience.
7.0 Th Hatch P riod - The LAST 3 DAYS of the whole period of incubation (see Species Chart) the eggs should
NOT BE TURNED. Fill up all your humdity pot to increase the humidity, close the lid, and leave the incubator
alone. Only open the top to refill humidity pot, then leave it again.
Once the chicks start hatching, leave them in the incubator. The chicks can live 3 days after they are born, even
without eating or drinking and without any kind of problem.
The chicks should not drink because they have to absorb the yolk sac completely. If chicks drink, they may not
absorb it completely & it may cause many deaths and deformities.
Leave chicks alone until the last chick hatched is dry and fluffy.
Capaciti s
Kind of Eggs\Model Hen | Duck |
Black Turkey
Pheasant |
Bantam
Quail | Grey
Partridge
Red Partridge Goose | Tur-
key | Peacock
MPS12 (UK18) 18 20 35 25 7

TECHNICAL SPECIFICATIONS:
ELECTRIC INCUBATOR FOR ANY TYPE OF EGG
ELECTRICAL FEATURES: 230 Volt AC + 10/-15% @ 50 Hz ± 0.5%
Plugs: Schuko plug (CEE) or British plug (2 poles + E # 13A fuse – British Standard: BS 1363A/95)
Species Days of Incubation Temperature °C % Incubation
Humidity
Move to Hatching
Period After:
% Hatching
Humidity
Hen 21 37.7 40/45 18 days 60/70
Duck/Small turkey 28 37.2/37.5 40/45 25 days 60/70
Dumb Duck 35-42 37.2 40/45 31 days 60/70
Goose 28-42 37.2 45/50 25 days 60/70
Pheasant 24 37.7 40/45 21 days 65/85
Giant Turkey 28-30 37.2 40/45 25 days 60/70
Grey and Red Leg Partridge 23-24 37.7 40/45 20 days 60/70
Quail and Pigeon 17 37.7 40/45 15 days 60/70
Incubator Servicing
Incubators used for hatching build up a large amount of chick down, dust and general dirt!. After every hatch
your incubator should be cleaned down. This prevents a build up of disease and prolongs the life of your
incubator components. If you use your incubator as a setter only( i.e. do not hatch in the incubator), then a 3
monthly clean down is advised to prevent a build up of domestic dust on components.
S1.0 Fans
S1.1 R000610 Square Black Fan
1.11 Undo the screws
holding the fan in the
incubator
1.12 Remove the label on the
fan to expose rubber stopper /
cover that protects the bearing
brass
1.13 Using a screwdriver to
remove the rubber stopper
1.14 With an oil can, put a
few drops of oil on the brass
bearing and then close with
the rubber stopper.
Reassemble into the
incubator
S2.0 General Cleaning
Don’t forget to remove the thermometer first, and place in a safe location. Remove heavy dirt and dust using a clean paint
brush, and/or compressed air from a can or air-line from around the control card, and the element.
Do not get the electrical components wet.
Wash in water the incubator base, and Egg Grid, allowing to dry out thoroughly before reusing. Disinfect as required using
an approved disinfectant.
NEVER SPRAY or wipe Disinfectants into the top of the incubator. Disinfectants are corrosive and
will destroy the coatings protecting the control board, drastically reducing its working life. It is not
necessary to completely sterilise this area of the incubator. The base and Turning tray can be disinfected if
required.

GUARANTEE and Certificate Of Conformity
Before using the incubator, you should read this instruction manual in full. All instructions, without exception, given in this
manual are given in good faith, and we or our dealer / distributor, cannot be held responsible for any damage arising from
these instructions, however caused. This includes, without restriction, damages, and hypothetical damage refered to in the
use of this given instructions, such as: loss of goods, profits and income; loss of biological value; restoration and replacement
cost or other similar costs; or any other special, casual or consequential damage. This information has been written very care-
fully. We have used best available knowledge in drawing it up, incorporating best technologies and best techniques. However
its accuracy and its reliability are in no wise and in no case due to the dealer/ distributor. The authorization to make use of this
information is strictly reserved for personal use. Every part of the appliance has been tested by the producer before the deliv-
ery and consignment date. Therefore the maker's guarantee does not include damages resulting from an incorrect transporta-
tion of the appliance. The guarantee does not include damages to the electric supply and electronic parts resulting from an
incorrect connection to the electricity circuits or power surges. The guarantee includes any necessary spare parts and man-
power to bring back into use in a functional way the appliance due to any breakdowns that might occur during the following 24
months after the initial testing. The guarantee work is done at the Producers company, or their agent, and will not include re-
funds of the appliance, or refunds of the damages suffered during the manufacture. The repairs will only have to be done by
authorized staff. Not complying with this clause will cause the annulment of the guarantee.
REFERENCE SET OF RULES: This product complies with the main requisitions of Electromagnetic and Safety Con-
sistency provided by the Regulations: 89/33/CEE of May 3 1989 with subsequent changes (Regulation 92/31/CEE of April
28 1992 and Regulation 93/68/CEE of July 22 1993); 73/23/CEE of February 19 1973 with subsequent changes (Regulation
93/68/CEE of July 22 1993); Since it has been projected in compliance with the directions of the following Harmonized
Rules: CEI EN61000-3-2 (1998) + A14 (2000) ref. Harmonic Current Emissions; EN61000-3-3 ref. Voltage Fluctuations;
EN55014-1 ref. Conducted Radiodisturbance Emissions; EN55014-1 ref. Click; EN55014-1 ref. Power Disturbace (30/300
Mhz) & Immunity Tests EN55014-2 ref. ESD , CM , FSB , S, VDSI + EN60335 + EN60335-2-71.
The compliance with the above-said main requisitions is attested by means of the affixing of the marking CE¹ on the
product. The marking CE¹ was introduced in 1995.
We attract your attention on the following actions that may compromise the compliance as well as, obviously, the features of
the product: 1. Incorrect electric power; 2. Incorrect installation or incorrect or improper or in any case different use as to the
directions written on the user's manual given with the product; 2. Change of parts or of original accessories with others not
approved by the maker, or changed by non-authorized staff;
DECLARATION OF CONFORMITY according to the attachment II, A of DPR 45 / 6
THE PRODUCER : IT01555980133
DISTRIBUTED IN
THE UK BY :
Maino UK , "Dovers Orchard Farm", Hoo Lane, Chipping
Campden, Glos. GL55 6AZ VAT GB 275 2945 31
Sales:+44 (0)1386 841109
Web: www.maino.co.uk
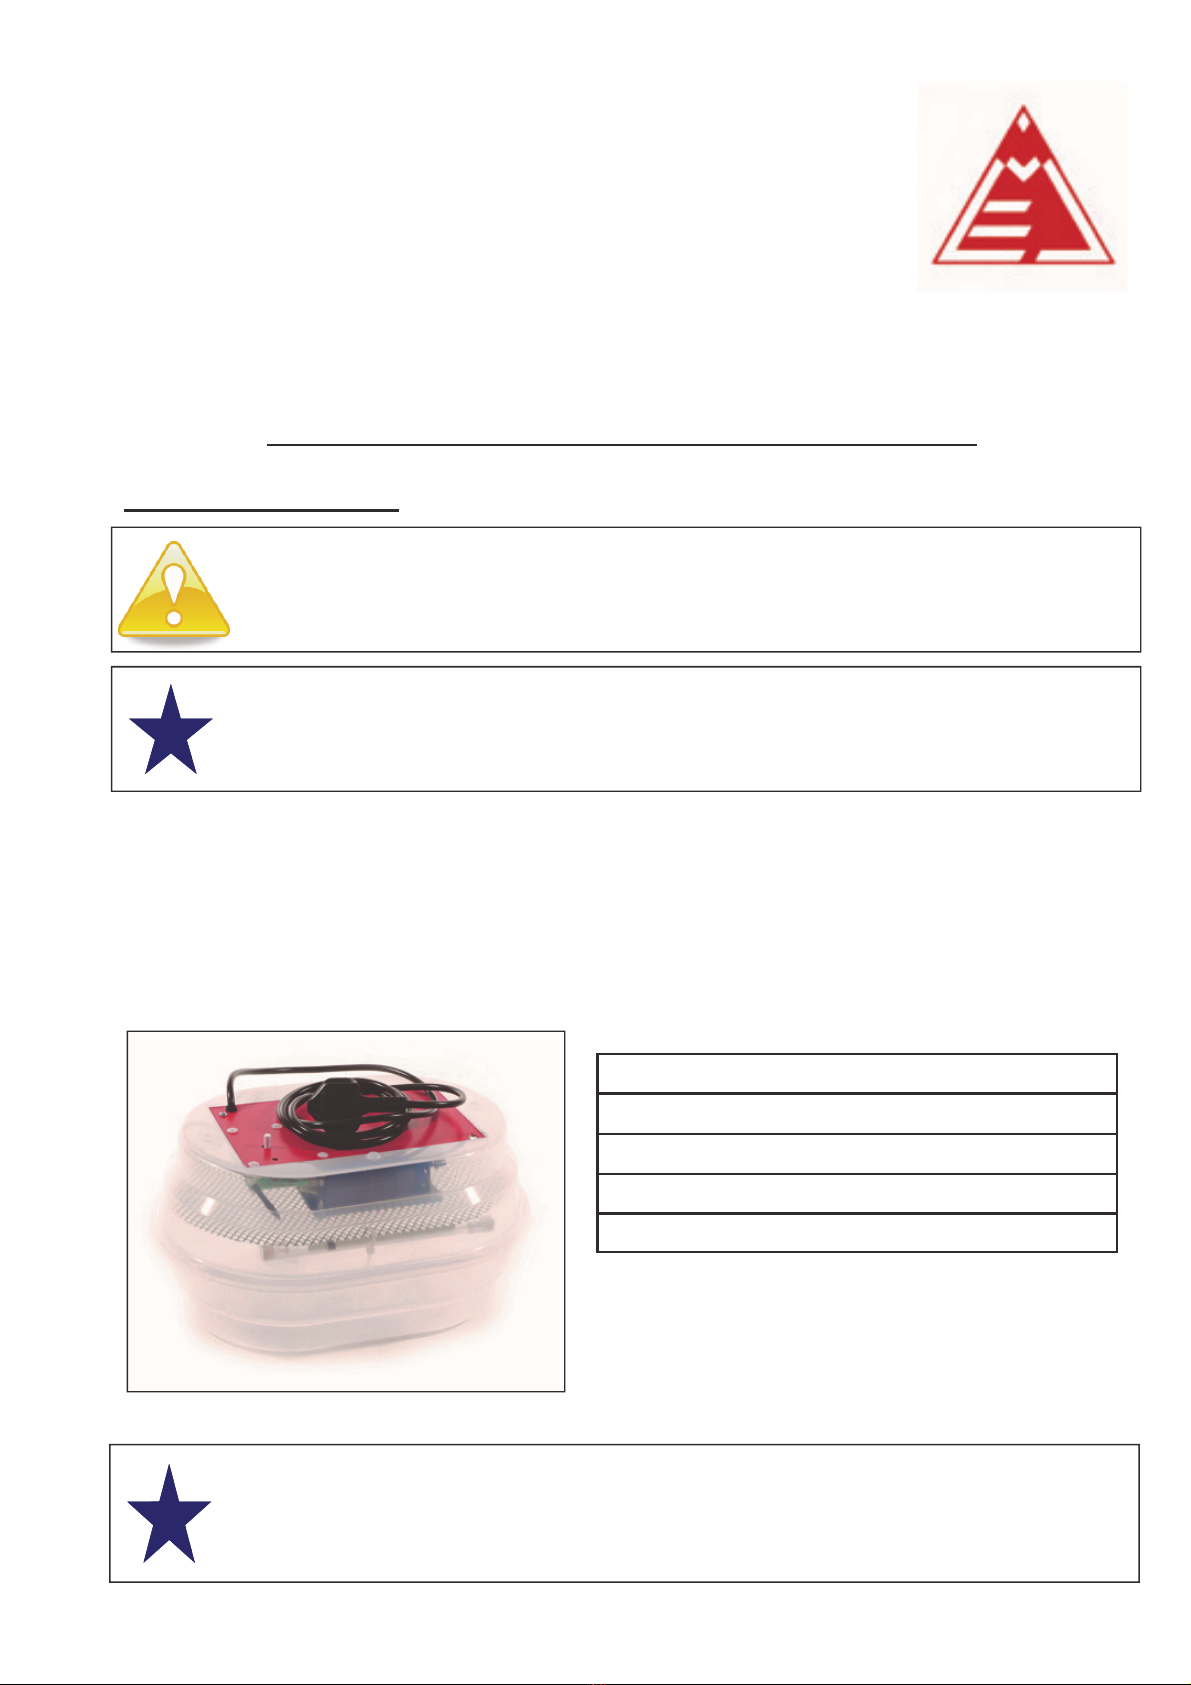
The Appliance INCUBATOR or HATCHING
machine
Model: MPS12 (UK18)
Matriculation Num-
ber:
From 4512 - 07 - 2003 and so on , until new issue
IS PROJECTED AND REALIZED IN COMPLIANCE WITH THE MAIN REQUISITES OF SAFETY AND HEALTH OF THE
D.P.R. 459/ of July 21 1996 - ATTACHMENT I - The adhesive plate with the mark CE¹ sticked on the appliance is integrant
part of it; on the plate there is the specific information of the Appliance Directives.
The following Harmonized Rules has been used to implement in a correct way the main requisites of Safety and
Health of the ATTACHMENT I: CEI EN61000-3-2 (1998) + A14 (2000) ref. Harmonic Current Emissions; EN61000-3-3 ref.
Voltage Fluctuations; EN55014-1 ref. Conducted Radiodisturbance Emissions; EN55014-1 ref. Click; EN55014-1 ref. Power
Disturbace (30/300 Mhz) & Immunity Tests EN55014-2 ref. ESD , CM , FSB , S, VDSI + EN60335 + EN60335-2-71
Oltrona di San Mamette 01/07/2003, The declarant:
Disposal of old special Equipment (Applicable throughout the European Union and other
European countries with separate collection programs). The symbol, found on your product
or on its packaging, indicates that this product should not be treated as household waste when you
wish to dispose of it. Instead, it should be handed over to an applicable collection point for the recy-
cling. By ensuring this product is disposed of correctly, you will help prevent potential negative con-
sequences to the environment and human health, which could otherwise be caused by inappropriate
disposal of this product. The recycling of materials will help to conserve natural resources. For more
detailed information about the recycling of this product, please contact your local city office, house-
hold waste disposal service or the retail store where you purchased this product
RAEE ITALY: IT08040000004688 – VALID ONLY IN ITALY
DECLARES THAT:

Spare Parts List - MPS 12 (UK18
Control Board R000510 Fan R000610
Thermometer RMPS0600 Element R00A700
Optional Accessories
R009010CC Fluorescent 240v Candler LCD HygrometerRHD300
Table of contents
Other Maino Accessories manuals
Popular Accessories manuals by other brands

Squirrel
Squirrel CRUX user manual

Bühler technologies
Bühler technologies ENK 300-15-4-0.75kW-50Hz Installation and operation instruction

FIXED
FIXED ZEN 5000 Product description

Abibird
Abibird AbiSensor quick start guide

Philips
Philips CPWBS154 Quick start quide

Festo
Festo SPAU Translation of the original instructions