BLACK - GROUND INPUT :(-) neg. ground input. To vehicle chassis
YELLOW - BATTERY INPUT: (+) pos. 12 volt constant input
RED - ACC INPUT:(+) pos. 12 volt accessory input
BROWN - AMP CONTROL:(+) 300mA max. remote turn-on
wire output( for external Amplifier option)
BLUE WITH WHITE - REVERSE INPUT(+): (+) pos. reverse wire input
(for rear view camera option)
PINK -MONITOR CONTROL:(+) 300mA max. remote turn-on wire output
(for Screen on/off control)
COAXIAL CABLE 75Ω
VIDEO OUT
AUDIO OUT(FR,FL,RR,RL)
for rear-view camera
CAM VIDEO IN
AUDIO IN AUX 2 Left (White) AUX2 Right (Red)
For some audio system input like AM/FM turner
REMOTE Remote control sensor jack.
Connect IR sensor plug directly
to this jack for remote operation.
Connections
ANALOG
ANALOG OUTPUT
Coaxial cable
Audio cable
Connect Audio out( audio related, see page 19)
SPDIF/RAW
RAW DATA VIA SPDIF
SPDIF/PCM
PCM DATA VIA SPDIF
Rear panel
Front panel
REMOTE
Rear of product
R L VIDEO RRFR RLFL VIDEO1 Coaxial
AUX2
CAM VIDEO IN
DRIVER VIDEO
VIDEO3
VIDEO2
EXTRA VIDEO OUTPUTS
DRIVER VIDEO dedicated self switching rear view
monitor output.
VIDEO INPUT
for video games
VIDEO IN
AUDIO IN AUX1 Left (White) AUX1 Right (Red)
NOTE
1 Refer to the owner's manual for the connected
monitor as well.
"
"
2 Refer to the owner's manual of the connected
equipment for additional information.
3 When you connect the DVD player to other
equipment, be sure to turn off the power .
4 If you place the DVD near a tuner or radio, the radio
broadcast sound might be distorted. In this case, place
the DVD player away from any other tuner or radio.
5 The output sound of the DVD player has a wide dynamic
range. Be sure to adjust the receiver's volume to a
moderate listening level. Otherwise, the speakers may
be damaged by a sudden high output.
6 Turn off the amplifier before you connect or disconnect
the DVD player's power leads. If you leave the amplifier
power on, the speakers may be damaged.
EXT REMOTE
4
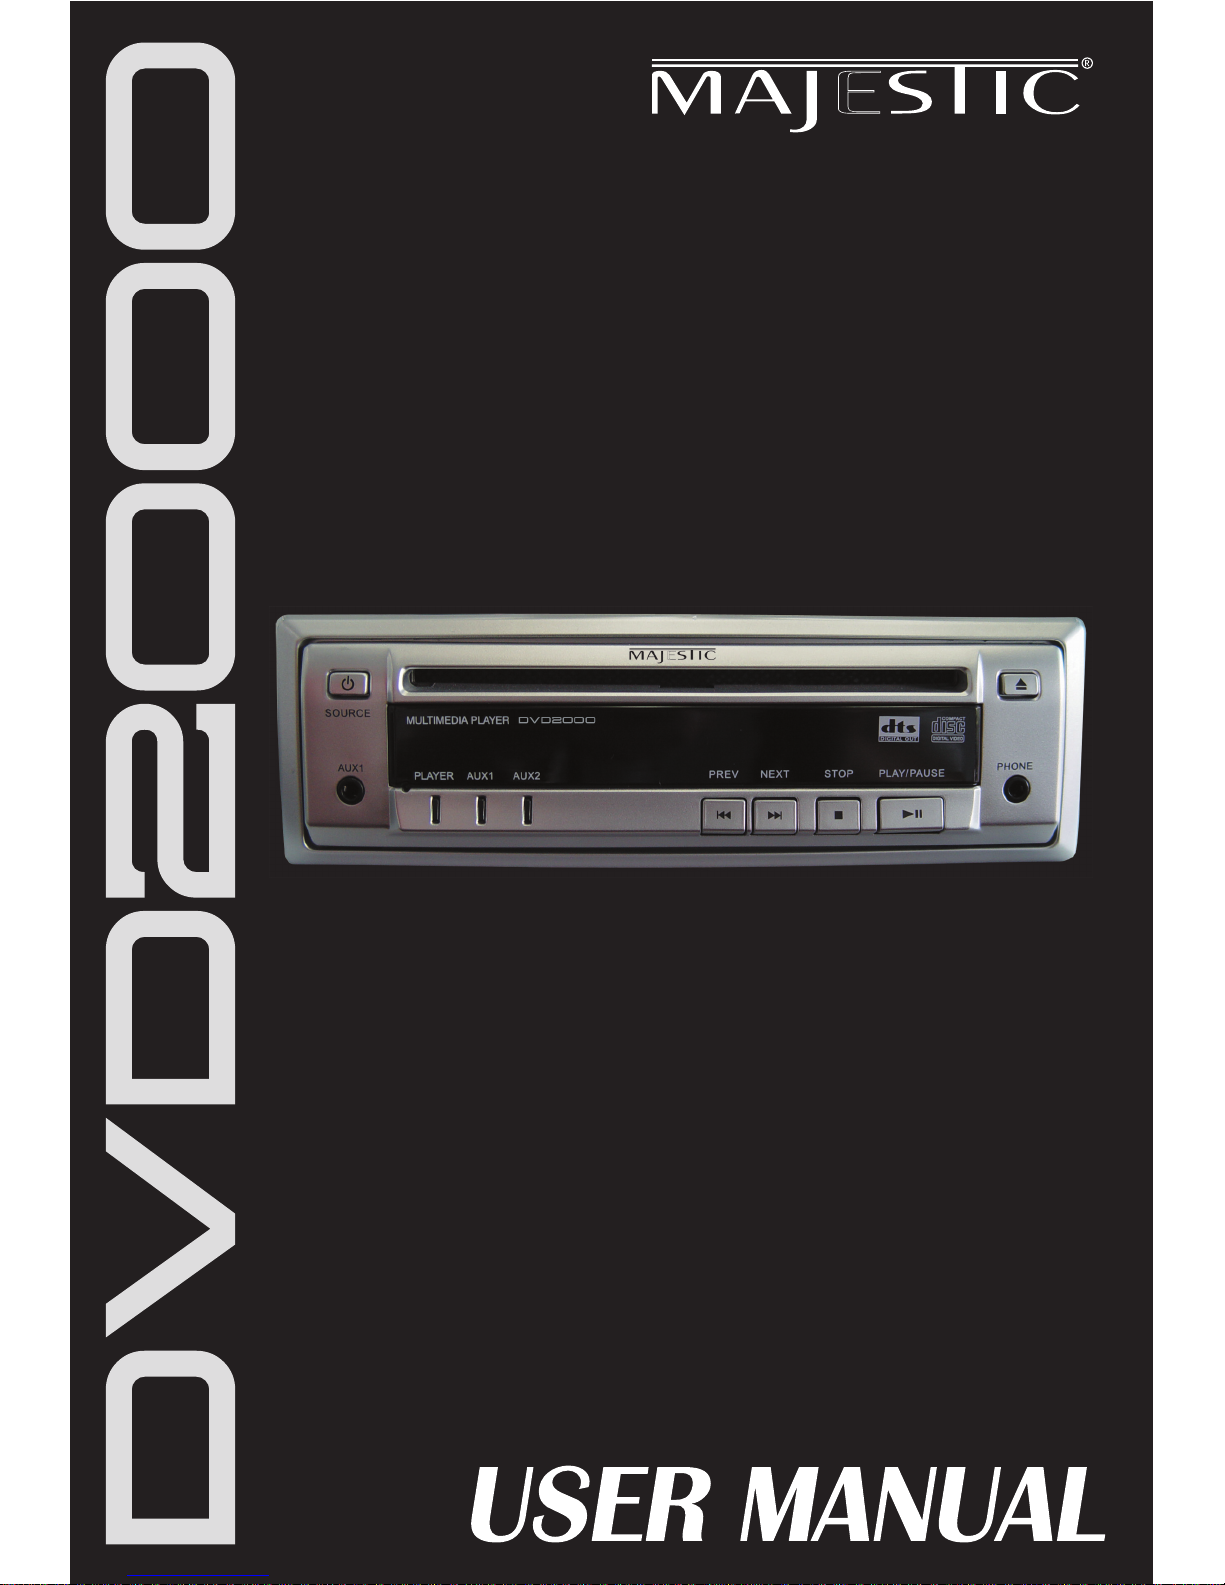
VIDEO INPUT
To enjoy your desired music with
earphone, connect the PHONE eye
jack to the earphone. And the sound
will only output via the earphone.
PLAYE RPLAYE R
AUX 1AUX 1
PRE VPREV NE XTNEX T STOPSTO P PLAY/PLAY/ PA USEPAUSE
AUX 2AUX 2
AUX 1AUX 1 PHON EPHO NE
SOU RCESOU RCE