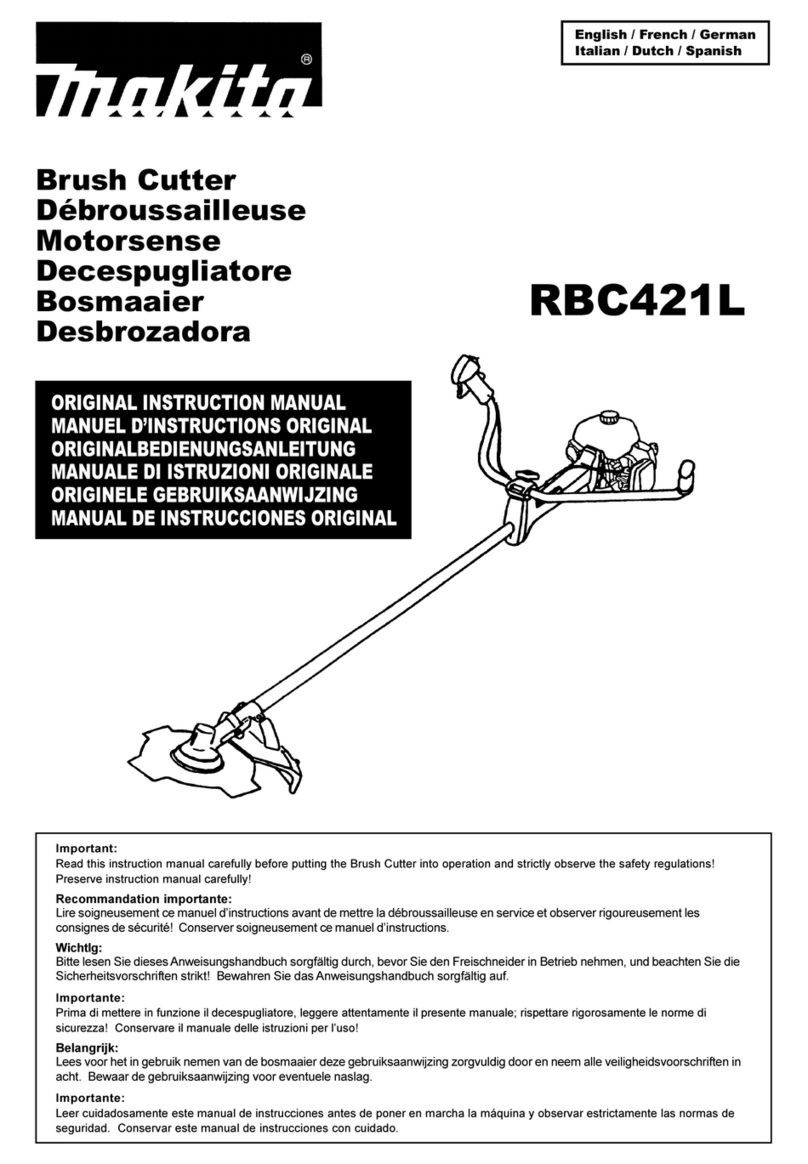
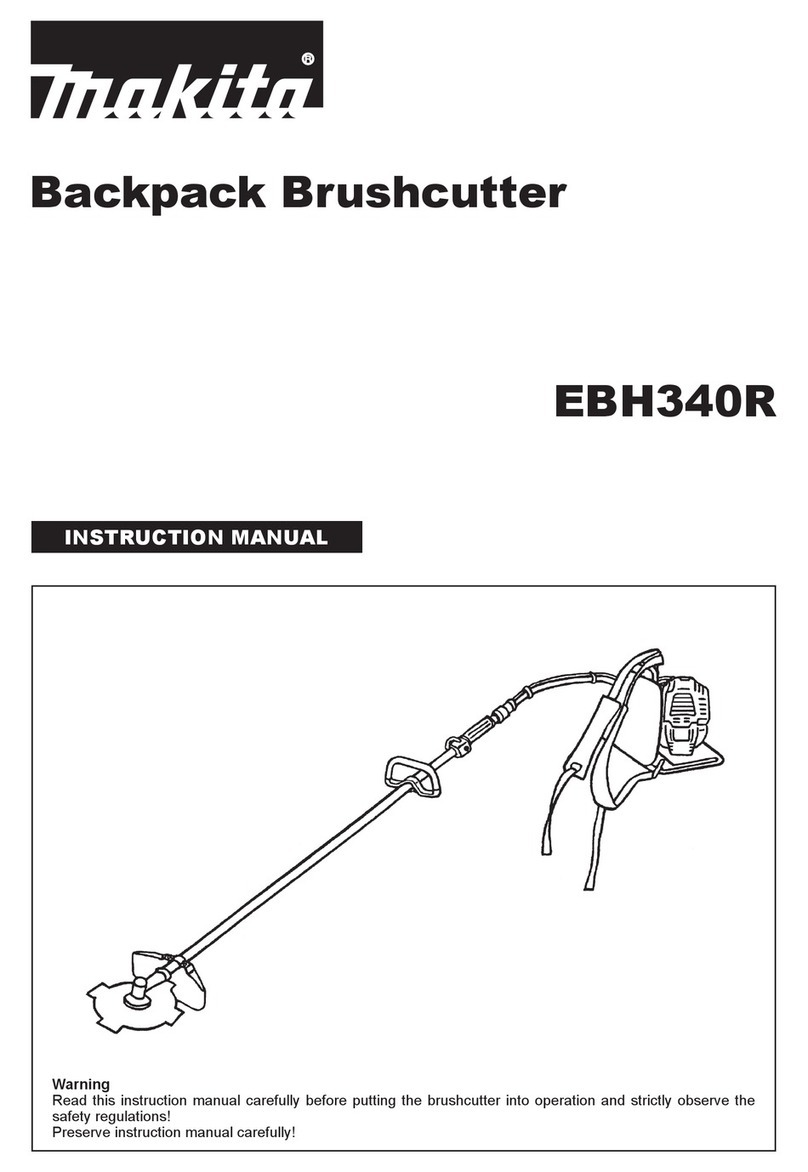
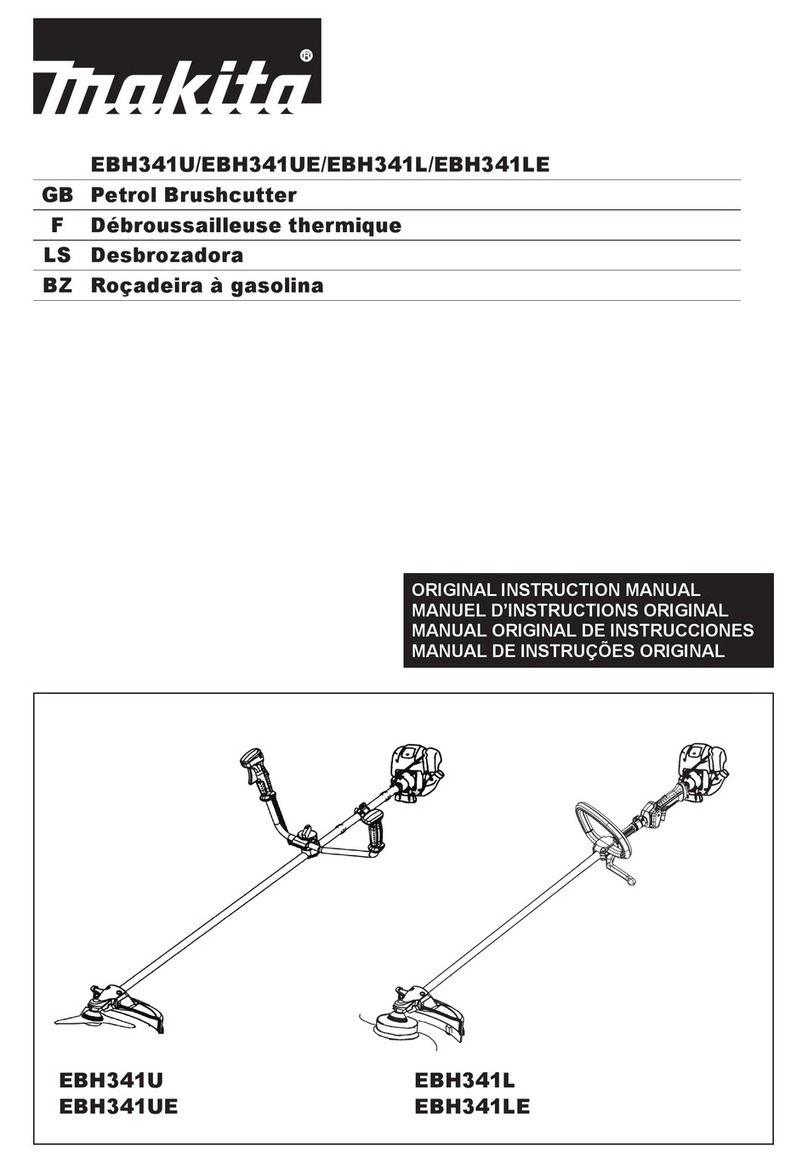
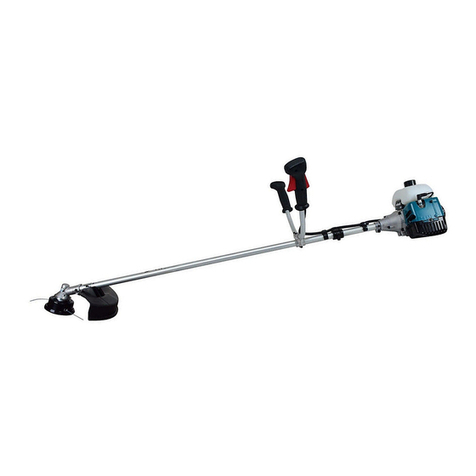
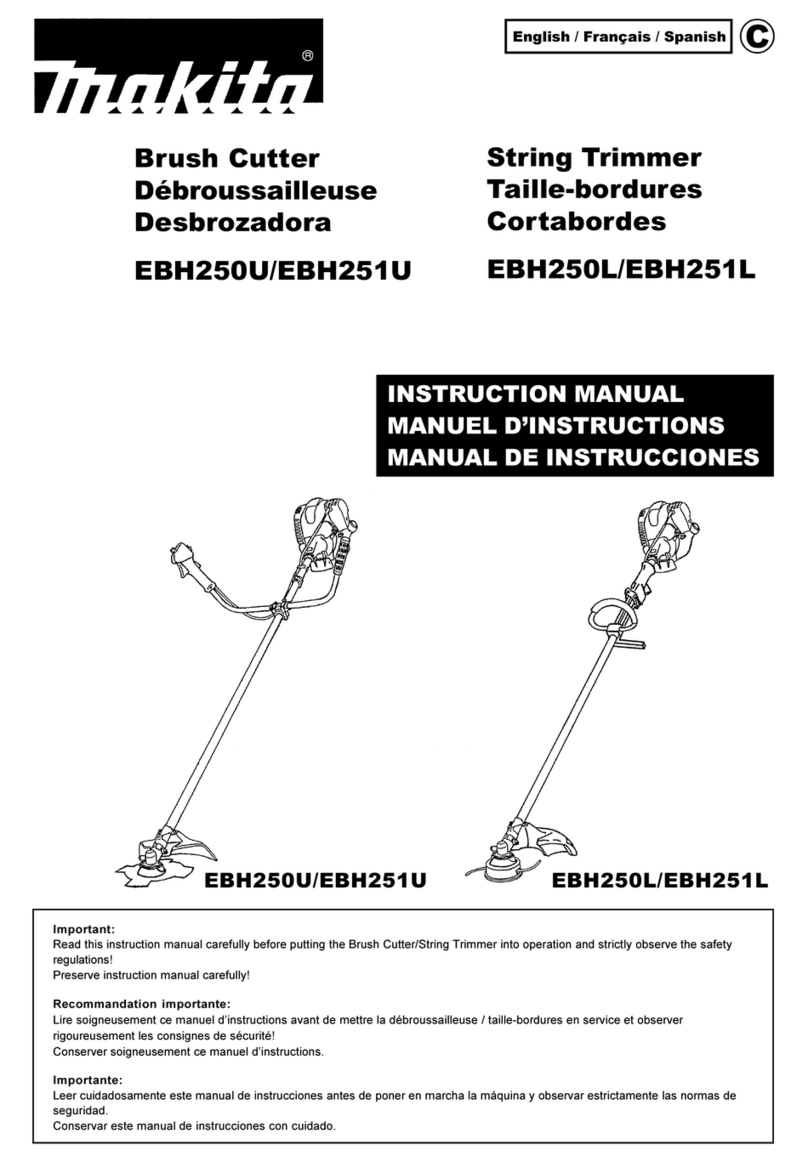
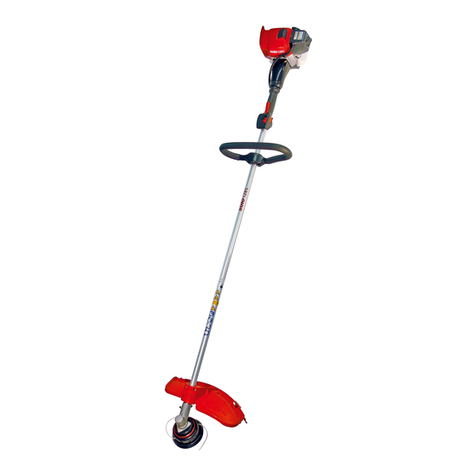
Makita EM2500L User manual

Instruction Manual
Petunjuk Penggunaan
Tàiliệuhướngdẫn
คูมือการใชงาน
Important:
Read this instruction manual carefully before putting the petrol brushcutter into operation and strictly observe the safety regulations!
Preserve instruction manual carefully!
Penting:
Bacalah petunjuk penggunaan ini dengan teliti sebelum mengoperasikan pemotong semak bermesin bensin dan patuhilah dengan ketat
peraturan keselamatan yang berlaku!
Simpanlah buku petunjuk penggunaan ini dengan baik!
Quantrọng:
Đọckỹtàiliệuhướngdẫnnàytrướckhivậnhànhmáycắtcỏchạyxăngvàtuânthủchặtchẽcácquyđịnhvềantoàn!
Bảoquảntàiliệuhướngdẫnmộtcáchcẩnthận!
ข้อสำคัญ:
อ่านคู่มือการใช้งานนี้อย่างระมัดระวังก่อนใช้งานเครื่องตัดหญ้าแบบใช้น้ำมันและปฏิบัติตามกฎความปลอดภัยอย่างเคร่งครัด!
เก็บคู่มือการใช้งานไว้ในที่ปลอดภัย!
EM2500L

2
Thank you very mush for purchasing the MAKITA petrol brushcutter. We are
pleased to recommend to you the MAKITA petrol brushcutter which is the result
ofalongdevelopmentprogramandmanyyearsofknowledgeandexperience.
Please read this booklet which refers in detail to the various points that will
demonstrate its outstanding performance. This will assist you to obtain the best
possible result from your MAKITA petrol brushcutter.
Table of Contents Page
You will note the following symbols when reading the instructions manual.
SYMBOLS
English (Original instructions)
Symbols.........................................................................2
Safety instructions .........................................................3
Technical data................................................................7
Designation of parts.......................................................8
Mounting of handle........................................................9
Mounting of protector.....................................................9
Mounting of cutter blade/nylon cutting head................10
Fuels/refuelling ............................................................ 11
Correct handling of machine........................................12
Points in operation and how to stop ............................13
Resharpening the cutting tool......................................14
Servicing instructions...................................................16
Storage........................................................................18
Read instruction manual Wear eye and ear protection
Take particular are and attention Wear protective helmet, eye and ear
protection
Forbidden Do not use metal blades
Keep distance Top permissible tool speed
Flying object hazard Fuelandoilmixture
No smoking Engine-manual start
Noopenflame Emergency stop
Protective gloves must be worn First Aid
Kickback START
Keep the area of operation clear of all
persons and pets
Wear sturdy boots with non-slip
soles. Steel toed safety boots are
recommended.

3
15 Meters
Diagrammaticfigure
SAFETY INSTRUCTIONS
General Instructions
Read this instruction manual to become familiar with handling of the–
equipment.Usersinsufficientlyinformedwillriskdangertothemselvesas
well as others due to improper handling.
Itisrecommendedonlytolendtheequipmenttopeoplewhohaveprovento–
beexperienced.
Always hand over the instruction manual.
First users should ask the dealer for basic instructions to familiarize oneself–
with the handling of brushcutters.
Children and young persons aged under 18 years must not be allowed to–
operatethisequipment.Personsovertheageof16yearsmayhowever
use the device for the purpose of being trained while under supervision of a
qualifiedtrainer.
Usewiththeutmostcareandattention.–
Operate only if you are in good physical condition. Perform all work calmly–
and carefully. The user has to accept liability for others.
Neverusethisequipmentafterconsumptionofalcoholordrugs,oriffeeling–
tired or ill.
National regulation can restrict the use of the machine.–
Intendeduseofthemachine
Thisequipmentisonlyintendedforcuttinggrass,weeds,bushes,–
undergrowth. It should not be used for any other purpose such as edging or
hedge cutting as this may cause injury.
Personal protective equipment
The clothing worn should be functional and appropriate, i.e. it should be tight-–
fittingbutnotcausehindrance.Donotweareitherjewelryorclothingwhich
could become entangled with bushes or shrubs.
In order to avoid either head-, eye-, hand-or foot injuries as well as to protect–
yourhearingthefollowingprotectiveequipmentandprotectiveclothingmust
be used during operation.
Always wear a helmet where there is a risk of falling objects. The protective–
helmet (1) is to be checked at regular intervals for damage and is to be
replacedatthelatestafter5years.Useonlyapprovedprotectivehelmets.
The visor (2) of the helmet (or alternatively goggles) protects the face from–
flyingdebrisandstones.Duringoperationalwaysweargoggles,oravisorto
prevent eye injuries.
Wearadequatenoiseprotectionequipmenttoavoidhearingimpairment(ear–
muffs (3), ear plugs etc.).
Theworkoveralls(4)protectagainstflyingstonesanddebris.–
We strongly recommend that the user wears work overalls.
Gloves(5)arepartoftheprescribedequipmentandmustalwaysbeworn–
during operation.
Whenusingtheequipment,alwayswearsturdyshoes(6)withanonslip–
sole. This protects against injuries and ensures a good footing.
Startingupthebrushcutter
Please make sure that there are no children or other people within a working–
range of 15 meters (50 ft), also pay attention to any animals in the working
vicinity.
Beforeusealwayschecktheequipmentissafeforoperation:–
Check the security of the cutting tool, the throttle lever for easy action and
check for proper functioning of the throttle lever lock.
Rotation of the cutting tool during idling speed is not allowed. Check with your–
dealer for adjustment if in doubt. Check for clean and dry handles and test
the function of the start/stop switch.

4
Resting•
Transport•
Refueling•
Maintenance•
Tool replacement•
3 meters
Start the brushcutter only in accordance with the instructions.
Do not use any other methods for starting the engine!–
Usethebrushcutterandthetoolsonlyforsuchapplicationsasspecified.–
Only start the engine, after the entire assembly is done. Operation of the–
device is only permitted after all the appropriate accessories are attached!
Before starting make sure that the cutting tool has no contact with hard–
objects such as branches, stones etc. as the cutting tool will revolve when
starting.
The engine is to be switched off immediately in case of any engine problems.–
Should the cutting tool hit stones or other hard objects, immediately switch off–
the engine and inspect the cutting tool.
Inspect the cutting tool at short regular intervals for damage (detection of–
hairline cracks by means of tapping-noise test).
Iftheequipmentgetsheavyimpactorfall,checktheconditionbefore–
continuing work. Check the fuel system for fuel leakage and the controls
and safety devices for malfunction. If there is any damage or doubt, ask our
authorized service center for the inspection and repair.
Operatetheequipmentonlywiththeshoulderharnessattachedwhichis–
to be suitably adjusted before putting the brushcutter into operation. It is
essential to adjust the shoulder harness according to the user size to prevent
fatigue occurring during use. Never hold the cutter with one hand during use.
During operation always hold the brushcutter with both hands.–
Always ensure a safe footing.
Operatetheequipmentinsuchamannerastoavoidinhalationoftheexhaust–
gases. Never run the engine in enclosed rooms (risk of gas poisoning).
Carbonmonoxideisanodorlessgas.
Switchofftheenginewhenrestingandwhenleavingtheequipment–
unattended, and place it in a safe location to prevent danger to others or
damage to the machine.
Never put the hot brushcutter onto dry grass or onto any combustible–
materials.
Alwaysinstalltheapprovedcuttingtoolguardontotheequipmentbefore–
starting the engine.
Otherwise contact with the cutting tool may cause serious injury.
All protective installations and guards supplied with the machine must be–
used during operation.
Neveroperatetheenginewithfaultyexhaustmuffler.–
Shut off the engine during transport.–
Whentransportingtheequipment,alwaysattachthecovertothemetalblade.–
Ensuresafepositionoftheequipmentduringcartransportationtoavoidfuel–
leakage.
When transporting, ensure that the fuel tank is completely empty.–
Whenunloadingtheequipmentfromthetruck,neverdroptheEnginetothe–
ground or this may severely damage the fuel tank.
Exceptincaseofemergency,neverdroporcasttheequipmenttotheground–
orthismayseverelydamagetheequipment.
Remembertolifttheentireequipmentfromthegroundwhenmovingthe–
equipment.Draggingthefueltankishighlydangerousandwillcausedamage
andleakageoffuel,possiblycausingfire.
Refueling
Shutofftheengineduringrefueling,keepawayfromopenflamesanddonot–
smoke.
Avoid skin contact with mineral oil products. Do not inhale fuel vapor. Always–
wear protective gloves during refueling. Change and clean protective clothing
at regular intervals.
Take care not to spill either fuel or oil in order to prevent soil contamination–
(environmental protection). Clean the brushcutter immediately after fuel has
been spilt.
Avoid any fuel contact with your clothing. Change your clothing instantly if–
fuelhasbeenspiltonit(topreventclothingcatchingfire).
Inspect the fuel cap at regular intervals making sure that it can be securely–
fastened and does not leak.
Carefully tighten the fuel tank cap. Change location to start the engine (at–
least 3 meters away from the place of refueling).
Never refuel in closed rooms. Fuel vapors accumulate at ground lever (risk of–
explosions).
Only transport and store fuel in approved containers. Make sure the fuel–
stored is not accessible to children.

5
Caution:
Kickback
Diagrammatic
figure
Diagrammatic
figure
Methodofoperation
Only use in good light and visibility. During the winter season beware of–
slippery or wet areas, ice and snow (risk of slipping). Always ensure a safe
footing.
Never cut above waist height.–
Never stand on a ladder.–
Never climb up into trees to perform cutting operation.–
Never work on unstable surfaces.–
Remove sand, stones, nails etc. found within the working range.–
Foreign particles may damage the cutting tool and can cause dangerous
kick-backs.
Before commencing cutting, the cutting tool must have reached full working–
speed.
When using metal blades, swing the tool evenly in half-circle from right to left,–
like using a scythe.
If grass or branches get caught between the cutting tool and guard, always
stop the engine before cleaning. Otherwise unintentional blade rotation may
cause serious injury.
Take a rest to prevent loss of control caused by fatigue. We recommend to–
take a 10 to 20-minute rest every hour.
Cutting Tools
Useanapplicablecuttingtoolforthejobinhand.–
Nylon cutting heads (string trimmer heads) are suitable for trimming lawn
grass.
Metal blades are suitable for cutting weeds, high grasses, bushes, shrubs,
underwood, thicket, and the like.
Neveruseotherbladesincludingmetalmultipiecepivotingchainsandflail
blades. Otherwise serious injury may result.
When using metal blades, avoid “kickback” and always prepare for an–
accidental kickback. See the section “Kickback” and “Kickback prevention.”
Kickback(bladethrust)
Kickback (blade thrust) is a sudden reaction to a caught or bound metal–
blade.Onceitoccurs,theequipmentisthrownsidewayortowardthe
operator at great force and it may cause serious injury.
Kickback occurs particularly when applying the blade segment between 12–
and 2 o’clock to solids, bushes and trees with 3 cm or larger diameter.
Toavoidkickback:–
Apply the segment between 8 and 11 o’clock;•
Never apply the segment between 12 and 2 o’clock;•
Never apply the segment between 11 and 12 o’clock and between 2 and•
5o’clock,unlesstheoperatoriswelltrainedandexperiencedanddoesitat
his/her own risk;
Never use metal blades close to solids, such as fences, walls, tree trunks•
and stones;
Never use metal blades vertically, for such operations as edging and•
trimming hedges.
Vibration
Peoplewithpoorcirculationwhoareexposedtoexcessivevibrationmay–
experienceinjurytobloodvesselsorthenervoussystem.Vibrationmay
causethefollowingsymptomstooccurinthefingers,handsorwrists:“Falling
asleep” (numbness), tingling, pain, stabbing sensation, alteration of skin color
or of the skin. If any of these symptoms occur, see a physician!
Toreducetheriskof“whitefingerdisease”,keepyourhandswarmduring–
operationandwellmaintaintheequipmentandaccessories.

Maintenance instructions
Haveyourequipmentservicedbyourauthorizedservicecenter,alwaysusing–
only genuine replacement parts. Incorrect repair and poor maintenance can
shortenthelifeoftheequipmentandincreasetheriskofaccidents.
The condition of the cutter, in particular of the cutting tool of the protective–
devices and also of the shoulder harness must be checked before
commencing work. Particular attention is to be paid to the metal blades which
must be correctly sharpened.
Turn off the engine and remove spark plug connector when replacing or–
sharpening cutting tools, and also when cleaning the cutter or cutting tool.

6
Neverstraightenorwelddamagedcuttingtools.
Pay attention to the environment. Avoid unnecessary throttle operation for–
less pollution and noise emissions. Adjust the carburetor correctly.
Cleantheequipmentatregularintervalsandcheckthatallscrewsandnuts–
are well tightened.
Neverserviceorstoretheequipmentinthevicinityofnakedflames.–
Alwaysstoretheequipmentinlockedroomsandwithanemptiedfueltank.–
Whencleaning,servicingandstoringtheequipment,alwaysattachthecover–
to the metal blade.
Observe the relevant accident prevention instructions issued by the relevant trade associations and by the insurance companies.
Donotperformanymodificationstotheequipmentasthiswillendangeryoursafety.
The performance of maintenance or repair work by the user is limited to those activities as described in the instruction manual. All other work is
tobedonebyanAuthorizedServiceAgent.UseonlygenuinesparepartsandaccessoriesreleasedandsuppliedbyMAKITA.
Useofnonapprovedaccessoriesandtoolsmeansincreasedriskofaccidents.
MAKITAwillnotacceptanyliabilityforaccidentsordamagecausedbytheuseofnonapprovedcuttingtoolsandfixingdevicesofcuttingtools,
or accessories.
FirstAid
Incaseofaccidentmakesurethatafirstaidboxisavailableinthevicinityof
thecuttingoperations.Immediatelyreplaceanyitemtakenfromthefirstaidbox.
Whenaskingforhelp,pleasegivethefollowing
information:
Place of accident–
What happened–
Number of injured persons–
Kind of injuries–
Your name–

7
TECHNICAL DATA EM2500L
Model EM2500L
Engine displacement 24.5 cm3
Maximumengineperformance 0.73kWmax.
Enginespeedatrecommendedmax. 9,700/minmax.(Blade)
8,200/minmax.(Stringhead)
Cutting Width 230 mm (Blade)
430 mm (String-head)
Idling speed 3,000/min ± 100/min
Clutch engagement speed 4,100/min ± 300/min
Gear ratio 14/19
Fuel Mixedgas
Gasoline:TwostrokeEngineOil=50:1
Volume(fueltank) 0.5 L
Mass (without plastic guard and cutting blade) 4.3 kg
Duetoourcontinuingprogramofresearchanddevelopment,thespecificationshereinaresubjecttochangewithoutnotice.•
Specificationsmaydifferfromcountrytocountry.•
Weight according to EPTA-Procedure 01/2003•

8
DESIGNATION OF PARTS
(21)
(16)
(17)
(19)
(18)
(20)
(12)
(13)
(14)
(11)
(15)
(1)
(2)
(5)
(6)
(8)
(10)
(9)
(7)
(4)
(3)
EM2500L
LoopHandleType
GB Names of parts
1 Control Cable
2 Control Lever
3 Throttle Lever
4 Start-Stop Switch
5 Hanger
6 Handle
7 Handle Holder
8 Shaft
9 Protector (Cutting Tool Guard)
10 Gear Case
11 Air Cleaner Cover
12 Fuel Filler Cap
13 Fuel Tank
14 Primer Pump
15 Clutch Case
16 ExhaustMuffler
17 ExhaustPipe
18 Recoil Starter
19 Starter Knob
20 Choke Lever
21 Spark Plug

9
CAUTION: Beforedoinganyworkontheequipment,alwaysstoptheengine
and pull the spark plug connector off the spark plug.
Always wear protective gloves!
CAUTION: Starttheengineonlyafterhavingassembleditcompletely.
To meet the applicable safety standards, you must only use the tool/protector
combinations indicated in the table.
AlwaysusegenuineMAKITAcutterblades/nyloncuttinghead.
The cutter blade must be well polished, and free of cracks breakages. If the–
cutter blade hits against a stone during operation, stop the engine and check
the blade immediately.
Polish or replace the cutter blade every three hours of operation.–
If the cutting tool hits against a stone during operation, stop the engine and–
check the cutting tool immediately.
(1)
(4)
(5)
(2)
(3)
MOUNTING OF HANDLE
MOUNTING OF PROTECTOR
Put the handle holder (1) and handle (2) on to the shaft.–
Makesurethatthehandleassemblyisnotfittedfartherthanthearrowmark–
(3).
FixandtightenthembyfourM5×30bolts(4)andfourM5nuts(5).–
Note:Insomecountriesthehandlemaybenonbarriertype.
Nylon cutting headStar Blade Protector for cord cutterProtector for metal blades
Engine
CAUTION: Theappropriateprotectorsmustalwaysbeinstalledforyourown
safety and in order to comply with accident-prevention regulations.
Operationoftheequipmentwithouttheguardinstalledisprohibited.
Fixtheprotector(1)totheclamp(3)withtwoM6×30bolts(2).–
Whenusingthenyloncuttinghead,fittheprotector(5)intotheprotector(1),–
and tighten them with two screws (4).
(2)
(3)
(1)

10
Thecutterbladeornyloncuttingheadcanbereplacedeasilybyfirstturningthe
equipmentupsidedown.
Insertthehexwrenchthoughtheholeinthegearcaseandrotatethe–
receiverwasher(3)untilitislockedwiththehexwrench.
Loosen the nut/spring washer (1) (left-hand thread) with the socket wrench,–
and remove the nut/spring washer (1) and clamp washer (2).
MOUNTING OF CUTTER BLADE/NYLON CUTTING HEAD
Withthehexwrenchstillinplace
Mount the cutter blade onto the shaft so that the guide of the receiver washer–
(3)fitsinthearborholeinthecuterblade.Installtheclampwasher(2)and
secure the cutter blade with the nut/spring washer (1).
[Tighteningtorque:13–23Nm]
NOTE: Alwaysweargloveswhenhandlingthecutterblade.
NOTE: Thecutterbladefasteningnut(withspringwasher)isaconsumable
part. If there appears any wear or deformation on the spring washer,
replace the nut.
NOTE:Theclampwasher(2),andnut/springwasher(1)arenotnecessaryfor
mounting the nylon cutting head. The nylon head should go on top of
the receiver washer (3).
Screw the nylon cutting head onto the shaft.–
Make sure that the blade rotates counterclockwise.–
Tighten
Hexwrench
Loosen
(1) (2)
(3)
Tighten
Rotation
Hexwrench
Loosen

11
Handlingfuel
Utmostcareisrequiredwhenhandlingfuel.Fuelmaycontainsubstances
similar to solvents. Refuel either in a well ventilated room or outdoors. Do not
inhale fuel vapors, avoid any contact of fuel or oil with your skin.
Mineral oil products degrease your skin. If your skin comes in contact with these
substancesrepeatedlyandforanextendedperiodoftime,itwilldesiccate.
Variousskindiseasesmayresult.Inaddition,allergicreactionsmayoccur.
Eyes can be irritated by contact with oil. If oil comes into your eyes, immediately
wash them with clear water. If your eyes are still irritated, see a doctor
immediately.
FUELS/REFUELLING
Fuelandoilmixture
Theengineofthebrushcutterisahighefficiencytwostrokeengine.Itisrun
withamixtureoffuelandtwostrokeengineoil.Theengineisdesignedfor
unleaded regular fuel with a min. octane value of 91 RON. In case no such fuel
is available, you can use fuel with a higher octane value. This will not affect the
engine, but may cause poor operating behavior.
A similar situation will arise from the use of leaded fuel. To obtain optimum
engine operation and to protect your health and environment, only unleaded
fuel should be used!
Forlubricatingtheengineuseatwostrokeengineoil(qualitygrade:TC3),
whichisaddedtothefuel.Theenginehasbeendesignedtousespecifiedtwo
strokeengineoilatmixtureratioof50:1toprotecttheenvironment.Inaddition,
alongservicelifeandareliableoperationwithaminimumemissionofexhaust
gasesisguaranteed.Itisabsolutelyessentialtoobserveamixtureratioof50:1
(specified2strokeengineoil),asotherwisereliablefunctionofthebrushcutter
cannot be guaranteed.
Thecorrectmixtureratio:
Gasoline:Specifiedtwostrokeengineoil=50:1or
Gasoline:Othermanufacturer’stwostrokeengineoil=25:1
recommended
Note: Forpreparingthefueloilmixturefirstmixtheentireoilquantitywithhalf
ofthefuelrequired,thenaddtheremainingfuel.Thoroughlyshakethe
mixturebeforefillingitintothebrushcuttertank.Itisnotwisetoaddmore
engineoilthanspecifiedtoensuresafeoperation.
This will only result in a higher production of combustion residues which
willpollutetheenvironmentandclogtheexhaustchannelinthecylinder
aswellasthemuffler.Inaddition,thefuelconsumptionwillriseandthe
performance will decrease.
Refuelling
Theenginemustbeswitchedoff.
Thoroughlycleantheareaaroundthefuelfillercap(2),topreventdirtfrom–
getting into the fuel tank (1).
Unscrewthefuelfillercap(2)andfillthetankwithfuel.–
Tightlyscrewonthefuelfillercap(2).–
Cleanscrewfuelfillercap(2)andtankafterrefuelling.–
Storage of Fuel
Fuel cannot be stored for an unlimited period of time.
Purchaseonlythequantityrequiredfora4weekoperatingperiod.Onlyuse
approved fuel storage containers.
Observe the Safety Instructions on page 3.
Gasoline
1,000 cm3(1 liter)
5,000 cm3(5 liter)
10,000 cm3(10 liter)
50:1
20 cm3
100 cm3
200 cm3
40 cm3
200 cm3
400 cm3
25:1
(1)
(2)
+

12
Attachmentofshoulderstrap
Adjust the strap length so that the cutter blade will be kept parallel with the–
ground.
CORRECT HANDLING OF MACHINE
Detachment
Thisstrapprovidesquickreleasemechanism.Adjustthereleasebutton–
forward to the operator as shown in the illustration.
Press the both side of the release button with one hand, the machine can–
bereleasedquicklyfromtheoperatorintheeventofemergency(e.g.occur
spark, smoking or vibrate abnormally).
Beextremelycarefultomaintaincontrolofthemachineatthistime.–
Donotallowthemachinetobedeflectedtowardyouoranyoneinthework
vicinity.
WARNING:Failuretomaintaincompletecontrolofthemachineatallcould
result in serious bodily injury or death.

13
Observe the applicable accident prevention regulations.
Starting
Moveatleast3mawayfromtheplaceofrefuelling.Placetheequipmenton
a clean piece of ground taking care that the cutting tool does not come into
contact with the ground or any other objects.
Coldstart
Firstplacetheequipmentontheground.–
Set the Start-Stop Switch (1) to start position.–
POINTS IN OPERATION AND HOW TO STOP
Give a gentle push on the primer pump (2) repeatedly (7 – 10 times) until fuel–
comes into the primer pump.
Push the choke lever (3) to the position “– ”.
Firmly hold the clutch case by your left hand, as illustrated.–
Slowly pull the starter knob until resistance is felt and continue with a smart–
pull.
Donotpulloutthestarterropetoitsfullextentanddonotallowthestarter–
handle to be retracted without control, but ensure that it is retracted slowly.
Repeat the starting operation until initial ignitions are heard.–
When the engine start, return the choke lever to “– ”. Please note that the
choke lever will return to “ ” position automatically when the throttle lever is
operated and the throttle is opened.
(1)
(2)
(3)

14
Runtheengineforapproximatelyoneminuteatamoderatespeedbeforeapplyingfullthrottle.–
Note: –Ifthestarterhandleispulledrepeatedlywhenthechokeleverremainsat“ ”position,theenginewillnotstarteasilyduetoexcessive
fuel intake.
–Incaseofexcessivefuelintake,removethesparkplugandpullthestarterhandleslowlytoremoveexcessfuel.Also,drytheelectrode
section of the spark plug.
Cautionduringoperation:
If the throttle lever is opened fully in a no-load operation, the engine rotation is increased to 10,000 min-1 or more. Never operate the engine at a
higherspeedthanrequiredandatanapproximatespeedof6,000–8,000min-1.
Startingthewarmengine
Sameasabove,exceptwithoutmovingthechokelever(chokeleverremainsintheposition“– ”).
STOPPING
Release the throttle lever (2) fully, and when the engine rpm has lowered,–
push the Start-Stop Switch (1) to “STOP” position to stop the engine.
Be aware that the cutting head may not stop immediately, and always allow it–
to slow down and stop fully by itself.
(1)
(2)
STOP
CAUTION: Thecuttingtoolsmentionedbelowmustonlyberesharpenedbyan
authorized facility. Manual resharpening will result in imbalances of
thecuttingtoolcausingvibrationsanddamagetotheequipment.
cutter blade (star blade (4 teeth))–
AnexpertresharpeningandbalancingserviceisprovidedbyAuthorized
Service Center.
NOTE:Toincreasetheservicelifeofthecutterblade(starblade)itmaybe
turned over once, until both cutting edges have become blunt.
RESHARPENING THE CUTTING TOOL

15
NYLON CUTTING HEAD
The nylon cutting head is a dual line trimmer head that has bump & feed
mechanism.
The nylon cutting head feeds out the nylon cord after tapping the trimmer head
on the ground.
Operation
The most effective cutting area is shown by the shaded area.–
Tofeedthenyloncord,increasethenyloncuttingheadspeedtoapprox.–
6,000 min-1 and tap the nylon cutting head lightly on the ground.
If the nylon cutting head does not feed out by tapping, rewind/replace the–
nylon cord by following the procedures described under “Replacing the nylon
cord.”
Replacingthenyloncord
Stop the engine.–
Press the housing latches inward to lift off the cover, then remove the spool.–
Hook the center of new nylon cord into the notch in the center of the spool,–
withoneendofthecordextendingabout80mm(31/8”)morethantheother.
Thenwindbothendsfirmlyaroundthespoolinthedirectionofthehead
rotation (left-hand direction indicated by LH and right-hand direction by RH on
the side of the spool).
Wind all but about 150 mm (6”) of the cords around the spool, leaving the–
ends temporarily hooked through the notch on the side of the spool.
Most effective cutting area
Spool
Spool
80 mm (3-1/8”)
For left hand
rotation
Cover
Latches
Press Press
Notches
150 mm (6”)

16
Feed the cords through the eyelets to come out of the housing.–
Mount the washer, spring, and spool in the housing.
Align the hooks on the the cover and the housing.–
Thenpushcoverfirmlyontothehousingtosecureit.
Eyelet
Cover
Hook
Hook
Eyelet
CAUTION: Beforedoinganyworkontheequipment,alwaysswitchoffthe
motor and pull the plug cap off the spark plug (see “Checking the
spark plug”).
Always wear protective gloves.
CAUTION: Neverremovetherecoilstarterforyourself,whichmaycausean
accident. It should be asked to the Authorized Service Agent.
Cleaning of air cleaner
Remove the screw (1).–
Remove the air cleaner cover (3).–
Take out the sponge element (2), wash it in lukewarm water and dry it–
completely.
After cleaning, put back the air cleaner cover (3) and fasten it with screw (1).–
NOTE: Ifthereisexcessivedustordirtadheringtotheaircleaner,cleanit
everyday.Acloggedaircleanermaymakeitdifficultorimpossibleto
start the engine or increase the engine rotational speed.
Toensurealongservicelifeandtoavoidanydamagetotheequipment,thefollowingservicingoperationsshouldbeperformedatregular
intervals.
Dailycheckupandmaintenance
Before operation, check the machine for loose screws or missing parts. Pay particular attention to the tightness of the cutting tool.–
Beforeoperation,alwayscheckforcloggingofthecoolingairpassageandthecylinderfins.–
Clean them if necessary.
Performthefollowingworkdailyafteruse:–
Cleantheequipmentexternallyandinspectfordamage.•
Cleantheairfilter.Whenworkingunderextremelydustyconditions,cleanthefiltertheseveraltimesaday.•
Checkthecuttingtoolfordamageandmakesureitisfirmlymounted.•
Checkthatthereissufficientdifferencebetweenidlingandengagementspeedtoensurethatthecuttingtoolisatastandstillwhilethe•
engine is idling (if necessary, reduce idling speed).
If under idling conditions the tool should still continue to run, consult your nearest Authorized Service Center.
Check the functioning of the start-stop switch, the lock-off lever, the control lever, and the look button.–
SERVICING INSTRUCTIONS
(1)
(2)
(3)

17
Suctionheadinthefueltank
Thefuelfilter(5)ofthesuctionheadisusedtofilterthefuelrequiredbythe–
carburetor.
Aperiodicalvisualinspectionofthefuelfilteristobeconducted.Forthat–
purpose open the tank cap, use a wire hook and pull out the suction head
through the tank opening. Filters found to have hardened, been polluted or
clogged up are to be replaced.
Insufficientfuelsupplycanresultintheadmissiblemaximumspeedbeing–
exceeded.Itisthereforeimportanttoreplacethefuelfilteratleastquarterlyto
ensure satisfactory fuel supply to the carburetor.
Cleaningofmufflerexhaustport
Checkofmufflerexhaustport(6)regularly.–
If it is clogged by carbon deposits, carefully scratch the deposits out with a–
suitable tool.
Any maintenance of adjustment work that is not included and described in this manual is only to be performed by Authorized Service Center.
0.6 mm – 0.7 mm
(0.024” – 0.028”)
Checkingthesparkplug
Only use the supplied universal wrench to remove or to install the spark plug.–
The gap between the two electrodes of the spark plug should be 0.6 ––
0.7 mm (0.024” –0.028”). If the gap is too wide or too narrow, adjust it. If the
spark plug is clogged with carton or fouled, clean it thoroughly or replace it.
CAUTION: Nevertouchthesparkplugconnectorwhiletheengineisrunning
(danger of high voltage electric shock).
Grease hole
Supplyofgreasetogearcase
Supplygrease(ShellAlvania2orequivalent)tothegearcasethroughthe–
grease hole every 30 hours. (Genuine MAKITA grease may be purchased
from your nearest authorized service center.)
(5)
(6)

18
Fault location
Maintenanceschedule
When the machine is in storage for a long time, drain fuel from the fuel–
tankandcarburetorasfollows:Drainallfuelfromthefueltank.Disposeof
properly and in accordance with all local laws.
Remove the spark plug and apply a few drops of oil into the spark plug hole.–
Then, pull the starter knob gently, so that oil covers the engine inside and
tighten the spark plug.
Clear dirt or dust from the cutter blade and outside of engine, wipe them with–
a oil-immersed cloth and keep the machine in a place as dry as possible.
Drain fuel
Humidity
STORAGE
Fault System Observation Cause
Engine not starting or with
difficulty
Ignition system Ignition spark O.K. Fault in fuel supply or compression system, mechanical
defect
No ignition spark Start-stop switch operated, wiring fault or short circuit,
spark plug or connector defective, ignition module faulty
Fuel supply Fueltankfilled Incorrect choke position, carburetor defective, fuel supply
line bent or blocked, fuel dirty
Compression No compression when
pulled over
Cylinder bottom gasket defective, crankshaft seals
damaged, cylinder or piston rings defective or improper
sealing of spark plug
Mechanical fault Starter not engaging Broken starter spring, broken parts inside of the engine
Warm start problems Tankfilledignitionspark
existing
Carburetor contaminated, must be cleaned
Engine starts but dies Fuel supply Tankfilled Incorrect idling adjustment, carburetor contaminated
Fuel tank vent defective, fuel supply line interrupted,
cable or start-stop switch faulty
Insufficientperformance Several systems may
simultaneously be
affected
Engine idling poor Airfiltercontaminated,carburetorcontaminated,muffler
clogged,exhaustductinthecylinderclogged
General Engine assembly, screws and nuts Visualinspectionfordamageandtightness
Check for general condition and security
After each refuelling Control lever
Start-stop switch
Functional check
Functional check
Daily Airfilter
Cooling air duct
Cutting tool
Idling speed
To be cleaned
To be cleaned
Check for damage and sharpness
Inspection (cutting tool must not move)
Weekly Spark plug
Muffler
Inspection, replace if necessary
Check and if necessary clean the opening
Quarterly Suction head
Fuel tank
To be replaced
To be cleaned
Shutting down procedure Fuel tank
Carburetor
Empty fuel tank
Operate until engine runs out of fuel

19
Terima kasih telah membeli pemotong semak bermesin bensin MAKITA.
Dengan bangga kami merekomendasikan bagi Anda produk pemotong semak
bermesin bensin MAKITA yang merupakan hasil program pengembangan yang
panjang dan akumulasi pengetahuan dan pengalaman bertahun-tahun.
Bacalah buklet ini, yang secara terperinci mengungkapkan berbagai poin
yang akan menunjukkan kinerjanya yang unggul. Ini akan membantu Anda
mendapatkan hasil maksimal dari pemotong semak bermesin bensin MAKITA.
Daftar Isi Halaman
Anda akan melihat simbol-simbol berikut ini saat membaca petunjuk penggunaan.
SIMBOL-SIMBOL
Bahasa Indonesia (Petunjuk Asli)
Simbol-simbol..............................................................19
Petunjuk keselamatan .................................................20
Data teknis...................................................................24
Penamaan bagian .......................................................25
Pemasangan gagang ..................................................26
Pemasangan pelindung...............................................26
Pemasangan bilah pemotong/
head pemotongan nilon...............................................27
Bahan bakar/pengisian bahan bakar...........................28
Penanganan-mesin yang benar ..................................29
Hal-hal tentang pengoperasian dan
cara menghentikan......................................................30
Menajamkan kembali alat pemotong...........................31
Petunjuk penyervisan ..................................................33
Penyimpanan...............................................................35
Bacalah petunjuk penggunaan Kenakan pelindung mata dan telinga
Perhatikan dan berhati-hatilah Kenakan helm pengaman, pelindung
mata, dan pelindung telinga
Dilarang Jangan gunakan bilah logam
Jaga jarak Kecepatan tertinggi mesin yang
diperbolehkan
Bahaya benda beterbangan Campuran bahan bakar dan oli
Dilarang merokok Menghidupkan mesin secara manual
Dilarang menyalakan api Penghentian darurat
Sarung tangan pelindung harus dipakai Pertolongan Pertama
Tendang-balik START(MULAI)
Jagalah area kerja selalu bebas dari
orang dan hewan peliharaan
Kenakan sepatu yang kuat dengan sol
antiselip. Sepatu pengaman dengan
pelindung ujung dari baja adalah yang
dianjurkan.

20
15 Meter
Gambar diagramatik
PETUNJUK KESELAMATAN
Petunjuk Umum
Bacalah petunjuk penggunaan ini untuk membiasakan diri dengan–
penanganan alat ini. Pengguna yang pemahamannya kurang akan
menghadapi risiko bahaya bagi dirinya sendiri dan juga orang lain akibat
penanganan yang tidak benar.
Dianjurkan untuk hanya meminjamkan alat ini kepada orang yang telah–
terbukti berpengalaman.
Selalu serahkan juga petunjuk penggunaan ini.
Pengguna pertama-kali harus meminta petunjuk dasar dari toko tempat–
membeli alat ini untuk membiasakan diri dengan penanganan pemotong
semak ini.
Anak-anak dan orang muda yang berusia kurang dari 18 tahun harus–
dilarang mengoperasikan alat ini. Namun demikian, mereka yang berusia
lebih dari 16 tahun boleh menggunakan perangkat ini untuk tujuan pelatihan
dibawahpengawasanpelatihyangberkualifikasi.
Gunakan dengan kehati-hatian dan perhatian maksimal.–
OperasikanhanyajikaAndaberadadalamkondisifisikyangbaik.Lakukan–
semua pekerjaan dengan tenang dan hati-hati. Pengguna harus bertanggung
jawab atas orang lain.
Jangan sekali-kali menggunakan alat ini setelah mengonsumsi alkohol atau–
obat, atau jika merasa lelah atau sakit.
Peraturan nasional dapat membatasi penggunaan mesin ini.–
Maksudpenggunaanmesin
Alat ini dimaksudkan hanya untuk memotong rumput, gulma, semak, dan–
perdu kecil. Alat ini sebaiknya tidak digunakan untuk tujuan lain seperti
merapikan tepian atau memotong tanaman pagar karena dapat menimbulkan
cedera.
Alatpelindungdiri
Pakaian yang dikenakan haruslah fungsional dan sesuai, yaitu harus–
terpasang pas tetapi tidak menghambat. Jangan mengenakan perhiasan atau
pakaian yang dapat tersangkut pada semak atau belukar.
Guna menghindari cedera kepala, mata, tangan, atau kaki di samping untuk–
melindungi pendengaran Anda, alat pelindung dan pakaian pelindung berikut
ini harus dikenakan selama mengoperasikan.
Selalu kenakan helm saat berada di tempat di mana ada risiko benda jatuh.–
Helm pelindung (1) harus diperiksa secara teratur dari kerusakan dan harus
diganti setelah paling lama 5 tahun. Gunakan hanya helm pelindung yang
disetujui.
Kaca helm (2) (atau kaca mata) melindungi wajah dari serpihan dan batu–
yang beterbangan. Selama mengoperasikan, selalu kenakan kaca mata, atau
kaca helm untuk mencegah cedera pada mata.
Kenakan alat pelindung dari kebisingan yang memadai untuk menghindari–
kerusakan pendengaran (penutup telinga (3), sumbat telinga, dll.).
Pakaian kerja terusan (4) akan melindungi tubuh dari batu dan serpihan yang–
beterbangan.
Kami sangat menganjurkan pengguna untuk mengenakan pakaian kerja
terusan.
Sarung tangan (5) merupakan salah satu alat yang dianjurkan dan harus–
selalu dikenakan selama mengoperasikan.
Saat menggunakan alat ini, selalu kenakan sepatu yang kuat (6) dengan sol–
antiselip. Ini akan melindungi Anda dari cedera dan memastikan tercapainya
pijakan yang baik.
Menghidupkanpemotongsemak
Pastikan tidak ada anak-anak atau orang lain dalam radius tempat kerja–
sejauh 15 meter (50 kaki), juga perhatikan binatang yang ada di dekat tempat
kerja.
Sebelummenggunakan,selalupastikanalatamanuntukdioperasikan:–
Periksalah keamanan alat pemotong, tuas gas, apakah mudah dioperasikan
dan periksa apakah pengunci tuas gas berfungsi dengan benar.
Alat pemotong harus tidak berputar selama mesin berjalan dalam kecepatan–
stasioner. Tanyakan kepada dealer terdekat perihal penyetelan jika Anda
ragu. Pastikan gagang bersih dan kering dan uji fungsi sakelar mulai/henti
(start/stop).
Table of contents
Languages:
Other Makita Brush Cutter manuals

Makita
Makita EBH341U User guide

Makita
Makita EM3400U User manual

Makita
Makita EA3201 SERIES User guide

Makita
Makita EBH252U User guide

Makita
Makita EM2650UH Manual

Makita
Makita EE2650H User guide

Makita
Makita RBC413U User manual

Makita
Makita EM4351UH User manual

Makita
Makita BBC231U User manual

Makita
Makita EM2650UH User manual

Makita
Makita BBC231U User manual

Makita
Makita RBC411U Manual

Makita
Makita EM400MP User manual

Makita
Makita EM4350RH User guide

Makita
Makita EBH340U User manual

Makita
Makita EBH341R User guide

Makita
Makita EM2650UH User manual

Makita
Makita EM4350UH Manual

Makita
Makita EM2650UH User manual

Makita
Makita EBH252U User guide