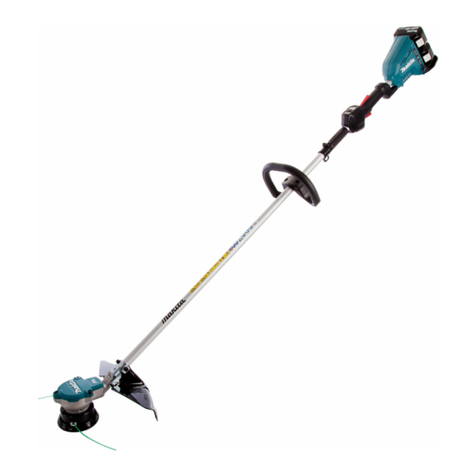
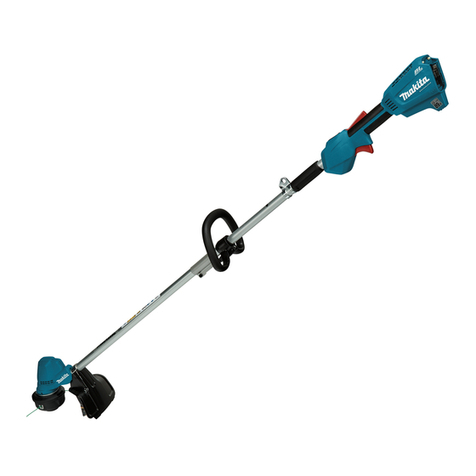
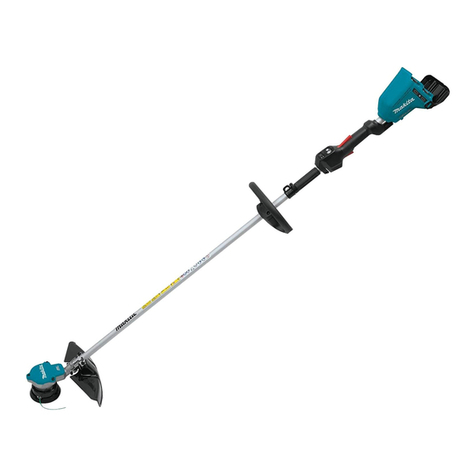
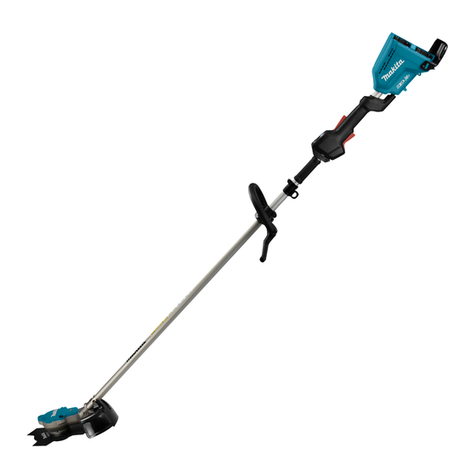
Makita DUR141 User manual

DUR141
DUR181
EN Cordless String Trimmer INSTRUCTION MANUAL 6
UK Акумуляторна кордова
газонокосарка
ІНСТРУКЦІЯ З
ЕКСПЛУАТАЦІЇ 15
PL Wykaszarka Akumulatorowa INSTRUKCJA OBSŁUGI 25
RO Motocositoare cu r fără
cablu MANUAL DE INSTRUCŢIUNI 34
DE Akku-Rasentrimmer BEDIENUNGSANLEITUNG 43
HU Vezeték nélküli nejlonszálas
fűkasza HASZNÁLATI KÉZIKÖNYV 53
SK Akumulátorová strunová
kosačka NÁVOD NA OBSLUHU 62
CS Akumulátorová strunová
sekačka NÁVOD K OBSLUZE 71

1
2
3
1
1
2
1
2
1
Fig.1
Fig.2
Fig.3
Fig.4
Fig.5
Fig.6
Fig.7
Fig.8
2

1
2
1
1
2
3
1
2
3
1
2
3
4
Fig.9
Fig.10
Fig.11
Fig.12
Fig.13
Fig.14
Fig.15
Fig.16
3

1
2
1
2
1
2
Fig.22
Fig.17
Fig.18
Fig.19
Fig.20
Fig.21
Fig.23
Fig.24
4

1
2
Fig.30
1
Fig.25
Fig.26
Fig.27
Fig.28
Fig.29
Fig.31
5

6ENGLISH
ENGLISH (Original instructions)
SPECIFICATIONS
Model DUR141 DUR181
No load speed 6,000 min-1 7,800 min-1
Overall length 1,229 mm - 1,433 mm 1,229 mm - 1,433 mm
Cutting diameter with nylon cutting head 260 mm 260 mm
Net weight 2.6 - 2.9 kg 2.6 - 3.0 kg
Rated voltage D.C. 14.4 V D.C. 18 V
• Duetoourcontinuingprogramofresearchanddevelopment,thespecicationshereinaresubjecttochange
without notice.
• Specicationsmaydierfromcountrytocountry.
• Theweightmaydierdependingontheattachment(s),includingthebatterycartridge.Thelightestandheavi-
estcombination,accordingtoEPTA-Procedure01/2014,areshowninthetable.
Applicable battery cartridge and charger
Battery cartridge D.C.14.4 V Model BL1415N/BL1430/BL1430B/BL1440/BL1450/BL1460B
D.C.18 V Model BL1815N/BL1820/BL1820B/BL1830/BL1830B/BL1840/
BL1840B/BL1850/BL1850B/BL1860B
Charger DC18RC/DC18RD/DC18RE/DC18SD/DC18SE/DC18SF/
DC18SH
• Someofthebatterycartridgesandchargerslistedabovemaynotbeavailabledependingonyourregionof
residence.
WARNING: Only use the battery cartridges and chargers listed above.Useofanyotherbatterycartridges
andchargersmaycauseinjuryand/orre.
Symbols
Thefollowingshowthesymbolsusedfortheequip-
ment.Besurethatyouunderstandtheirmeaningbefore
use.
Take particular care and attention.
Read instruction manual.
Danger;beawareofthrownobjects.
Thedistancebetweenthetooland
bystandersmustbeatleast15m.
Keepbystandersaway.
15m(50FT)Keep distance at least 15 m.
Avoidkickback.
Wear safety glasses.
Wear ear protection.
Wear a helmet, goggles and ear protection.
Wear protective gloves.
Wearsturdybootswithnonslipsoles.
Steeltoedsafetybootsarerecommended.
Do not expose to moisture.
Toppermissibletoolspeed.
Ni-MH
Li-ion
OnlyforEUcountries
Donotdisposeofelectricequipmentor
batterypacktogetherwithhouseholdwaste
material!
InobservanceoftheEuropeanDirectives,
onWasteElectricandElectronic
EquipmentandBatteriesandAccumulators
andWasteBatteriesandAccumulators
and their implementation in accordance
withnationallaws,electricequipmentand
batteriesandbatterypack(s)thathave
reachedtheendoftheirlifemustbecol-
lected separately and returned to an envi-
ronmentallycompatiblerecyclingfacility.
Noise
ThetypicalA-weightednoiseleveldeterminedaccord-
ingtoEN786:
Model DUR141
Soundpressurelevel(LpA):75dB(A)
Soundpowerlevel(LWA):83.7dB(A)
Uncertainty(K):2.5dB(A)
Thenoiselevelunderworkingmayexceed80dB(A).

7ENGLISH
Model DUR181
Soundpressurelevel(LpA):82dB(A)
Soundpowerlevel(LWA):88.5dB(A)
Uncertainty(K):2.5dB(A)
NOTE:Thedeclarednoiseemissionvalue(s)has
beenmeasuredinaccordancewithastandardtest
methodandmaybeusedforcomparingonetoolwith
another.
NOTE:Thedeclarednoiseemissionvalue(s)
mayalsobeusedinapreliminaryassessmentof
exposure.
WARNING: Wear ear protection.
WARNING: The noise emission during actual
use of the power tool can dier from the declared
value(s) depending on the ways in which the
tool is used especially what kind of workpiece is
processed.
WARNING: Be sure to identify safety mea-
sures to protect the operator that are based on an
estimation of exposure in the actual conditions of
use (taking account of all parts of the operating
cycle such as the times when the tool is switched
o and when it is running idle in addition to the
trigger time).
Vibration
Thevibrationtotalvaluedeterminedaccordingto
EN786:
Vibrationemission(ah):2.5m/s2or less
Uncertainty(K):1.5m/s2
NOTE:Thedeclaredvibrationtotalvalue(s)hasbeen
measured in accordance with a standard test method
andmaybeusedforcomparingonetoolwithanother.
NOTE:Thedeclaredvibrationtotalvalue(s)mayalso
beusedinapreliminaryassessmentofexposure.
WARNING: The vibration emission during
actual use of the power tool can dier from the
declared value(s) depending on the ways in which
the tool is used especially what kind of workpiece
is processed.
WARNING: Be sure to identify safety mea-
sures to protect the operator that are based on an
estimation of exposure in the actual conditions of
use (taking account of all parts of the operating
cycle such as the times when the tool is switched
o and when it is running idle in addition to the
trigger time).
EC Declaration of Conformity
For European countries only
TheECdeclarationofconformityisincludedasAnnexA
to this instruction manual.
IMPORTANT SAFETY
INSTRUCTIONS
WARNING! Read all safety warnings and all
instructions.Failuretofollowthewarningsandinstruc-
tionsmayresultinelectricshock,reand/orserious
injury.
Save all warnings and instruc-
tions for future reference.
1. Be familiar with the controls and proper use of
the equipment.
2. Cutting elements continue to rotate after the
motor is switched o.
3. Never allow children or people unfamiliar with
the instructions to use the machine.
4. Stop using the machine while people, espe-
cially children, or pets are nearby.
5. Only use the machine in daylight or good arti-
cial light.
6. Before using the machine and after any
impact, check for signs of wear or damage and
repair as necessary.
7. Take care against injury from any device
tted for trimming the lament line length.
After extending new cutter line always return
the machine to its normal operating position
before switching on.
8. Never t metal cutting elements.
9. This appliance is not intended for use by
persons (including children) with reduced
physical, sensory or mental capabilities, or
lack of experience and knowledge, unless they
have been given supervision or instruction
concerning use of the appliance by a person
responsible for their safety. Children should be
supervised to ensure that they do not play with
the appliance.
10. Use the tool with the utmost care and
attention.
11. Operate the tool only if you are in good phys-
ical condition. Perform all work calmly and
carefully. Use common sense and keep in mind
that the operator or user is responsible for
accidents or hazards occurring to other people
or their property.
12. Never operate the tool when tired, feeling ill or
under the inuence of alcohol or drugs.
13. The tool should be switched o immediately if
it shows any signs of unusual operation.
Intended use of the tool
1. Use right tool. The cordless string trimmer is
only intended for cutting grass, light weeds. It
should not be used for any other purpose such
as hedge cutting as this may cause injury.
Personal protective equipment
►Fig.1
►Fig.2
1. Dress Properly. The clothing worn should be
functional and appropriate, i.e. it should be
tight-tting but not cause hindrance. Do not
wear either jewelry or clothing which could
become entangled with high grass. Wear pro-
tective hair covering to contain long hair.
2. When using the tool, always wear sturdy shoes
with a non-slip sole. This protects against
injuries and ensures a good footing.
3. Wear protective glasses or goggles.

8ENGLISH
Electrical and battery safety
1. Avoid dangerous environment. Don't use the
tool in damp or wet locations or expose it to
rain. Water entering the tool will increase the
risk of electric shock.
2. Recharge only with the charger specied by
the manufacturer. A charger that is suitable for
one type of battery pack may create a risk of
re when used with another battery pack.
3. Use power tools only with specically desig-
nated battery packs. Use of any other battery
packs may create a risk of injury and re.
4. Do not dispose of the battery(ies) in a re. The
cell may explode. Check with local codes for
possible special disposal instructions.
5. Do not open or mutilate the battery(ies).
Released electrolyte is corrosive and may
cause damage to the eyes or skin. It may be
toxic if swallowed.
Starting up the tool
►Fig.3
1. Make sure that there are no children or other
people within a working range of 15 meters
(50 ft), also pay attention to any animals in the
working vicinity. Otherwise stop using the tool.
2. Before use always check that the tool is safe
for operation. Check the security of the cutting
tool and the guard and the switch trigger/lever
for easy and proper action. Check for clean
and dry handles and test the on/o function of
the switch.
3. Check damaged parts before further use of
the tool. A guard or other part that is damaged
should be carefully checked to determine
that it will operate properly and perform its
intended function. Check for alignment of
moving parts, binding of moving parts, break-
age of parts, mounting, and any other condi-
tion that may aect its operation. A guard or
other part that is damaged should be properly
repaired or replaced by our authorized ser-
vice center unless indicated elsewhere in this
manual.
4. Switch on the motor only when hands and feet
are away from the cutting tool.
5. Before starting make sure that the cutting
tool has no contact with hard objects such as
branches, stones etc. as the cutting tool will
revolve when starting.
Method of operation
1. Never operate the machine with damaged
guards or without the guards in place.
2. Only use the tool in good light and visibility.
During the winter season beware of slippery
or wet areas, ice and snow (risk of slipping).
Always ensure a safe footing.
3. Take care against injury to feet and hands from
the cutting tool.
4. Keep hands and feet away from the cutting
means at all times and especially when switch-
ing on the motor.
5. Never cut above waist height.
6. Never stand on a ladder and run the tool.
7. Never work on unstable surfaces.
8. Don't overreach. Keep proper footing and
balance at all times.
9. Always be sure of your footing on slopes.
10. Walk, never run.
11. Remove sand, stones, nails etc. found within
the working range. Foreign particles may
damage the cutting tool and can cause to be
thrown away, resulting in a serious injury.
12. Never touch moving hazardous parts before
the machine is disconnected from the mains
and the moving hazardous parts have come to
a complete stop.
13. Should the cutting tool hit stones or other hard
objects, immediately switch o the motor and
inspect the cutting tool.
14. Before commencing cutting, the cutting tool
must have reached full working speed.
15. During operation always hold the tool with
both hands. Never hold the tool with one hand
during use. Always ensure a safe footing.
16. All protective equipment such as guards
supplied with the tool must be used during
operation.
17. Except in case of emergency, never drop
or cast the tool to the ground or this may
severely damage the tool.
18. Never drag the tool on the ground when mov-
ing from place to place, the tool may become
damaged if moved in this manner.
19. Always remove the battery cartridge from the
tool:
— whenever leaving the tool unattended;
— before clearing a blockage;
— before checking, cleaning or working on
the tool;
— before making any adjustments, chang-
ing accessories or storing;
— whenever the tool starts vibrating
unusually;
— whenever transporting the tool.
20. Don't force the tool. It will do the job better and
with less likelihood of a risk of injury at the
rate for which it was designed.
Maintenance instructions
1. The condition of the cutting tool, protective
devices must be checked before commencing
work.
2.
Turn o the motor and remove the battery
cartridge before carrying out maintenance,
replacing the cutting tool and cleaning the tool.
3. After use, disconnect the battery cartridge
from the tool and check for damage.
4. Check for loose fasteners and damaged parts
such as nearly halfway cut-o state in the
cutting tool.
5. When not in use store the equipment in a dry
location that is locked up or out of children's
reach.

9ENGLISH
6. Use only the manufacturer's recommended
replacement parts and accessories.
7. Always ensure that ventilation openings are
kept clear of debris.
8. Inspect and maintain the tool regularly, espe-
cially before/after use. Have the tool repaired
only by our authorized service center.
9. Keep handles dry, clean and free from oil and
grease.
SAVE THESE INSTRUCTIONS.
WARNING: DO NOT let comfort or famil-
iarity with product (gained from repeated
use) replace strict adherence to safety
rules for the subject product. MISUSE or
failure to follow the safety rules stated in
this instruction manual may cause serious
personal injury.
Important safety instructions for
battery cartridge
1.
Before using battery cartridge, read all instruc-
tions and cautionary markings on (1) battery char-
ger, (2) battery, and (3) product using battery.
2. Do not disassemble battery cartridge.
3. If operating time has become excessively
shorter, stop operating immediately. It may
result in a risk of overheating, possible burns
and even an explosion.
4. If electrolyte gets into your eyes, rinse them
out with clear water and seek medical atten-
tion right away. It may result in loss of your
eyesight.
5. Do not short the battery cartridge:
(1) Do not touch the terminals with any con-
ductive material.
(2) Avoid storing battery cartridge in a con-
tainer with other metal objects such as
nails, coins, etc.
(3) Do not expose battery cartridge to water
or rain.
A battery short can cause a large current
ow, overheating, possible burns and even a
breakdown.
6. Do not store the tool and battery cartridge in
locations where the temperature may reach or
exceed 50 °C (122 °F).
7. Do not incinerate the battery cartridge even if
it is severely damaged or is completely worn
out. The battery cartridge can explode in a re.
8. Be careful not to drop or strike battery.
9. Do not use a damaged battery.
10.
The contained lithium-ion batteries are subject to
the Dangerous Goods Legislation requirements.
Forcommercialtransportse.g.bythirdparties,
forwardingagents,specialrequirementonpack-
agingandlabelingmustbeobserved.
Forpreparationoftheitembeingshipped,consult-
inganexpertforhazardousmaterialisrequired.
Pleasealsoobservepossiblymoredetailed
national regulations.
Tapeormaskoopencontactsandpackupthe
batteryinsuchamannerthatitcannotmove
around in the packaging.
11. When disposing the battery cartridge, remove
it from the tool and dispose of it in a safe
place. Follow your local regulations relating to
disposal of battery.
12. Use the batteries only with the products
specied by Makita.Installingthebatteriesto
non-compliantproductsmayresultinare,exces-
sive heat, explosion, or leak of electrolyte.
13. If the tool is not used for a long period of time,
the battery must be removed from the tool.
SAVE THESE INSTRUCTIONS.
CAUTION: Only use genuine Makita batteries.
Useofnon-genuineMakitabatteries,orbatteriesthat
havebeenaltered,mayresultinthebatterybursting
causingres,personalinjuryanddamage.Itwill
also void the Makita warranty for the Makita tool and
charger.
Tips for maintaining maximum
battery life
1. Charge the battery cartridge before completely
discharged. Always stop tool operation and
charge the battery cartridge when you notice
less tool power.
2. Never recharge a fully charged battery car-
tridge. Overcharging shortens the battery
service life.
3. Charge the battery cartridge with room tem-
perature at 10 °C - 40 °C (50 °F - 104 °F). Let
a hot battery cartridge cool down before
charging it.
4. Charge the battery cartridge if you do not use
it for a long period (more than six months).

10 ENGLISH
Parts description
1
2
3
4
5
6
Battery cartridge
Indication lamp
Switch trigger
Front grip
Guard7
8
Clamping nut
Lock grip
Nylon cutting head
1
2
3
4
5
6
7
8

11 ENGLISH
FUNCTIONAL DESCRIPTION
WARNING:
• Always be sure that the tool is switched
o and battery cartridge is removed before
adjusting or checking function on the tool.
Failuretoswitchoandremovethebattery
cartridgemayresultinseriouspersonalinjury
from accidental start-up.
Installing or removing battery cartridge
►Fig.4: 1. Red indicator 2. Button 3. Battery cartridge
CAUTION:
• Alwaysswitchothetoolbeforeinstallingor
removingofthebatterycartridge.
• Hold the tool and the battery cartridge rmly
when installing or removing battery car-
tridge.Failuretoholdthetoolandthebattery
cartridgermlymaycausethemtoslipoyour
hands and result in damage to the tool and
batterycartridgeandapersonalinjury.
Toremovethebatterycartridge,slideitfromthetool
whileslidingthebuttononthefrontofthecartridge.
Toinstallthebatterycartridge,alignthetongueonthe
batterycartridgewiththegrooveinthehousingandslip
it into place. Insert it all the way until it locks in place
with a little click. If you can see the red indicator on the
uppersideofthebutton,itisnotlockedcompletely.
CAUTION:
• Alwaysinstallthebatterycartridgefullyuntilthe
redindicatorcannotbeseen.Ifnot,itmayacci-
dentallyfalloutofthetool,causinginjurytoyou
or someone around you.
• Donotinstallthebatterycartridgeforcibly.Ifthe
cartridgedoesnotslideineasily,itisnotbeing
inserted correctly.
Battery protection system (Lithium-
ion battery with star marking)
►Fig.5: 1. Star marking
Lithium-ionbatterieswithastarmarkingareequipped
with a protection system. This system automatically
cutsopowertothetooltoextendbatterylife.
Thetoolwillautomaticallystopduringoperationifthetooland/
orbatteryareplacedunderoneofthefollowingconditions:
• Overloaded:
The tool is operated in a manner that causes
ittodrawanabnormallyhighcurrent.
In this situation, release the switch trigger on
the tool and stop the application that caused
thetooltobecomeoverloaded.Thenpullthe
switch trigger again to restart.
Ifthetooldoesnotstart,thebatteryisover-
heated.Inthissituation,letthebatterycool
beforepullingtheswitchtriggeragain.
• Lowbatteryvoltage:
Theremainingbatterycapacityistoolow
and the tool will not operate. In this situation,
removeandrechargethebattery.
Indicating the remaining battery
capacity
Only for battery cartridges with the indicator
►Fig.6: 1. Indicator lamps 2.Checkbutton
Pressthecheckbuttononthebatterycartridgetoindi-
catetheremainingbatterycapacity.Theindicatorlamps
light up for a few seconds.
Indicator lamps Remaining
capacity
Lighted O Blinking
75% to 100%
50% to 75%
25% to 50%
0% to 25%
Charge the
battery.
Thebattery
may have
malfunctioned.
NOTE: Depending on the conditions of use and the
ambienttemperature,theindicationmaydierslightly
from the actual capacity.
Power switch action
WARNING:
• Before inserting the battery cartridge in the
tool, always check to see that the switch
trigger actuates properly and returns to the
"OFF" position when released. Do not pull
the switch trigger hard without pressing in
the lock-o button. This can cause switch
breakage. Operating a tool with a switch that
does not actuate properly can lead to loss of
controlandseriouspersonalinjury.
►Fig.7: 1.Lock-obutton2. Switch trigger
Topreventtheswitchtriggerfrombeingaccidentally
pulled,alock-obuttonisprovided.
Tostartthetool,movethelock-obuttonforwardand
pull the switch trigger. Release the switch trigger to
stop.

12 ENGLISH
Indication lamp
►Fig.8: 1. Indication lamp
Runningthetoolallowstheindicationlamptoshowthebatterycartridgecapacitystatus.
When the tool is also overloaded and has stopped during operation, the lamp lights up in red.
Refertothefollowingtableforthestatusandactiontobetakenfortheindicationlamp.
Note 1: The time at which the indication lamp lights up varies by the temperature
around the work area and the battery cartridge conditions.
Indication lamp
The lamp blinks in red.
The lamp lights up in red.
(Note 1)
The lamp lights up in red.
(Note 1)
Status
This indicates the appropriate
time to replace the battery
cartridge when the battery
power becomes low.
This function works when the
battery power is almost used
up. At this time, tool stops
immediately.
Autostop due to overload.
Action to be taken
Recharge the battery cartridge
as soon as possible.
Recharge the battery cartridge.
Turn off the tool.
Adjusting the shaft length
WARNING:
• Beforeadjustingtheshaftlength,releasethe
switchtriggerandremovethebatterycartridge
fromthestringtrimmer.Failuretoreleasethe
triggerandremovingthebatterycartridgemay
causeapersonalinjury.
►Fig.9: 1. Shaft 2. Grip
Toadjustthelengthoftheshaft,turnthegripcounter-
clockwise until the shaft is unlocked and pull out or push
in to the desired length.
Nylon cutting head
NOTICE:
• Thebumpfeedwillnotoperateproperlyifthe
Nylon cutting head is not rotating.
►Fig.10: 1. Nylon cutting head
The nylon cutting head is a single string trimmer head
providedwithabump&feedmechanism.
To cause the nylon cord to feed out, the cutting head
shouldbebumpedagainstthegroundwhilethetoolis
running.Asthenyloncordisfeedingoutitwillautomat-
icallybecuttotheproperlengthbythecutteronthe
guard.
NOTE:
• Ifthenyloncorddoesnotfeedoutwhilebump-
ingthehead,rewind/replacethenyloncord
byfollowingtheproceduresdescribedunder
“Installing or removing the Nylon cutting head”
and "Winding a new Nylon cord on the spool."
• Donotbumpthetooltotheconcreteorasphalt
surface.Bumpingtothiskindofobjectsmay
cause the tool damage.
ASSEMBLY
WARNING:
• Always be sure that the tool is switched
o and battery cartridge is removed before
carrying out any work on the tool.Failureto
switchoandremovethebatterycartridgemay
resultinseriouspersonalinjuryfromaccidental
start-up.
• Never start the tool unless it is completely
assembled. Operation of the tool in a partially
assembledstatemayresultinseriouspersonal
injuryfromaccidentalstart-up.
Installing the front grip
►Fig.11: 1.Frontgrip2. Clamping nut 3.Hexbolt
Putthefrontgriponthefrontgripholderandsecureit
withahexboltandtheclampingnutprovidedwiththe
stringtrimmerasshowninthegure.Atthistime,the
hexboltneedstobeinstalledfromthesideinwhichthe
hexboltlockportislocatedandtheclampingnutneeds
tobeinstalledfromtheoppositeside.
NOTE:
• The front grip has a edge-to-edge cut slit in its
mounting area. Using this slit allows you to eas-
ily install the front grip on the front grip holder.
Thefrontgripangleisadjustable.Toadjustthefront
grip angle, loosen the claming nut, set the front grip at
an proper angle according to your work and then tighten
thenutclockwisermly.

13 ENGLISH
Installing the guard
CAUTION:
• While installing the guard, be careful not to
contact the nylon cord cutter provided on
the guard. Contact with the cutter could result
inpersonalinjury.
►Fig.12: 1. Guard 2. Screws 3. Cutter cover
Mounttheguardbyttingitontothemotorhousing
sothattheNyloncordisnotpinchedbetweenthe
guard and the motor housing, and then secure it with
two screws. Before starting the trimmer, take away the
cutter cover from the cord cutter.
Installing or removing the Nylon
cutting head
WARNING:
• Before installing or removing the Nylon cut-
ting head (both spool cover and spool, and
hereafter called this way), make sure that the
tool is switched o and the battery cartridge
is removed from the tool.Failuretoswitcho
thetoolandremovethebatterycartridgemay
causeapersonalinjury.
CAUTION:
• While installing or removing the Nylon cut-
ting head, be careful not to contact the nylon
cord cutter provided on the guard. Contact
withthecuttercouldresultinpersonalinjury.
►Fig.13
►Fig.14
ToremovetheNyloncuttinghead(spoolandspool
cover)fromthestringtrimmer,pressinthelatches
forcefullyonbothsidesofthespoolcoverandraiseit.
►Fig.15: 1. Nylon cord eyehole 2. Notch of the nylon
cutting head installation port 3. Spring
4. Spool holder
NOTICE:
• Make sure that the spring is installed inside the
spool holder.
Toinstallacord-newly-woundNyloncuttinghead(spool
andspoolcover)onthestringtrimmer,aligntheNylon
cord eyehole with the notch of the Nylon cutting head
installation port on the trimmer and then press in it until
a click is heard.
Winding a new Nylon cord on the
spool
►Fig.16
Removethespoolfromthespoolcoverandtakeothe
remaining used Nylon cord from the spool.
►Fig.17: 1. Nylon cord 2. Retainer for nylon cord end
InsertaNyloncordtotheretainershowninthegure.
►Fig.18
Windittightlyataroundthespoolinthedirectionof
arrow on the spool so that the wound Nylon cord sur-
face appears uniform over the winding area.
►Fig.19
TemporarilyxaNyloncordatthenotchshowninthe
gure.
►Fig.20
Bring the Nylon cord through the Nylon cord eyehole in
the spool cover.
►Fig.21: 1. Spool 2. Nylon cord
AfterinstallingtheNyloncuttinghead,makesurethat
theNyloncordcomesoutbypressingthespooland
pulling the Nylon cord.
OPERATION
Attachment of shoulder strap
►Fig.22: 1. Shoulder strap 2. Hook
Hook the shoulder strap in a hole in the front grip.
OPERATION
CAUTION:
• Do not cut high grass at a time. Cutting high
grass at a time near the root may cause the
trimmermotorspindletobeentangledbygrass
which leads to the motor under overload, result-
ing in damage to the trimmer.
►Fig.23
►Fig.24
CAUTION:
• Use the trimmer without getting the spool
into a contact with the ground surface. Using
the spool contacting the ground surface may
cause the motor under overload resulting in
damage to the trimmer.
►Fig.25
CAUTION:
• Do not force the trimmer in densely growing
grass.
►Fig.26
CAUTION:
• Do not use the trimmer as if you dig out the
ground with it.
Cutting the grass near a tree,
concrete block, brick or garden
stone
►Fig.27
Hold the trimmer tilting at a level so that it does not
contact the ground surface and cut the grass using the
Nylon cord tip like knocking the ground. In this work,
smoothfeedingoutisneededbecausetheNyloncord
wearsmorequicklythanusual.

14 ENGLISH
NOTE:
• Getting the trimmer too close to a tree, concrete
block,brickorgardenstoneorthelikeduring
performing the edging work or such similar cut-
tingworkmaycausetheNyloncordtobecuto
halfwayinsidethespoolcover.Atthistime,take
the spool out of the spool cover and then set
theNyloncordagainproperlybyreferringtothe
section titled "Installing or removing the Nylon
cutting head" and "Winding a new Nylon cord on
the spool". Using the tip of the Nylon cord during
operationbringsthebestresultofoperationand
therefore it is recommended to keep the tool
more than 5 cm away from the tree, concrete
block,brickorgardenstoneorthelike.
Startthetrimmerbeforegettingclosetothegrassto
becut.
CutthegrassusingtheNyloncordtipbymovingthe
trimmer from right to left and proceed slowly, keeping
thetrimmertiltedattheangleofabout30°inrelationto
the ground surface.
Whencuttinghighgrass,cutinlayersalwaysbeginning
from the top with each cut length short.
Using the tool as an edger
►Fig.28
Using the tool as an edger allows the operator to cut
alongtheedgeoftheconcreteblock,brickandthelike.
►Fig.29: 1. Motor housing 2. Grip
Forusingthetoolasanedger,holdtheshaftofthe
trimmer with one hand and turn the grip counter clock-
wise to loosen the shaft. Rotate the shaft with the motor
housing180°andtightenthegripclockwiseuntilit
locks.
NOTE:
• Beforerotatingtheshaft,itneedstobefully
shortened or extended.
• Afterchangingtotheedgerposition,makesure
that the motor housing and shaft are locked.
►Fig.30
Toobtainagoodresultofnishcutting,moveparallelto
the edge you are going to perform an edging work.
Cutting the grass in a tight place or
on a slope
WARNING:
• Whencuttingthegrassonaslope,becarefulof
stones,grassandotherforeignobjectsthrown
from the cutting head area.
• When cutting the grass on a slope, make sure
thatyoualwayskeepagoodandstablefooting.
►Fig.31: 1.Lockbutton
To ease the work in a tight place which restricts the
height, such as cutting the grass under an outdoor
wooddeckandsimilars,pushthelockbuttonandthen
benddownthecuttingheadsothattheshaftisparallel
tothegroundsurface.Adjustingthecuttingheadangle
properly in this way helps you cut the grass on a slope.
MAINTENANCE
WARNING:
• Always be sure that the tool is switched
o and battery cartridge is removed before
attempting to perform inspection or main-
tenance on the tool.Failuretoswitchoand
removethebatterycartridgemayresultinseri-
ouspersonalinjuryfromaccidentalstart-up.
NOTICE:
Neverusegasoline,benzine,thinner,alcoholor
the like. Discoloration, deformation or cracks may
result.
TomaintainproductSAFETYandRELIABILITY,repairs,
anyothermaintenanceoradjustmentshouldbeper-
formedbyMakitaAuthorizedServiceCenters,always
using Makita replacement parts.
OPTIONAL
ACCESSORIES
CAUTION:
• These accessories or attachments are recom-
mendedforusewithyourMakitatoolspecied
in this manual. The use of any other accessories
orattachmentsmightpresentariskofinjuryto
persons. Only use accessory or attachment for
its stated purpose.
If you need any assistance for more details regard-
ing these accessories, ask your local Makita Service
Center.
• Nylon cutting head
• Nylon cords
• Shoulder strap
• Goggles
• Makitagenuinebatteryandcharger
NOTE:
• Someitemsinthelistmaybeincludedinthe
tool package as standard accessories. They
maydierfromcountrytocountry.

15 УКРАЇНСЬКА
УКРАЇНСЬКА (Оригінальні вказівки)
ТЕХНІЧНІ ХАРАКТЕРИСТИКИ
Модель DUR141 DUR181
Швидкістьбезнавантаження 6000хв-1 7800хв-1
Загальнадовжина 1229мм-1433мм 1229мм-1433мм
Діаметррізанняріжучоюголовкоюзнейлоновимшнуром 260мм 260мм
Чиставага 2,6-2,9кг 2,6-3,0кг
Номінальнанапруга 14,4Впост.струму 18Впост.струму
• Оскількинашапрограманауковихдослідженьірозробоктриваєбезперервно,наведенітуттехнічні
характеристикиможутьбутизміненібезпопередження.
• Урізнихкраїнахтехнічніхарактеристикиможутьбутирізними.
• Вагаможевідрізнятисязалежновіддопоміжногообладнання,наприкладкасетизакумулятором.
Найлегшітанайважчікомплекти,відповіднодостандартуEPTA(Європейськаасоціаціявиробників
електроінструменту)відсічня01/2014року,представленовтаблиці.
Застосовна касета з акумулятором і зарядний пристрій
Касетазакумулятором Модель14,4Впост.тока BL1415N/BL1430/BL1430B/BL1440/BL1450/BL1460B
Модель18Впост.тока BL1815N/BL1820/BL1820B/BL1830/BL1830B/BL1840/
BL1840B/BL1850/BL1850B/BL1860B
Заряднийпристрій DC18RC/DC18RD/DC18RE/DC18SD/DC18SE/DC18SF/
DC18SH
• Деякікасетизакумуляторомізарядніпристрої,яківказановище,можутьбутинедоступнимизалежно
відвашогорегіонуабомісцяперебування.
ПОПЕРЕДЖЕННЯ: Використовуйте лише касети з акумулятором і зарядні пристрої, перелічені
вище.Використаннябудь-якихіншихкасетзакумуляторомізаряднихпристроївможепризвестидотравму-
ванняй/абопожежі.
Символи
Далінаведенісимволи,якізастосовуютьсядля
позначенняобладнання.Передкористуванням
переконайтеся,щоВирозумієтеїхнєзначення.
Будьтеособливоуважнітаобережні!
Читайтеінструкціюзексплуатації.
Небезпека;пам’ятайте,щопредмети
можутьвідскочити.
Відстаньміжінструментомілюдьми,що
знаходятьсяпоблизу,повиннастановити
неменше15метрів.
Слідкуйтезатим,щобсторонніособи
знаходилисянанебезпечнійвідстані.
15m(50FT)Тримайтевідстаньщонайменше15
метрів.
Уникайтевіддачі.
Вдягайтезахисніокуляри.
Користуйтесязасобамизахистуорганів
слуху.
Обов'язковонадягайтешолом,захисні
окуляритазасобизахистуорганівслуху.
Вдягайтезахиснірукавиці.
Надягайтеміцневзуттяізпідошвами,що
нековзають.Мирекомендуємозахисне
взуттязісталевимноском.
Непіддавайтеінструментвпливувологи.
Максимальноприпустимашвидкість
роботиінструмента.
Ni-MH
Li-ion
ТількидлякраїнЄС
Невикидайтеелектроприладиабо
акумуляторнібатареїразомізпобутовим
сміттям!
ЗгіднозЄвропейськимидирективами
проутилізаціюелектричноготаелек-
тронногообладнаннятапроутилізацію
батарейтаакумуляторівібатарейта
акумуляторів,термінслужбиякихзакін-
чився,таїхвикористанняміздотриман-
нямнаціональнихзаконів,електричне
обладнання,батареїтаакумулятори,
термінслужбиякихзакінчився,потрібно
збиратиокремотавідправлятина
екологічночистіпідприємствазїхньої
переробки.

16 УКРАЇНСЬКА
Шум
РівеньшумузашкалоюАутиповомувиконанні,
визначенийвідповіднодоEN786:
Модель DUR141
Рівеньзвуковоготиску(LpA):75дБ(A)
Рівеньзвуковоїпотужності(LWA):83,7дБ(A)
Похибка(K):2,5дБ(A)
Рівеньшумупідчасроботиможеперевищувати80дБ(А).
Модель DUR181
Рівеньзвуковоготиску(LpA):82дБ(A)
Рівеньзвуковоїпотужності(LWA):88,5дБ(A)
Похибка(K):2,5дБ(A)
ПРИМІТКА:
Заявленезначенняшумубуловиміряно
відповіднодостандартнихметодівтестуванняйможевико-
ристовуватисядляпорівнянняодногоінструментазіншим.
ПРИМІТКА:
Заявленезначенняшумуможетакожвико-
ристовуватисядляпопередньогооцінюваннявпливу.
ПОПЕРЕДЖЕННЯ: Користуйтеся засобами
захисту органів слуху.
ПОПЕРЕДЖЕННЯ:
Залежно від умов вико-
ристання рівень шуму під час фактичної роботи
електроінструмента може відрізнятися від
заявленого значення вібрації; особливо сильно
на це впливає тип деталі, що оброблюється.
ПОПЕРЕДЖЕННЯ:
Забезпечте належні запо-
біжні заходи для захисту оператора, що відпові-
датимуть умовам використання інструмента (слід
брати до уваги всі складові робочого циклу, як-от
час, коли інструмент вимкнено та коли він починає
працювати на холостому ході під час запуску).
Вібрація
Загальнавеличинавібрації,визначенавідповіднодоEN786:
Вібрація(ah):2,5м/с2абоменше
Похибка(K):1,5м/с2
ПРИМІТКА:Заявленезагальнезначеннявібрації
буловиміряновідповіднодостандартнихметодів
тестуванняйможевикористовуватисядляпорів-
нянняодногоінструментазіншим.
ПРИМІТКА:Заявленезагальнезначеннявібрації
можетакожвикористовуватисядляпопереднього
оцінюваннявпливу.
ПОПЕРЕДЖЕННЯ:
Залежно від умов вико-
ристання вібрація під час фактичної роботи
електроінструмента може відрізнятися від
заявленого значення вібрації; особливо сильно
на це впиває тип деталі, що оброблюється.
ПОПЕРЕДЖЕННЯ:
Забезпечте належні запо-
біжні заходи для захисту оператора, що відпові-
датимуть умовам використання інструмента (слід
брати до уваги всі складові робочого циклу, як-от
час, коли інструмент вимкнено та коли він почи-
нає працювати на холостому ході під час запуску).
Декларація про відповідність
стандартам ЄС
Тільки для країн Європи
ДеклараціюпровідповідністьстандартамЄСнаве-
деновДодаткуAдоцієїінструкціїзексплуатації.
ВАЖЛИВІ ІНСТРУКЦІЇ БЕЗПЕКИ
УВАГА! Прочитайте усі застереження стосовно
техніки безпеки та всі інструкції.Недотримання
цихзастереженьтаінструкційможепризвестидо
ураженняструмом,виникненняпожежіта/абоможе
спричинитисерйознітравми.
Збережіть усі інструкції з тех-
ніки безпеки та експлуатації на
майбутнє.
1. Ознайомтеся із правилами належного
користування і керування інструментом.
2. Ріжучі частини продовжують обертатися
після вимкнення двигуна.
3. Ніколи не дозволяйте користуватися інстру-
ментом дітям та особам, які не ознайоми-
лися з цими інструкціями.
4. Ніколи не використовуйте інструмент, коли
інші люди, особливо діти, або домашні тва-
рини знаходяться поблизу.
5. Користуйтеся інструментом тільки у світлий
час доби або за умови належного штучного
освітлення.
6. До початку використання і після будь-якого
зовнішнього впливу на інструмент переві-
ряйте його на наявність ознак зношення або
пошкодження; у разі необхідності відремон-
туйте інструмент.
7. Будьте обережні, щоб не отримати травми
під час використання будь-якого пристрою
для підрізання довжини шнура. Після
витягування шнура та перед увімкненням
інструмента його слід повертати у звичайне
робоче положення.
8. Ніколи не застосовуйте металеві ріжучі
частини.
9. Цей інструмент не призначений для вико-
ристання особами (у тому числі дітьми) з
обмеженими фізичними, сенсорними або
розумовими здібностями та особами з
недостатнім досвідом і знаннями, доки за
ними не буде встановлений нагляд або їм
не будуть надані інструкції особою, відпо-
відальною за їхню безпеку, стосовно вико-
ристання цього інструмента. За дітьми слід
забезпечити нагляд, щоб бути певними, що
вони не грають із інструментом.
10. Інструмент слід завжди використовувати із
максимальною обережністю та увагою.
11. Працювати із інструментом можна тільки у
доброму фізичному стані. Усю роботу вико-
нуйте спокійно та обережно. Під час роботи
керуйтеся здоровим глуздом та пам’ятайте,
що оператор або користувач несуть відпові-
дальність за нещасні випадки та небезпеку,
якій вони піддають інших людей або їхнє
майно.
12. Ніколи не працюйте з інструментом, коли Ви
втомлені, нездужаєте або перебуваєте під
впливом алкоголю чи лікарських засобів.
13. Інструмент слід негайно вимикати у разі
появи будь-яких ознак несправної роботи.

17 УКРАЇНСЬКА
Використання інструмента за
призначенням
1.
Використовуйте інструмент за призначенням.
Акумуляторна кордова газонокосарка призна-
чена тільки для стриження трави та негустого
бур'яну. Не дозволяється використовувати
інструмент за іншим призначенням, напри-
клад, для стриження живоплоту, оскільки це
може призвести до отримання травм.
Засоби індивідуального захисту
►Рис.1
►Рис.2
1. Вдягніться належним чином. Одяг повинен
бути функціональним та відповідним, тобто
він має щільно прилягати, проте не зава-
жати роботі. Не надягайте прикраси чи одяг,
що може заплутатися у високій траві. Щоб
сховати довге волосся, слід надягати захис-
ний головний убір.
2. Використовуючи інструмент, завжди надя-
гайте міцне взуття з підошвами, що не ков-
зають. Це захистить Вас від травм та забез-
печить стійку опору на ноги.
3. Надягайте захисні окуляри.
Електробезпечність та техніка
безпеки під час роботи з
акумулятором
1. Не працюйте із інструментом у небезпечних
умовах. Не користуйтеся інструментом у
вологих або мокрих місцях і не допускайте
його знаходження під дощем. При потра-
плянні води в інструмент зростає ризик
ураження електричним струмом.
2. Перезаряджайте акумулятор лише за допо-
могою зарядного пристрою, вказаного
виробником. Зарядний пристрій, який під-
ходить для одного типу акумуляторів, може
призвести до пожежі при використанні з
іншим типом.
3. Використовуйте електроприлад лише зі
спеціально призначеним типом акумулято-
рів. Використання акумуляторів інших типів
може призвести до травм і пожежі.
4. Не спалюйте акумулятор(и). Акумулятор
може вибухнути. Ознайомтеся з місцевими
законами на предмет можливих спеціальних
інструкцій з утилізації відходів.
5. Не відкривайте та не деформуйте акумуля-
тор(и). Пролитий електроліт є роз'їдаючою
речовиною, тому може нанести травму при
контакті зі шкірою або очима. При проковту-
ванні може бути токсичним.
Запуск інструмента
►Рис.3
1. Будь ласка, переконайтеся, що в радіусі 15
метрів (50 футів) немає дітей або сторонніх
осіб, також слідкуйте за тваринами поблизу
місця роботи. Інакше роботу інструмента
слід зупинити.
2.
Перед початком роботи завжди перевіряйте,
щоб інструмент був у безпечному для роботи
стані. Перевіряйте надійність кріплення
ріжучої частини та захисного кожуха, а також
легкість і надійність функціонування важеля/
куркового вмикача. Переконайтеся, що ручки
чисті та сухі, після чого перевірте функцію
увімкнення/вимкнення вмикача.
3. Перед подальшим використанням інстру-
мента його слід перевіряти на наявність
пошкоджених частин. Захисний кожух або
іншу пошкоджену деталь слід уважно огля-
нути, щоб переконатися у тому, що вони
можуть далі виконувати свої функції належ-
ним чином. Перевіряйте положення та закрі-
плення рухомих частин, наявність поломок
частин, монтаж та інші аспекти, які можуть
впливати на експлуатацію інструмента.
Ремонтувати або замінювати пошкоджені
деталі або захисний кожух повинні спеці-
алісти авторизованого сервісного центру,
якщо інше не зазначено в цій інструкції.
4.
Вмикайте двигун тільки тоді, коли руки та ноги
перебувають на відстані від ріжучої частини.
5. Перед початком роботи слід переконатися,
що ріжуча частина не торкається твердих
предметів, наприклад, гілля, каміння тощо,
оскільки під час пуску він обертатиметься.
Порядок роботи
1. Ніколи не користуйтеся інструментом, якщо
захисні кожухи пошкоджені або відсутні.
2.
Інструмент можна використовувати тільки
за умов гарного освітлення та видимості.
Узимку слід берегтися слизьких або вологих
ділянок, льоду та снігу (небезпека ковзання).
Постійно слідкуйте за надійною опорою ніг.
3. Будьте обережні, щоб не травмувати ноги
або руки ріжучою частиною.
4. Завжди тримайте руки та ноги на відстані
від ріжучої частини, особливо під час
увімкнення двигуна.
5. Ніколи не ріжте вище рівня пояса.
6. Ніколи не стійте на сходах під час роботи з
інструментом.
7.
Заборонено працювати на нестійких поверхнях.
8. Не тягніться. Слід завжди твердо стояти на
ногах та тримати рівновагу.
9. Завжди займайте стійке положення на похи-
лій поверхні.
10. Пересувайтеся повільно, ніколи не біжіть.
11. Якщо в межах місця роботи знаходяться
цвяхи, пісок, каміння тощо, їх слід прибрати.
Сторонні предмети можуть пошкодити
ріжучу частину, а також можуть відскочити і
завдати серйозної травми.
12. Ніколи не торкайтеся рухомих деталей, що
несуть потенційну небезпеку, доки не від’єд-
наєте пристрій від мережі змінного струму
та доки рухомі деталі, що несуть потенційну
небезпеку, остаточно не зупиняться.
13.
Якщо ріжуча частина наштовхнулася на каміння
або на інші тверді предмети, слід негайно
вимкнути двигун та оглянути ріжучу частину.

18 УКРАЇНСЬКА
14.
Перш ніж Ви розпочнете роботу, ріжуча частина
повинна розвинути повну робочу швидкість.
15. Під час роботи завжди тримайте інструмент
обома руками. Ніколи не тримайте інстру-
мент під час роботи однією рукою. Постійно
слідкуйте за надійною опорою ніг.
16.
Під час роботи обов'язково слід використову-
вати всі засоби захисту, такі як захисні кожухи,
які постачаються разом з інструментом.
17. Крім аварійних випадків, ніколи не роняйте
та не кидайте інструмент на землю, оскільки
це може серйозно пошкодити його.
18. Не тягніть інструмент по землі при пере-
міщенні з місця на місце, тому що це може
його пошкодити.
19. Завжди знімайте касету з акумулятором з
інструмента:
—
коли залишаєте інструмент без нагляду;
— перш ніж прочищати засмічення;
—
перед перевіркою та очищенням інструмента
або проведенням робіт на інструменті;
— перед налаштуванням, зміною при-
ладдя або перед тим, як покласти
інструмент на зберігання;
— якщо інструмент починає незвичайним
чином вібрувати;
— під час транспортування інструмента.
20. Не перенавантажуйте інструмент. Він буде
виконувати роботу краще та з меншою
ймовірністю нанесення травм при роботі на
швидкості, на яку він розрахований.
Інструкції щодо технічного
обслуговування
1. Перед початком роботи слід перевіряти
стан ріжучої частини та захисних пристроїв.
2. Вимикайте двигун та знімайте касету з аку-
мулятором перед тим, як проводити роботи
з технічного обслуговування, замінювати
ріжучу частину або чистити інструмент.
3. Після використання інструмента слід від'єд-
нати касету з акумулятором і перевірити її
на наявність пошкоджень.
4.
Перевіряйте, чи міцно затягнуті кріплення та
чи не пошкоджені частини інструмента, напри-
клад, чи існує небезпека, що нейлоновий шнур
у ріжучій частині може порватися навпіл.
5. Коли інструмент не використовується, збе-
рігайте його у сухому закритому і недоступ-
ному для дітей місці.
6. Слід використовувати тільки запчастини та
приладдя, рекомендовані виробником.
7. Завжди стежте за тим, щоб вентиляційні
отвори не забивалися сміттям.
8. Регулярно оглядайте інструмент та про-
водьте його технічне обслуговування, осо-
бливо до та після використання. Інструмент
слід ремонтувати тільки в нашому автори-
зованому сервісному центрі.
9. Рукоятки повинні бути сухими, чистими без
залишків жиру та бруду.
ЗБЕРІГАЙТЕ ЦІ ВКАЗІВКИ.
ПОПЕРЕДЖЕННЯ: НІКОЛИ НЕ СЛІД
втрачати пильності та розслаблюватися
під час користування виробом (що тра-
пляється при частому використанні);
слід завжди строго дотримуватися пра-
вил безпеки під час використання цього
пристрою. НЕНАЛЕЖНЕ ВИКОРИСТАННЯ
або недотримання правил безпеки,
викладених в цьому документі, може
призвести до серйозних травм.
Важливі інструкції з безпеки для
касети з акумулятором
1. Перед тим як користуватися касетою з аку-
мулятором, слід прочитати всі інструкції та
застережні знаки щодо (1) зарядного при-
строю акумулятора, (2) акумулятора та (3)
виробів, що працюють від акумулятора.
2. Не слід розбирати касету з акумулятором.
3. Якщо період роботи дуже покоротшав, слід
негайно припинити користування. Це може
призвести до виникнення ризику перегріву,
опіку та навіть вибуху.
4.
У разі потрапляння електроліту в очі слід про-
мити їх чистою водою та негайно звернутися
до лікаря. Це може призвести до втрати зору.
5. Не закоротіть касету з акумулятором.
(1) Не слід торкатися клем будь яким стру-
мопровідним матеріалом.
(2)
Не слід зберігати касету з акумулятором
у ємності з іншими металевими предме-
тами, такими як цвяхи, монети тощо.
(3)
Не залишайте касету з акумулятором під
дощем, запобігайте контакту з водою.
Коротке замикання може призвести до
появи значного струму, перегріву, можливих
опіків та навіть виходу з ладу.
6. Не слід зберігати інструмент та касету з аку-
мулятором в місцях, де температура може
сягнути чи перевищити 50°C (122°F).
7. Не слід спалювати касету з акумулятором,
навіть якщо вона була неодноразово пошко-
джена або повністю спрацьована. Касета з
акумулятором може вибухнути у вогні.
8. Не слід кидати або ударяти акумулятор.
9.
Не слід використовувати пошкоджений акумулятор.
10. Літій-іонні акумулятори, що містяться в
інструменті, мають відповідати вимогам
законів про небезпечні товари.
Підчастранспортуваннязадопомогоюкомер-
ційнихперевезень,наприкладіззалучанням
третьоїсторонитаекспедиторів,необхідно
дотримуватисьособливихвимог,вказанихна
пакуваннійумаркуванні.
Підчаспідготуванняпозиціїдовідправленнянеоб-
хіднопроконсультуватисьзіспеціалістомзнебез-
печнихматеріалів.Крімтого,слідвиконуватибільш
докладнінаціональнінастанови,якщотакіє.
Заклейтевідкритіконтактистрічкоюабозахо-
вайтеїхізапакуйтеакумулятортакимчином,
щобвіннемігрухатисявпакуванні.

19 УКРАЇНСЬКА
11.
Для утилізації касети з акумулятором витяг-
ніть її з інструмента та утилізуйте безпечним
способом. Дотримуйтеся норм місцевого
законодавства щодо утилізації акумуляторів.
12. Використовуйте акумулятори лише з
виробами, указаними компанією Makita.
Установленняакумуляторівуневідповідні
виробиможепризвестидопожежі,надмірного
нагрівання,вибухучивитокуелектроліту.
13. Якщо інструментом не користуватимуться
протягом тривалого періоду часу, вийміть
акумулятор з інструмента.
ЗБЕРІГАЙТЕ ЦІ ВКАЗІВКИ.
ОБЕРЕЖНО: Використовуйте тільки акуму-
лятори Makita.Використанняакумуляторів,інших
ніжоригінальніакумуляториMakita,абоакумуля-
торів,конструкціюякихбулозмінено,можепризве-
стидовибухуакумулятораіспричинитипожежу,
травмуабопошкодження.Узв'язкузцимтакож
будеанульованогарантіюMakitaнаінструмент
Makitaіназаряднийпристрій.
Поради з забезпечення макси-
мального строку експлуатації
акумулятора
1. Касету з акумулятором слід заряджати до
того, як він розрядиться повністю. Завжди
слід зупиняти роботу інструмента та заря-
дити акумулятор, якщо ви помітили змен-
шення потужності інструмента.
2. Ніколи не слід заряджати повторно пов-
ністю заряджену касету з акумулятором.
Перезарядження скорочує строк експлуата-
ції акумулятора.
3. Заряджайте касету з акумулятором при кім-
натній температурі 10°C - 40°C (50°F - 104°F).
Перед тим як заряджати касету з акумулято-
ром, слід зачекати, доки вона охолоне.
4. Якщо касета з акумулятором не використо-
вувалася тривалий час (понад шість міся-
ців), її слід зарядити.
ОПИС ДЕТАЛЕЙ
1
2
3
4
5
6
Касета з акумулятором
Лампочка індикатора
Кнопка вимикача
Передня ручка
Захисний кожух7
8
Затискна гайка
Ручка-фіксатор
Ріжуча головка з нейлоновим шнуром
1
2
3
4
5
6
7
8

20 УКРАЇНСЬКА
ІНСТРУКЦІЯ З
ВИКОРИСТАННЯ
ПОПЕРЕДЖЕННЯ:
• Перед тим як відрегулювати інструмент
або перевірити його функціональність,
слід переконатися, що інструмент вимк-
нено й касету з акумулятором знято.Якщо
інструментневимкненойнезнятокасету
закумулятором,цеможепризвестидо
серйознихтравмчерезвипадковийзапуск
інструмента.
Встановлення та зняття касети з
акумулятором
►Рис.4: 1.Червонийіндикатор2.Кнопка3.Касета
закумулятором
ОБЕРЕЖНО:
• Завждивимикайтеінструментперед
встановленнямабозніманнямкасетиз
акумулятором.
• Під час встановлення або зняття касети з
акумулятором надійно утримуйте інстру-
мент і касету з акумулятором.Інакше
інструментабокасетазакумулятором
можутьвислизнутизрук,щоможепризвести
дотравмабопошкодженняінструментай
касетизакумулятором.
Щобзнятикасетузакумулятором,слідвитягнутиїїзінстру-
мента,натиснувшинакнопкувпереднійчастинікасети.
Щобустановитикасетузакумулятором,слідсумістити
шпонкукасетизакумуляторомізпазомукорпусіта
вставитикасетунамісце.Уставляйтеїї,докинепочуєте
клацання.Якщонаверхнійчастинікнопкивидночервоний
індикатор,цеозначає,щовоназаблоковананеповністю.
ОБЕРЕЖНО:
• Завждиуставляйтекасетуповністю,ажпоки
червонийіндикаторстаненевидимим.Якщо
цьогонезробити,касетаможевипадково
випастизінструментатазавдатитравмивам
аболюдям,щознаходятьсяпоруч.
• Невстановлюйтекасетузакумулятором
іззусиллям.Якщокасетаневставляється
легко,тоцеозначає,щоВиїїневірно
вставляєте.
Система захисту акумулятора
(літій-іонний акумулятор з
маркувальною зірочкою)
►Рис.5: 1.Маркувальназірочка
Літій-іонніакумуляторизмаркувальноюзірочкою
оснащенісистемоюзахисту.Цясистемаавтома-
тичновимикаєживленняінструментазметоюзбіль-
шенняробочогочасуакумулятора.
Інструментбудеавтоматичновимкненийпідчас
роботи,якщовінта/абоакумуляторзнаходити-
мутьсявтакихумовах:
• Перенавантаження:
Інструментспоживаєструмзанадтовисо-
коїпотужностіпідчасроботи.
Утакомуразівідпустітькуроквмикача
інструментатазупинітьроботу,якапри-
звеладоперенавантаженняінструмента.
Потімнатиснітьнакуроквмикача,щоб
зновузапуститиінструмент.
Якщоінструментзапуститинеможливо,
цеозначає,щоакумуляторперегрівся.
Утакомуразідайтеакумуляторуохоло-
нути,першніжзновунатиснутинакурок
вмикача.
• Низьканапругаакумулятора:
Залишковийзарядакумуляторазанадто
низький,томуінструментнебудепра-
цювати.Утакомуразізнімітьтазарядіть
акумулятор.
Відображення залишкового
заряду акумулятора
Тільки для касет з акумулятором, які мають
індикатори
►Рис.6: 1.Індикаторнілампи2.Кнопкаперевірки
Натиснітькнопкуперевіркинакасетізакумулятором
длявідображеннязалишковогоресурсуакумуля-
тора.Індикаторнілампизагорятьсянакількасекунд.
Індикаторні лампи Залишковий
ресурс
Горить Вимк. Блимає
від75до
100%
від50до
75%
від25до
50%
від0до25%
Зарядіть
акумулятор.
Можливо,
акумулятор
вийшовз
ладу.
ПРИМІТКА:Залежновідумоввикористаннята
температуриоточуючогосередовищапоказання
можутьнезначнимчиномвідрізнятисявіддійсного
ресурсу.
Other manuals for DUR141
13
This manual suits for next models
1
Table of contents
Languages:
Other Makita Trimmer manuals

Makita
Makita UH4570 User manual

Makita
Makita UH5570 User manual

Makita
Makita BUR360 User manual

Makita
Makita UR006G User manual

Makita
Makita EN420MP User manual

Makita
Makita RU03 User manual

Makita
Makita DUR181RT Manual

Makita
Makita UR2300 User manual

Makita
Makita EM4351UH User guide

Makita
Makita BBC231U Manual

Makita
Makita UH4510A User manual

Makita
Makita UR012G User manual

Makita
Makita UR013G User manual

Makita
Makita RU01 User manual

Makita
Makita 3709 User manual

Makita
Makita DUR187U User manual

Makita
Makita EBH252U User guide

Makita
Makita UR012G User manual

Makita
Makita RT0700C User manual

Makita
Makita HTB7600 User manual