MallinCam Universe User manual

Revision Sheet
Universe User Manual Page i
MALLINCAM UNIVERSE
[Version 1.0]
Michael Burns
Rock Mallin
[Mallincam Universe User Manual]
This document will quickly introduce you to the wonders of the MallinCam Universe
Camera. It will include instructions on how to install the Software and Drivers and how
connect the Universe to your computer along with explanations of the camera’s
major settings. The purpose of this guide is to quickly get you up and running with the
Universe Camera so that you can image. This guide is based on the original user
guide manual produced by Paul Klauninger.

Revision Sheet
Universe User Manual Page ii
Revision History
Version
Date
Revision Description
1.0
03/11/2017
Template Creation

Mallincam Universe User Manual March 11, 2017
Universe Quick Guide Page 1
Table of Contents
Contents
Revision History ................................................................................................................................... ii
Table of Contents
..........................................................................................................................1
1.
Introduction
............................................................................................................................3
The Contents of the Universe - Package...............................................................................4
Specifications:........................................................................................................................................4
Field-of-View reference.........................................................................................................................5
Included in Package:..............................................................................................................................5
System Requirements: ...........................................................................................................................6
2. Installing Driver and Software...............................................................................................7
System Requirements ................................................................................................................7
Installing the Software...............................................................................................................7
3. Connecting the Universe ......................................................................................................12
Connecting the Universe- to your Computer.........................................................................12
4. Using the Control Software..................................................................................................14
The Universe Window .............................................................................................................14
Universe Quick Setup and Pictorial Work-Flow...................................................................15
Dark Frame Subtraction Pictorial Work-Flow.....................................................................16
Saving Single Image Pictorial Work-Flow.............................................................................17
Saving Multiple Images Pictorial Work-Flow.......................................................................18
Record Video Pictorial Work-Flow........................................................................................19
More Detailed Work-Flow Procedures..................................................................................20
Quick Workflow for Mallincam Universe ...........................................................................................20
Starting Mallincam Universe and Imaging.......................................................................................20
Saving an image onto your Computer..............................................................................................22
Shutting Down for the Night............................................................................................................23
Detailed Workflow for Mallincam Universe .......................................................................................24
Starting Mallincam Universe and Imaging.......................................................................................24
Focusing the Telescope.................................................................................................................................................... 25
Imaging a Deep Sky Object .............................................................................................................................................28
Improve the Image Detail with the Histogram................................................................................................................. 29
Amp Glow Reduction...................................................................................................................................................... 30
Color Controls ................................................................................................................................................................. 31
Saving Images onto your Computer.................................................................................................32
Save a Single Image......................................................................................................................................................... 32
Save a Sequence of Images..............................................................................................................................................34
Save a Sequence of Images with each with Customized Time......................................................................................... 36
Capturing images using the Capture delay timer.............................................................................................................. 39
To Exit for the Night........................................................................................................................43

Mallincam Universe User Manual March 11, 2017
Universe User Manual Page 2
5. The Universe Software Controls ..........................................................................................45
The Property Panel..................................................................................................................46
Histogram.............................................................................................................................................46
Resolution Control...............................................................................................................................49
16-Bit...................................................................................................................................................50
Exposure ..............................................................................................................................................51
Gain......................................................................................................................................................51
Noise Reduction...................................................................................................................................52
Contrast................................................................................................................................................53
Gamma.................................................................................................................................................54
Horizontal and Vertical........................................................................................................................55
Cross ....................................................................................................................................................55
Sharpen ................................................................................................................................................56
Color Controls......................................................................................................................................56
R Gain, G Gain, and B Gain.............................................................................................................56
White Balance ..................................................................................................................................57
Saturation .........................................................................................................................................57
Monochrome ....................................................................................................................................57
Area Display ........................................................................................................................................58
Sequence Capture Mode ......................................................................................................................58
Custom Sequence Capture Mode.........................................................................................................60
Saving and Loading the Universe Camera Settings.............................................................................62
Saving your camera settings.............................................................................................................62
Loading a Saved Configuration........................................................................................................63
Deleting your camera settings ..........................................................................................................64
Subtracting Background.......................................................................................................................65
Preparing Dark Frame......................................................................................................................65
Applying Dark Frames.....................................................................................................................65
Saving Files..........................................................................................................................................67
Encode and Record...........................................................................................................................68
The Picture Panel.....................................................................................................................69
Viewing your Captured Images ...........................................................................................................69
All Images Preview..............................................................................................................................69
Sequence Capture Preview...................................................................................................................70
Capture Delay Timer............................................................................................................................71
Viewing the Preview Images ...................................................................................................76
Using Filters and Adjusting Color Balance..........................................................................................78
Processing Astronomical Images.........................................................................................................81
Using 16-bit TIF and RAW files......................................................................................................81
Using Dark Frames and Flat Fields..................................................................................................82
Stacking your images .......................................................................................................................82
Troubleshooting .......................................................................................................................84
Your computer doesn’t recognize the camera once it is connected. This can occur for a number of
reasons, including: ...............................................................................................................................84
The camera and drivers seem to install, but Windows issues a message stating that: “The device
might not work properly”.....................................................................................................................84
The optical window above the CCD sensor is fogged. ........................................................................85
The downloaded images appear very noisy. ........................................................................................85
The preview image appears scrambled. ...............................................................................................85
6. Appendix ...............................................................................................................................87
Installing Universe ASCOM Driver.......................................................................................87
Setting up to Broadcast on Night Skies Network..................................................................89
User Notes.................................................................................................................................96

Mallincam Universe User Manual March 11, 2017
Universe User Manual Page 3
1.Introduction
The New MallinCam UNIVERSE is 100% USB 2.0 controlled, and the image is also
transferred through the same USB connection. A Deep Cooling system with a
Premium Argon Gas filled sealed sensor chamber allows cooling possible to
reach as low as -45C continuous to ensure the lowest dark current possible; in
most cases a dark frame is not generally required. A first in the industry. Taking
magazine publication quality images is now possible and easier than ever with
this new system. A constant live image is also displayed for those who wish to use
the camera as a live observing system.
At the heart of the Universe is a Class 0 scientific grade Sony ICX413AQ-S large
APS-C class sensor, with a total size (diagonal) of 28.4 mm across and large 7.8 X
7.8 micron pixel size. The camera will excel in delivering live color images. Total
pixels of the ccd sensor is 6.31 mega pixels. Horizontal size of the sensor
is 25.10mm and Vertical size is 17.64mm. Active pixels deliver a total image size
of 3032 X 2016 (active pixels are 6.11 MP).
The New MallinCam UNIVERSE can also be switched from color mode to black
and white in the control software with a click of the mouse. A binning mode of
2x2, 3x3, 4x4 is also available in the control software to increase sensitivity and
change resolution, allowing live focus on the fly in any image size with the crop
feature not found on any other models of astronomy ccd camera. Live
processing per frame is done with features such as full Histogram adjustment,
Gamma Adjustment, Contrast adjustment, and Auto White Balance or manual
RGB Color Balance. Works with WIN 7, WIN 8, WIN 10 in 32 or 64 bits.
The unique "Hyper Circuit" found on all other MallinCam systems has been
introduced into this new design making the MallinCam UNIVERSE deliver a high
variable gain, an ultra-high dynamic range, and a Signal-to-Noise ratio of
60+ dB. The MallinCam Universe comes complete with: a 5 meter USB cable, 2"
threaded adapter, a 1.25" converter allowing the use of an optional 1.25"
eyepiece adapter, 110 volts AC to 12 volts DC power supply, and driver and
software on a USB key. An optional 0.5X focal reducer is available and an
optional spacer is also available that screws directly to the camera body. The
MallinCam Universe weighs just over 924 grams (2.1 pounds) and uses a 'T' mount
system.
.
So thank you for your purchase, and let the adventure begin.

Mallincam Universe User Manual March 11, 2017
Universe User Manual Page 4
The Contents of the Universe - Package
Specifications:
CCD sensor: Sony SuperHAD ICX413AQ-S Color (scientific
grade)
Sensor size: 25.10 x 17.64 mm
Active pixel array size: 3032 x 2018 (6.1 megapixels)
Pixel size: 7.8 x 7.8 microns
Analog-to-Digital conversion: 12-bit output written to a 16-bit data file
Total variable gain: 26.007 dB
Dynamic range: 80 dB
Signal-to-noise ratio: 60 dB
Exposure time range: 0.001 seconds to 55 minutes 59.999 seconds
Binning modes: 1x1, 2x2, 3x3, 4x4; all in full color
Filtering: No filtering of the CCD sensor
Thermo-electric cooling: -45oC below ambient temperature (maximum)
Weight: 32.5 oz. (924 gm)
Mounting interface: T-thread or 2” nosepiece

Mallincam Universe User Manual March 11, 2017
Universe User Manual Page 5
Field-of-View reference
The following reference table provides a list of some common telescope focal
lengths and the approximate angular field-of-view provided by the Universe
when connected to these scopes. The measurements shown are in arc-minutes.
Focal length Field-of-View Field-of-View with optional 0.5X focal reducer
300 mm 270’ x 180’ 540’ x 360’
400 mm 204’ x 138’ 408’ x 276’
500 mm 162’ x 108’ 324’ x 216’
750 mm 108’ x 72’ 216’ x 144’
1000 mm 84’ x 54’ 168’ x 108’
1500 mm 54’ x 36’ 108’ x 72’
2000 mm 41’ x 27’ 82’ x 54’
2500 mm 32.5’ x 21.6’ 65.0’ x 43.2’
2800 mm 29.0’ x 19.3’ 58.0’ x 38.6’
3000 mm 27.1’ x 18.0’ 54.2’ x 36.0’
3500 mm 23.2’ x 15.4’ 46.4’ x 30.8’
4000 mm 2 0.3’ x 13.5’ 40.6’ x 27.0’
Included in Package:
①MallinCam Universe CCD imaging camera
②T-mount to 2” threaded camera nosepiece adapter
③1.25” eyepiece adapter converter
➢This is part of the protective metal cap. Unscrew and remove
the central plug to expose the converter threads required to
mount the optional 1.25” eyepiece adapter.
④AC-to-DC power supply (specific model supplied may vary)
⑤16-foot (5-meter) USB 2.0 data cable
⑥ Disc or flash drive containing software installation files and User’s
Guide

Mallincam Universe User Manual March 11, 2017
Universe User Manual Page 6
The following optional components are also available for your MallinCam
Universe:
•0.5X T-mount focal reducer
oThe optional 0.5X focal reducer is a recommended accessory
when using the Universe on a telescope with a long focal length
and/or a high F-ratio, such as F8 or greater. A long focal length
yields a relatively small field-of-view. The 0.5X focal reducer
essentially cuts the telescope’s focal length in half and provides a
field-of-view that is twice as large in both length and width. It also
reduces the F-ratio by a factor of two. For example, it makes a
relatively slow F10 optical system perform like a much faster F5
configuration. This cuts the exposure time down by a factor of four.
A properly exposed 8-minute image taken through an F10
telescope would only require a 2-minute exposure to achieve the
same level of brightness using the focal reducer! And the sky area
covered in the image would be four times greater! A highly-
recommended accessory to increase the near-live viewing
experience!
•Focal reducer spacer
oThis is used to increase the focal reduction factor even further
when using the 0.5X focal reducer. The degree of reduction varies
with the telescope type.
•1.25” eyepiece adapter
oThis adapter allows the camera to be attached to a 1.25 focuser.
However, the camera’s large chip requires a 2” focuser for full
illumination. Using the camera on a 1.25” focuser will cause some
vignetting in the images.
System Requirements:
•Equal to Intel Core2 2.8GHz or Higher
•Memory: 4GB or More
•USB port: USB 2.0 Port
•Display Monitor: 17" or Larger Recommended
•A video display capable of rendering 1024x768 resolution minimum;
1280x1024 or higher is recommended, and in 24-bit color
•One available fully-specified high-speed USB 2.0 port
•120V AC Power for adapter, or 12V, 2.0A AC Source

Mallincam Universe User Manual March 11, 2017
Universe User Manual Page 7
2.Installing Driver and Software
System Requirements
PC running either Windows ® (32-bit & 64-bit) XP, Vista, 7, 8, 8.1, 10
Performance is not guaranteed if the following specification cannot be reached.
•DirectX 9.0 or later installed
•2.8GHz processor (Recommend dual core 2.8GHz or more)
•USB 2.0 Port
•4GB RAM (Recommend 4GB or more)
•200MB Free HDD
Installing the Software
Visit the Software Downloads Page in the Support Tab located on the website:
www.mallincam.net
Select the Blue Download Button to download the Universe Driver and the
Universe v4.9 Control Software. There is a Download that contains a ASCOM
drivers as well, but due to the large amount of data being passed by the
Universe, the ASCOM is a use at your own risk.
Step 1
Step 2

Mallincam Universe User Manual March 11, 2017
Universe User Manual Page 8
After you have clicked on the Blue DOWNLOAD indicator, a zipped file will be
downloaded onto your computer.
Make sure that the Universe is not plugged into the computer.
We will install the Universe driver v5.0 first
Place your mouse on the zipped driver file, Right-Click to pop-up an Action
Window, and choose Extract All …
A Select Destination and Extract Files Window will open-up. Just Click on the
Extract button to accept destination location. The Destination Folder will now
open-up the actual folder that contains the software to install.
Double-Click on the folder to open it up, revealing the Mallincam Driver Setup
program it contains.
We will now install the driver onto your Computer.
Double-Click on the Mallincam Driver Setup File
Windows may display a warning asking for permission to run the program, if it
does, select YES.
The Following Set-Up Screen will appear
Step 6
Step 4
Step 5
Step 3

Mallincam Universe User Manual March 11, 2017
Universe User Manual Page 9
Click on Next to start the installation process.
The installation program will then install the drivers onto your computer, a green
progress bar will indicate its process. Once completed, now wants to know
where you would like to install the software. Either choose your own location, or
select the default.
Depending upon the version on Windows you are using, you may need to
provide Windows Security permission to install. Just click on the Install Button.
Step 7

Mallincam Universe User Manual March 11, 2017
Universe User Manual Page 10
After all of the drivers have been installed onto your computer, the Setup
program will pop-up a window asking you to Click on Finish to exit the installation
process.
Click on the Finish Button.
Now is the Time to Install the Universe Control Software onto your Computer.
Place your mouse on the zipped mallincam_20univserv4.9 file, Right-Click to
pop-up an Action Window, and choose Extract All …
A Select Destination and Extract Files Window will open-up. Just Click on the
Extract button to accept destination location. The Destination Folder will now
open-up the actual folder that contains the software to install.
Double-Click on the folder to open it up, revealing the Mallincam Universe Setup
program it contains.
Double-Click on the Mallincam Universe Setup File
Step 9
Step 10
Step 8

Mallincam Universe User Manual March 11, 2017
Universe User Manual Page 11
Windows may display a warning asking for permission to run the program, if it
does, select YES.
The following Mallincam Universe Setup Screen will then appear:
The installation program now wants to know where you would like to install the
software. Either choose your own location, or select the default.
Click on Next to start the installation.
The Universe Software will then install the Control Software. When completed, the
following screen will appear:
Click on Finish to complete the installation
The Software is now installed and ready to use. An program icon will
be location on your desktop ready for you to start the application.
Step 11
Step 12

Mallincam Universe User Manual March 11, 2017
Universe User Manual Page 12
3. Connecting the Universe
Connecting the Universe- to your Computer
Remove the rubber dust cover from the front of the Universe- camera (place it
back in the box for safe keeping).
Screw in the optional 1.25” nose piece adapter
or the provided 2” nose piece adapter to the
front of the Universe.
There are 4 set screws located around the mounting collar of the camera body.
Make sure that these are out far enough to allow the nose piece to fully seat in
the camera. After the nose piece has been installed, you can tighten these 4 set
screws for increase security. The use of the set screws is completely optional.
Insert the Universe (with adapter attached) into a 1.25”
or 2” eyepiece adapter on your Telescope.
Depending upon the telescope, you may need extenders so that you can reach
focus with your telescope. It is recommended that you set this up in the daytime
so you can see what you are doing (plus can aim at an easy to find tree or
telephone pole).

Mallincam Universe User Manual March 11, 2017
Universe User Manual Page 13
Attach the 5 meter USB 2.0 Cable from the back of the Universe to a free USB 2.0
port on your computer.
The Universe has some strict power and thru-put requirements, and not all
computers are created equal. If you find you are having difficulties with the
following steps, it maybe the USB 2.0 port on your computer. If that is the case,
one option to try is; connected a Powered USB 2.0 Hub to your USB 2.0 port on
your computer. This simple step, can improve, both thru-put, power and distance
between your computer and the Universe camera.
Check to ensure that the recessed thermo-electric
cooler (TEC) switch is in the ON position. The TEC unit is
on when the slider switch is closest to the red Power
ON LED indicator.
Connect the +12 VDC lead from the AC-DC power supply to the camera’s
power port (next to the red Power LED.
Plug the AC-DC power supply into a power source to turn on the camera. The
Power ON indicator will light. Allow a minute for full stabilization of the hardware.
You should hear the fan operating on the Universe.
If this is the first time connecting your Universe to the computer, Windows will then
automatically load the correct Universe Camera Driver onto your computer.
You are now ready to Start the Universe Control Software.
Hint

Mallincam Universe User Manual March 11, 2017
Universe User Manual Page 14
4.Using the Control Software
The Universe Window
The Universe Software Window is segmented into a few regions to make viewing
and adjusting the Universe camera easy and intuitive.
①The Top Menu Line provides information about the current software
②The Universe Video Window will contain the display image from the Universe
Camera. It is here that you will see the live video, or images.
③The Right SideBar provides selection options adjusting the exposure,
controlling the Universe camera’s Settings, choosing Folders, and Saving
images.
④The Shut Down Program Icon will terminate the Universe Software, and will
close the Program Window.
⑤The Panel Tabs will indicate the current Tab (Property or Picture), that
appears on the Right Panel.
①
②
③
⑤
④

Mallincam Universe User Manual March 11, 2017
Universe User Manual Page 15
Universe Quick Setup and Pictorial Work-Flow
A typical workflow when using the Universe.
Start Universe
Exit Universe
Set Exposure
Start Camera
Choose Resolution
Adjust Image
Stop Camera

Mallincam Universe User Manual March 11, 2017
Universe User Manual Page 16
Dark Frame Subtraction Pictorial Work-Flow
A typical workflow when Using Dark Frame with Universe.
Image and Choose
and Apply Dark
Frame
Start Universe
Set Exposure
Start Camera
Choose Resolution
Cover Telescope and Choose
Name of Dark Frame
Capture Dark Frame
Stop Camera

Mallincam Universe User Manual March 11, 2017
Universe User Manual Page 17
Saving Single Image Pictorial Work-Flow
A typical workflow when saving a Single Image with Universe.
Start Universe
Start Camera
Choose Resolution
Capture Image
Choose location for
Saved Image

Mallincam Universe User Manual March 11, 2017
Universe User Manual Page 18
Saving Multiple Images Pictorial Work-Flow
A typical workflow when Saving Multiple Images with Universe.
Start Universe
Start Camera
Choose Resolution
Choose location for
Saved Image
Move into Picture
Panel
Choose number of
Images, and Delay
between images and Start
the capture process
Other manuals for Universe
2
Table of contents
Other MallinCam Digital Camera manuals

MallinCam
MallinCam Universe User manual
MallinCam
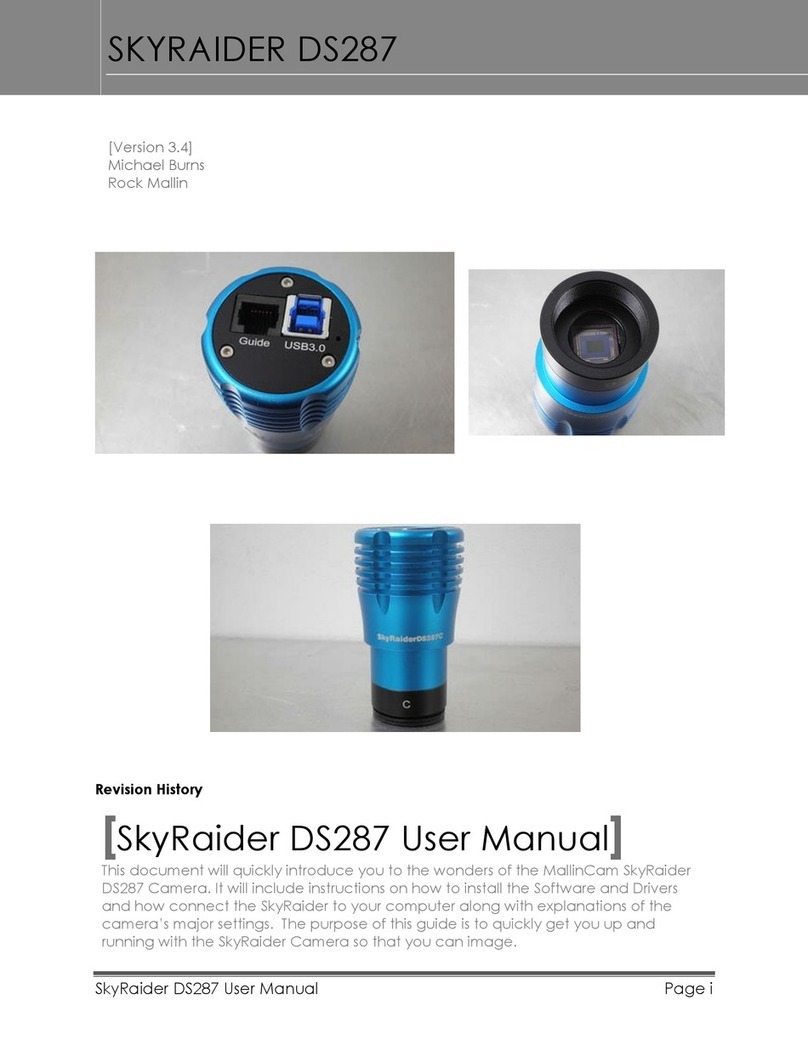
MallinCam SKYRAIDER DS287 User manual
MallinCam
MallinCam SolarCam 20 User manual
MallinCam
MallinCam SKYRAIDER DS16C User manual
MallinCam
MallinCam SKYRAIDER DS16C TEC User manual
MallinCam
MallinCam HD-10 II User manual

MallinCam
MallinCam SkyRaider DS432 TEC User manual
