MallinCam SolarCam 20 User manual

Revision Sheet
SolarCam 20 User Manual Page i
MALLINCAM SolarCam 20
[Version 1.0]
Michael Burns
Rock Mallin
[Mallincam SolarCam 20 User Manual]
This document will quickly introduce you to the wonders of the Mallincam SolarCam
20 Camera. We will include instructions on how to install the Software and Drivers and
how to connect the SolarCam 20 to your computer along with explanations of the
camera’s major settings. The purpose of this guide is to quickly get you up and
running with the SolarCam 20 Camera so that you can image the skies and share
your passion with others.

Revision Sheet
SolarCam 20 User Manual Page ii
Revision History
Version
Date
Revision Description
1.0
11/06/2023
Template Creation

Mallincam SolarCam 20 User Manual November 6, 2023
SolarCam 20 Quick Guide Page 1
Table of Contents
Contents
Revision History..................................................................................................................................................ii
Table of Contents
....................................................................................................................................1
1.
Introduction
.......................................................................................................................................7
The Contents of the SOLARCAM 20 - Package..........................................................................8
Specifications:...................................................................................................................................................... 8
Included in Package:............................................................................................................................................9
Optional Components..........................................................................................................................................9
2. Installing Driver and Software..........................................................................................................10
System Requirements............................................................................................................................10
Installing the Software..........................................................................................................................10
First Time Installation of Software....................................................................................................................11
3. Mallincam SOLARCAM 20 with a Computer..................................................................................13
Connecting the SolarCam 20 to your Computer................................................................................13
Starting on the SolarCam 20 on the Computer ..................................................................................................13
SolarCam 20 Quick Setup and Pictorial Workflow...........................................................................14
Detailed Work-Flow Procedures on a Computer...............................................................................................15
Resolution ......................................................................................................................................................15
Binning...........................................................................................................................................................15
Exposure ........................................................................................................................................................15
Gain................................................................................................................................................................16
White Balance................................................................................................................................................17
Gray................................................................................................................................................................17
Color Temperature (CCT)..............................................................................................................................17
Hue, Saturation, Light, Contrast, Sharpness, and DPC..................................................................................18
Hue -..................................................................................................................................................................................................18
Saturation.........................................................................................................................................................................................18
Light..................................................................................................................................................................................................18
Contrast............................................................................................................................................................................................18
Sharpness..........................................................................................................................................................................................18
DPC...................................................................................................................................................................................................18
Flat Field Calibration Wizard.........................................................................................................................19
Histogram.......................................................................................................................................................19
Gamma..............................................................................................................................................................................................20
Capture a Snapshot.........................................................................................................................................21
Capture and Save a Video Sequence..............................................................................................................23
Exit the Software............................................................................................................................................26
4. Mallincam Software Commands.......................................................................................................27
SolarCam 20 Status Bar (Computer) ..................................................................................................27
Action Tabs............................................................................................................................................27

Mallincam SolarCam 20 User Manual November 6, 2023
SolarCam 20 User Manual Page 2
Capture Tab .........................................................................................................................28
Snapshot Icon ....................................................................................................................................................28
Resolution Tab .............................................................................................29
Binning Tab....................................................................................................................................................... 30
Exposure Control Tab .....................................................................31
Auto Exposure..............................................................................................................................................31
Area Exposure..............................................................................................................................................31
......................................................................................................................................................31
Manual Exposure Setting ............................................................................................................................32
Exposure Time..............................................................................................................................................32
Gain...............................................................................................................................................................32
Default...........................................................................................................................................................32
Bit of Depth Tab ........................................................................33
Bit of Depth...................................................................................................................................................33
White Balance Tab ..............................................................34
Lock White Balance.....................................................................................................................................34
Area White Balance .....................................................................................................................................34
..............................................................................................................................................34
Gray...............................................................................................................................................................34
Color Control................................................................................................................................................35
....................................................................................................................................35
Default...........................................................................................................................................................35
Image Adjust Tab ....................................................................................36
Hue ................................................................................................................................................................36
Saturation .....................................................................................................................................................36
Light..............................................................................................................................................................36
Contrast ........................................................................................................................................................36
Sharpness......................................................................................................................................................37
DPC ...................................................................................................................................................................37
Flat Field.......................................................................................................................................................37
Default...........................................................................................................................................................38
Histogram Tab ..........................................................................................39
Histogram .....................................................................................................................................................39
Color Channel ..............................................................................................................................................39
Left Control..................................................................................................................................................39
Right Control................................................................................................................................................40
Gamma..........................................................................................................................................................40
Data algorithm..............................................................................................................................................40
Default...........................................................................................................................................................40
File Save Tab ............................................................................................41
Use Dialog .....................................................................................................................................................41
Use File Name...............................................................................................................................................41
File Name......................................................................................................................................................41
Name Drop Down.........................................................................................................................................41

Mallincam SolarCam 20 User Manual November 6, 2023
SolarCam 20 User Manual Page 3
File Format ...................................................................................................................................................41
Path................................................................................................................................................................42
Time Stamp...................................................................................................................................................42
3D DeNoise....................................................................................................................................................42
ROI Tab ....................................................................................................43
Select ROI.....................................................................................................................................................43
Select ROI Coordinates ...............................................................................................................................44
Mask Tab .................................................................................................. 45
Select Mask...................................................................................................................................................45
Select Mask Area..........................................................................................................................................46
Transparency................................................................................................................................................46
Image Stitching (Live) Tab ....................................................................47
Stitching Speed.............................................................................................................................................47
Background Color........................................................................................................................................47
Start Stitching...............................................................................................................................................47
EDF (Live) Tab ...............................................................................49
Quality...........................................................................................................................................................49
Start EDF......................................................................................................................................................49
Realtime Dye Tab..............................................................................................................................................50
Current..........................................................................................................................................................50
RGB...............................................................................................................................................................50
Add New Dye................................................................................................................................................50
New Dye ........................................................................................................................................................51
Delete.............................................................................................................................................................51
Dye Type .......................................................................................................................................................51
Apply.............................................................................................................................................................51
Cancel............................................................................................................................................................51
Video Record Tab ............................................................................52
Encoder.........................................................................................................................................................52
Auto Stop ......................................................................................................................................................52
Total Frame..................................................................................................................................................52
Total Time.....................................................................................................................................................52
Delay Time....................................................................................................................................................52
Playback Rate...............................................................................................................................................53
Video Format................................................................................................................................................53
Save to...........................................................................................................................................................53
Video Record ................................................................................................................................................53
Default...........................................................................................................................................................53
Delay Capture Tab .................................................................................54
Total Time.....................................................................................................................................................54
Total Frame..................................................................................................................................................54
Interval Time................................................................................................................................................55
Delay Time....................................................................................................................................................55
Capture Frame.............................................................................................................................................55
Playback Rate...............................................................................................................................................55
Capture as Video..........................................................................................................................................55
Save Settings Tab .....................................................................................56
Group Name .................................................................................................................................................56
Save................................................................................................................................................................56
Group............................................................................................................................................................56
Load...............................................................................................................................................................56
Delete.............................................................................................................................................................56
Export............................................................................................................................................................56
Import ...........................................................................................................................................................57

Mallincam SolarCam 20 User Manual November 6, 2023
SolarCam 20 User Manual Page 4
Reset All........................................................................................................................................................57
Load Fluorescence Mode.............................................................................................................................57
Light Frequency Tab..........................................................................................................................................58
Light Frequency...........................................................................................................................................58
Other Settings Tab ...................................................................................58
Other Settings...............................................................................................................................................58
Image Tab ............................................................................................................................................59
Save image As.. ................................................................................................................................................. 59
Image Crop ................................................................................................................................................60
Sizer...............................................................................................................................................................60
Image Adjust Tab ..........................................................................60
Brightness .....................................................................................................................................................60
Gamma..........................................................................................................................................................60
Contrast ........................................................................................................................................................61
Saturation .....................................................................................................................................................61
Sharpen.........................................................................................................................................................61
Apply as a New Image..................................................................................................................................61
Default...........................................................................................................................................................61
Image Dye Tab ......................................................................................62
Current..........................................................................................................................................................62
RGB...............................................................................................................................................................62
Add To New Dye ..........................................................................................................................................62
Dye Type .......................................................................................................................................................62
New Dye ........................................................................................................................................................62
Delete.............................................................................................................................................................62
Apply As A New Image................................................................................................................................62
Cancel............................................................................................................................................................62
Binaryzation Tab ............................................................................63
Start Binaryzation........................................................................................................................................63
Threshold......................................................................................................................................................63
Default...........................................................................................................................................................63
Apply.............................................................................................................................................................63
Cancel............................................................................................................................................................63
Advanced Computational Imaging Tab ...................................................64
Extend Depth of Field..................................................................................................................................64
Image Stitching.............................................................................................................................................64
High Dynamic Range...................................................................................................................................64
Apply As a New Image.................................................................................................................................64
Histogram Tab ..........................................................................65
Histogram .....................................................................................................................................................65
Color Channel ..............................................................................................................................................65
Apply.............................................................................................................................................................65
Cancel............................................................................................................................................................65
Smooth Tab ..........................................................................66
Start Smooth.................................................................................................................................................66
Gaussian Blur...............................................................................................................................................66
Box Filter ......................................................................................................................................................66
Median Blur..................................................................................................................................................66
Radius............................................................................................................................................................67
Default...........................................................................................................................................................67
Apply.............................................................................................................................................................67
Cancel............................................................................................................................................................67

Mallincam SolarCam 20 User Manual November 6, 2023
SolarCam 20 User Manual Page 5
Filter/Extract/Inverse Color Tab .......................................68
Color..............................................................................................................................................................68
Filter Color ...................................................................................................................................................68
Extract Color................................................................................................................................................68
Inverse Color ................................................................................................................................................69
Apply.............................................................................................................................................................69
Cancel............................................................................................................................................................69
Deconvolution .............................................................................................70
Iterations.......................................................................................................................................................70
Kernal Size....................................................................................................................................................70
Calculation....................................................................................................................................................70
Apply.............................................................................................................................................................70
Automatic Counting ....................................................................71
Display Tab .........................................................................................................................72
Zoom in.........................................................................................................................................................72
Zoom out.......................................................................................................................................................72
1:1..................................................................................................................................................................72
Fit...................................................................................................................................................................72
Black Background........................................................................................................................................73
Full Screen....................................................................................................................................................73
Horizontal Flip .............................................................................................................................................73
Vertical Flip..................................................................................................................................................73
Rotate 90 .......................................................................................................................................................74
Config Tab ...........................................................................................................................74
Info Tab ................................................................................................................................75
Preferences....................................................................................................................................................75
Help ...............................................................................................................................................................75
About.............................................................................................................................................................75
On Screen Controls...............................................................................................................................76
Show File Directory...........................................................................................................................................76
Sizer...................................................................................................................................................................76
5. Appendix.............................................................................................................................................77
Appendix A: Using the 1.25” 0.5 x Focal Reduce...............................................................................77
Attaching the Mallincam Focal reducer.............................................................................................................77
Appendix B: Using Filters....................................................................................................................78
Mallincam Polarizing Filter...............................................................................................................................78
Mallincam IR Filter ........................................................................................................................................... 78
Appendix C: Connecting to Night Skies Network (NSN) using the SolarCam 20 Software ..........79
Setting up to Broadcast on LiveSkies.....................................................................................................79
Introduction ....................................................................................................................................................... 79
Obtaining a Broadcast Account .........................................................................................................................80
Logging into Liveskies ......................................................................................................................................81
This section explains how to Capture and Broadcast Using either SplitCam or OBS .......................................83
Live Chat ........................................................................................................................................................... 85
Finished .............................................................................................................................................................85
Using OBS (Open Broadcast Software) –This is a more challenging process to initially setup.......................86
Viewing a Live Skies Channel...........................................................................................................................91
If you want to participate in the Live Chat ........................................................................................................91

Mallincam SolarCam 20 User Manual November 6, 2023
SolarCam 20 User Manual Page 6
To Live Chat......................................................................................................................................................93
To exit................................................................................................................................................................93
Appendix D –First Aid for the SolarCam 20.....................................................................................95
The SolarCam 20 Software is not Working.............................................................................................. 95
My Image is all White. ................................................................................................................................. 95
My Images is looking all wrong, colors, blotchy. ................................................................................95
When I save my AVI Video it only saves part of the Video. .............................................................96
My SolarCam 20 is frozen, or the commands do not seem to be working correctly................96
My Image on the Screen is great, but when I try to Modify it, the image is all White. ..............96
Appendix E: Notes.................................................................................................................................97

Mallincam SolarCam 20 User Manual November 6, 2023
SolarCam 20 User Manual Page 7
1. Introduction
Introducing the MallinCam SolarCam 20 imager, the newest member of the MallinCam family of
astronomical imaging video cameras. This state-of-the-art camera boasts a Sony 20 MP sensor,
providing heightened sensitivity essential for observing and capturing celestial events, especially
solar phenomena. Tailored for demanding astronomical solar applications, the SolarCam 20 excels
in real-time observation and imaging of solar system objects, making it the most versatile
video/imaging camera ever developed for computer use. It enables live observation of all solar
system targets while simultaneously capturing images or recording video.
Equipped with a square megapixel ceramic CMOS sensor featuring a pixel size of 2.4μm x 2.4μm,
the SolarCam 20 delivers impressive 5472 x 3648 resolution, covering a diagonal field of view of
15.86mm. The SolarCam 20 camera produces high-resolution 20 million-pixel images using various
solar telescope setups. Users also have the flexibility to expand the field of view or magnification
further by incorporating an optional focal reducer or Barlow, facilitating the detailed observation
of vast astronomical objects. Notably, the SolarCam 20 offers "Newton Rings" Free performance on
solar telescopes, both in H Alpha and White light.
With its 1-inch large target surface, the SolarCam 20 captures images with optimal clarity and
detail. This professional-grade camera provides complete control through its dedicated software,
offering seamless connectivity via USB3. It comes bundled with a professional USB cable featuring
secure hardware attachments for outdoor use. The package includes specialized software stored
on a thumb drive, a 1.25" adapter, and a high-grade USB 3 cable, ensuring a comprehensive and
user-friendly experience for all astronomers.
So, thank you for your purchase, and let the adventure begin.

Mallincam SolarCam 20 User Manual November 6, 2023
SolarCam 20 User Manual Page 8
The Contents of the SOLARCAM 20 - Package
Specifications:
Sensor: Sony CMOS sensor IMX183CQJ-J
Sensor size: 13.1 x 8.8 mm
Array Diagonal: 15.86 mm
Active pixel array size: 5472 (H) × 3648 (V) (20 Mega Pixels)
Effective Area: 13.1mm x 8.8mm
Pixel size: 2.4 x 2.4 microns
Analog-to-Digital conversion: 8/16-bit output
Exposure time range: 18 micro-seconds to 15 seconds
Weight: 11.5 oz. (327 g)
Mounting interface: c-Mount
Shutter Mode: Rolling
Frame Rate: 15fps@5472x3648
Exposure Time: 18μs-15s
Binning: 2x2, 3x3, 4x4
Color Temperature: 2000-15000K
Picture Format: TIFF/JPG/PNG/DICOM
Camera Size: 68mmx68mmx46mm
Data Interface: USB: 3.0 Power:3W
Environment: Temperature:-10~45℃; Humidity: 10%~85%
Operating System: Windows 7/10 (32 Bit/64 Bit)/Mac
Analog-to-Digital conversion: 8/16-bit output

Mallincam SolarCam 20 User Manual November 6, 2023
SolarCam 20 User Manual Page 9
Included in Package:
①MallinCam SolarCam 20 imaging camera.
②Flash drive containing software installation files.
③USB 3.0 Cable with mounting screws.
④1.25” eyepiece adapter
Optional Components
➢Mallincam 1.25” 0.5 x Focal Reducer w/25mm extension
➢Mallincam 1.25” IR Blocking Filter
➢Mallincam 1.25” Polarizing Filter

Mallincam SolarCam 20 User Manual November 6, 2023
SolarCam 20 User Manual Page 10
2. Installing Driver and Software
System Requirements
PC running either Windows ® (32-bit & 64-bit) or MAC
Performance is not guaranteed if the following specification cannot be reached.
•Equal to Intel Corei5 or Higher
•Memory: 8GB or More
•USB port: USB 3.0 Port
•Display Monitor: 17" or Larger Recommended
•A video display capable of rendering 1024x768 resolution minimum; 1280x1024 or higher is
recommended, and in 24-bit color.
•One available fully specified high-speed USB 3.0 port.
Installing the Software
Visit the Software Downloads Page in the Support Tab located on the website:
www.mallincam.net
Select the Blue Click Here Button to download the SolarCam 20 Driver.
After you have clicked on the Blue Click Here indicator, a zipped file will be downloaded
onto your computer.
Make sure that the SOLARCAM 20 is not plugged into the computer.
Step 1
Step 2
MALLINCAM HD-10 II, SolarCam 20 Software

Mallincam SolarCam 20 User Manual November 6, 2023
SolarCam 20 User Manual Page 11
First Time Installation of Software
Double-Click on the Mallincam2.4 Setup to start the installation
process (You may need to accept installation).
The following window will appear:
Click on Next to continue the installation process.
An Acceptance Window will now appear.
Either accept the file location for the Mallincam2.1 Software to be installed in or choose a
folder of your choice. We recommend accepting the default location.
MallinCam2.4 Setup

Mallincam SolarCam 20 User Manual November 6, 2023
SolarCam 20 User Manual Page 12
Click Next to pop-up the Components window.
Make sure both the Mallincam2.1 and Camera Driver are checked.
Click Next to accept the Components.
The Mallincam2.1 and Drivers will be installed on your computer. Then the Completing the
MallinCam Setup Window will pop-up.
Click on Finish to acknowledge the installation.
Once complete, you will now have a Mallincam Icon on your desktop.

Mallincam SolarCam 20 User Manual November 6, 2023
SolarCam 20 User Manual Page 13
3. Mallincam SOLARCAM 20 with a Computer
Connecting the SolarCam 20 to your Computer
First make sure you have the following pieces of equipment:
•Mallincam SolarCam 20 Camera
•1.25” C nose-piece adapter
•USB 3.0 Cable
•Laptop or Computer
Starting on the SolarCam 20 on the Computer
Attach the provided USB 3.0 cable from the SolarCam 20 to a USB 3.0 port on
your Computer (Drivers may install on first attachment).
Double-Click on the Mallincam Icon (located on your Desktop) to start the
software (Note: it takes a few seconds to activate).
The Mallincam Window should open with current image displayed in the
Video window.
①Status Bar
②Display Window.
③Feature Tabs.
④Image Bar.
⑤Image Tray.
⑥Data Bar
①
②
③
④
The Feature Tab Panel provides a variety of Drop-down
tabs to open-up more controls within the Feature Tab
Panel. When the little black triangle next to the tab
descriptor is pointing to the right, the tab is closed. When
the little black triangle is pointing down, the Tab is open
(thus displaying more controls)
Clicking in the little black triangle toggles the tab from
being open or closed, thus allowing you more control of
what information controls are available for you to use.

Mallincam SolarCam 20 User Manual November 6, 2023
SolarCam 20 User Manual Page 14
SolarCam 20 Quick Setup and Pictorial Workflow
A typical workflow when using the SolarCam 20.
Connect SolarCam 20
Stops HD-10 II
Set Exposure
Computer
Adjust Image
Save Images
Exit Program
Set Binning
Set Resolution
Select Capture

Mallincam SolarCam 20 User Manual November 6, 2023
SolarCam 20 User Manual Page 15
Detailed Work-Flow Procedures on a Computer
This section describes the typical procedures in imaging using a computer. For a more
detailed explanation of each control of all of their options, see the section SOLARCAM 20
Control Software below.
Once you have the SolarCam 20’sSoftware up and running, you should see an image of
whatever the SolarCam 20 camera is looking at (at whatever exposure setting the software
is set at).
At the Top of the Window on the Status Bar, ensure that the Capture tab is selected.
Resolution
The SolarCam 20 provides 3resolutions for you to
choose from. So, from the Resolution Tab, we might as
well choose the default 5472 x 3648 to verify that our
computer can handle this. Note: the lower the
resolution, the higher the frame rate.
Binning
The SolarCam 20 provides 4binning choices for you
to select from. So, from the Binning Tab, we might as
well choose the default 1 x 1 to see how our
computer and telescope parameters handle this.
Exposure
The first thing you should do (until you become more
familiar with the operation of the Camera) is to turn on
the Auto Exposure. The Mallincam Software provides a
simple process of selecting and deselecting the
autofocus along with the ability to manually adjust the
exposure settings. Area Exposure will provide you with a
resizable blue box to select a specific area of your
image for the Auto Exposure to examine.
Step 1
Step 3
Step 2

Mallincam SolarCam 20 User Manual November 6, 2023
SolarCam 20 User Manual Page 16
The Mallincam SolarCam 20 has an exposure range from 18 ms to 15 seconds.
To activate the Auto-Exposure, just check the box next to its name. This will gray out the
manual adjustments, Exposure Time slider and the Gain slider. The software will then
continuously adjust the Exposure and the Gain slider values to optimize the image.
You have two ways to manually adjust the exposure (make sure Auto Exposure is
unchecked):
1. By using Manual entry values.
You can enter in a value in the s, ms, and μsboxes or use the up and down arrows
adjacent to the box to increase or decrease the value in the box.
Click on the OK button accept the new exposure value.
The SolarCam 20 will not change the exposure value until you give it permission by clicking
on the OK button.
2. By using the Exposure Time slider and the Gain slider, adjustments are immediately
transferred to the SolarCam 20 for real time viewing.
Left-click-hold and drag the slider to adjust the exposure time. You will notice
the exposure time value in the manual entry boxes for the time change in
real time along with the real time response from the camera.
Gain
When on Manual Exposure, you can also adjust the Gain (Left-Click-Hold-and-Drag the
Gain slider) to make the image brighter (larger Gain value) or dimmer (smaller Gain value).
You will get more comfortable with finding the best exposure/gain values for your image.
Play with them to see how both the Exposure and the Gain values affect your image. Gain
is a setting that controls the amplification of the signal from the camera sensor to the
screen. Too much amplification can cause noise in the image.
By clicking on the Default button, the software will activate autoexposure, and both the
Exposure and Gain slider will adjust to match the current conditions to produce an image.

Mallincam SolarCam 20 User Manual November 6, 2023
SolarCam 20 User Manual Page 17
White Balance
Different planetary objects, in combination with different sky
conditions, may throw off the colour balance of the
SolarCam 20. We can bring everything back to normal by
using the White Balance control which is located in the
Feature Tab.
The default setting of the White Balance is Auto-White Balance (unchecked), but you can
manually adjust the ratio of the three individual components of Red, Green and Blue to reflect the
true image color under various illuminating conditions. To adjust the values, Checkmark the Lock
WB and then use the sliders to adjust the color ratio to the required values. Do not uncheck the
Lock WB as this will again activate Auto White Balance. Area WB will allow an Auto White Balance
based on image inside the resizable and moveable red enclosure box.
Gray
Check-marking this option will convert the color image to a black and white image. When
selected, the color sliders are deactivated.
Color Temperature (CCT) When the Lock White Balance is checked, the current
approximate color temperature can be achieved by adjusting
the two sliders which are Red and Blue. It can also be manually
adjusted by moving its own slider to match the approximate
color temperature according to the illuminating environment (It
will automatically adjust the Red and Blue sliders and set Green
to 128). A light having higher color temperature will have more
blue light or larger Kelvin value as compared to lower light,
which has a smaller Kelvin value. By calibrating the White
Balance sliders, you will more accurately achieve the correct
color temperature. The color temperature settings range from
2000K to 15000K.
If you don’t like the White Balance adjustments, you can go back to the default settings by
Clicking on the Default button beneath the White Balance controls. It will set Red to 175,
Blue to 203, Green to 128, and CCT to 5500K.
Step 4

Mallincam SolarCam 20 User Manual November 6, 2023
SolarCam 20 User Manual Page 18
Hue, Saturation, Light, Contrast, Sharpness, and DPC
Located in the Image Adjust Tab are the six controls called Hue, Saturation, Light, Contrast,
Sharpness and DPC. By using the mouse cursor, Left-Click-Hold-and-Drag the slider bar of
each of the controls to produce an image that meets your requirements.
Hue - Hue is the shade of the color, adjusting ranges from 0 to 360. Hues are made
up of the three primary colors (red, blue, and yellow) and the three
secondary colors (orange, green, and violet) that appear in the color wheel
or color circle. When you refer to hue, you are referring to its pure color, or
the visible spectrum of basic colors that can be seen in a rainbow. When
hues are combined with other color qualities, such as Saturation, or Light,
then the resulting combination is known as the color’s chromaticity.
Saturation - Saturation is similar to contrast, however instead of increasing the separation
between shadows and highlights, we increase the separation between
colors. It represents the purity of the color, the higher the purity, the more
vivid it appears. It ranges from 0to 255.
Light - Light is the brightness and darkness of the image. It ranges from 0to 255.
Contrast - Contrast is the scale of difference between black and white in your images.
Without contrast you wouldn't have an image because there wouldn't be
any differentiation between light and dark; everything would be black, white,
or a single shade of grey somewhere in between. It ranges from 0 to 63.
Sharpness - Sharpness can be defined as edge contrast, that is, the contrast along edges
in an object in the image. When we increase sharpness, we increase the
contrast only along/near edges in the object while leaving smooth areas of
the image alone.
DPC - This represents for Dead Pixel Correction and is used to detect and remove
dead pixels from the active image. It ranges from 0to 3. The higher the
number the more aggressive the Dead Pixel removing process.
Step 4
Before: DPC=0
After: DPC=1
Table of contents
Other MallinCam Digital Camera manuals
MallinCam
MallinCam SKYRAIDER DS16C User manual
MallinCam
MallinCam SKYRAIDER DS16C TEC User manual
MallinCam
MallinCam SKYRAIDER DS287 User manual
MallinCam
MallinCam Universe User manual

MallinCam
MallinCam SkyRaider DS432 TEC User manual

MallinCam
MallinCam Universe User manual
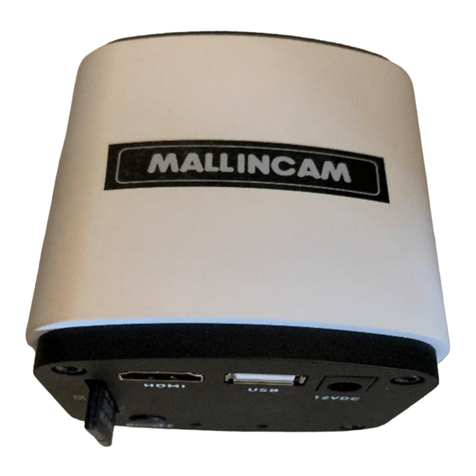
MallinCam
MallinCam HD-10 II User manual
