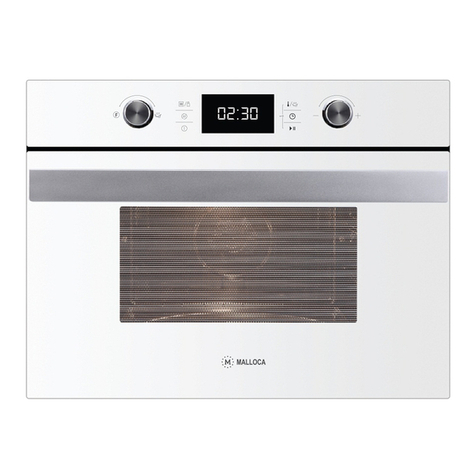
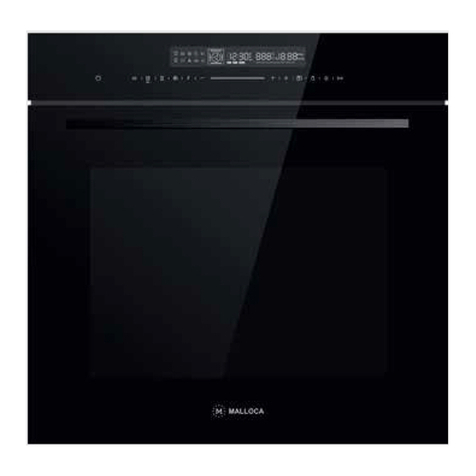
Malloca MW-LX12 User manual

1
USER MANUAL
HƯỚNG DẪN SỬDỤNG
MODEL: MW-LX12

2
EN Table of contents
Important safety information ............................................................................................................................................ 3
Causes of damage ........................................................................................................................................................... 4
Installation ..................................................................................................................................................................... 4
Your new appliance ........................................................................................................................................................ 6
Control panel ................................................................................................................................................................... 6
Touch keys and display ..................................................................................................................................................... 6
Function selector .............................................................................................................................................................. 6
Parameter selector ........................................................................................................................................................... 7
Cooling fan ...................................................................................................................................................................... 7
Accessories ..................................................................................................................................................................... 7
Before using the appliance for the first time ...................................................................................................................... 8
Setting the clock ............................................................................................................................................................... 8
Heating up the oven .......................................................................................................................................................... 8
Cleaning the accessories ................................................................................................................................................... 8
Setting the oven ............................................................................................................................................................. 8
Setting the type of heating and temperature .......................................................................................................................... 9
Rapid preheating .............................................................................................................................................................. 9
The microwave ............................................................................................................................................................... 9
Notes regarding ovenware ................................................................................................................................................. 9
Microwave power settings .................................................................................................................................................. 9
Setting the microwave ....................................................................................................................................................... 10
Micro-Combine operation ................................................................................................................................................ 10
Setting Microwave Combine operation ............................................................................................................................. 10
Automatic program ......................................................................................................................................................... 10
Setting a program ........................................................................................................................................................... 10
Defrosting program ......................................................................................................................................................... 11
Setting the time-setting options ....................................................................................................................................... 11
Setting the cooking time .................................................................................................................................................... 11
Setting the clock ............................................................................................................................................................... 11
Childproof lock ............................................................................................................................................................... 12
Switching on the childproof lock .......................................................................................................................................... 12
Switching off the childproof lock .......................................................................................................................................... 12
Childproof lock with automatic program ................................................................................................................................ 12
Care and cleaning ........................................................................................................................................................... 12
Cleaning agents ............................................................................................................................................................... 13
Technical data ................................................................................................................................................................. 13
Malfunction table ............................................................................................................................................................ 13

3
Important safety information
Read these instructions carefully. Only then will you be able to operate your appliance safely and correctly. Retain the instruction manual
for future use or for subsequent owners.
Check the appliance for damage after unpacking it. Do not connect the appliance if it has been damaged in transport.
The microwave oven is intended for heating food and beverages. Drying of food or clothing and heating of warming pads, slippers,
sponges, damp cloth and similar may lead to risk of injury, ignition or fire.
Only a licensed professional may connect appliances without plugs. Damage caused by incorrect connection is not covered under
warranty.
This appliance is intended for domestic use only. The appliance must only be used for the preparation of food and drink. The appliance
must be supervised during operation. Only use this appliance indoors. This appliance can be used by children aged from 8 years and
above and persons with reduced physical, sensory or mental capacity or lack of experience and knowledge if they have been given
supervision or instruction concerning use of the appliance in a safe way and understand the hazards involved. Children shall not play with
the appliance.
Cleaning and user maintenance shall not be made by children without supervision.
The appliances are not intended to be operated by means of an external timer or separate remote control system.
This appliance is intended to be used in household and similar applications such as:
- Staff kitchen areas in shops, offices and other working environments.
- Farm house
- By clients in hotels, motels, and other residential type environments; bed and breakfast type environments.
Risk of fire!
■ Combustible items stored in the cooking compartment may catch fire. Never store combustible items in the cooking
compartment. Never open the appliance door if there is smoke inside. Switch off the appliance and unplug it from the mains or
switch off the circuit breaker in the fuse box.
■ When heating food in plastic or paper containers, keep an eye on the oven due to the possibilities of ignition.
■ If smoke is observed, switch off or unplug the appliance and keep the door closed in order to stifle any flames
WARNING: Accessible parts may become hot during use .Young children should be kept away.
WARNING: Do not use harsh abrasive cleaners or sharp metal scrapers to clean the microwave oven door glass since they can scratch
the surface, which may result in shattering of the glass.
■
Do not select a microwave power or
time setting that is higher than necessary. Follow the information high a microwave power or
for too long.
■ Cooking oil may catch fire. Never use the microwave to heat cooking oil on its own.
Risk of explosion!
Liquids and other food may explode when in containers that have been tightly sealed. Never heat liquids or other food in containers that
have been tightly sealed.
Only use utensils that are suitable for use in microwave ovens.
Risk of serious damage to health!
■The surface of the appliance may become damaged if it is not cleaned properly. Microwave energy may escape. Clean the
appliance on a regular basis, and remove any food residue immediately. Always keep the cooking compartment, door seal, door
and door stop clean; see also section Care and cleaning.
WARNING: If the door or door seals are damaged, the oven must not be operated until it has been repaired by a competent person.
WARNING: It is hazardous for anyone other than a competent person to carry out any service or repair operation that involves the
removal of a cover which gives protection against exposure to microwave energy.
■Microwave energy may escape if the cooking compartment door or the door seal is damaged. Never use the appliance if the
cooking compartment door or the door seal is damaged. Contact the after-sales service.
■Microwave energy will escape from appliances that do not have any casing. Never remove the casing. For any maintenance or
repair work, contact the after-sales service.
Risk of electric shock!
■Incorrect repairs are dangerous. Repairs may only be carried out and damaged power cables replaced by one of our trained
after-sales technicians. If the appliance is defective, unplug the appliance from the mains or switch off the circuit breaker in the
fuse box. Contact the after -sales service.
■The cable insulation on electrical appliances may melt when touching hot parts of the appliance. Never bring electrical appliance
cables into contact with hot parts of the appliance.
■Penetrating moisture may cause an electric shock. Do not use any high-pressure cleaners or steam cleaners.
■A defective appliance may cause electric shock. Never switch on a defective appliance. Unplug the appliance from the mains or
switch off the circuit breaker in the fuse box. Contact the after-sales service.
■The appliance is a high-voltage appliance. Never remove the casing.
WARNING: Ensure that the appliance is switched off before replacing the lamp to avoid the possibility of electric shock.
Risk of burns!
■During use the appliance becomes hot .Care should be taken to avoid touching heating elements inside the oven.
■Accessories and ovenware become very hot. Always use oven gloves to remove accessories or ovenware from the cooking
compartment.
■Alcoholic vapours may catch fire in the hot cooking compartment. Never prepare food containing large quantities of drinks with a
high alcohol content. Only use small quantities of drinks with a high alcohol content. Open the appliance door with care.
■Foods with peel or skin may burst or explode during, or even after, heating. Never cook eggs in their shells or reheat hard-boiled
eggs. Never cook shellfish or crustaceans. Always prick the yoke when baking or poaching eggs. The skin of foods that have a
peel or skin, such as apples, tomatoes, potatoes and sausages, may burst. Before heating, prick the peel or skin.
■The contents of feeding bottles and baby food jars shall be stirred or shaken and the temperature checked before consumption in
order to avoid burns.
4
■Heated food gives off heat. The ovenware may become hot. Always use oven gloves to remove ovenware or accessories from
the cooking compartment.
WARNING: Liquids and other foods must not be heated in sealed containers since they are liable to explode. Always observe the
instructions on the packaging. Always use oven gloves to remove dishes from the cooking compartment.
Risk of scalding!
■When you open the appliance door, hot steam may escape. Open the appliance door with care. Keep children at a safe distance.
■Microwave heating of beverages can result in delayed eruptive boiling, therefore care must be taken when handling the
container. This means that the liquid reaches boiling temperature without the usual steam bubbles rising to the surface. Even if
the container only vibrates a little, the hot liquid may suddenly boil over and spatter. When heating, always place a spoon in the
container. This will prevent delayed boiling.
Risk of injury!
■Scratched glass in the appliance door may develop into a crack. Do not use a glass scraper, or sharp or abrasive cleaning aids
or detergents.
■Unsuitable ovenware may crack. Porcelain or ceramic ovenware can have small perforations in the handles or lids. These
perforations conceal a cavity below. Any moisture that penetrates this cavity could cause the ovenware to crack. Only use
microwave-safe ovenware.
Causes of damage
Caution!
■Creation of sparks: Metal - e.g. a spoon in a glass - must be kept at least 2 cm from the oven walls and the inside of the door. Sparks
could irreparably damage the glass on the inside of the door.
■Water in the hot cooking compartment: Never pour water into the hot cooking compartment. This will cause steam. The temperature
change can cause damage.
■Moist food: Do not store moist food in the closed cooking compartment for long periods.
■Do not use the appliance to store food. This can lead to corrosion.
■Cooling with the appliance door open: Only leave the cooking compartment to cool with the door closed. Do not trap anything in the
appliance door. Even if the door is only slightly ajar, the fronts of adjacent units may be damaged over time.
■Heavily soiled seal: If the seal is very dirty, the appliance door will no longer close properly during operation. The fronts of adjacent units
could be damaged. Always keep the seal clean.
■Operating the microwave without food: Operating the appliance without food in the cooking compartment may lead to overloading. Never
switch on the appliance unless there is food in the cooking compartment. An exception to this rule is a short crockery test (see the
section "Microwave, suitable crockery").
■Using the appliance door for standing on or placing objects on: Do not stand or place anything on the open appliance door. Do not place
ovenware or accessories on the appliance door.
■Transporting the appliance: Do not carry or hold the appliance by the door handle. The door handle cannot support the weight of the
appliance and could break.
■Microwave popcorn: Never set the microwave power too high. Use a power setting no higher than 600 watts. Always place the popcorn
bag on a glass plate. The disc may jump if overloaded.
■Liquid that has boiled over must not be allowed to run through the turntable drive into the interior of the appliance. Monitor the cooking
process. Choose a shorter cooking time initially, and increase the cooking time as required.
■The oven should be cleaned regularly and any food deposits removed since they may explode, even after microwave heating has
ended.
■Failure to maintain the oven in a clean condition could lead to deterioration of the surface that could adversely affect the life of the
appliance and possibly result in a hazardous situation.
Installation
Fitted units
■This appliance is only intended to be fully fitted in a kitchen.
■This appliance is not designed to be used as a tabletop appliance or inside a cupboard.
■The fitted cabinet must not have a back wall behind the appliance.
■A gap of at least 45 mm must be maintained between the wall and the base or back panel of the unit above.
■The fitted cabinet must have a ventilation opening of 250 cm2 on the front. To achieve this, cut back the base panel or fit a
ventilation grille.
■Ventilation slots and intakes must not be covered.
■The safe operation of this appliance can only be guaranteed if it has been installed in accordance with these inatallation
instructions.
■The fitter is liable for any damage resulting from incorrect installation.
■The units into which the appliance is fitted must be heat-resistant up 90 oC.

5
min 45
min 45
460
50
250
Ventilation grid Cupboard feet
Note: There should be gap above the oven
Do not hold or carry the appliance by the door handle. The door handle cannot hold the weight of the appliance and may break off.
1. Carefully push the microwave into the box, making sure that it is in the center.
2. Open the door and fasten the microwave with the screws that were supplied.
Electrical connection
The appliance is fitted with a plug and must only be connected to a properly installed earthed socket. Only a qualified electrician who takes
the approriate regulations into account may install the socket or replace the connecting cable. If the plug is no longer accessible following
installation, an all-pole isolating switch must be present on the installation side with a contact gap of at least 3 mm. Contact protection must
be ensured by the installation.
Fuse protection: see instructions for use-technical data.
10

6
Your new appliance
Use this section to familiarize yourself with your new appliance. The control panel and the individual operating controls are explained. You
will find information on the cooking compartment and the accessories.
Control panel
Touch keys and display
The touch keys are used to set the various additional functions. On the display, you can read the values that you have set.
Symbol
Function
/
Power / Weight
Press briefly : Rapid preheating
On/Off
Temperature/Auto menu
Clock
Start/Pause
Function selector
Use the function selector to set the type of heating.
Function
Use
3D Hot air
For baking sponge cakes in baking tins, flans and
cheesecakes as well as cakes, pizza and small baked items
on the baking tray.50°C can maintain the taste of food after
heat preservation of 1-2 hours.
Grill with fan
Poultry goes brown and crispy. Baked casseroles and
grilled dishes work out best using this setting.
Pizza setting
For frozen convenience products and dishes which require
a lot of heat from underneath.
Grill
Select between the levels high, medium or low. This is
ideal if you wish to grill several steaks, sausages, pieces of
fish or slices of bread.
+ Microwave + Hot air
Use this function to roast meals quickly. And at the same
time use the function of 3D Hot air
+ Microwave + Grill Fan
Poultry goes brown and crispy. Baked casseroles and
grilled dishes work out best using this setting. And use the
function to roast meals evenly.
+ Microwave + Pizza
Use this function to roast meals quickly. And at the same
time us the function of Pizza setting
+ Microwave + Grill
Use this function to cook meals quickly and at the same
time give the meal a brown crust.
Defrost
2 defrosting program
Auto-programs
13 cooking program. The type of heating and cooking time
are set by weight
Microwave
Defrost, reheat and cooking.

7
Parameter selector
Use the selector to set the parameters.
Parameter
Function
Auto menu
Select 13 automatic programs. From P 01 to P 13
Temperature
Select the temperature of cooking (C)
: 50,100,105,110...230
:100,105,110...230
: 100,105,110...230
: 50,100,105,110...230
: 100,105,110...230
: 100,105,110...230
Weight
Set the weight of cooking.
Time
Set the time of cooking.
Microwave
Select microwave power : 100W, 300W, 450W, 700W
and 900W
Cooling fan
Your appliance has a cooling fan. The cooling fan switches on during operation. The hot air escapes above the door.
The cooling fan continues to run for a certain time after operation.
Caution!
Do not cover the ventilation slots. Otherwise, the appliance will overheat.
Notes
■ The appliance remains cool during microwave operation. The cooling fan will still switch on. The fan may run on even when microwave
operation has ended.
■ Condensation may appear on the door window, interior walls and floor. This is normal and does not adversely affect microwave
operation. Wipe away the condensation after cooking.
Accessories

8
Before using the appliance for the first time
Here you will find everything you need to do before using your oven to prepare food for the first time. First read the section on Safety
information.
Setting the clock
Once the appliance is connected, "00:00" will blink, buzzer will ring once. Set the clock.
1. Turn the knob between 00:00 and 23:59.
2. Touch the key. Time is set.
Cleaning the accessories
Before you use the accessories for the first time, clean them thoroughly with hot soapy water and a soft dish cloth.
Heating up the oven
To remove the new cooker smell, heat up the oven when it is empty and closed. One hour with Hot air at 230 °C is ideal. Ensure that
no packaging remnants have been left in the cooking compartment.
1. Use the function selector to set heating mode . Turn the knob to select hot air function.
2. Touch the key. Turn the knob to set the temperature to 230 °C.
3. Touch the key. Turn the knob to set the cooking time to 60 minutes.
4. Touch the key. The oven begins to heat up.
Setting the oven
There are various ways in which you can set your oven. Here we will explain how you can select the desired type of heating and
temperature or grill setting. You can also select the oven cooking time for your dish. Please refer to the section on Setting the time-setting
options.
Setting the type of heating and temperature
Example: Hot air at 200 °C for 25 minutes.
1. Use the function selector to . Turn the knob to .
2. Touch the key. The default temperature 180°C will display. Turn the knob to set the temperature to 200 °C.
3. Touch the key. Turn the knob to set the cooking time to 25 minutes.
4. Touch the key. The oven begins to heat up.
Cancelling operation
This can be done at any time. Touch the key to enter into the off state.
Rapid Preheating
With rapid preheating, your oven reaches the set temperature particularly quickly.
Rapid Preheating is available for the following types of heating:
■ 3D Hot air
■ Grill with fan
■+ Microwave + Hot air
■+ Microwave + Grill Fan
■Pizza setting
■+ Microwave + Pizza
To ensure an oven cooking result, only put your food in the cooking compartment when the preheating phase is complete.
1. Setting the type of heating and temperature.
2. Touch the key. The symbol lights up in the display.
3. Touch the key. The oven begins to heat up.

9
The preheating process is complete
A signal sounds. The symbol in the display blinks. Put your dish in the oven.
Cancelling rapid preheating
During setting the rapid preheating function, touch the key can cancel the function. During rapid preheating, touch the or the
can cancel the function. Also you can open the door to cancel the function.
Note:
1. The rapid preheating function only works if you have already chosen one of the modes above. During pre-heating, the microwave
function is switched off.
2. Only when you can hear alarm and preheating icon is blinking you can open the door and put food inside.
The microwave
Microwaves are converted to heat in foodstuffs. The microwave can be used solo, i.e. on its own, or in combination with a different type of
heating. You will find information about ovenware and how to set the microwave.
Note:
In the Expert Cooking Guide, you will find example for defrosting, heating and cooking with the microwave oven.
Note:
The step quantities for the adjustment time of the coding switch are as follow:
0-1 Min: 1 second
1-5 Min: 10 seconds
5-15 Min: 30 seconds
15-60 Min: 1 Minute
Over 60 Min: 5 Minutes
Notes regarding ovenware
Suitable ovenware
Suitable dishes are heat-resistant ovenware made of glass, glass ceramic, porcelain, ceramic or heat-resistant plastic. These materials
allow microwaves to pass through.
You can also use serving dishes. This saves you having to transfer food from one dish to another. You should only use ovenware with
decorative gold or silver trim if the manufacturer guarantees that they are suitable for use in microwaves.
Unsuitable ovenware
Metal ovenware is unsuitable. Metal does not allow microwaves to pass through. Food in covered metal containers will remain cold.
Caution!
Creation of sparks: metal – e.g. a spoon in a glass – must be kept at least 2 cm from the oven walls and the inside of the door. Sparks
could destroy the glass on the inside of the door.
Ovenware test
Do not switch on the microwave unless there is food inside. The following ovenware test is the only exception to this rule.
Perform the following test if you are unsure whether your ovenware is suitable for use in the microwave:
1. Heat the empty ovenware at maximum power for ½ to 1 minute.
2. Check the temperature occasionally during that time.
The ovenware should still be cold or warm to the touch.
The ovenware is unsuitable if it becomes hot or sparks are generated.
Microwave power settings
Use the key to set the desired microwave power.
100W
- Defrosting sensitive/delicate foods
- Defrosting irregularly-shaped foods
- Softening ice cream
- Allowing dough to rise
300W
- Defrosting
- Melting chocolate and butter
450W
- Cooking rise , soup
700W
- Reheating
- Cooking mushrooms, shell fish.
- Cooking dishes containing eggs and cheese
900W
- Boiling water, reheating
- Cooking chicken, fish, vegetables

10
Notes
■ When you touch a key, the selected power lights up.
■ The microwave power can be set to 900 watts for a maximum of 30 minutes. With all other power settings a maximum cooking time of 1
hour 30 minutes is possible.
Setting the microwave
Example: Microwave power setting 300 W, cooking time 17 minutes
1. In the off state, touch the key to enter microwave function. The default microwave power 900W will appear. And the
default cooking time will blink.
2. Touch the key to activate the microwave power. Turn the knob to adjust the microwave power to 300W.
3. Touch the key .Turn the knob to adjust the cooking time to 17 minutes.
4. Touch the key. Operation begins. The cooking time starts counting down in the display.
Micro-Combine operation
This involves simultaneous operation of the grill and the microwave. Using the microwave makes your dishes ready more quickly, but
they are still nicely browned. You can switch on all microwave power settings. Exception: 900 watts
Setting Microwave Combine operation
Example: microwave 100 W, 17 minutes and hot air 190 °C.
1. Turn the knob to . Turn the knob to .
2. Touch the key. The default temperature 180°C will display. Turn the knob to set the temperature to 190 °C.
3. Touch the key. Turn the knob to set the cooking time to 17 minutes.
4. Touch the key. The oven begins to heat up.
Automatic program
The automatic program enable you to prepare food very easily. You select the program and enter the weight of your food. The automatic
program makes the optimum setting. You can choose from 13 programs. Always place the food in the cold cooking compartment.
When you have selected a program, set the oven. The temperature selector must be in the off position.
Example: Program 3 with a weight of 1 kilogram.
1. Turn the knob to automatic program .
2. Touch the key. Turn the knob to select to program number.
3. Touch the key.
4. Turn the knob to set the weight, cooking time will show.
5. Touch the key. The program starts. You can see the cooking time counting down.
Auto menu
Program No.
Category
Item
P 01**
Vegetables
Fresh vegetables
P 02**
Side Dishes
Potatoes-peeled/cooked
P 03**
Side Dishes
Potatoes-roasted
If you hear a beep, turn the
food. The combine microwave
oven starts the next fase
automatically.
P 04**
Poultry/Fish
Chicken pieces
If you hear a beep, turn the
food. The combine microwave
oven starts the next fase
automatically.
P 05**
Bakery
Cake
P 06**
Bakery
Apple pie
P 07**
Bakery
quiche
P 08**
Reheat
Drink/soup
P 09**
Reheat
Plated meal
P 10**
Reheat
Sauce/stew/dish
P 11**
Convenience
Frozen-Pizza
P 12**
Convenience
Oven chips
If you hear a beep, turn the
food. The combine
microwave oven starts the
next fase automatically.
P 13**
Convenience
Lasagna

11
Notes
■
The program with a * are preheated. During preheating, the
cooking time pauses and the preheating symbol is on. After
preheating, you will
hear an alarm and the preheating symbol
will blink.
■
The program with ** only use the microwave function.
Defrosting program
You can use the 2 defrosting program to defrost meat, poultry and bread.
1. Set the function selector to automatic program . The first program number blinks in the display.
2. Turn the knob to select the program number.
3. Touch the key.
4. Turn the knob to set the weight, cooking time will show.
5. Touch the key . The program starts. You can see the cooking time counting down.
Notes
■ Preparing food
Use food that has been frozen at -18 °C and stored in portion-sized quantities that are as thin as possible.
Take the food to be defrosted out of all packaging and weigh it. You need to know the weight to set the program.
■ Liquid will be produced when defrosting meat or poultry. Drain off this liquid when turning meat and poultry and under no
circumstances use it for other purposes or allow it to come into contact with other foods.
■ Ovenware
Place the food in a microwaveable shallow dish, e.g. a china or glass plate, but do not cover.
■ When defrosting chicken and chicken portions (d 01), an audible signal will sound on two occasions to indicate that the food should
be turned.
■ Resting time
The defrosted food should be left to stand for an additional 10 to 30 minutes until it reaches an even temperature. Large pieces of
meat require a longer standing time than smaller pieces. Flat pieces of meat and items made from minced meat should be
separated from each other before leaving to stand.
After this time, you can continue to prepare the food, even though thick pieces of meat may still be frozen in the middle. The
giblets can be removed from poultry at this point.
Program No.
Defrost
Weight range in Kg
d 01*
meat, poultry and fish
0.20 - 1.00
d 02*
bread, cake and fruit
0.10 - 0.50
*During defrosting, place the food on the Lower wire rack.
Setting the time-setting options
Your oven has various time-setting options. You can use the
key to call up the menu and switch between the individual
functions. A time-setting option that has already been set can be changed directly with the knob .
Setting the cooking time
The cooking time for your meal can be set on the oven. When the cooking time has elapsed, the oven switches itself off automatically. This
means that you do not have to interrupt other work to switch off the oven. The cooking time cannot be accidentally exceeded.
The oven starts. The cooking time counts down in the display.
Setting the clock
Once the appliance is connected, "00:00" will blink, buzzer will ring once. Set the clock.
1.Turn the knob between 00:00 and 23:59.
2. Touch the key . The time is set.
Changing the clock
1.Touch and hold the key for 3 seconds in waiting state. The actually time disappear and then the time will blink in the display.
2.Turn the right knob to set the new time and touch the key to confirm the setting.

12
Childproof lock
The oven has a childproof lock to prevent children switching it on accidentally. The oven will not react to any settings. The timer and clock
can also be set when the childproof lock has been switched on.
Switching on the childproof lock
Requirement: No cooking time should be set and the function selector is in the off position.
1.Touch and hold the and keys for approx. 3 seconds.
2.The symbol appears in the display. The childproof lock is activated.
Switching off the childproof lock
1.Touch and hold the and keys for approx. 3 seconds.
2.The symbol on the display goes out. The childproof lock is deactivated.
Childproof lock with other cooking operations
When other cooking program have been set, the childproof lock is not operational.
Care and cleaning
With careful care and cleaning your microwave oven will retain its looks and remain good order. We will explain here how you should care
for and clean your appliance correctly.
Risk of electric shock.!
Penetrating moisture may cause an electric shock. Do not use any high-pressure cleaners or steam cleaners.
Risk of burns!
Never clean the appliance immediately after switching off. Let the appliance cool down.
Risk of serious damage to health!
Microwave energy may escape if the cooking compartment door or the door seal is damaged. Never use the appliance if the cooking
compartment door or the door seal is damaged. Contact the after-sales service.
Notes
■ Slight differences in color on the front of the appliance are caused by the use of different materials, such as glass, plastic and metal.
■ Shadows on the door panel which look like streaks, are caused by reflections made by the oven light.
■ Unpleasant odors, e.g. after fish has been prepared, can be removed very easily. Add a few drops of lemon juice to a cup of water.
Place a spoon into the container as well, to prevent delayed boiling. Heat the water for 1 to 2 minutes at maximum microwave power.
Cleaning agents
To ensure that the different surfaces are not damaged by using the wrong cleaning agent, observe the information in the table. Do not use
■ sharp or abrasive cleaning agents,
■ metal or glass scrapers to clean the glass in the appliance door.
■ metal or glass scrapers to clean the door seal,
■ hard scouring pads and sponges,
■ Cleaning agents with high concentrations of alcohol.
Wash new sponge cloths thoroughly before use.
Allow all surfaces to dry thoroughly before using the appliance again.
Area
Cleaning agents
Appliance front
Hot soapy water:
Clean with a dish cloth and dry with a soft cloth. Do not use glass
cleaners or metal or glass scrapers for cleaning.
Appliance front with stainless steel
Hot soapy water:
Clean with a dish cloth and dry with a soft cloth. Remove flecks of
limescale, rease, starch and albumin (e.g. egg white) immediately.
Corrosion can form under such residues. Special stainless steel
cleaning agents can be obtained from the after-sales service or
from specialist shops. Do not use glass cleaners or metal or glass
scrapers for cleaning.
Cooking compartment
Hot soapy water or a vinegar solution:
Clean with a dish cloth and dry with a soft cloth. If the oven is
very dirty: Do not use oven spray or other aggressive oven
cleaners or abrasive materials. Scouring pads, rough sponges
and pan cleaners are also unsuitable. These items scratch the
surface. Allow the interior surfaces to dry thoroughly.

13
Recess in cooking compartment
Damp cloth:
Ensure that no water seeps through the turntable drive into the
appliance interior.
Wire racks
Hot soapy water:
Clean using stainless steel cleaning agent or in the dishwasher.
Seal
Hot soapy water:
Clean with a dish cloth, do not scour. Do not use a metal or glass
scraper for cleaning.
Door panels
Glass cleaner:
Clean with a dish cloth. Do not use a glass scraper.
Technical data
Rated Voltage
220-230 V, 50 Hz
Maximum Power
2300W
Rated Output Power(Microwave)
900W
Oven Capacity
44L
Turntable Diameter
360mm
External Dimensions Without handle
454(W) 594(D) 568(H)mm
Net Weight
Approx. 44kg
Malfunction table
Malfunctions often have simple explanations. Please refer to the malfunction table before calling the after-sales service. If a meal does not
turn out exactly as you wanted, refer to the Expert Cooking Guide section, where you will find plenty of cooking tips and tricks.
Risk of electric shock!
Incorrect repairs are dangerous. Repairs may only be carried out by one of our trained after-sales engineers.
Problem
Possible cause
Remedy/information
The appliance does not work.
Faulty circuit breaker.
Look in the fuse box and check that the
circuit breaker for the appliance is in
working order.
Plug not plugged in.
Plug in the plug.
Power cut
Check whether the kitchen light works.
The appliance does not work appears in
the display panel.
Childproof lock is active.
Deactivate the childproof lock (see
section: Childproof lock).
‹:‹‹ is in the display panel.
Power cut
Reset the clock.
The microwave does not switch on.
Door not fully closed.
Check whether food residue or debris is
trapped in the door.
It takes longer than before for the food to
heat up in the microwave
The selected microwave power level is too
low.
Select a higher power level.
A larger amount than usual has been
placed in the appliance.
Double the amount = almost double the
cooking time.
The food was colder than usual.
Stir or turn the food during cooking.
Turntable grates or grinds.
Dirt or debris in the area around the
turntable drive.
Clean the rollers under the turntable and
the recess in the oven floor thoroughly.
A particular operating mode or power level
cannot be set.
The temperature, power level or combined
setting is not possible for this operating
mode.
Choose permitted settings.
“‚ appears in the display panel.
The thermal safety switch-off function has
been activated.
Call the after-sales service.
“ appears in the display panel.
The thermal safety switch-off function has
been activated
Call the after-sales service.
“‚‚ appears in the display panel.
Moisture in the control panel.
Allow the control panel to dry.
“‚ˆ appears in the display panel.
Rapid heating has failed.
Call the after-sales service.
Energy and environment tips

14
Here you can find tips on how to save energy when baking and roasting and how to dispose of your appliance properly.
Saving energy
■ Only preheat the oven if this is specified in the recipe or in the operating instruction tables.
■ Use dark, black lacquered or enameled baking tins. They absorb the heat particularly well.
■ Open the oven door as infrequently as possible while you are cooking, baking or roasting.
■ It is best to bake several cakes one after the other. The oven is still warm. This reduces the baking time for the second cake. You can
also place two loaf tins next to each other.
■ For longer cooking times, you can switch the oven off
10 minutes before the end of the cooking time and use the residual heat to finish cooking.
Environmentally-friendly disposal
Dispose of packaging in an environmentally-friendly manner.
This appliance complies with European Directive 2002/ 96/EC on Waste Electrical and Electronic Equipment (WEEE). The
directive gives a framework for the collection and recycling of old appliances, which is valid across the EU.
VN Bảng Nội Dung

15
Thông tin an toàn quan trọng........................................................................................................................................... 16
Nguyên nhân gây hư hỏng ................................................................................................................................................. 17
Lắp đặt .......................................................................................................................................................................... 17
Thiết bị .......................................................................................................................................................................... 19
Bảng điều khiển ............................................................................................................................................................... 19
Phím điều khiển và hiển thị ................................................................................................................................................ 19
Cài đặt chức năng ............................................................................................................................................................ 19
Cài đặt thông số ............................................................................................................................................................... 20
Quạt tản nhiệt .................................................................................................................................................................. 20
Phụ kiện ......................................................................................................................................................................... 20
Lần đầu tiên sửdụng thiết bị ........................................................................................................................................... 21
Cài đặt thời gian ............................................................................................................................................................... 21
Gia nhiệt lò ...................................................................................................................................................................... 21
Vệ sinh các phụ kiện ......................................................................................................................................................... 21
Cài đặt lò ....................................................................................................................................................................... 21
Cài đặt chức năng và nhiệt độ ............................................................................................................................................ 21
Chức năng gia nhiệt trước khi nấu ...................................................................................................................................... 21
Chức năng vi sóng ......................................................................................................................................................... 22
Lưu ý về nồi nấu .............................................................................................................................................................. 22
Cài đặt công suất vi sóng ................................................................................................................................................... 22
Cài đặt chức năng vi sóng.................................................................................................................................................. 22
Chức năng kết hợp ......................................................................................................................................................... 23
Cài đặt chức năng kết hơp ................................................................................................................................................. 23
Chức năng tựđộng ......................................................................................................................................................... 23
Cài đặt chức năng tự động ................................................................................................................................................. 23
Chức năng rã đông ......................................................................................................................................................... 24
Cài đặt thời gian ............................................................................................................................................................. 24
Cài đặt thời gian nấu ......................................................................................................................................................... 24
Cài đặt thời gian ............................................................................................................................................................... 24
Khóa phím ..................................................................................................................................................................... 24
Bật khóa phím ................................................................................................................................................................. 25
Tắt khóa phím .................................................................................................................................................................. 25
Khóa phím ở chương trình tự động ..................................................................................................................................... 25
Bảo trì và vệsinh ............................................................................................................................................................ 25
Vệ sinh ........................................................................................................................................................................... 25
Thông số kỹ thuật ............................................................................................................................................................. 26
Giải quyết vấn đề ............................................................................................................................................................ 26
Vệsinh và môi trường .................................................................................................................................................... 26
Thông tin an toàn quan trọng

16
Chúng tôi khuyên bạn nên đọc kỹ hướng dẫn sử dụng trước khi sử dụng thiết bị, Điều này giúp bạn lắp đặt, sử dụng và bảo trì một
cách an toàn. Và hướng dẫn sử dụng này sẽ giúp ích khi bạn cần đến.
Kiểm tra thiết bị có bị va chạm hay không sau khi mở bao bì. Nếu thiết bị bị va chạm có thể gây nên hư hỏng trong khi vận chuyển,
không nên kết nối thiết bị với nguồn điện.
Lò vi sóng được dùng để hâm thức ăn và đồ uống. Thiết bị không có chức năng sấy thực phẩm, quần áo, miếng xốp, khăn ướt, sưởi
ấm và những vật dụng tương tự có thể dẫn đến nguy hiểm, hỏa hoạn hoặc cháy.
Chỉ nhân viên có trình độ mới có thể kết nối thiết bị. Những thiệt hại do kết nối không chính xác gây nên hư hỏng thì sẽ không được
bảo hành.
Thiết bị này được thiết kế để chỉ sử dụng nội địa. Thiết bị được sử dụng cho việc hâm nóng thức ăn và đồ uống. Khi thiết bị hoạt
động cần được giám sát trong suốt quá trình nấu và chỉ sử dụng thiết bị này trong nhà không được để bên ngoài trời. Thiết bị này có thể
được sử dụng bởi trẻ em độ tuổi từ 8 tuổi trở lên. Đối với người không có năng lực về thể chất, giác quan hoặc tâm thần hoặc thiếu kinh
nghiệm và kiến thức thì họ cần được giám sát hoặc hướng dẫn sử dụng thiết bị một cách an toàn và tránh được những mối nguy hiểm có
tính liên quan.
Vệ sinh và lau chùi không nên thực hiện bởi trẻ em nếu không có sự giám sát của người lớn.
Thiết bị không được vận hành bằng một bộ đếm thời gian lắp riêng hoặc điều khiển thông qua hệ thống điều khiển từ xa.
Thiết bị này được thiết kế để được sử dụng trong các hộ gia đình và các ứng dụng tương tự như:
- Khu vực Nhân viên nhà bếp trong các cửa hàng, văn phòng và môi trường làm việc khác.
- Nhà vườn
- Trong các khách sạn, nhà nghỉ,…
Nguy cơ cháy!
■ Các chất dễ cháy được lưu trữ trong ngăn nấu ăn có thể bắt lửa. Không bao giờ lưu trữ các vật dễ cháy trong khoang nấu ăn.
Không bao giờ mở cửa thiết bị nếu có khói bên trong. Tắt thiết bị và rút phích cắm ra khỏi nguồn điện hoặc tắt cầu dao điện.
■ Khi đun nóng thức ăn trong hộp nhựa hoặc giấy, luôn canh trừng trong lò vì có các khả năng bắt lửa.
■ Nếu thấy có khói, tắt hoặc rút phích cắm điện và giữ cho cánh cửa đóng lại để dập tắt ngọn lửa
CẢNH BÁO: Các bộ phận có thể trở nên nóng khi sử dụng , vì vậy trẻ em nên tránh xa.
Chú ý: Không sử dụng chất tẩy rửa ăn mòn khắc nghiệt hoặc chọc kim loại sắc nhọn để làm sạch lò vi sóng kính cửa lò vì chúng có thể
làm xước bề mặt, có thể dẫn đến vỡ cửa kính.
Chú ý: Không sử dụng chất tẩy rửa ăn mòn hoặc các vật kim loại sắc nhọn để làm sạch lò vi sóng, vì có thể làm xước bề mặt và kính
của lò vi sóng.
■ Không chọn một công suất vi sóng hoặc thiết lập thời gian đó là cao hơn mức cần thiết. Thực hiện theo các thông tin của công
suất vi sóng.
■ Dầu nấu ăn có thể bắt lửa. Không được sử dụng lò vi sóng để làm nóng dầu ăn.
Nguy cơ cháy!
Chất lỏng và các thực phẩm đóng kín hộp có thể phát nổ. Không được để chất lỏng hoặc thực phẩm đóng kín hộp trong lò vi sóng. Chỉ sử
dụng đồ phù hợp theo chỉ định để sử dụng trong lò vi sóng.
Nguy cơ thiệt hại nghiêm trọng cho sức khỏe!
■ Các bề mặt của thiết bị có thể bị hư hỏng nếu không được làm sạch đúng cách. năng lượng của vi sóng có thể thoát ra ngoài.
Làm sạch các thiết bị thường xuyên, và loại bỏ thực phẩm còn sót lại ngay lập tức. Luôn luôn giữ cho khoang nấu ăn, cửa sạch sẽ; xem
thêm phần vệ sinh và làm sạch.
CẢNH BÁO: Nếu gioăng cửa hoặc cửa bị hư hỏng, thì lò phải không được hoạt động cho đến khi nó đã được sửa chữa bởi nhân viên
kỹ thuật.
■ Năng lượng lò vi sóng có thể thoát ra nếu cửa khoang nấu ăn hoặc cửa đóng bị hư hỏng. Không bao giờ sử dụng thiết bị nếu
cửa khoang nấu ăn hoặc cửa đóng bị hư hỏng. Liên hệ với trung tâm chăm sóc khách hàng khi bị hư hỏng.
■ Năng lượng lò vi sóng sẽ thoát ra từ các thiết bị mà không có vỏ bên ngoài. Đối với bất kỳ bảo dưỡng hoặc sửa chữa công
trình, liên hệ với bộ phận chăm sóc khách hàng.
Nguy cơ bị điện giật!
■ Sửa chữa không đúng có thể nguy hiểm. Sửa chữa chỉ có thể được thực hiện và cáp điện bị hư hỏng được thay thế bởi một
trong những kỹ thuật viên kỹ thuật của chúng tôi. Nếu thiết bị đang bị lỗi, rút phích cắm của thiết bị từ nguồn điện hoặc tắt cầu dao điện
trong hộp cầu chì. Liên lạc với các trung tâm chăm sóc khách hàng.
■ Các cách điện dây cáp trên các thiết bị điện có thể cháy khi chạm vào bộ phận nóng của thiết bị. Không bao giờ mang cáp
thiết bị điện tiếp xúc với bộ phận nóng của thiết bị.
■ Hơi nước thấm vào có thể gây ra điện giật. Không sử dụng bất kỳ chất tẩy rửa áp suất cao hoặc chất tẩy rửa hơi nước.
■ Một thiết bị khiếm khuyết có thể gây điện giật. Rút phích cắm của thiết bị từ nguồn điện hoặc tắt cầu dao điện trong hộp cầu
chì.
Chú ý: Đảm bảo rằng thiết bị đã được tắt trước khi thay thế các bóng đèn để tránh khả năng bị điện giật.
Nguy cơ bỏng!
■ Trong khi sử dụng thiết bị này trở nên nóng . Cẩn thận tránh tiếp xúc với bộ phận làm nóng bên trong lò.
■ Các phụ kiện trở nên rất nóng. Luôn luôn sử dụng găng tay lò để tháo các phụ kiện từ khoang nấu ăn.
■Hơi cồn có thể bắt lửa trong khoang nấu ăn nóng. Đừng bao giờ để thức ăn có chứa một lượng lớn các loại đồ uống có hàm
lượng cồn cao. Chỉ sử dụng một lượng nhỏ đồ uống có hàm lượng cồn cao, khi mở cửa thiết bị phải cẩn thận.
■ Thực phẩm có vỏ hoặc da có thể bị vỡ hoặc nổ trong, hoặc ngay cả sau khi, hâm nóng. Đừng bao giờ nấu trứng có vỏ hoặc
hâm nóng trứng luộc. Luôn cắt nhỏ thịt khi nướng hoặc bóc vỏ trứng. Ngoài ra, Vỏ của rau củ thức ăn hoặc da, chẳng hạn như táo, cà
chua, khoai tây và xúc xích, có thể gây nổ.
■Như bình sữa và lọ đựng thức ăn trẻ em được khuấy hoặc lắc và kiểm tra nhiệt độ trước khi uống để tránh bị bỏng.
CẢNH BÁO: Chất lỏng và các loại thực phẩm khác không được làm nóng trong thùng kín, vì vậy có thể phát nổ. Luôn tuân thủ các
hướng dẫn trên bao bì. Luôn luôn sử dụng găng tay lò nướng để loại bỏ các món ăn từ khoang nấu ăn.
Nguy cơ bị bỏng!
■ Khi bạn mở cửa thiết bị, hơi nước nóng có thể thoát ra ngoài. Mở cửa thiết bị cẩn thận. Giữ ở một khoảng cách an toàn.
■ Lò vi sóng làm nóng đồ uống có thể dẫn đến sôi phun trào chậm, do đó cần phải cẩn thận khi lấy thức uống ra khỏi khoang
chứa. Điều này có nghĩa là đạt chất lỏng sôi nhiệt độ mà không có bong bóng hơi nước thông thường tăng lên bề mặt. Thậm chí nếu

17
khoang chứa chỉ rung một chút, chất lỏng nóng có thể đột nhiên sôi lên và bắn tung tóe. Khi đun nóng, luôn luôn đặt một muỗng trong
khoang chứa. Điều này sẽ ngăn chặn sôi chậm.
Nguy cơ chấn thương!
■ Kính trầy xước trong cửa thiết bị có thể phát triển thành một vết nứt. Không sử dụng vật sắc nhọn, chất mài mòn hoặc chất tẩy
rửa làm sạch kính.
■ Nồi sứ hoặc nồi gốm có thể có lỗ thủng nhỏ ở tay cầm hoặc nắp đậy. Bất kỳ độ ẩm thâm nhập vào bên trong này có thể gây ra
các nồi bị vỡ. Chỉ sử dụng nồi được chỉ định sử dụng cho lò vi sóng để bảo vệ an toàn.
Nguyên nhân gây hư hỏng
Chú ý!
■ Tạo ra các tia lửa: Kim loại, ví dụ: một muỗng trong ly - phải giữ khoảng cách ít nhất 2 cm từ các bức tường của lò và bên
trong của cánh cửa. Các kim loại nhọn có thể làm hỏng kính bên trong của cánh cửa.
■ Nước trong khoang nấu nóng: Không bao giờ được đổ nước vào khoang nấu ăn nóng. Điều này sẽ gây ra hơi nước. Sự thay
đổi nhiệt độ có thể gây ra thiệt hại.
■ Thực phẩm ẩm: Không lưu trữ thực phẩm ẩm trong khoang nấu ăn kín trong thời gian dài.
■ Không sử dụng thiết bị để lưu trữ thực phẩm. Điều này có thể dẫn đến ăn mòn.
■ Làm mát với cửa thiết bị mở: Chỉ để lại khoang nấu ăn để làm mát với cánh cửa đóng. Đừng bẫy bất cứ điều gì trong cửa thiết
bị. Thậm chí nếu cửa chỉ hơi hé mở, các phần lân cận có thể bị hư hỏng theo thời gian.
■ Vận hành lò vi sóng mà không có thức ăn: Vận hành thiết bị không có thức ăn trong khoang nấu ăn có thể dẫn đến quá tải.
Đừng bao giờ bật thiết bị trừ khi có thức ăn trong khoang nấu ăn.
■ Sử dụng cửa thiết bị cho đứng trên hoặc đặt các đối tượng trên: Không đặt bất cứ điều gì trên cửa thiết bị mở. Không đặt nồi
hoặc phụ kiện trên cửa thiết bị.
■ Vận chuyển thiết bị: Đừng mang hoặc giữ thiết bị bằng tay nắm cửa. Trọng lượng của máy có thể làm hỏng cửa.
■ Làm bỏng ngô: Không bao giờ đặt công suất điện lò vi sóng quá cao. Cài đặt công suất không quá 600 watt. Luôn đặt túi bỏng
ngô trên một đĩa thủy tinh.
■ Các lò phải được làm sạch thường xuyên và bất kỳ các chất bẩn thực phẩm cần được loại bỏ vì chúng có thể gây nổ, ngay cả
sau khi lò vi sóng làm nóng đã kết thúc.
■ Không duy trì các lò trong điều kiện sạch sẽ có thể dẫn đến sự suy giảm của các bề mặt có thể ảnh hưởng xấu đến tuổi thọ
của thiết bị và có thể dẫn đến một tình huống nguy hiểm.
Lắp đặt
■ Thiết bị này nhằm mục đích để được trang bị cần thiết cho một nhà bếp.
■ Thiết bị này không được thiết kế để được sử dụng như một thiết bị để bàn hoặc bên trong tủ, mà thiết kế để sử dụng âm tủ.
■ Mặt sau của thiết bị phải để sát tường
■ Một khoảng cách ít nhất là 45 mm giữa bức tường và mặt phía sau của thiết bị.
■ Tủ âm phải được trang bị một lỗ thông gió 250 cm2 ở mặt trước hoặc thiết kế phù hợp với một lưới tản nhiệt thông gió.
■ Không được che khe thông gió và lỗ thông gió.
■ Các hoạt động an toàn của thiết bị này chỉ có thể được đảm bảo nếu nó đã được cài đặt phù hợp theo hướng dẫn lắp đặt.
■ Nhà cung cấp không chịu bất kỳ trách nhiệm do thiệt hại do việc lắp không đúng.
■ Tủ âm lắp đặt thiết bị được trang bị phải chịu nhiệt lên 90 oC

18
min 45
min 45
460
50
250
Ventilation grid Cupboard feet
Kết nối điện
Thiết bị này được trang bị với một ổ cắm và chỉ được kết nối với một nguồn điện được nối đất cài đặt đúng cách. Chỉ nhân viên
kỹ thuật có thể lắp đặt kết nối điện hoặc thay thế cáp kết nối. Nếu sau khi đã kết nối với nguồn điện thiết bị không hoạt động, vui lòng liên
hệ với nhân viên kỹ thuật để đảm bảo việc kết nối điện.
Cầu chì bảo vệ: xem hướng dẫn sử dụng số liệu kỹ thuật.
Thiết bị
10

19
Bảng điều khiển
Phím điều khiển và hiển thị
The touch keys are used to set the various additional functions. On the display, you can read the values that you have set.
Biểu tượng
Chức năng
/
Công suất / Cân nặng
Chức năng gia nhiệt
Mở/Tắt
Nhiệt độ/Chức năng tự động
Thời gian
Bắt đầu/Tạm dừng
Cài đặt chức năng
Chức năng
Sửdụng
3D Hot air
Để nướng bánh xốp trong hộp thiếc đựng bánh, flans và
bánh trứng cũng như bánh ngọt, pizza và các bánh nướng
nhỏ trên khay nướng 50°C có thể duy trì hương vị của
thực phẩm sau khi bảo quản nhiệt 1-2 giờ.
Nướng kết hợp quạt
Gia cầm sẽ trở nên vàng và giòn. Thịt nướng và các món
nướng nên sử dụng chức năng này.
Pizza
Đối với các sản phẩm đông lạnh và các món ăn mà đòi hỏi
rất nhiều nhiệt từ bên dưới.
Nướng
Chọn giữa các cấp độ cao, trung bình hay thấp. Lý tưởng
nếu bạn muốn nướng vài miếng thịt bò, xúc xích, miếng cá
hoặc lát bánh mì.
+ Vi sóng + Hot air
Chức năng dùng để nướng thức ăn nhanh
+ Vi sóng + Nướng kết hợp quạt
Gia cầm sẽ trở nên vàng và giòn. Thịt hầm nướng và các
món nướng làm việc ra tốt nhất sử dụng thiết lập này. Và
sử dụng các chức năng để nướng thức ăn đều.
+ Vi sóng + Pizza
Sử dụng chức năng này để nấu thức ăn nhanh hơn và sử
dụng chức năng này để làm bánh pizza.
+ Vi sóng + Nướng
Sử dụng chức năng này để nấu thức ăn nhanh hơn và
cùng thơi gian này cho thức ăn vàng đều.
Rã đông
2 chức năng rã đông
Chức năng tự động
13 chức năng nấu.Chức năng nhiệt và cài đặt thời gian
nấu bằng cân nặng.
Vi sóng
Rã đông, gia nhiệt và nấu.
Cài đặt thông số
Bảng cài đặt thông số
Thông số
Chức Năng

20
Chức năng tự động
Cài đặt 13 chức năng tự động từ P 01 đến P 13
Nhiệt độ
Cài đặt nhiệt độ nấu (C)
: 50,100,105,110...230
:100,105,110...230
: 100,105,110...230
: 50,100,105,110...230
: 100,105,110...230
: 100,105,110...230
Cân nặng
Cài đặt cân nặng nấu
Thời gian
Cài đặt thời gian nấu
Vi sóng
Cài đặt công suất của vi sóng : 100W, 300W, 450W,
700W và 900W
Quạt tản nhiệt
Thiết bị của bạn có quạt tản nhiệt. Quạt tản nhiệt được bật khi thiết bị hoạt động. Hơi nóng được thoát ra ngoài thông qua cửa lò.
Quạt tản nhiệt sẽ tiếp tục chạy một khoảng thời gian ngắn sau khi máy kết thúc vận hành.
Chú ý!
Không che các khe thông gió. Nếu không, thiết bị sẽ bị nóng.
Ghi chú
■ Thiết bị sẽ vẫn mát khi hoạt động ở chế độ vi sóng, quạt tản nhiệt vẫn sẽ được hoạt động. Và quạt tản nhiệt vẫn có thể được
hoạt động ngay sau khi kết thúc chế độ vi sóng hoạt động.
■ Hơi nước ngưng tụ có thể xuất hiện trên cửa và bên trong khoang chứa. Điều này là bình thường và không ảnh hưởng đến
hoạt động lò vi sóng. Vì vậy cần phải vệ sinh các hơi nước của lò sau khi lò hoạt động.
Phụkiện
Lần đầu
tiên trước
Table of contents
Languages:
Other Malloca Microwave Oven manuals

Malloca
Malloca MW-944TA User manual

Malloca
Malloca MW-944R User manual

Malloca
Malloca MW-925BF User manual

Malloca
Malloca BMG25BK User manual

Malloca
Malloca MOV-72 CB User manual

Malloca
Malloca MW-40CP User manual

Malloca
Malloca MW35-IX03 User manual

Malloca
Malloca MW-927J User manual

Malloca
Malloca MW-820B User manual

Malloca
Malloca MW 927BG User manual
Popular Microwave Oven manuals by other brands

Fisher & Paykel
Fisher & Paykel CMOH30SS2Y user guide

Siemens
Siemens BF525LMS0B User manual and installation instructions

LG
LG LMH1517CV Owner's manual & cooking guide

Bosch
Bosch HMT84M421R instruction manual

Siemens
Siemens iQ700 BE634LGS1B instruction manual

Russell Hobbs
Russell Hobbs RHRETMM705B-EU user guide