Maluk PSR Rotolift + Autolid Controller Manual

1
PSR Rotolift + Autolid Controller setup v1 Bulid 2020-07
Your new Rotolift+ Autolid Control Box has many new features and posisbilities , comparing to other Sabaj Lifts.
Please read this manual before you start programming the lift to your preferences.
Default settings
: Every delivered lift is set by default to max left and right rotation , and max up and down
movement. The RF remote attached is also already paired with the Control box. To reset all the settings or
change the remote – please read the reset section in this document.
Setup Mode and Memory mode
: Please note that the lift has 2 levels of setup. The first is acquired by
pressing&holding the setup button , and is signalized by a RED SETUP LED light. To enter the motion setup –
press RC-SET button. You will hear short beeping sounds when in Motion setup mode – this is normal , and
acquiring the certain motion limit ( I.E. max left rotation ) will result as a proper digital display symbol . The full
table of symbols is also attached in this manual.
Troubleshooting
: The table of symbols on the digital display should also be used as a troubleshooting guide.
Always check , if the green POWER led light is on – this signals , that the control box is powered . When you put
the plug to the socket, you will hear the beeper sound , and the green led will be turned on. If the LED is not on
,the problem might be with the control box fuse breakdown , or there is no power in the socket.
RF Remote
: Every control box with RF function is delivered with a pre-progammed RF Remote . Only Sabaj RF
remotes can operate with Sabaj Control boxes. The control box can store up to 8 different remotes.
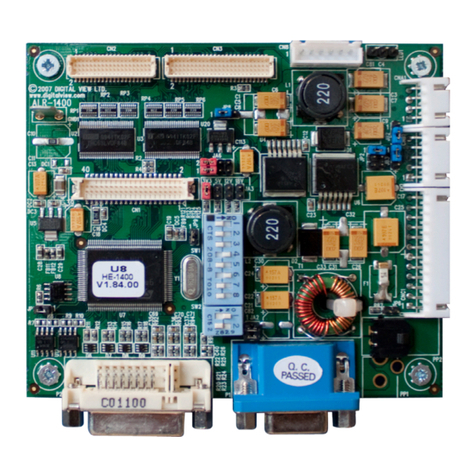
SETUP led light ( red)
Power led light ( green)
Digital Display

2
To program a new remote – press the RC-SET button in standard mode - you will see this symbol onthe digital
display
It means, that the control box is waiting for a Remote controller signal. Press any button on the remote for about
1 second. Properly programmed remote will result with the digital display symbol disappearing , and a short
beep.
The remotes are stored in a consequentional manner – this means that every next remote pushes the previrous
forward in the queue. This is easy to understand by looking at the diagram below.
R
RE
EM
MO
OT
TE
E1
1 ---- F
Fr
re
ee
eS
Sl
lo
ot
t2
2-----F
Fr
re
ee
eS
Sl
lo
ot
t3
3---F
Fr
re
ee
eS
Sl
lo
ot
t4
4----F
Fr
re
ee
eS
Sl
lo
ot
t5
5----F
Fr
re
ee
eS
Sl
lo
ot
t6
6----F
Fr
re
ee
eS
Sl
lo
ot
t7
7-----F
Fr
re
ee
eS
Sl
lo
ot
t8
8---
To add another remote , or program new one , simply press the RC-SET button and press any button on the new
remote , for the control box to aquire it. The diagram now looks like this :
R
RE
EM
MO
OT
TE
E2
2 ---- R
RE
EM
MO
OT
TE
E1
1-----F
Fr
re
ee
eS
Sl
lo
ot
t3
3---F
Fr
re
ee
eS
Sl
lo
ot
t4
4----F
Fr
re
ee
eS
Sl
lo
ot
t5
5----F
Fr
re
ee
eS
Sl
lo
ot
t6
6----F
Fr
re
ee
eS
Sl
lo
ot
t7
7-----F
Fr
re
ee
eS
Sl
lo
ot
t8
8---
If you want to remove REMOTE1 from the memory , you have to bump it out by consequently pressing the RC
SET button and acquiring REMOTE2 . after it reaches Slot8 , REMOTE1 will be removed from memory
R
RE
EM
MO
OT
TE
E2
2 ---- R
RE
EM
MO
OT
TE
E2
2-----
R
RE
EM
MO
OT
TE
E2
2---
R
RE
EM
MO
OT
TE
E2
2----
R
RE
EM
MO
OT
TE
E2
2----
R
RE
EM
MO
OT
TE
E2
2----
R
RE
EM
MO
OT
TE
E2
2-----
R
RE
EM
MO
OT
TE
E2
2---
The buttons on the RF remote are pre-programmed and cannot be changed.
IR-Multicode IR Remote Setup
: The IR-Multicode system allows you to use any TV’s remote using the most
popular IR frequencies . Most popular IR remote manufacturers use the similar code , so you only need to point
your TVs ( or any other you prefer) remote towards the SABAJ IR Reciver ( IR-EYE) for the Control Box to save the
presets. To Start acquiring the IR remote to your Control box follow these steps :
I.Press&hold STEUP button for about 2 seconds – Red SETUP led will be lit.
II.Press RC SET ( Memory) button once - you will hear constant short beep signals.
III.Press SETUP button again – the beeping signal is now continuous , which confirms you are now in IR
remote programming mode.
UP
DOWN
LEFT
RIGHT

3
IV.Aiming your remote towards the IR Receiver , press 5 buttons you want to use for controlling the lift.
Every properly received button will be confirmed by short pauses . Number of pauses correspond to the
button set :
1
-
UP
( 1 pause)
2
-
DOWN
(2 pauses)
3-Left
( 3 pauses)
4-Right
( 4 pauses)
5- RC SET (Memory button)
(
5 pauses)
After assigning all the 5 buttons , the beeper will go silent , but the red LED button wil stay on . You can always
leave the Setup mode by pressing&holding setup , until the RED led is off .
Reset settings :
It is possible to reset all the favorite positions . t . To reset the lift press&hold setup button for
about 5 seconds. Control box will confirm re-setting by showing you this symbol on the digital display :
.
Please note , that it will not reset none of the remote setup ( RF or IR ) . To change the remote settings , you need
to go through the IR of RF remote assingment again.
After resetting the lift , it will move substantially slower ( both lift and autolid) , until it will reach the marginal
positions , to calibrate itself. If you reset the settings , please drive the lift to its lowest positon , move it up and
rotate at least 45° left and 45° right
Movement Accuracy
: Please note that , due to many external reasons the accuracy of rotation might be within
the tolerance of 2°-3°for left/right movement and 1° -2° for central “0” setting. Thus it is recommended taking
this into consideration when designing the furniture
SETUP AND Motion MEMORY MODE
To enter SETUP mode , press&hold setup button for about 2 seconds – you will notice the RED Setup LED lit.
Note: Do not hold the SETUP button longer , as you might evoke another function , which will be described later
in this manual.
The setup mode allows you to move the lift freely – to its maximum capacities both left , right , up and down.
Setting favorite positions is possible only in
SETUP MODE
To set TOP VP
( top viewing position ) - follow these steps : Remember this has to be done in SETUP mode.
I.Move the lift to your preferred TOP position
II. Press RC SET ( this can be either the button on your IR Remote - 5-RC SET , or use the control box RC-SET
button ) . You will hear intermittent beeper signal , which means the control box is awaiting input

4
III. Now press the button corresponding to upward movement on your RF or IR remote.
This symbol will appear on the digital display , confirming , that the UP VP has been set.
To set DOWN VP ( setting this step is not recommended with Autolid) :
I.Move the lift to your preffered DOWN position
II. Press RC SET ( this can be either the button on your IR Remote - 5-RC SET , or use the control box RC-SET
button ) You will hear intermittent beeper signal , which means the control box is awaiting input
III. Now press the button corresponding to upward movement on your RF or IR remote.
This symbol will appear on the digital display , confirming , that the DOWN VP has been set.
Please note , that the AUTOLID will activate only when the lift contacts the down limit switch. Thus setting DOWN
VP might be unnecesary. DOWN VP is set to the lowest possible position by default.
To set LEFT/RIGHT ( M1 / M2) favorite rotation angle :
I. Move the lift to your preferred LEFT/RIGHT position
II. Press RC SET ( this can be either the button on your IR Remote - 5-RC SET , or use the control box RC-SET
button ) You will hear intermittent beeper signal , which means the control box is awaiting input
III. Now press the button corresponding to LEFT OR RIGHT movement on your RF or IR remote.
For M1(left) This symbol will appear : For M2(right) This symbol will appear :
Note , that you can pick any angle to set those parameters to . For example you can rotate the lift to around 30° left
and set M1 , than move it to 100° left and use M2 .
After you are done with all the settings, simply leave the SETUP mode by pressing&holding the SETUP button for
about 2 seconds , until the RED LED light will go off.

5
Troubleshooting and digital display
Display
Explanation
Solution
Assigning RF remote to
control box Press any button on RF remote to assign , or
wait 15 seconds to quit mode
Safety system activated Remove obstacles from the lifts way.
Eventually reduce the safety system sensivity
AUTOLID Limit switch cable
harness disconnected
Check all the connections and contacts from AUTOLID
to control box. Some pins might be loose due to
transport of furniture fitting
LIFT Limit switch cable
harness disconnected
Check all the connections and contacts from Lift to
control box. Some pins might be loose due to transport
of furniture fitting
Attempt on setting DOWN VP
position before the DOWN limit
swithc.
Use this option only intentionally. It is not
recommended to set DOWN VP higher than
where the limit switch is located.
Attempt on setting UP VP lower
than DOWN VP. Re-set the UP/DOWN settings. This might make the lift
unable to move up or down.
Down VP Memory approved -------
UP VP Memory approved -------
Left (M1) rotation angle
approved -------
Right (M2) rotation angle
approved -------
Furthest left rotation
aqquired ( mechanical stop) -------

6
Furthest left rotation
aqquired ( mechanical stop) -------
LITF electric motor overload Lower the LIFTs load
AUTOLID electric motor overload Lower the Autolid load ( lid too heavy)
LIFTs wiring disconnected Check all the connections and contacts from LIFT wiring
to control box. Some pins might be loose due to
transport of furniture fitting.
AUTOLIDs wiring
disconnected
Check all the connections and contacts from AUTOLID
witing to control box. Some pins might be loose due to
transport of furniture fitting
Rotating movement stopped
due to safety Remove obstacles from the lifts way.
Central „0” position acquired -------
No impulses from LIFTs Motor
The LIFT motor might be blocked mechanically , unable to
start moving. Cables might be loose. Many reasons to this
error – please contact Sabaj suport , providing fotos of the
installation.
No impulses from LIDs Motor
The LID motor might be blocked mechanically , unable to
start moving. Cables might be loose. Many reasons to this
error – please contact Sabaj suport , providing fotos of the
installation.
Full motion reset -------
maluk GmbH
Rosenhain 24
9125 Kühnsdorf
www.maluk.at
0043 4232 89 559
Table of contents
